Export dữ liệu ra excel trong ứng dụng Angular
Bài đăng này đã không được cập nhật trong 7 năm
Chúng ta thường xuất dữ liệu từ bảng sang bảng excel trong các ứng dụng web. Có hai cách để thực hiện chức năng này trong Angular: một là sử dụng components directive và cách khác là sử dụng attribute directive. Trong bài, chúng ta sẽ so sánh cả hai và xem xem cách nào là tốt trong các trường hợp khác nhau.
Prerequisites
Để bắt đầu cho tutorial này, bạn cần: 1 project Angular với Angular CLI, cài các gói npm: xlxs, file-saver
// generate angular project
ng new <projectname>
// install required dependencies
npm install ngx-bootstrap xlsx file-saver --save
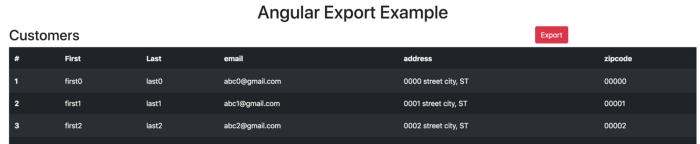
Hãy cùng nhau tạo một bảng cơ bản và điền vào một số dữ liệu giả.
ng g c customers
<table class="table table-striped table-dark">
  <thead>
    <tr>
      <th scope="col">#</th>
      <th scope="col">First</th>
      <th scope="col">Last</th>
      <th scope="col">email</th>
      <th scope="col">address</th>
      <th scope="col">zipcode</th>
    </tr>
  </thead>
  <tbody>
    <tr *ngFor="let cust of customers; let i = index;">
      <th scope="row">{{i+1}}</th>
      <td>{{cust.firstName}}</td>
      <td>{{cust.lastName}}</td>
      <td>{{cust.email}}</td>
      <td>{{cust.address}}</td>
      <td>{{cust.zipcode}}</td>
    </tr>
  </tbody>
</table>
Tạo mảng customers trong lifecycle method ngOnInit() của app component và chuyển nó cho thành phần customers như bên dưới.
// removed code for brevity

<app-customers
    [customers]="customers"
  >
</app-customers>
export class AppComponent implements OnInit {
  title = 'angular-exportexcel-example';

  customers: any = [];


  ngOnInit() {
    for (let i = 0; i <= 25; i++) {
      this.customers.push({firstName: `first${i}`, lastName: `last${i}`,
      email: `abc${i}@gmail.com`, address: `000${i} street city, ST`, zipcode: `0000${i}`});
    }
  }
Component Directive
Trong phần này, chúng ta sẽ thấy cách chúng ta có thể thực hiện chức năng xuất này với component directives và services. Một component sẽ là một directive với một template. Hãy service có một phương thức lấy dữ liệu JSON làm đầu vào và xuất dưới dạng excel với sự trợ giúp của xsls and file-saver.
ng g s _services/export
import { Injectable } from '@angular/core';
import * as FileSaver from 'file-saver';
import * as XLSX from 'xlsx';

@Injectable({
providedIn: 'root'
})
export class ExportService {

constructor() { }

fileType = 'application/vnd.openxmlformats-officedocument.spreadsheetml.sheet;charset=UTF-8';
fileExtension = '.xlsx';

public exportExcel(jsonData: any[], fileName: string): void {

  const ws: XLSX.WorkSheet = XLSX.utils.json_to_sheet(jsonData);
  const wb: XLSX.WorkBook = { Sheets: { 'data': ws }, SheetNames: ['data'] };
  const excelBuffer: any = XLSX.write(wb, { bookType: 'xlsx', type: 'array' });
  this.saveExcelFile(excelBuffer, fileName);
}

private saveExcelFile(buffer: any, fileName: string): void {
  const data: Blob = new Blob([buffer], {type: this.fileType});
  FileSaver.saveAs(data, fileName + this.fileExtension);
}
}
Giờ hãy tạo method exportExcel để có thể xuất mảng customer.
import { Component, OnInit } from '@angular/core';
import {ExportService} from './_services/export.service';

@Component({
  selector: 'app-root',
  templateUrl: './app.component.html',
  styleUrls: ['./app.component.css']
})
export class AppComponent implements OnInit {
  title = 'angular-exportexcel-example';

  customers: any = [];
  constructor(private exportService: ExportService) {}

  ngOnInit() {
    for (let i = 0; i <= 25; i++) {
      this.customers.push({firstName: `first${i}`, lastName: `last${i}`,
      email: `abc${i}@gmail.com`, address: `000${i} street city, ST`, zipcode: `0000${i}`});
    }
  }

  export() {
    this.exportService.exportExcel(this.customers, 'customers');
  }
}
Với đoạn code này, khi nhấn nút export, dữ liệu Json sẽ được tải xuống dưới dạng excel
Attribute Directive
Trong phần này, chúng ta sẽ thấy cách chúng ta có thể thực hiện chức năng export với attribute directive. Hãy tạo ra một directive có tên là ExportDirective và nhập nó trong AppModule và thêm nó vào mảng khai báo.
ng g d _directives/export
import { ExportDirective } from './_directives/export.directive';

@NgModule({
  declarations: [
    ExportDirective
  ],
Dưới đây là export directive với HostListener lắng nghe sự kiện click và lấy mảng customer và tên tệp làm đầu vào. ExportService được đưa vào hàm tạo của lệnh và được sử dụng khi sự kiện click xảy ra.
import { Directive, ElementRef, HostListener, Input } from '@angular/core';
import { ExportService } from '../_services/export.service';

@Directive({
selector: '[appExport]'
})
export class ExportDirective {

constructor(private exportService: ExportService) { }

@Input('appExport') customers: any[];
@Input() fileName: string;

@HostListener('click', ['$event']) onClick($event) {
  console.log('clicked: ' + $event);
  this.exportService.exportExcel(this.customers, this.fileName);
}

}
Trong component template, bạn cần xóa chức năng được thêm trước đó và thêm attribute directive này với các đầu vào như bên dưới. Vì tên bộ chọn chỉ thị và tên bí danh đầu vào là appExport, chúng tôi có thể trực tiếp chuyển mảng cusomer đến directive appExport và fileName như một thuộc tính riêng biệt.
// remove  this
<button type="button" (click)="export()" class="btn btn-danger">
  Export
</button>

// add this
<button type="button" [appExport]="customers" fileName="customers" class="btn btn-danger">
  Export
</button>
Khi đã có đoạn mã trên, bạn có thể kiểm tra điều này với chức năng tải xuống và bạn có thể thấy đầu ra giống như phương pháp trước đó.
Comparison
Chúng ta đã thấy hai phương pháp của chức năng export. Bạn nên chọn cái nào? Nó phụ thuộc vào ứng dụng của bạn.
Nếu ứng dụng đủ đơn giản và có chức năng export này ở một nơi, chúng ta có thể chọn thực hiện nó với component directive.
Nếu ứng dụng đủ lớn và yêu cầu chức năng export này ở nhiều nơi, chúng ta có thể chọn triển khai nó bằng attribute directive.
Vấn đề với component directive là chúng ta cần thêm vào cả hai lớp mẫu và thành phần để thực hiện chức năng này. Với attribute directive, chúng ta chỉ cần thêm bộ chọn đó trong mẫu mà thôi. Với attribute directive, service export được gắn với lớp thành phần. Ví dụ: nếu bạn muốn triển khai chức năng export trong nhiều thành phần, bạn cần inject service export trong mọi thành phần.
Summary
Chúng ta cần xsls và lib file-saver để thực hiện chức năng export trong Angular.
Triển khai logic export với service trong Angular để có thể sử dụng lại và cũng có thể được thêm vào trong cả chỉ thị thành phần và thuộc tính.
Thực hiện với Chỉ thị thành phần nếu ứng dụng của bạn đơn giản và chức năng xuất của bạn được yêu cầu tại một nơi.
Thực hiện với chỉ thị thuộc tính nếu ứng dụng của bạn lớn và chức năng xuất của bạn được yêu cầu ở nhiều nơi.
Example Project
Dưới đây là 1 app đơn giản với nút export
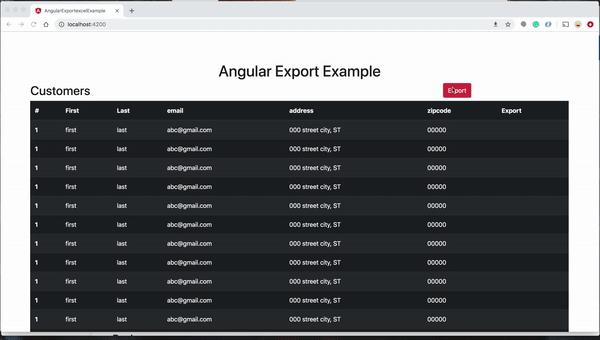
Bạn có thể tải, và chạy project:
// clone the project
git clone https://github.com/bbachi/angular-exportexcel-example.git
// install and start the project
npm install
npm start
via: bitsrc
All rights reserved
