Design support library: Navigation View
Bài đăng này đã không được cập nhật trong 4 năm

**Google I/O 2015 ** đã mang đến những bộ công cụ(tools) mới nhất cho việc hỗ trợ cho những nhà phát triển ứng dụng android trở nên dễ dàng hơn. Trong bài viết này tôi sẽ giới thiệu các bạn về một thành phần view mới rất hữu ích trong bộ thư viện hỗ trợ design của google dành cho việc phát triển ứng dụng Android.
Navigation View
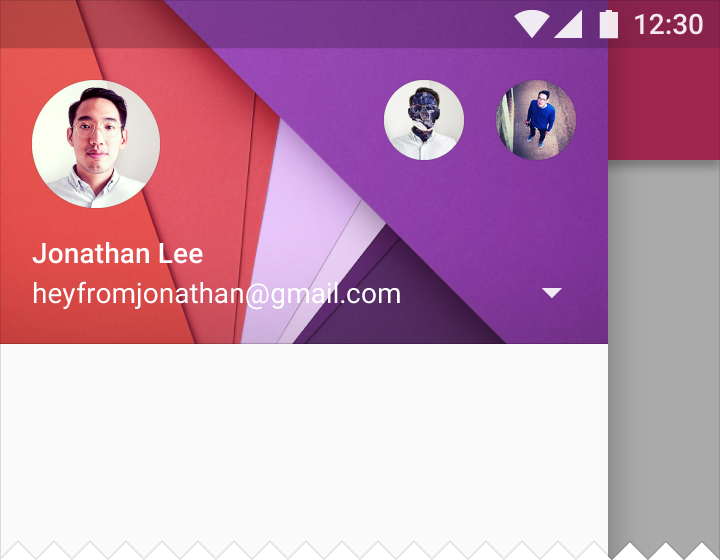
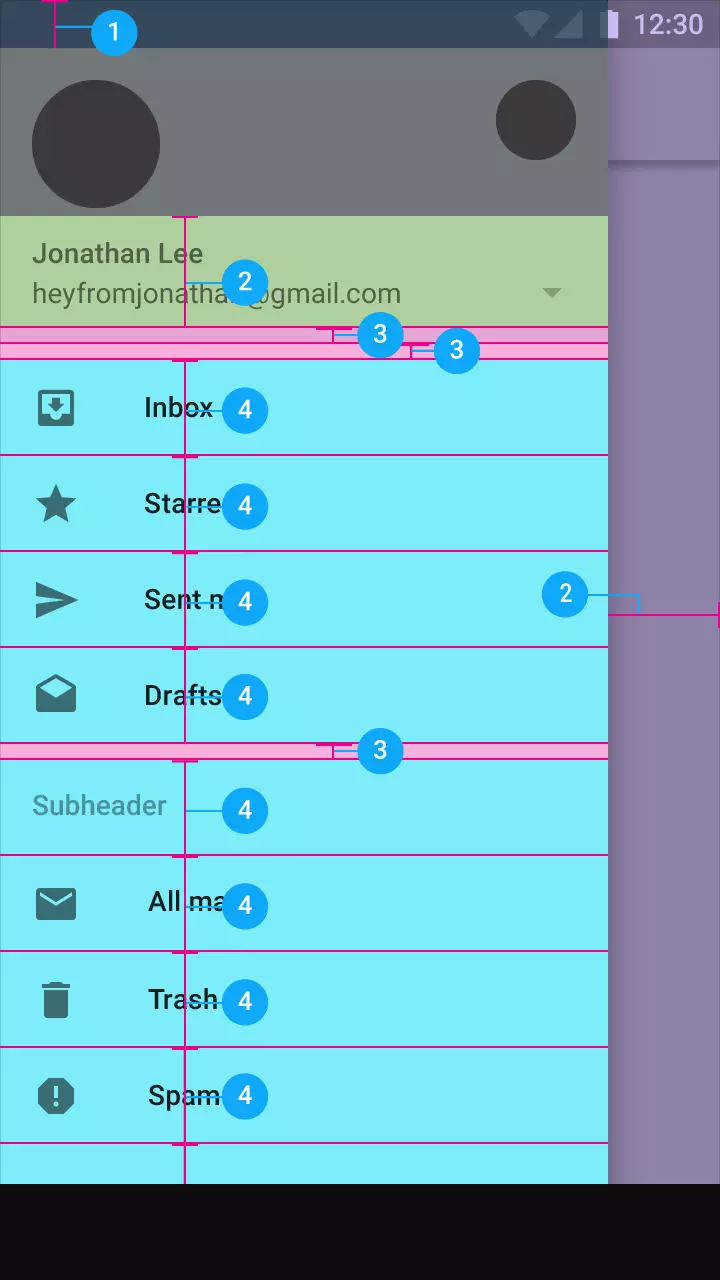
Trong bài viết này tôi sẽ nói về Navigation View. Khi Material Design được phát hành. Họ đã định nghĩa một tiêu chuẩn cho thiết kế của Navigation Drawer.

Làm thế nào Navigation View hoạt động?##
Design Support Libary bây giờ đã sẵn sằng, để đảm bảo phiên bản update mới nhất được cập nhập. Bắt đầu sử dụng Design Libray bạn cần sử dụng một dependency. Chú ý rằng Design Library phụ thuộc trên Supprotv4 và AppCompat Support Libraries.
dependencies {
    compile fileTree(include: ['*.jar'], dir: 'libs')
    testCompile 'junit:junit:4.12'
    compile 'com.android.support:appcompat-v7:23.1.1'
    compile 'com.android.support:design:23.1.1'
    compile 'com.jakewharton:butterknife:7.0.1'
}
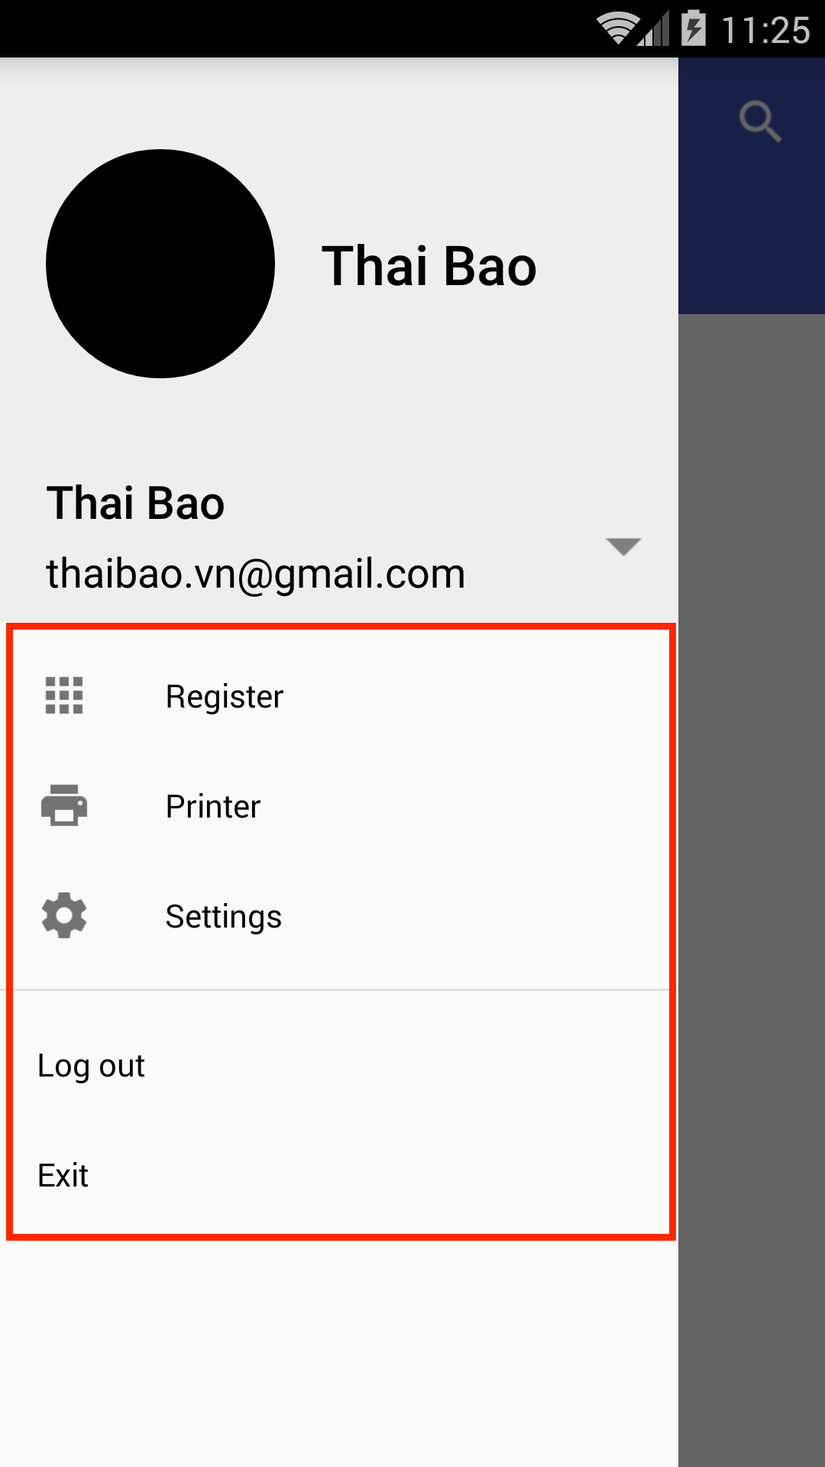
Sau khi chúng ta đã thêm một dependency vào trong file build.gradle như trên. Bây giờ chúng ta sẽ cần tạo một file layout cho những item chúng ta muốn. Ở đây tôi gọi là là menu_drawer.xml như hình bên dưới(trong khung vuông đỏ)

<?xml version="1.0" encoding="utf-8"?>
<menu xmlns:android="http://schemas.android.com/apk/res/android">
    <group
        android:id="@+id/feature_items"
        android:checkableBehavior="single">
        <item
            android:id="@+id/nav_drawer_register"
            android:checked="false"
            android:icon="@drawable/ic_nav_register"
            android:title="@string/string_nav_drawer_register"></item>
        <item
            android:id="@+id/nav_drawer_printer"
            android:checked="false"
            android:icon="@drawable/ic_nav_printer"
            android:title="@string/string_nav_drawer_printer"
            />
        <item
            android:id="@+id/nav_drawer_setting"
            android:checked="false"
            android:icon="@drawable/ic_nav_settings"
            android:title="@string/string_nav_drawer_setting"/>

    </group>
    <group
        android:id="@+id/system_items"
        android:checkableBehavior="single"
        >
        <item
            android:id="@+id/nav_drawer_logout"
            android:checkable="false"
            android:title="@string/string_nav_drawer_logout"
            />
        <item
            android:id="@+id/nav_drawer_exit"
            android:checkable="false"
            android:title="@string/string_nav_drawer_exit"/>
    </group>
</menu>
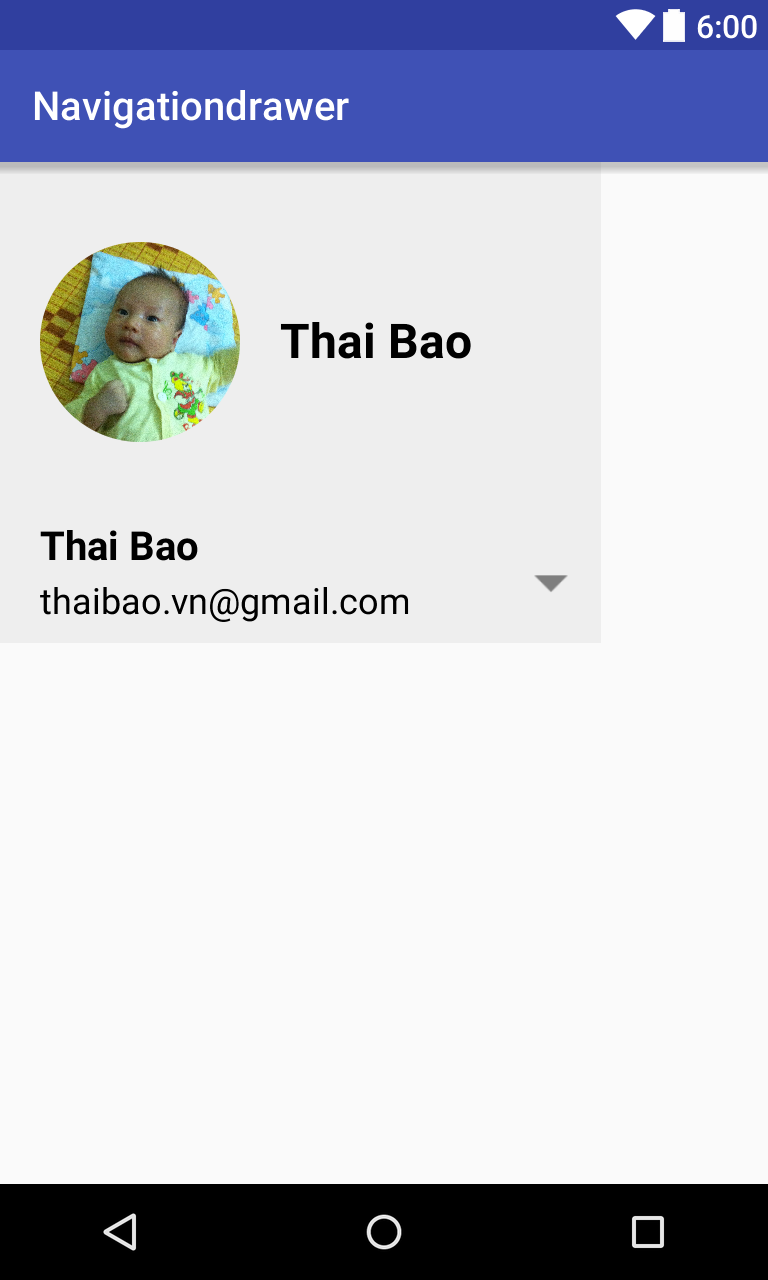
Tiếp theo bạn sẽ định nghĩa phần header cho Navigation Drawer. Như trong hình bên dưới.

<?xml version="1.0" encoding="utf-8"?>
<RelativeLayout xmlns:android="http://schemas.android.com/apk/res/android"
                xmlns:app="http://schemas.android.com/apk/res-auto"
                xmlns:tools="http://schemas.android.com/tools"
                android:layout_width="wrap_content"
                android:layout_height="wrap_content"
                android:background="@drawable/navdrawer_header_background">

    <RelativeLayout
        android:id="@+id/avatar_container"
        android:layout_width="wrap_content"
        android:layout_height="wrap_content"
        android:layout_marginBottom="@dimen/dimen_navdrawer_header_magrin_top"
        android:layout_marginStart="@dimen/dimen_20dp"
        android:layout_marginTop="@dimen/dimen_navdrawer_header_magrin_top"
        android:gravity="center_vertical"
        tools:ignore="UselessParent">

        <com.techdb.app.navigationdrawer.widgets.CircleImageView
            android:id="@+id/account_image"
            android:layout_width="@dimen/dimen_100dp"
            android:layout_height="@dimen/dimen_100dp"
            android:layout_centerVertical="true"
            android:src="@drawable/son"/>

        <com.techdb.app.navigationdrawer.widgets.TextView
            android:id="@+id/account_name"
            android:layout_width="wrap_content"
            android:layout_height="wrap_content"
            android:layout_centerVertical="true"
            android:layout_marginStart="@dimen/dimen_20dp"
            android:layout_toEndOf="@id/account_image"
            android:text="Thai Bao"
            android:textColor="@color/color_black"
            android:textSize="@dimen/size_24sp"
            android:textStyle="bold"
            app:fixWidowWords="true"
            app:fontVariation="medium"

            />
    </RelativeLayout>

    <RelativeLayout
        android:id="@+id/account_box_details"
        android:layout_width="wrap_content"
        android:layout_height="wrap_content"
        android:layout_below="@id/avatar_container"
        android:background="?android:selectableItemBackground"
        android:clickable="true"
        android:paddingBottom="@dimen/dimen_10dp"
        android:paddingEnd="@dimen/dimen_5dp"
        android:paddingStart="@dimen/dimen_20dp"
        >

        <com.techdb.app.navigationdrawer.widgets.TextView
            android:id="@+id/account_user_name"
            android:layout_width="wrap_content"
            android:layout_height="wrap_content"
            android:text="Thai Bao"
            android:textColor="@color/color_black"
            android:textSize="@dimen/size_20sp"
            android:textStyle="bold"
            app:fixWidowWords="true"
            app:fontVariation="medium"
            />

        <com.techdb.app.navigationdrawer.widgets.TextView
            android:layout_width="wrap_content"
            android:layout_height="wrap_content"
            android:id="@+id/account_user_email"
            android:layout_marginTop="@dimen/dimen_5dp"
            android:layout_below="@id/account_user_name"
            android:text="thaibao.vn@gmail.com"
            android:textSize="@dimen/dimen_18sp"
            android:textColor="@color/color_black"
            android:textStyle="normal"
            app:fixWidowWords="true"
            app:fontVariation="normal"/>

        <ImageView
            android:layout_width="@dimen/dimen_40dp"
            android:layout_height="@dimen/dimen_40dp"
            android:id="@+id/account_switcher"
            android:contentDescription="@null"
            android:layout_centerVertical="true"
            android:layout_marginStart="@dimen/dimen_50dp"
            android:layout_toEndOf="@id/account_user_email"
            android:src="@drawable/ic_account_switcher"/>
    </RelativeLayout>

</RelativeLayout>
Bây giờ chúng ta có thể add Navigation View vào trong file layout của activity mà chúng ta muốn. Bạn có thể tham khảo như bên dưới tôi đã làm.
<?xml version="1.0" encoding="utf-8"?>
<android.support.v4.widget.DrawerLayout
    android:id="@+id/main_drawer_layout"
    app="http://schemas.android.com/apk/res-auto"
    xmlns:android="http://schemas.android.com/apk/res/android"
    xmlns:app="http://schemas.android.com/apk/res-auto"
    xmlns:tools="http://schemas.android.com/tools"
    android:layout_width="match_parent"
    android:layout_height="match_parent"
    android:fitsSystemWindows="true"
    tools:context=".MainActivity">

    <com.techdb.app.navigationdrawer.widgets.ScrimInsertsRelativeLayout
        android:layout_width="match_parent"
        android:layout_height="match_parent"
        app:insetForeground="#4000"
        >

        <include
            android:id="@+id/main_toolbar"
            layout="@layout/main_toolbar"
            android:layout_width="match_parent"
            android:layout_height="wrap_content"
            android:layout_alignParentTop="true"/>

       <FrameLayout
        android:id="@+id/content"
        android:layout_width="match_parent"
        android:layout_height="match_parent"
        android:orientation="vertical">

    ...

    </FrameLayout>
    <android.support.design.widget.NavigationView
        android:id="@+id/main_navigation_view"
        android:layout_width="wrap_content"
        android:layout_height="match_parent"
        android:layout_gravity="start"
        app:headerLayout="@layout/layout_header_navigation"
        app:itemTextColor="@color/color_black"
        app:menu="@menu/menu_drawer">

    </android.support.design.widget.NavigationView>
</android.support.v4.widget.DrawerLayout>
Chúng ta đã xây dựng xong phần layout cho việc sử dụng Navigation View trong project của chúng ta. Tiếp theo chúng ta sẽ tiếp tục những bước cuối cùng trong code java.
Đầu tiên chúng ta cần enable home as up như bên dưới:
final Toolbar toolbar = (Toolbar) findViewById(R.id.toolbar);
setSupportActionBar(toolbar);
final ActionBar actionBar = getSupportActionBar();

if (actionBar != null) {
    actionBar.setHomeAsUpIndicator(R.drawable.ic_menu_black_24dp);
    actionBar.setDisplayHomeAsUpEnabled(true);
}
Tiếp theo chúng ta sẽ bắt đầu thiết lập Navigation View. Xử lý những sự kiện khi một Item được lựa chọn...Như ở đây, tôi định nghĩa một function cho việc thiết lập và xử lý sự kiện.
public void setupNavDrawer() {
        mDrawerLayout = (DrawerLayout) findViewById(R.id.main_drawer_layout);
        if (mDrawerLayout == null) {
            return;
        }

        if (Build.VERSION.SDK_INT >= Build.VERSION_CODES.KITKAT) {
            mDrawerLayout.setStatusBarBackgroundColor(mThemedStatusBarColor);
        } else {
            mDrawerLayout.setStatusBarBackgroundColor(mNormalStatusBarColor);
        }

        mNavigationView = (NavigationView) findViewById(R.id.main_navigation_view);
        if (mNavigationView == null) {
            return;
        }

        if (mNavigationView.isShown()) {
            final Window window = getWindow();
            if (Build.VERSION.SDK_INT >= Build.VERSION_CODES.LOLLIPOP) {
                window.addFlags(WindowManager.LayoutParams.FLAG_DRAWS_SYSTEM_BAR_BACKGROUNDS);
                window.clearFlags(WindowManager.LayoutParams.FLAG_TRANSLUCENT_STATUS);
                window.setStatusBarColor(getResources().getColor(R.color.color_transparent));
            }
        }

        mNavigationView.setNavigationItemSelectedListener(menuItem -> {
            menuItem.setChecked(true);
            mDrawerLayout.closeDrawers();
            Toast.makeText(BaseActivity.this, menuItem.getTitle(), Toast.LENGTH_SHORT).show();
            final int menuItemId = menuItem.getItemId();
            switch (menuItemId) {
                case R.id.nav_drawer_exit: {
                    BaseActivity.this.finish();
                    return true;
                }
                case R.id.nav_drawer_logout: {
                    return true;
                }
                case R.id.nav_drawer_printer: {
                    return true;
                }
                case R.id.nav_drawer_register: {
                    return true;
                }
                case R.id.nav_drawer_setting: {
                    return true;
                }
                default: {
                    return false;
                }
            }
        });

    }
Bây giờ là bước cuối cùng để xử lý sự kiện khi Menu Action được nhấn
if (mActionBarToolbar != null){
            mActionBarToolbar.setNavigationIcon(R.drawable.ic_menu);
            mActionBarToolbar.setNavigationOnClickListener( view -> {
                mDrawerLayout.openDrawer(GravityCompat.START);
            });
        }
Để hiểu thêm chi tiết các bạn có thể tham khảo source code tại đây.
All rights reserved