Dependency Injection Basic with Dagger 2 trong Android (Phần 1)
Bài đăng này đã không được cập nhật trong 4 năm
1. Dependency Injection (DI)
-
Trong quá trình xây dựng ứng dụng nói riêng và phát triển phần mềm nói chung, các class thường phải tham chiếu đến các lớp khác.
-
Ví dụ: class Staff chứa 1 tham chiếu của class Address, như vậy class Staff phụ thuộc vào lớp Address để có thể tính khoảng cách từ nhà đến công ti.
-
Các cách để 1 class lấy được 1 object mà nó cần:
*1. class Staff tự khởi tạo class Andress của chính nó *
class Staff {

    private Addess address = new Addess();

    public long calculateDistance() {
        //calculate distance by address field
    }
}
-> Vấn đề:
- Staff và Addess được kết hợp chặt chẽ. Trong trường hợp Addess có sự thay đổi đối với 1 Staff, ta sẽ phải tạo ra thêm 1 object Staff nữa thay vì việc dùng lại object Staff cũ.
- Gây khó khăn trong việc testing khi Staff đang sử dụng 1 instance thực của Address, do đó sẽ ngăn việc sử dụng 1 test double để thử nghiệm ở nhiều trường hợp khác nhau.
2. Sử dụng nó như một tham số
class Staff {

    private final Address address;

    public Staff(Address address) {
        this.address = address;
    }

    public long calculateDistance() {
        //calculate distance by address field
    }
}
Và khi sử dụng
    Address address = new Address();
    Staff staff = new Staff(address);
    println(staff.calculateDistance());
Khi sử dụng, Do Staff phụ thuộc vào Address nên chúng ta cần khởi tạo 1 object Address trước và sử dụng nó để khởi tạo Staff -> Cách này chính là DI, Staff không cần biết Address được khởi tạo như thế nào mà chỉ cần biết mỗi lần khởi tạo nó sẽ được truyền vào 1 address.
2. Dependency Injection with Dagger 2 in Android
- Dagger 2 là dependency injection framework. Nó dựa trên Java Specification Request (JSR) 330. Nó sử dụng tạo mã và dựa trên annotations.
- Để sử dụng Dagger 2 trong project, ta cần thêm import dependency sau vào project
dependencies {
    implementation 'com.google.dagger:dagger:2.x'
    annotationProcessor 'com.google.dagger:dagger-compiler:2.x'
}
- Xem xét biểu đồ phụ thuộc dưới đây
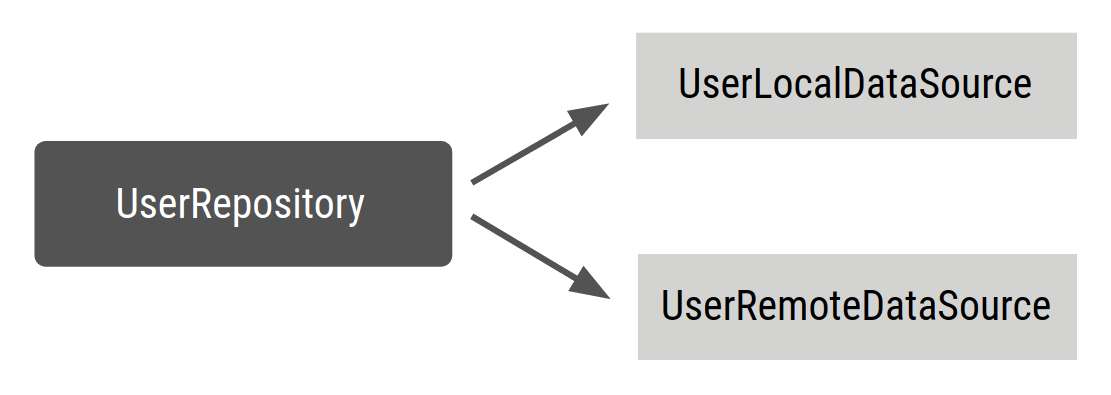
Theo biểu đồ trên, ta sẽ có đoạn code sau của class UserRepository.
public class UserRepository {

    private final UserLocalDataSource userLocalDataSource;
    private final UserRemoteDataSource userRemoteDataSource;

    public UserRepository(UserLocalDataSource userLocalDataSource, UserRemoteDataSource userRemoteDataSource) {
        this.userLocalDataSource = userLocalDataSource;
        this.userRemoteDataSource = userRemoteDataSource;
    }

    ...
}
Thêm annotation @Inject vào hàm tạo UserRepository để Dagger biết cách tạo UserRepository:
public class UserRepository {
private final UserLocalDataSource userLocalDataSource;
private final UserRemoteDataSource userRemoteDataSource;

// @Inject lets Dagger know how to create instances of this object
@Inject
public UserRepository(UserLocalDataSource userLocalDataSource, UserRemoteDataSource userRemoteDataSource) {
    this.userLocalDataSource = userLocalDataSource;
    this.userRemoteDataSource = userRemoteDataSource;
}
}
Bây giờ Dagger biết cách tạo một phiên bản của UserRepository, nhưng nó không biết cách tạo các dependency của nó. Nếu bạn cũng chú thích các class khác, Dagger biết cách tạo chúng:
public class UserLocalDataSource {
    @Inject
    public UserLocalDataSource() { }
}

public class UserRemoteDataSource {
    @Inject
    public UserRemoteDataSource() { }
}
Dagger có thể tạo một biểu đồ về các phụ thuộc trong dự án của bạn mà nó có thể sử dụng để tìm ra nơi nó sẽ lấy các dependency khi chúng cần thiết. Để Dagger làm được điều này, ta cần tạo một interface với annotation @Component.
Bên trong interface @Component, bạn có thể xác định các hàm trả về các phiên bản của các lớp bạn cần (tức là UserRepository). @Component yêu cầu Dagger tạo một vùng chứa với tất cả các phụ thuộc cần thiết để đáp ứng các loại mà nó hiển thị. Đây được gọi là thành phần Dagger; nó chứa một biểu đồ bao gồm các đối tượng mà Dagger biết cách cung cấp và các phụ thuộc tương ứng của chúng.
// @Component makes Dagger create a graph of dependencies
@Component
public interface ApplicationGraph {
    // The return type  of functions inside the component interface is
    // what can be consumed from the graph
    UserRepository userRepository();
}
Khi bạn build project, Dagger tạo một triển khai của interface ApplicationGraph cho bạn: DaggerApplicationGraph. Với các annotation của mình, Dagger tạo một biểu đồ phụ thuộc bao gồm các mối quan hệ giữa ba lớp (UserRepository, UserLocalDatasource và UserRemoteDataSource) và nhận được một instance UserRepository. Bạn có thể sử dụng nó như sau:
// Create an instance of the application graph
ApplicationGraph applicationGraph = DaggerApplicationGraph.create();

// Grab an instance of UserRepository from the application graph
UserRepository userRepository = applicationGraph.userRepository();
Scoping with Dagger
Bạn có thể sử dụng annotation scope để giới hạn thời gian tồn tại của một đối tượng trong thời gian tồn tại của component của nó.
Để có một phiên bản duy nhất của UserRepository, hãy sử dụng cùng một annotation cho interface @Component và UserRepository. Bạn có thể sử dụng chú thích @Singleton đã đi kèm với gói javax.inject mà Dagger sử dụng:
// Scope annotations on a @Component interface informs Dagger that classes annotated
// with this annotation (i.e. @Singleton) are scoped to the graph and the same
// instance of that type is provided every time the type is requested.
@Singleton
@Component
public interface ApplicationGraph {
    UserRepository userRepository();
}

// Scope this class to a component using @Singleton scope (i.e. ApplicationGraph)
@Singleton
public class UserRepository {

    private final UserLocalDataSource userLocalDataSource;
    private final UserRemoteDataSource userRemoteDataSource;

    @Inject
    public UserRepository(UserLocalDataSource userLocalDataSource, UserRemoteDataSource userRemoteDataSource) {
        this.userLocalDataSource = userLocalDataSource;
        this.userRemoteDataSource = userRemoteDataSource;
    }
}
Trên đây mình đã giới thiệu sơ bộ về DI và Dagger cũng như 1 vài annotation của nó. Bài viêt tới mình sẽ đi sâu hơn vào các bước thực hiện DI với Dagger hoàn chỉnh cho 1 ứng dụng Android
TÀI LIỆU THAM KHẢO
https://developer.android.com/training/dependency-injection/dagger-basics
All rights reserved
