Deeplink Và Navigation Trong Android ArChitecture Component Phần 2
Bài đăng này đã không được cập nhật trong 7 năm
 Trong bài viết trước chúng ta đã cùng tìm hiểu về Navigation Architecture Component .Trong phần tiếp theo này, chúng ta sẽ cùng nhau tìm hiểu về việc kết hợp deeplink và navigation trong Navigation Architecture Component.
Explicit Deep Linking
Explicit Deep Linking từ notifications, app shortcusts hay app widgets, actions, và slices là được xử lý bằng cách tạo một thể thiện của NavDeepLinkBuilder như:
Bundle args = new Bundle();
args.putString("argument", "value");
val deeplink = Navigation.findNavController(view)
        .createDeepLink()
        .setDestination(R.id.nav_deeplink)
        .setArguments(args)
        .createPendingIntent()
Chúng ta hãy lấy một ví dụ bằng cách tạo notification và navigate tới màn hình tương ứng.
var args = Bundle()
args.putString("arg", "hello")
val deeplink = Navigation.findNavController(it).createDeepLink()
        .setDestination(R.id.nav_deeplink)
        .setArguments(args)
        .createPendingIntent()
val notificationManager = context!!.getSystemService(Context.NOTIFICATION_SERVICE) as NotificationManager
if (Build.VERSION.SDK_INT >= Build.VERSION_CODES.O) {
  notificationManager.createNotificationChannel(NotificationChannel(
            channelId, "Deep Links", NotificationManager.IMPORTANCE_HIGH))
}
val builder = NotificationCompat.Builder(
        context!!, channelId)
        .setContentTitle("Navigation")
        .setContentText("Deep link to Android")
        .setSmallIcon(R.drawable.ic_menu_camera)
        .setContentIntent(deeplink)
        .setAutoCancel(true)
notificationManager.notify(0, builder.build())
Như bạn đã nhìn thấy trong đoạn code bên trên, chúng ta đã set một destination trong method setDestination nó sẽ chuyển hướng đến desitination tương ứng(hay màn hình tương ứng). Chúng ta không cần phải tạo ra intent để thực hiện việc đó nữa.
Implicit Deep Linking
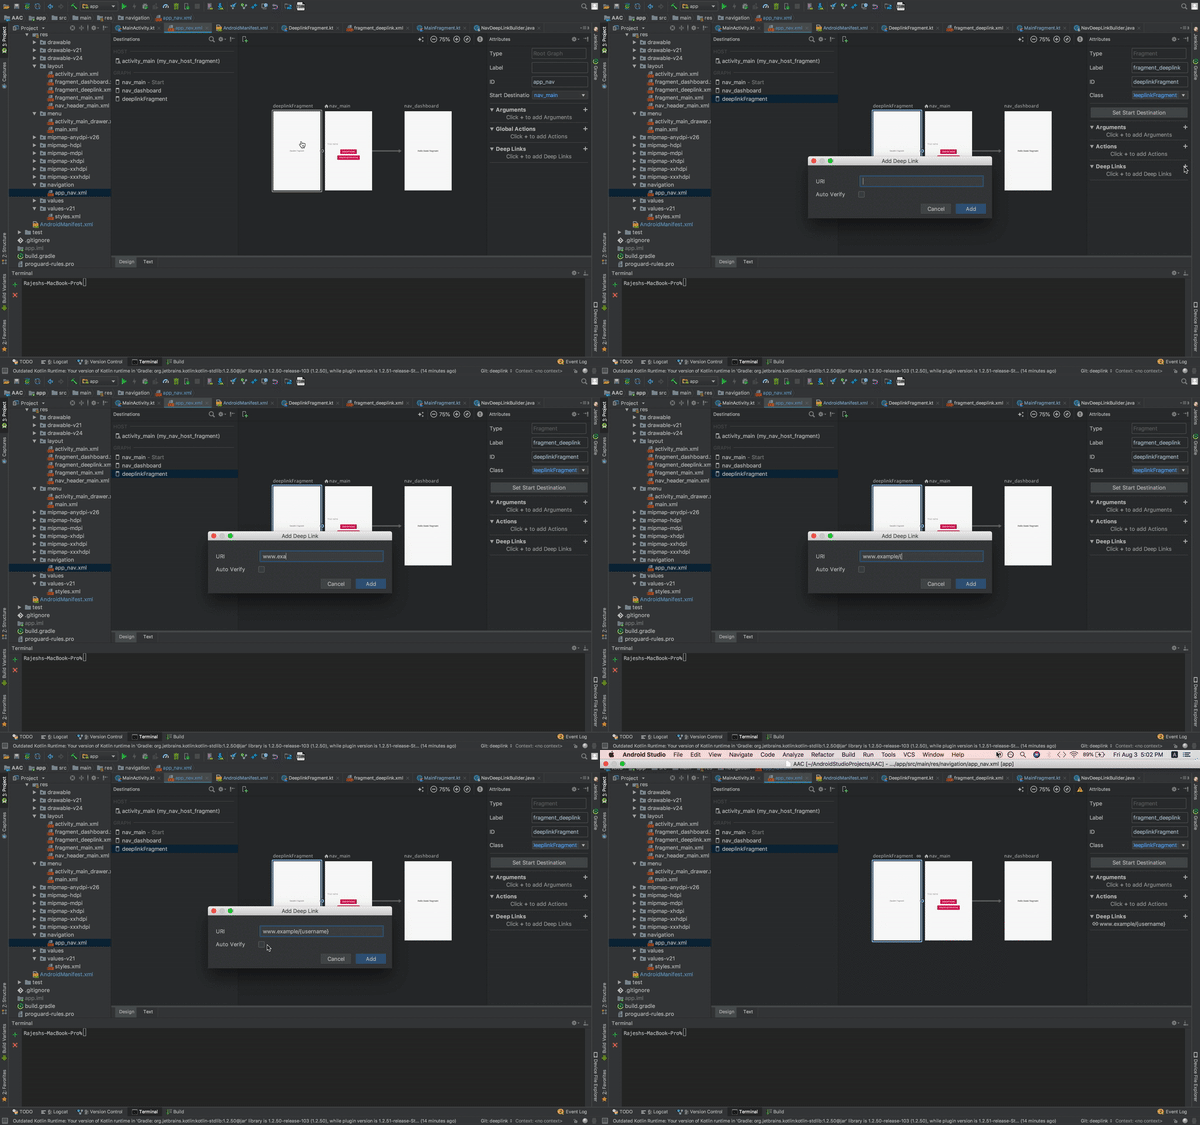
Bạn có thể add một deeplink bằng cách sử dụng navigation editor. Đây là những bước cần theo sau để add một deeplink như đã nêu trong tài liệu chính thức của google. Chỉ định một deep link tới một destination trong navigation graph như hình bên dưới:

- URIs không có a scheme như là http và https. Cho ví dụ www.cashdog.com phù hợp với http://www.cashdog.com hay https://www.cashdog.com.
- Placeholders trong form của {placeholdername} matches với một hoặc nhiều characters.Giá trị String của placeholder là sẵn sàng trong đối số Bundle với một key của cùng tên. Cho ví dụ http://www.example.com/users/{id} tưởng đương với http://www.example.com/users/4.
- ký tự đại diện .* được sử dụng để biểu thị 0 hoặc nhiều chracters.
<deepLink app:uri="digital.com/{myarg}"/>
Một điều quan trọng là bạn không được quên định nghĩa nav graph trong file android manifest
<activity
    android:name=".MainActivity"
    android:label="@string/app_name"
    android:theme="@style/AppTheme.NoActionBar">
    <nav-graph android:value="@navigation/app_nav"/>
</activity>
Bạn hay thử nó làm việc hoặc không bằng cách sử dụng các câu lệnh trong adb shell như :
adb shell am start -a android.intent.action.VIEW -d "digital.com/?myarg=thaibao" com.example.lequanghoa.navigationcomponentcodelabs
Các bạn có thể tham khảo source tại đây
All rights reserved