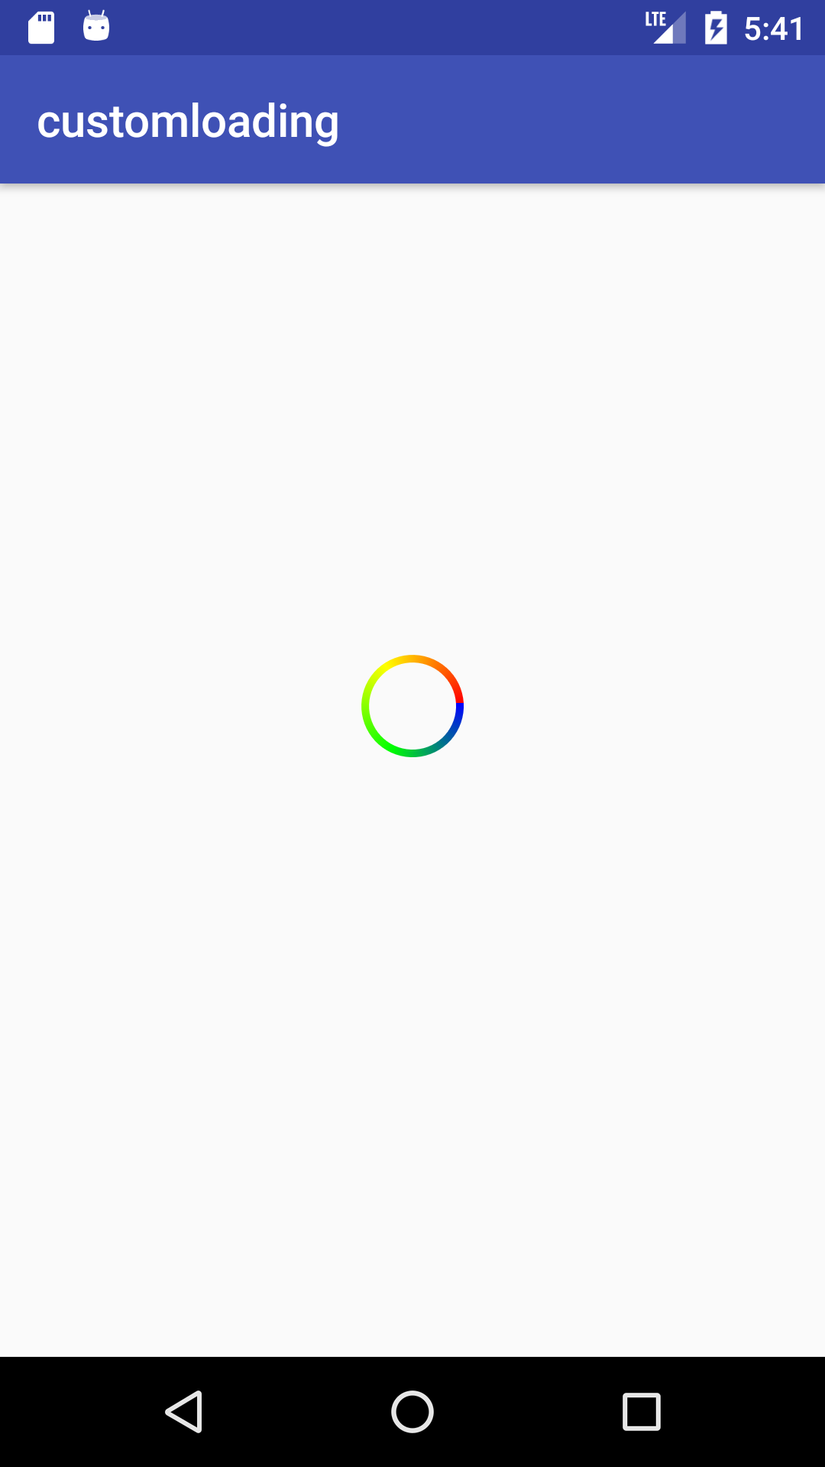
Custom Loading Indicator Like ZingMP3 app
Bài đăng này đã không được cập nhật trong 7 năm
Trong bài này mình sẽ hướng dẫn tạo loading indicator tương tự như app Zingmp3(không giống hoàn toàn :3). Có khá nhiều cách để custom loading indicator, tuy nhiên trong bài này mình sẽ sử dụng dialog cùng với custom view và animation.
I. Custom view tạo loading indicator
- Đầu tiên ta sẽ tạo 1 class gọi là LoadingIndicator, lớp này mình extend ImageView.
- trong hàm onDraw ta sẽ vẽ 1 hình tròn với stroke được gradient như hình dưới

LoadingIndicator.java
public class LoadingIndicator extends android.support.v7.widget.AppCompatImageView {
    private final int PURPLE = 17170457;
    private int[] colors = new int[] {Color.BLUE, Color.GREEN, Color.YELLOW, Color.RED};
    private Paint paint;
    private int stroke = 10;

    public LoadingIndicator(Context context) {
        super(context);
        init();
    }

    public LoadingIndicator(Context context, @Nullable AttributeSet attrs) {
        super(context, attrs);
        init();
    }

    public LoadingIndicator(Context context, @Nullable AttributeSet attrs, int defStyleAttr) {
        super(context, attrs, defStyleAttr);
        init();
    }

    private void init() {
        paint = new Paint();
        paint.setStrokeWidth(stroke);
        paint.setStyle(Paint.Style.STROKE);
        paint.setAntiAlias(true);
    }

    @Override
    protected void onDraw(Canvas canvas) {
        super.onDraw(canvas);
        Shader shader = new SweepGradient(getWidth() / 2, getHeight() / 2, colors, null);
        paint.setShader(shader);
        canvas.drawCircle(getWidth() / 2, getHeight() / 2, getWidth() / 2 - stroke, paint);
    }
}
- Ở đây sẽ dùng Shader để tạo gradient color cho stroke
II. Tạo Animation
- Tiếp theo ta sẽ tạo animation rotate360
anim/rotate360
<set xmlns:android="http://schemas.android.com/apk/res/android"
    android:interpolator="@android:anim/linear_interpolator">

    <rotate
        android:fromDegrees="0"
        android:toDegrees="360"
        android:pivotX="50%"
        android:pivotY="50%"
        android:duration="1000"
        android:repeatCount="infinite"/>
</set>
- Ta sử dụng dòng này android:interpolator="@android:anim/linear_interpolator" để animation diễn ra mượt hơn, không bị dừng mỗi khi thực hiện xong
III. Tạo layout và style cho Dialog
- Ta sẽ tao layout chứa custom view ta vừa tạo cho dialog
layout_loading.xml
<android.support.constraint.ConstraintLayout
    xmlns:android="http://schemas.android.com/apk/res/android" android:layout_width="match_parent"
    xmlns:app="http://schemas.android.com/apk/res-auto"
    android:layout_height="match_parent">

    <com.example.mac.customloading.LoadingIndicator
        android:id="@+id/loading_icon"
        android:layout_width="48dp"
        android:layout_height="48dp"
        app:layout_constraintBottom_toBottomOf="parent"
        app:layout_constraintLeft_toLeftOf="parent"
        app:layout_constraintRight_toRightOf="parent"
        app:layout_constraintTop_toTopOf="parent" />

</android.support.constraint.ConstraintLayout>
- Tiếp theo ta tạo style cho dialog với background là transparent
styles.xml
<style name="LoadingDialog">
        <item name="android:windowBackground">@android:color/transparent</item>
    </style>
IV. Hiển thị loading
- Cuối cùng ta sẽ kết hợp lại và show loading trong class MainActivity.java
MainActivity.java
public class MainActivity extends AppCompatActivity {

    @Override
    protected void onCreate(Bundle savedInstanceState) {
        super.onCreate(savedInstanceState);
        setContentView(R.layout.activity_main);

        Dialog dialog = new Dialog(this, R.style.LoadingDialog);
        dialog.setContentView(R.layout.layout_loading);
        dialog.show();
        dialog.findViewById(R.id.loading_icon).startAnimation(AnimationUtils.loadAnimation(this, R.anim.rotate360));
    }
}
All rights reserved