Create project iOS support iOS version below 13 and project SwiftUI support iOS 13 on Xcode 12+.
Bài đăng này đã không được cập nhật trong 4 năm
Xin chào mọi người, mình viết bài viết này dựa trên kinh nghiệm cá nhân nếu có gì không đúng mong được mọi người góp ý.
Tạo project iOS hỗ trợ iOS dưới 13
Như mọi người đã biết từ Xcode 11 khi tạo mới 1 project chúng ta không chỉ có file AppDelegate mà còn có thêm SceneDelegate. Khi điều chỉnh iOS Deployment Target xuống dưới iOS 13 thì file SceneDelegate sẽ báo lỗi cần check available (iOS 13.0, *). Có nhiều cách để fix lỗi này. Hoặc là thêm @available(iOS 13, *) trong SceneDelegate.swift hoặc là chúng ta xoá luôn file SceneDelegate này đi không sử dụng nó nữa.
Fix bằng cách thêm @available(iOS 13, *) trong SceneDelegate
Như ở tiêu đề ta có thể fix bằng cách thêm @available(iOS 13, *) trong file SceneDelegate. Các bước như sau:
- Bước 1: Thêm
@available(iOS 13.0, *)vào các function chỉ support từ iOS 13 trở lên trongSceneDelegate
// SceneDelegate.swift
@available(iOS 13.0, *)
class SceneDelegate: UIResponder, UIWindowSceneDelegate {

//...

}
- Bước 2: Thêm
@available(iOS 13.0, *)vào các function chỉ support từ iOS 13 trở lên trongAppDelegate
// AppDelegate.swift

@available(iOS 13.0, *)
func application(_ application: UIApplication, configurationForConnecting connectingSceneSession: UISceneSession, options: UIScene.ConnectionOptions) -> UISceneConfiguration {
    // Called when a new scene session is being created.
    // Use this method to select a configuration to create the new scene with.
    return UISceneConfiguration(name: "Default Configuration", sessionRole: connectingSceneSession.role)
}

@available(iOS 13.0, *)
func application(_ application: UIApplication, didDiscardSceneSessions sceneSessions: Set<UISceneSession>) {
    // Called when the user discards a scene session.
    // If any sessions were discarded while the application was not running, this will be called shortly after application:didFinishLaunchingWithOptions.
    // Use this method to release any resources that were specific to the discarded scenes, as they will not return.
}
- Bước 3: Thêm
var window: UIWindow?vào trongAppDelegate
// AppDelegate.swift
class AppDelegate: UIResponder, UIApplicationDelegate {

    var window: UIWindow?

    func application(_ application: UIApplication, didFinishLaunchingWithOptions launchOptions: [UIApplication.LaunchOptionsKey: Any]?) -> Bool {
        // Override point for customization after application launch.
        return true
    }
Ok, vậy là đã xong.
Nếu bạn không muốn dùng StoryBoard Main mặc định thì có thể tự set rootViewController như sau:
Bạn vẫn config như các step trên và sửa trong function func application(_ application: UIApplication, didFinishLaunchingWithOptions launchOptions: [UIApplication.LaunchOptionsKey: Any]?) -> Bool như sau:
func application(_ application: UIApplication, didFinishLaunchingWithOptions launchOptions: [UIApplication.LaunchOptionsKey: Any]?) -> Bool {
        // Override point for customization after application launch.
        guard #available(iOS 13.0, *) else {
            let window = UIWindow(frame: UIScreen.main.bounds)
            let vc = ViewController() // ViewController you need
            window.rootViewController = vc
            self.window = window
            window.makeKeyAndVisible()
            return true
        }

        return true
    }
và trong SceneDelegate cũng phải làm tương tự:
func scene(_ scene: UIScene, willConnectTo session: UISceneSession, options connectionOptions: UIScene.ConnectionOptions) {
        // Use this method to optionally configure and attach the UIWindow `window` to the provided UIWindowScene `scene`.
        // If using a storyboard, the `window` property will automatically be initialized and attached to the scene.
        // This delegate does not imply the connecting scene or session are new (see `application:configurationForConnectingSceneSession` instead).
        guard let windowScene = (scene as? UIWindowScene) else { return }
        window = UIWindow(windowScene: windowScene)

        let vc = ViewController() // ViewController you need

        window?.rootViewController = vc
        window?.makeKeyAndVisible()
    }
Fix bằng cách xoá file SceneDelegate
- Bước 1: Tất nhiên rồi, chúng ta xoá file
SceneDelegate.swiftđi - Bước 2: Vào info.plist xoá
Application Scene Manifestđi - Bước 3: Trong
AppDelegatexoá những function liên quan đếnSceneDelegatenhưfunc application(_ application: UIApplication, configurationForConnecting connectingSceneSession: UISceneSession, options: UIScene.ConnectionOptions) -> UISceneConfiguration,func application(_ application: UIApplication, didDiscardSceneSessions sceneSessions: Set<UISceneSession>). Sau đó thêm code sau vào trongAppDelegate:
func application(_ application: UIApplication, didFinishLaunchingWithOptions launchOptions: [UIApplication.LaunchOptionsKey: Any]?) -> Bool {
        // Override point for customization after application launch.
        let window = UIWindow(frame: UIScreen.main.bounds)
        let vc = ViewController() // ViewController you need
        window.rootViewController = vc
        self.window = window
        window.makeKeyAndVisible()
        return true
    }
Tuỳ thuộc vào bạn muốn sử dụng StoryBoard Main mặc định hay không mà khởi tạo vc ở chỗ này.
Thế là xong.
Tạo project SwiftUI trên Xcode 12 trở lên support iOS 13
Khi lên Xcode 12 thì structure base khi tạo một project SwiftUI không còn như khi tạo project ở Xcode 11. Nó sẽ sử dụng một base trên iOS 14. Vậy làm sao để tạo project SwiftUI mà vẫn support iOS 13?
-
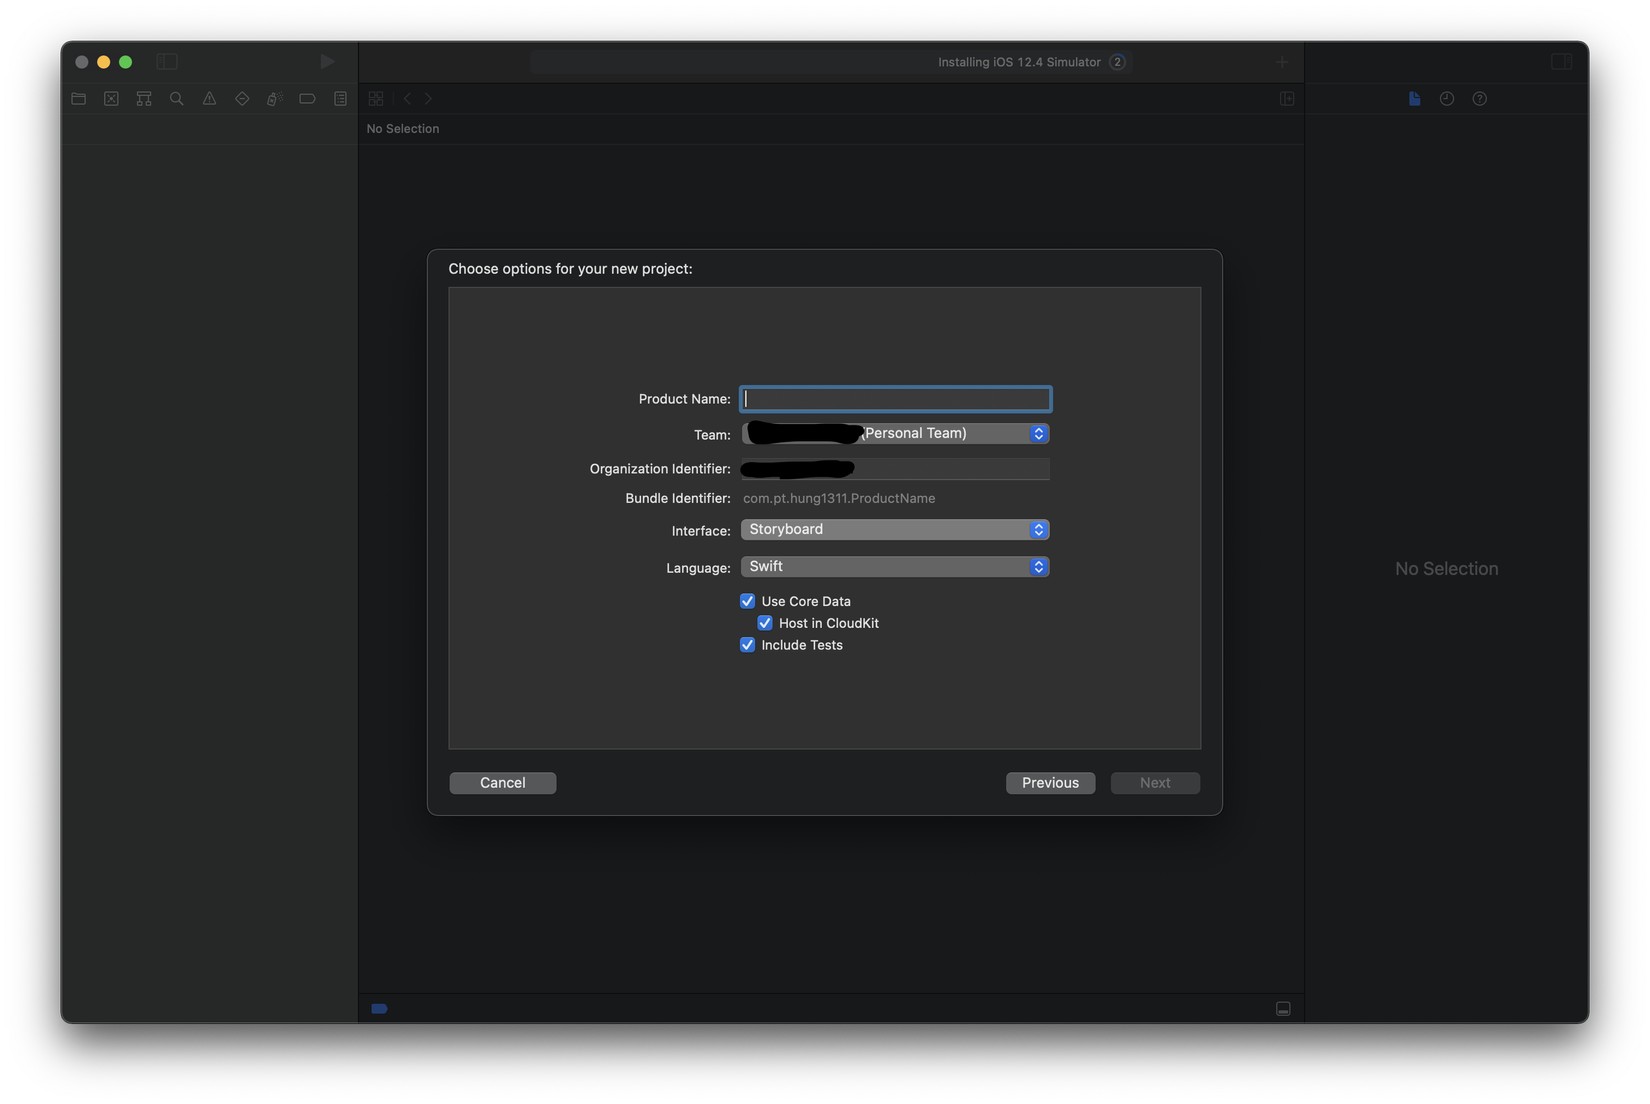
Bước 1: Các bạn tạo mới một project như bình thường nhưng thay vì chọn SwiftUI thì bạn hãy chọn StoryBoard:
![]()
-
Bước 2: Xoá các file
ViewController.swift,Main.storyboard -
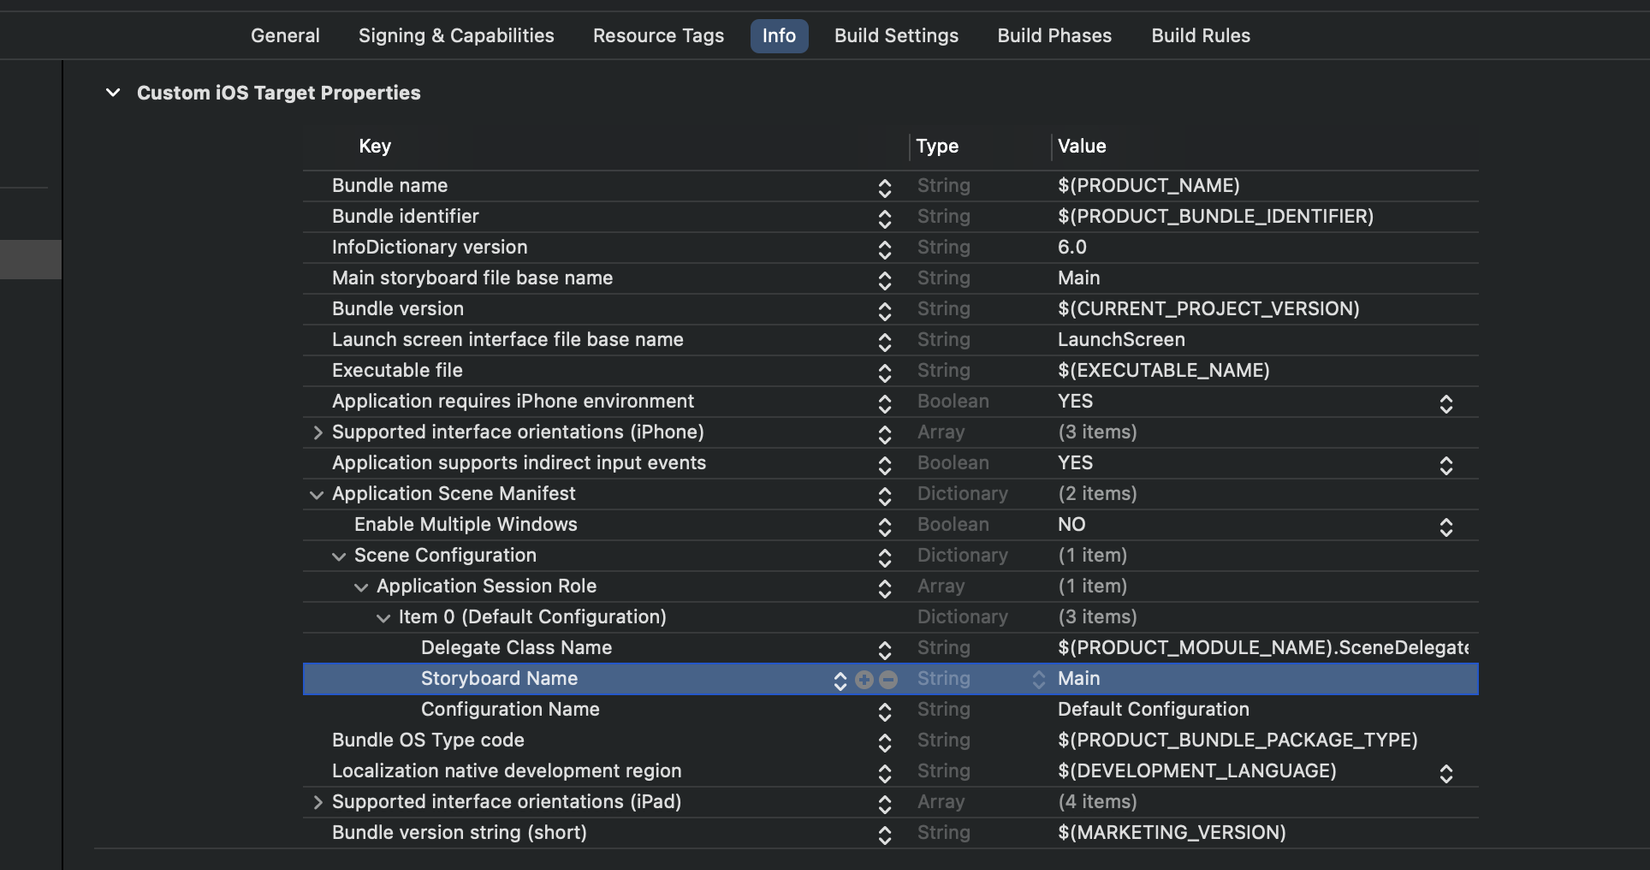
Bước 3: Trong Target-> Info xoá
Application Scene Manifest -> Scene Configuration -> Application Session Role -> Item 0 -> Storyboard NamevàMain Storyboard file base nameđi:![]()
-
Bước 4: Tạo một file
ContentView.swiftnhư sau:
import SwiftUI

struct ContentView: View {
    var body: some View {
        Text("Hello SwiftUI!")
            .padding()
    }
}

struct ContentView_Previews: PreviewProvider {
    static var previews: some View {
        ContentView()
    }
}
- Bước 5: Trong SceneDelegate ta sửa lại như sau:
func scene(_ scene: UIScene, willConnectTo session: UISceneSession, options connectionOptions: UIScene.ConnectionOptions) {
        // Use this method to optionally configure and attach the UIWindow `window` to the provided UIWindowScene `scene`.
        // If using a storyboard, the `window` property will automatically be initialized and attached to the scene.
        // This delegate does not imply the connecting scene or session are new (see `application:configurationForConnectingSceneSession` instead).
        guard let windowScene = (scene as? UIWindowScene) else { return }

        let window = UIWindow(windowScene: windowScene)
        let contentView = ContentView()

        window.rootViewController = UIHostingController(rootView: contentView)
        self.window = window
        window.makeKeyAndVisible()
    }
Vậy là xong bạn đã tạo được project SwiftUI trên Xcode 12+ support iOS 13.
Cảm ơn đã đọc bài viết. Nếu có sai sót mong được mọi người góp ý. Thanks
All rights reserved
