Cách Send Email to Multiple Users trong Laravel.
Bài đăng này đã không được cập nhật trong 3 năm
Hello mọi người,
trong bài viết này mình sẽ chia sẻ cách gửi một nội dụng email đến nhiều users trong cùng một lúc.
Bạn có thể sử dụng demo trong bài viết này với các phiên bản laravel 6+ trở nên nhé, ở bài này mình sẽ demo ở laravel 8+.
Để không mất thời gian, mình đi vào ví dụ luôn nhé
Step1: Config thông tin gửi mail trong file config
.env
MAIL_DRIVER=smtp
MAIL_HOST=smtp.gmail.com
MAIL_PORT=587
MAIL_USERNAME=mygoogle@gmail.com
MAIL_PASSWORD=rrnnucvnqlbsl
MAIL_ENCRYPTION=tls
MAIL_FROM_ADDRESS=mygoogle@gmail.com
MAIL_FROM_NAME="${APP_NAME}"
Step 2: Create Mail Class
Tiếp theo, chúng ta sẽ tạo UserEmail class bằng cách sử dụng lệnh laravel artistan và sau đó chúng ta sẽ định nghĩa view và subject.
php artisan make:mail UserEmail
app/Mail/UserEmail.php
<?php

namespace App\Mail;

use Illuminate\Bus\Queueable;
use Illuminate\Contracts\Queue\ShouldQueue;
use Illuminate\Mail\Mailable;
use Illuminate\Queue\SerializesModels;

class UserEmail extends Mailable
{
    use Queueable, SerializesModels;

    public $user;

    /**
     * Create a new message instance.
     *
     * @return void
     */
    public function __construct($user)
    {
        $this->user = $user;
    }

    /**
     * Build the message.
     *
     * @return $this
     */
    public function build()
    {
        return $this->subject('Mail from Gau Con')
                    ->view('emails.userEmail');
    }
}
Tiếp theo, chúng ta sẽ tạo file blade userEmail trong thư mục emails với code bên dưới.
resources/views/emails/userEmail.blade.php
<!DOCTYPE html>
<html>
<head>
    <title>Gau Con</title>
</head>
<body>

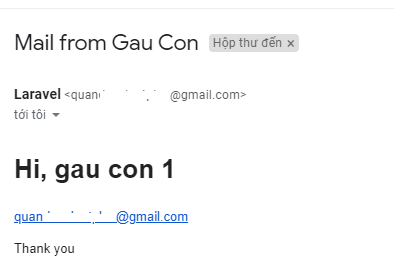
    <h1>Hi, {{ $user['name'] }}</h1>
    <p>{{ $user['email'] }}</p>

    <p>Thank you</p>
</body>
</html>
Step 3: Add Routes
routes/web.php
<?php

use Illuminate\Support\Facades\Route;

use App\Http\Controllers\UserController;

/*
|--------------------------------------------------------------------------
| Web Routes
|--------------------------------------------------------------------------
|
| Here is where you can register web routes for your application. These
| routes are loaded by the RouteServiceProvider within a group which
| contains the "web" middleware group. Now create something great!
|
*/

Route::get('users-send-email', [UserController::class, 'sendEmail']);
Step 4: Create Controller
app\Http\Controllers\UserController.php
<?php

namespace App\Http\Controllers;

use Illuminate\Http\Request;
use App\Models\User;
use App\Mail\UserEmail;
use Mail;

class UserController extends Controller
{
    /**
     * Write code on Method
     *
     * @return response()
     */
    public function sendEmail(Request $request)
    {
        $users = [
            [
                'name' => 'gau con 1',
                'email' => 'gaucon1@gmail.com',
            ],
            [
                'name' => 'gau con 2',
                'email' => 'gaucon2@gmail.com',
            ],
        ];


        foreach ($users as $key => $user) {
            Mail::to($user['email'])->send(new UserEmail($user));
        }

        dd('Send email successfully.');
    }
}
Trong trường hợp bạn không muốn dùng vòng lặp foreach để gửi mail to users thì bạn hãy cập nhật như code bên dưới nhé.
    /**
     * Write code on Method
     *
     * @return response()
     */
    public function sendEmail(Request $request)
    {
        $users = ['gaucon1@gmail.com','gaucon2@gmail.com'];

        Mail::to($users)->send(new UserEmail());

        dd('Send email successfully.');
    }
Output:

Mình hy vọng bài viết này giúp ích cho các bạn!
All rights reserved