
Building a GraphQL server on Cloudflare Workers with Apollo Server v4 (2024 edition)
Bài đăng này đã không được cập nhật trong 2 năm
In the modern web development world, GraphQL has become a popular tool for building flexible and powerful API services. Alongside this trend, the use of cloud services such as Cloudflare Workers for deploying applications has also become prevalent. In this article, we will explore how to build a GraphQL server on Cloudflare Workers using Apollo Server version 4, a renowned library for building GraphQL applications.
Cloudflare Workers
Cloudflare Workers is an edge computing service provided by Cloudflare. It allows you to run your JavaScript code on a globally distributed network of edge servers, enhancing the performance and reliability of your web applications. Cloudflare Workers offer a free plan, albeit with limitations such as a maximum of 100,000 requests per day and constrained CPU resources. You can try it out and upgrade your plan as needed.
Building a GraphQL Server
For building Apollo Server on Cloudflare Workers, we will need to use the package @as-integrations/cloudflare-workers. This is a community integration that I developed. It is written in TypeScript and the current version is v1.0.1.
With each release, I also publish a repository template so that everyone can experience the demo version quickly and build applications with that sample source code. There are some features provided:
- @as-integrations/cloudflare-workers integrated
- @apollo/datasource-rest integrated
- GraphQL Codegen integrated
- ESModule syntax + TypeScript
- Auto-deploy to Cloudflare Workers with GitHub Actions
- Auto-update dependencies with RenovateBot
Here is the link to the repository template: https://github.com/kimyvgy/worker-apollo-server-template. Please click the Use this template button to create a repository quickly, or create it manually following the instructions below.
1. Initializing CF Worker
We'll start by initializing the source code for the worker using the following command:
npm create cloudflare@latest
Follow the prompts to create the application, specifying the directory and application type. Once created, you'll have commands likenpm run dev, npm run deploy, and npm run test available.
using create-cloudflare version 2.16.1

╭ Create an application with Cloudflare Step 1 of 3
│
├ In which directory do you want to create your application?
│ dir ./my-apollo-server
│
├ What type of application do you want to create?
│ type "Hello World" Worker
│
├ Do you want to use TypeScript?
│ yes typescript
│...
╰ Application created

╭ Configuring your application for Cloudflare Step 2 of 3
│ ...
├ Do you want to use git for version control?
│ yes git
│...
╰ Application configured

╭ Deploy with Cloudflare Step 3 of 3
│
├ Do you want to deploy your application?
│ no deploy via `npm run deploy`
The CF Worker code is in file src/index.ts. It will look like this:
export interface Env {
    // ...
}

export default {
	async fetch(request: Request, env: Env, ctx: ExecutionContext): Promise<Response> {
		return new Response('Hello World!');
	},
};
- The
fetchfunction serves as the entry point of the application, and it will be executed by Cloudflare Workers when a client request comes in. - The
Envinterface is used to bind additional environment variables or bind other Cloudflare Workers services such as KV, R2, Queue.
2. Initializing Apollo Server
Install the dependencies for Apollo Server:
npm add @apollo/server graphql
Define the Apollo Server in a separate file, typically named src/apollo.ts, with your schema and resolvers. There is no different code when building on Node.js.
# src/apollo.ts
import { ApolloServer } from '@apollo/server';
import { ApolloServerPluginLandingPageLocalDefault } from '@apollo/server/plugin/landingPage/default';

const typeDefs = `#graphql
  type Query {
    example: String!
  }
`;

const resolvers = {
  Query: {
    example: () => {
      return 'Hello universe!';
    },
  }
}

export interface Context {
  token: string
}

export const server = new ApolloServer<Context>({
  typeDefs,
  resolvers,
  introspection: true,
  plugins: [
    ApolloServerPluginLandingPageLocalDefault({ footer: false }),
  ],
});
3. Integrating Apollo and CF Worker
To run Apollo on Workers, we'll use the @as-integrations/cloudflare-workers module. You can install it with:
npm add @as-integrations/cloudflare-workers
After that, integrate Apollo with CF Worker by calling the startServerAndCreateCloudflareWorkersHandler function. This function returns a callback function with the same signature as the fetch function of the CF Worker, which we'll provide to the Worker.
# src/index.ts
import { startServerAndCreateCloudflareWorkersHandler } from '@as-integrations/cloudflare-workers';
import { type Context, server } from './apollo';

export default {
  fetch: startServerAndCreateCloudflareWorkersHandler<Env, Context>(server, {
    context: async ({ env, request, ctx }) => {
      return { token: 'secret' };
    },
  }),
};
Since Apollo Server requires some Node.js modules, we need to polyfill these modules. As of the current time, Cloudflare Workers also support polyfilling corresponding replacement modules. We just need to enable the node_compat flag in the wrangler.toml file. While you're at it, go ahead and give a name to your worker in the file.
name = "my-apollo-server"                  # update
main = "src/index.ts"
compatibility_date = "2024-03-29"
# compatibility_flags = ["nodejs_compat"]  # remove legacy field
node_compat = true                         # add
Start the CF Worker to verify that Apollo Server is running without errors.
npm run dev
The output will be similar to this:
> my-apollo-server@0.0.0 dev
> wrangler dev

 ⛅️ wrangler 3.41.0
-------------------
▲ [WARNING] Enabling Node.js compatibility mode for built-ins and globals. This is experimental and has serious tradeoffs. Please see https://github.com/ionic-team/rollup-plugin-node-polyfills/ for more details.

[wrangler:inf] Ready on http://localhost:39923
⎔ Starting local server...
Try accessing the sandbox on your browser using the link displayed in the terminal. You should see a sandbox running similar to the image.
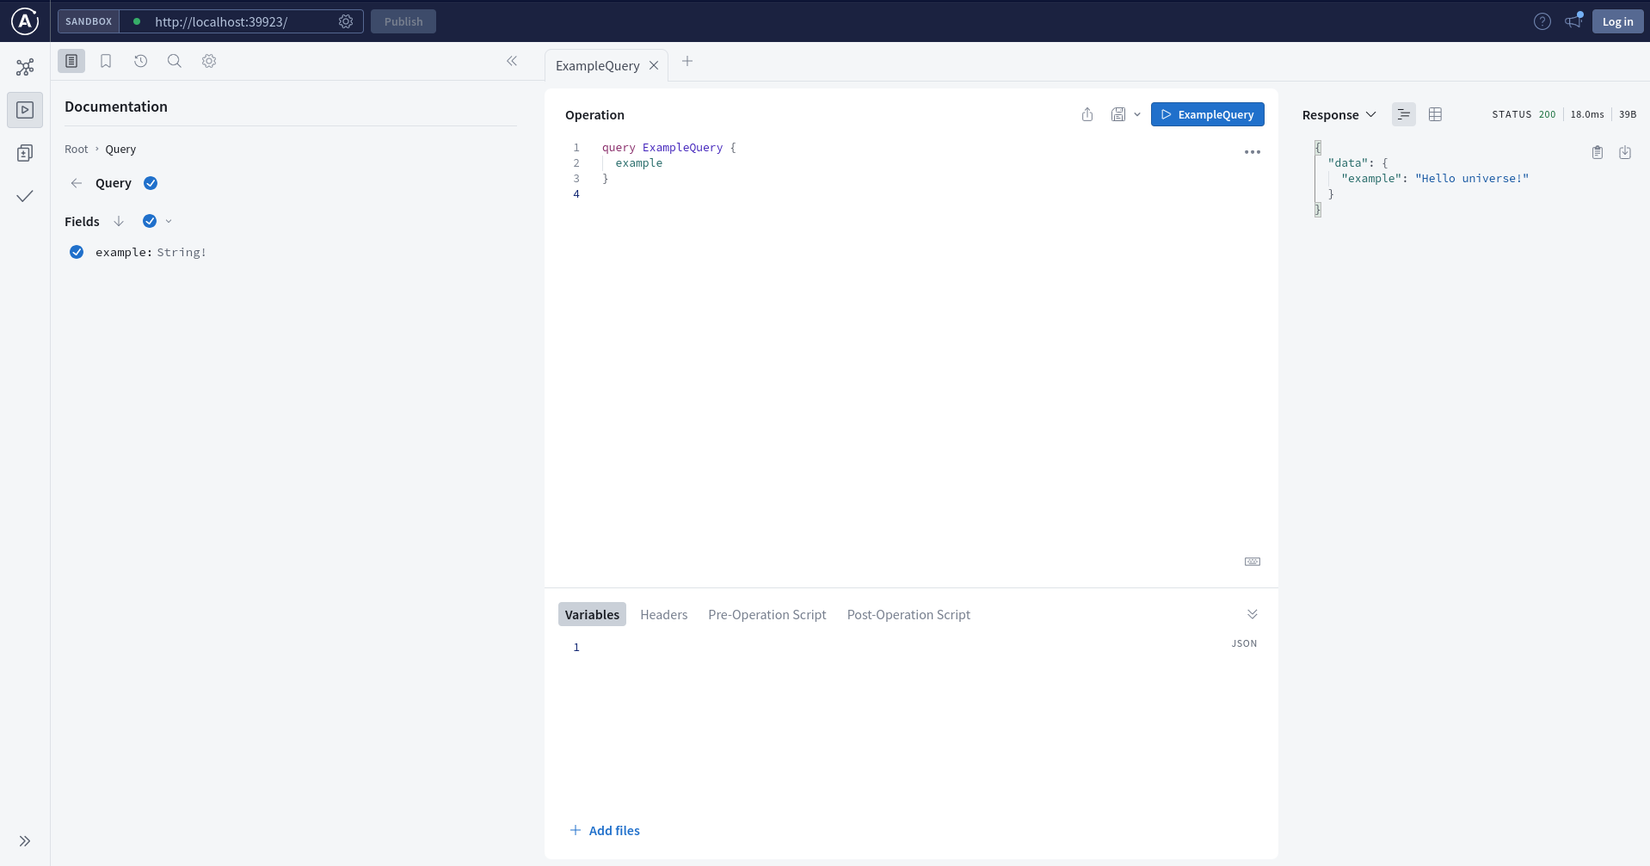
Note: The port changes every time the app runs, if you need to fix it to a specific port, such as 4000, you can modify the dev command in the package.json as follows:
wrangler dev --port 4000
Deploying to Cloudflare is a breeze. Just run the command npm run deploy and follow the prompts to log in and authorize via your browser. If you don't have an account, make sure to sign up for Cloudflare first.
Summary
Above is my sharing about how to build a GraphQL server on Cloudflare Workers. If you encounter any issues during the installation process mentioned above, feel free to comment below.
Please like, subscribe to the Dev Success 101 channel on platforms like Viblo / YouTube / TikTok. Thank you so much!
✴️ Subscribe! https://l.devsuccess101.com/subscribe
✴️ Join our Discord community for help https://l.devsuccess101.com/discord
✴️ Donate: Momo, Paypal
✴️ TikTok: https://l.devsuccess101.com/tiktok
✴️ YouTube: https://l.devsuccess101.com/youtube
✴️ Viblo: https://l.devsuccess101.com/viblo
✴️ Facebook: https://l.devsuccess101.com/facebook
✴️ Discord: https://l.devsuccess101.com/discord
All rights reserved
