Build RestFul API Laravel Authenticator (Có Demo)
Bài đăng này đã không được cập nhật trong 6 năm
API Authenticator vẫn thường được dùng cho việc register hay login vào hệ thống hoặc dịch vụ của chúng ta. Khi người dùng tạo mới tài khoản với username và password phía server sẽ insert thông tin đó vào database rồi trả về 1 access_token.
Mục đích của việc generate cho client access_token này để xác thực thiết bị này đã được đăng ký trên hệ thống của chúng ta tránh việc những khách không mời mà đến, các bạn cũng biết rằng việc call liên tục lên server sẽ gây tắc nghẽn hệ thống nghiệm trọng.
Bây giờ chúng ta sẽ build 1 vài api cơ bản như sau có áp dụng API Authenticator, ở đây mình sẽ dùng 1 framework rất hữu ích thực thi việc này đó là Laravel Passport .
Yêu cầu:
- Đã cài đặt Composer (Hướng dẫn cài đặt)
- Đã cài Laravel
Bạn đừng lo lắng nếu chưa cài đặt Laravel mình sẽ hướng dẫn ngay dưới đây.
1. Cài đặt Laravel
Rất đơn giản hãy chạy command dưới đây:
composer global require laravel/installer
Sau khi cài đặt thành công bạn gõ command laravel --version nếu kết quả như sau là thành công!
SUCCESS: Laravel Installer 3.1.0
Failed: laravel: command not found
Giải pháp :
Bạn cần cài đặt những extension cần thiết của PHP để Laravel có thể install thành công. Sau đó mới run lại command trên: composer global require laravel/installer
Extension laravel yêu cầu:
PHP >= 7.1.3
BCMath PHP Extension
Ctype PHP Extension
JSON PHP Extension
Mbstring PHP Extension
OpenSSL PHP Extension
PDO PHP Extension
Tokenizer PHP Extension
XML PHP Extension
2. Tạo project và cài Passport
Sau khi hoàn thành bước số 1 bạn có thể tạo project demo của mình rồi.
Tên project mình để: author-api
Terminal: composer create-project --prefer-dist laravel/laravel author-api
Sau khi anh em rót nước pha trà xong xuôi thì em composer nó cũng tạo xong project được tích hợp laravel 7.12.0 ( đây là phiên bản mới nhất mình dùng)
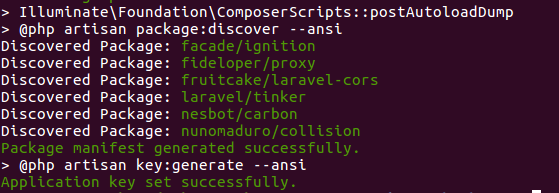
Màn hình khởi tạo thành công như sau:
Tiếp đến bạn thêm Laravel Passport nhé, cũng rất đơn giản thôi
cd path_of_project
composer require laravel/passport
Phiên bản hiện tại là : "laravel/passport": "^9.2"
3. Config DB và Passport
Mở file .env để chỉnh sửa thông tin db mà bạn muốn project mình sử dụng
DB_DATABASE=laravel
DB_USERNAME=root
DB_PASSWORD=
Hãy thay 3 thông tin trên.
Tạo Migrations:
- Employee table ( username, email, name, pass )
- Job User (name, major, job, company)
Với 2 table trên chúng ta sẽ tạo lần lượt 2 migrate như dưới đây.
Table Employees:
php artisan make:migration create_employees_table --create=employees
Trong migration bạn thêm code như sau để khởi tạo bảng:
Schema::create('employees', function (Blueprint $table) {
            $table->id();
            $table->timestamps();
            $table->string('name');
            $table->string('email')->unique();
            $table->string('pass');
            $table->string('username');
        });
Table Jobs:
php artisan make:migration create_jobs_table --create=jobs
Trong file migration bạn hãy thêm :
$table->id();
$table->timestamps();
$table->string('name');
$table->string('major');
$table->string('job');
$table->string('company');
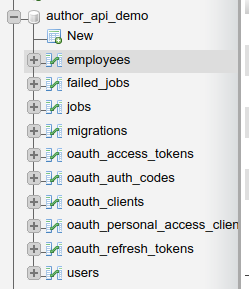
Sau khi các bạn đã thực hiện xong hãy chạy lệnh và quan sát kết quả : php artisan migrate
Success! :
Migrating: 2020_06_16_032953_create_jobs_table
Migrated:  2020_06_16_032953_create_jobs_table (0.03 seconds)
Create 2 model tương ứng:
php artisan make:model Employee
php artisan make:model Job
Config Laravel Passport
Đây là bước quan trọng nhất! Mình sẽ thực hiện chậm để bạn có thể xem nó kỹ càng hơn.
Open class App\Employee
Thêm khai báo thư viện : use Laravel\Passport\HasApiTokens;
Và thêm : use Notifiable, HasApiTokens;
Open class app/Providers/AuthServiceProvider và thêm như sau:
AuthServiceProvider.php
class AuthServiceProvider extends ServiceProvider
{
    /**
     * The policy mappings for the application.
     *
     * @var array
     */
    protected $policies = [
         'App\Model' => 'App\Policies\ModelPolicy',
    ];

    /**
     * Register any authentication / authorization services.
     *
     * @return void
     */
    public function boot()
    {
        $this->registerPolicies();
        Passport::routes();
    }
}
Thực hiện việc này xong là bạn đã hoàn thành 80% phần việc cài đặt Passport có thể hoạt động rồi.
Tiếp đến, open file config/auth
Thay thế line 45'driver' => 'token', => 'driver' => 'passport',
4. Khởi tạo Authenticator Controller
php artisan make:controller API/BaseController
BaseController.php
class BaseController extends Controller
{
    /**
     * success response method.
     *
     * @return \Illuminate\Http\Response
     */
    public function sendResponse($result, $message)
    {
        $response = [
            'success' => true,
            'data'    => $result,
            'message' => $message,
        ];


        return response()->json($response, 200);
    }


    /**
     * return error response.
     *
     * @return \Illuminate\Http\Response
     */
    public function sendError($error, $errorMessages = [], $code = 404)
    {
        $response = [
            'success' => false,
            'message' => $error,
        ];


        if(!empty($errorMessages)){
            $response['data'] = $errorMessages;
        }


        return response()->json($response, $code);
    }
}
php artisan make:controller API/EmployeeAuthor
EmployeeAuthor.php
class EmployeeAuthor extends BaseController
{
    public function register(Request $request)
    {
        $validatedData = $request->validate([
            'name' => 'required|max:55',
            'email' => 'email|required|unique:users',
            'pass' => 'required|confirmed'
        ]);

        $validatedData['pass'] = bcrypt($request->pass);

        $user = Employee::create($validatedData);

        $accessToken = $user->createToken('authToken')->accessToken;
        $data['employee'] = $user;
        $data['access_token'] = $accessToken;

        return sendResponse($data, "Employee created successful");
    }

    public function login(Request $request)
    {
        $loginData = $request->validate([
            'username' => 'email|required',
            'pass' => 'required'
        ]);

        if (!auth()->attempt($loginData)) {
            return response(['message' => 'Invalid Credentials']);
        }

        $accessToken = auth()->user()->createToken('authToken')->accessToken;
        $data['employee'] = auth()->user();
        $data['access_token'] = $accessToken;

        return response($data, "Login successful!");

    }
}
Thêm Resource Job
php artisan make:resource JobRES
Khởi tạo JobAll Controller
JobAll.php
class JobAll extends Controller
{
    public function index()
    {
        $ceos = Job::all();
        return response([ 'job' => JobRES::collection($ceos), 'message' => 'Retrieved successfully'], 200);
    }

    public function store(Request $request)
    {
        $data = $request->all();

        $validator = Validator::make($data, [
            'name' => 'required|max:255',
            'major' => 'required|max:255',
            'job' => 'required|max:255',
            'company' => 'required'
        ]);

        if($validator->fails()){
            return response(['error' => $validator->errors(), 'Validation Error']);
        }

        $job = Job::create($data);

        return response([ 'job' => new JobRES($job), 'message' => 'Created successfully'], 200);
    }

    public function show(Job $job)
    {
        return response([ 'job' => new JobRES($job), 'message' => 'Retrieved successfully'], 200);

    }

    public function update(Request $request, Job $job)
    {

        $job->update($request->all());

        return response([ 'job' => new JobRES($job), 'message' => 'Retrieved successfully'], 200);
    }

    public function destroy(Job $job)
    {
        $job->delete();

        return response(['message' => 'Deleted']);
    }
}
Tiếp theo bạn cần khai báo các Routes để server có thể nhận diện các API bạn đã tạo ở trên.
Open file routes.api.php
Route::post('/register', 'API\EmployeeAuthor@register');
Route::post('/login', 'API\EmployeeAuthor@login');

Route::apiResource('/job', 'API\JobAll')->middleware('auth:api');
5. Run DEMO
Vậy là quá trình cài đặt và coding project đã xong bây giờ bạn sẽ tiến hành chạy demo xem kết quả ra sao 
Đầu tiên bạn cần chạy lệnh : php artisan passport:install
Nó sẽ generate ra 2 cái secret key :
Personal access client created successfully.
Client ID: 1
Client secret: NcuUcYGj93eLqrLfH5TCAvChR6xpdA556Aqu61jv
Password grant client created successfully.
Client ID: 2
Client secret: eDnIkv4VXGKhhfT92iYOdso2BhVGTkGSGavItl7d
Tiếp đến bạn cần chạy lệnh sau từ root project:
php artisan serve
Bạn đã có domain để call api mặc định là http://127.0.0.1:8000
Chỉnh sửa file config.auth.php
Line 71: Bạn cần set 'model' => App\Employee::class,
Do chúng ta cần authen cho model Employee chứ không phải User như mặc định.
Giờ chúng ta chạy thử API register nhé!
API - Register DONE

API - Create A Job
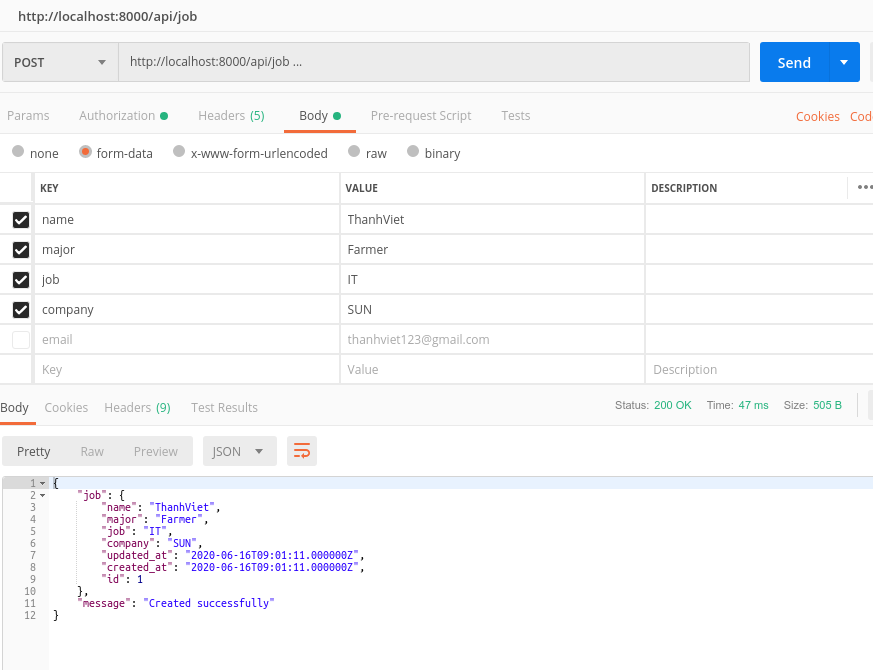
Vậy là bạn đã tạo 1 Job IT cho user có tên là ThanhViet. Trong thực tế bạn cần check thông tin require như ngày tháng năm sinh và email để xác định đúng user (name = ThanhViet) đã thực hiện thao tác insert này nhằm mục đích bảo mật hơn.
Nhưng ở demo này bạn có thể thấy với access_token tạo ra là duy nhất và phải bắt buộc có mới thực hiện call api/job cho nên nó cũng khá an toàn thông tin trên server mình rồi.
Lưu ý :
Bạn phải truyền tham số Authorization trong Postman như sau:
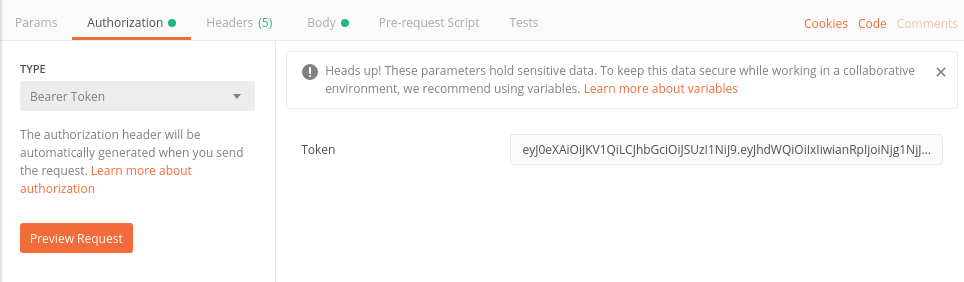
Tương tự những API khác bạn có thể chủ động khám phá nhé!
6. Tổng kết
Trên đây là phần sử dụng Laravel Passport để tạo RESTFUL API Authentication một cách đầy đủ, mình hy vọng bài viết sẽ đem lại sự hữu ích tới các bạn đang cần. Nếu bạn có vướng mắc hoặc có câu hỏi hãy để dưới phần comment mình sẽ cố gắng giải đáp nhanh nhất nha! Happy coding ^^
All rights reserved
