[BOT][AWS Lambda] Sử dụng Selenium trên Lambda Function để theo dõi giá sản phẩm Shoppe định kỳ
Mở đầu:
Hello mọi người, đầu xuân năm mới kính chúc mọi người tràn đầy sức khỏe, đạt được nhiều mục tiêu trong năm mới nhé nhé, hôm nào mình cũng có thói quen lướt lướt các sàn thương mại điện tử như Shoppe, Tiki để xem giá một số món đồ mình dự định mua ( tham khảo thôi chứ chưa có tiền mua ). Cũng mất khá nhiều thời gian nên nay rảnh rỗi làm cái tool nhè nhẹ để crawl giá của sản phẩm sau đó bắn sang Slack luôn, khi nào giá tốt thì múc thôi :v.
Stack sử dụng:
- Selenium
- AWS Lambda Service
- AWS CloudWatch Events
Mình cũng hay sử dụng Selenium để làm một số công cụ tự động hóa (automation) phục vụ cho công việc, với việc sử dụng selenium có thể mô phỏng các thao tác trên trình duyệt như người thật (perfect). Mình thấy cũng ít người sử dụng Selenium chạy trên AWS LAMBDA SERVICE, hôm nay hướng dẫn mọi người Setup phục vụ cho nhu cầu của bản thân luôn nhé.
Tạo Lambda Function:
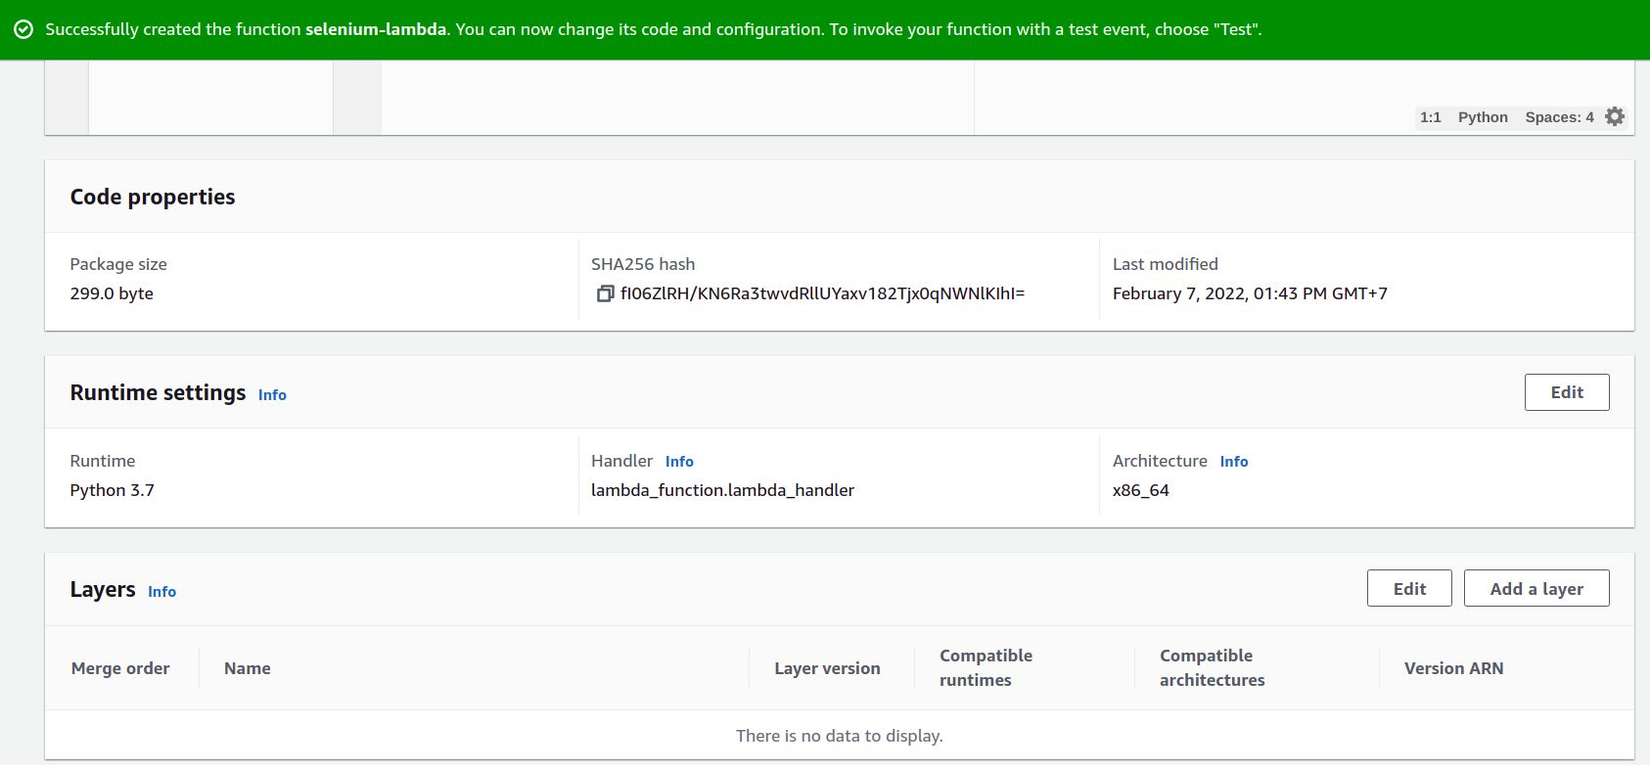
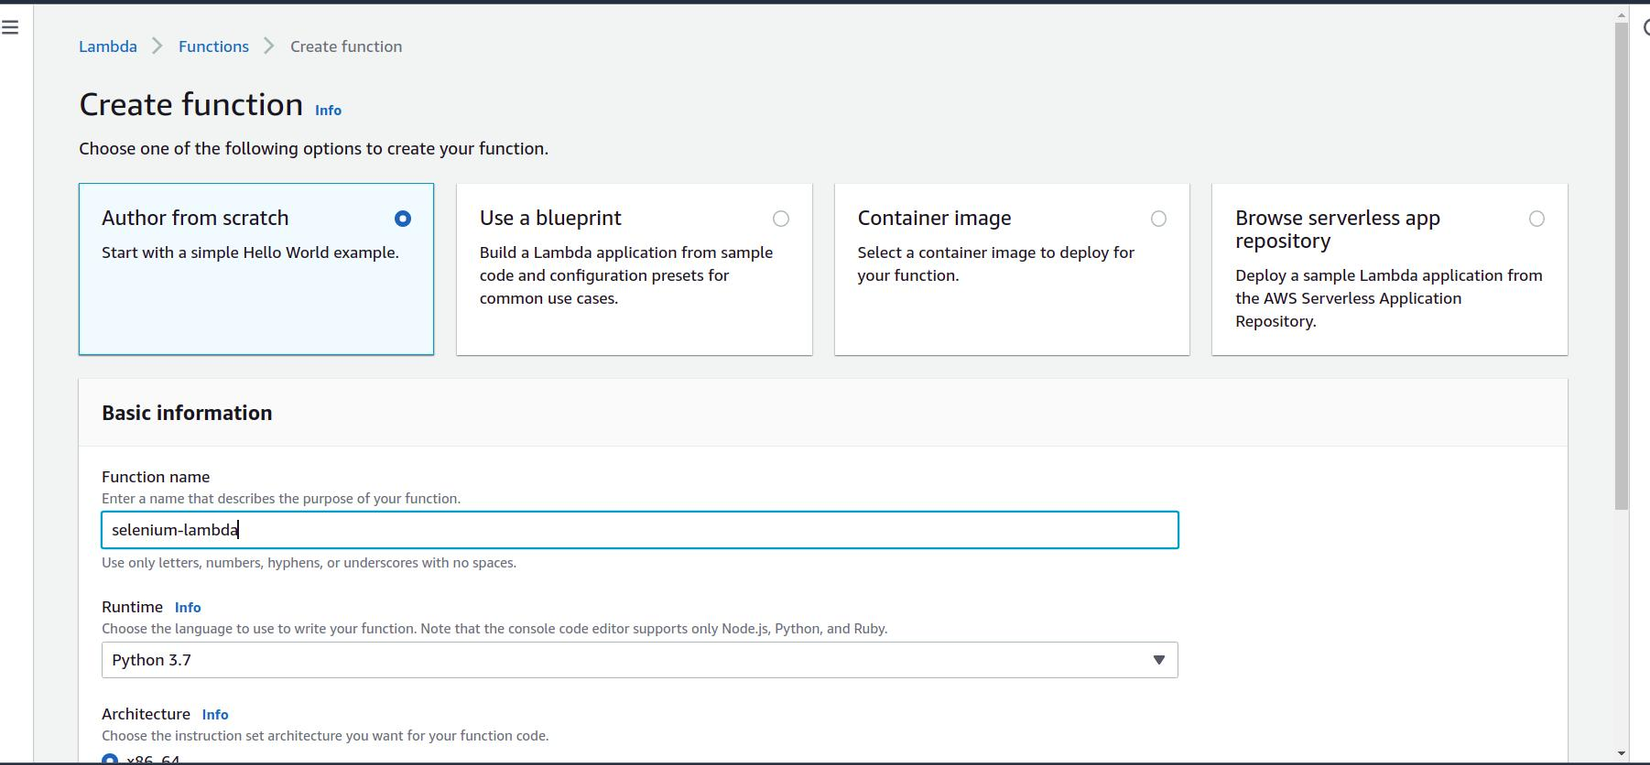
- Vào AWS Console -> Chọn Lambda Service để tạo 1 Lambda Function nhé.
- Sau khi tạo được Lambda Function, tại Sidebar chọn Layers -> Create layer

-
Lambda Layer giúp chúng ta dễ dàng cài đặt tất cả các thư viện và các dependencies bạn cần để ứng dụng của mình chạy được. Việc sử dụng Layer giúp chúng ta giảm kích thước của file .zip deployment và deploy ứng dụng một cách nhanh hơn.
-
Một layer là một .zip file mà chứa các thư viện, dependence, configuration files, custom runtime, data,...
-
File Layer chrome_headless.zip đã build sẵn mọi người có thể tải tại đây, hoặc muốn build mới thì mọi người làm theo các step sau:
git clone git@github.com:longnd-1038/selenium-lambda.git

rm -rf chrome_headless.zip

chmod -x chrome_headless_lambda_layer.sh

./chrome_headless_lambda_layer.sh
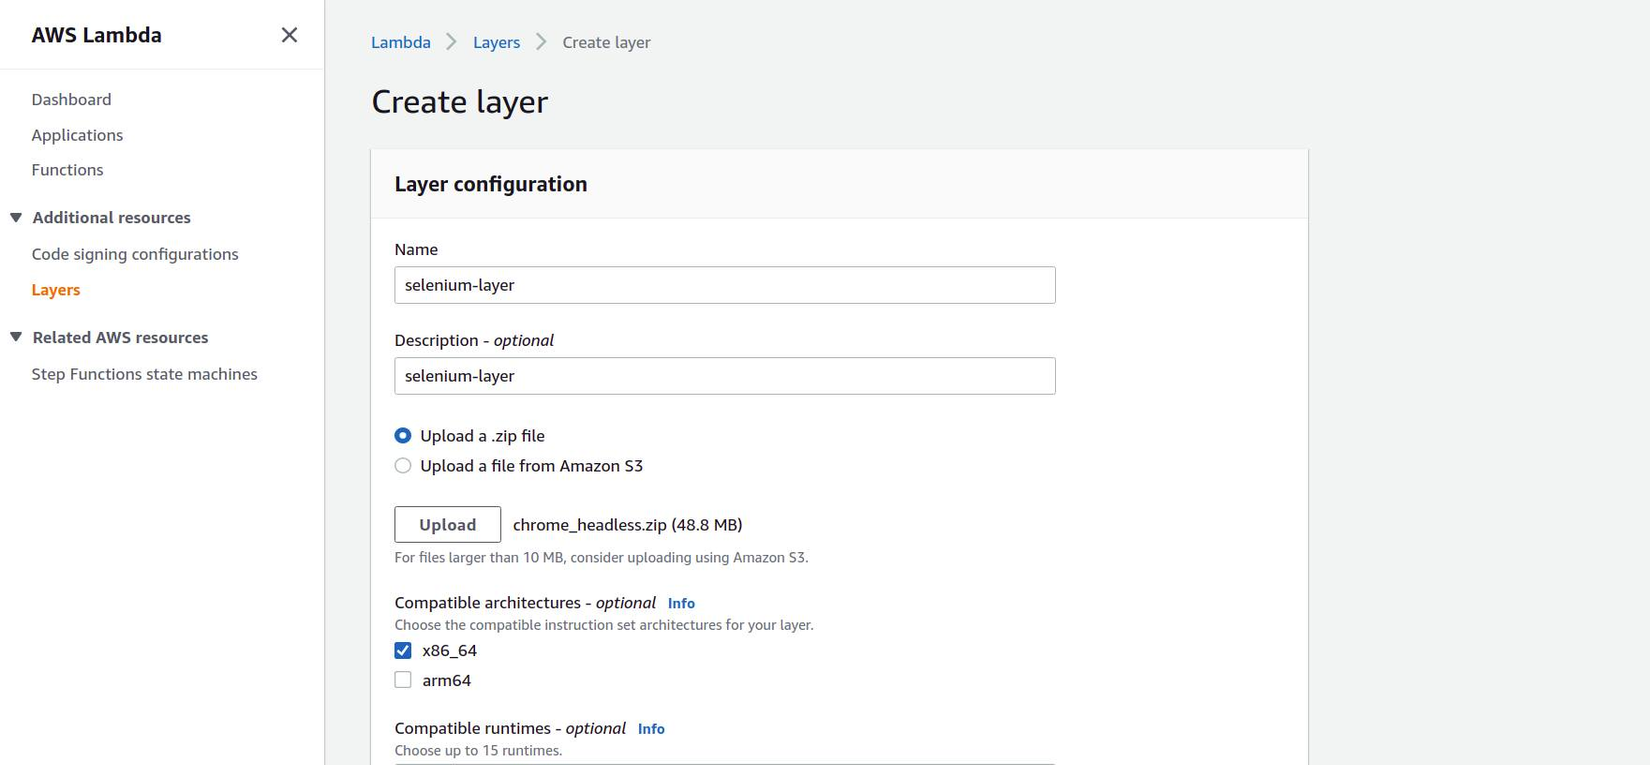
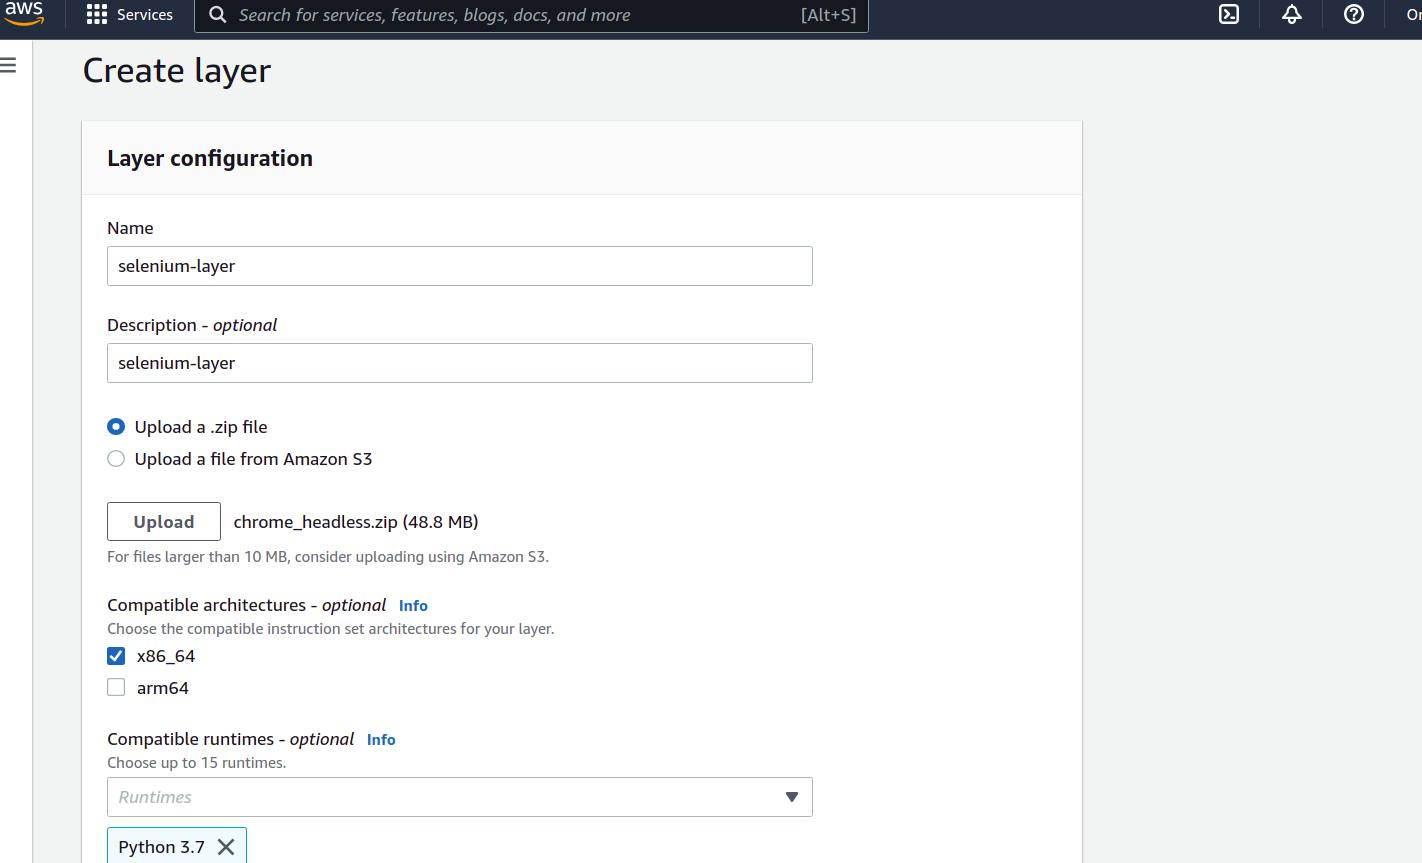
- Mình dùng Python 3.7 nên chọn Compatible Runtime là Python 3.7:
-
Add Layer vào Lambda Function, vào Lambda Function vừa tạo ở trên kéo xuống chọn Add layer
![image.png]()
-
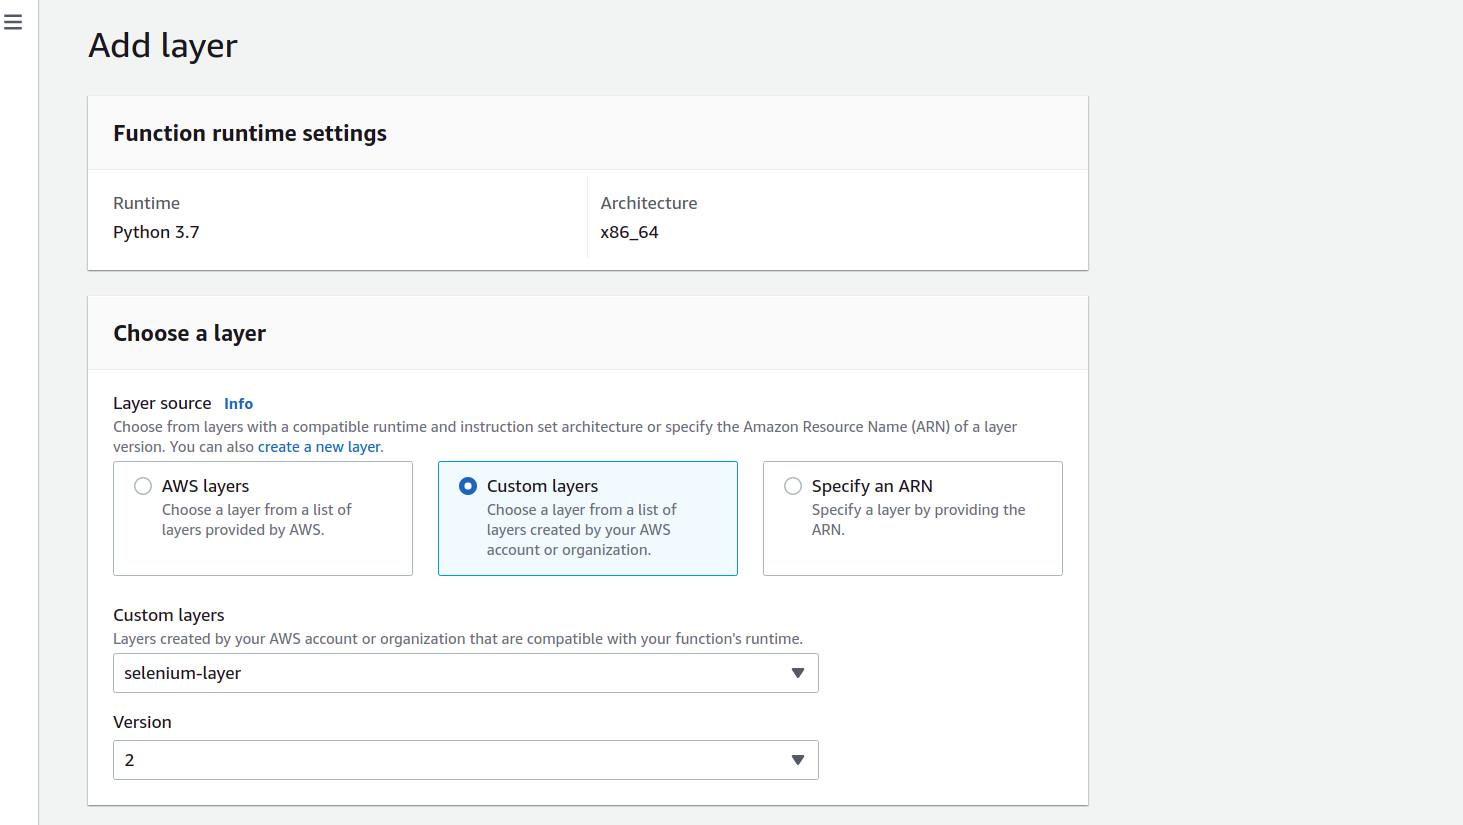
Chọn Layer đã tạo phía trên:
![image.png]()
-
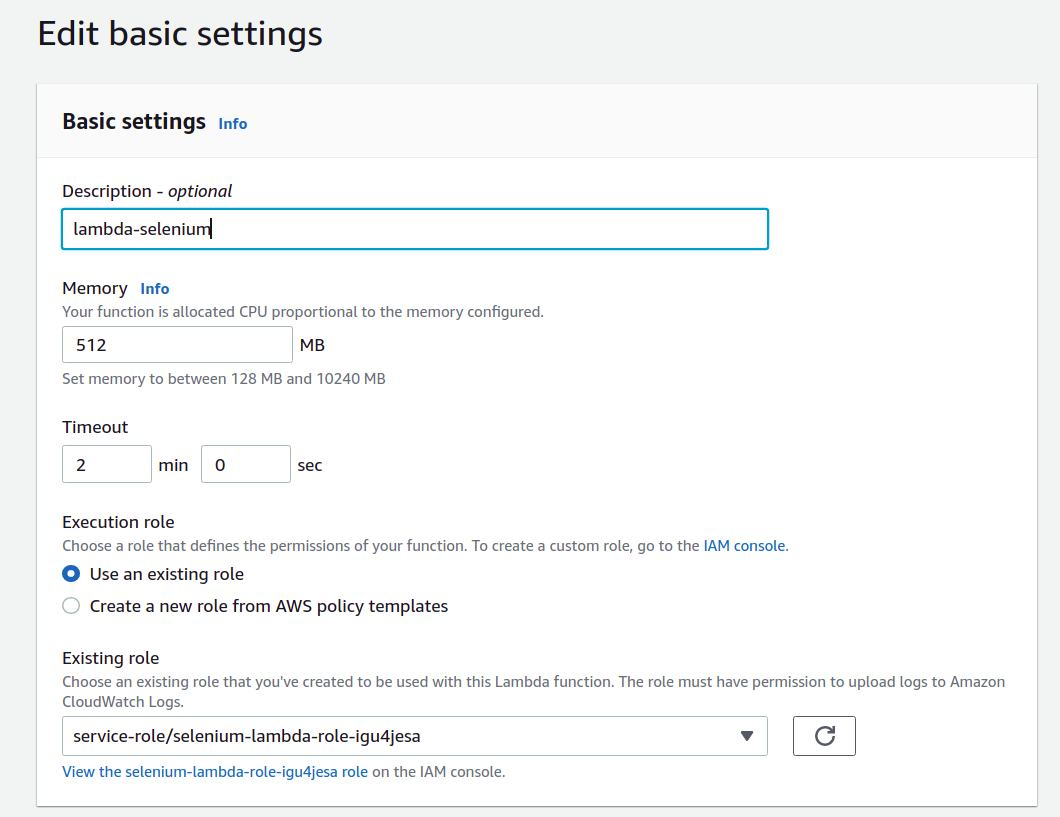
Mọi người nhớ vào Lamda function đã tạo chọn Configuration -> General configuration để setting lại timeout lên tầm 3 ~ 5 minutes, memory tầm 512mb để chạy nhé:
![image.png]()
-
Ok sau khi tạo xong lambda function cũng như add layer để có một số thư viện cần thiết để chạy thì tiếp theo chúng ta viết một script nhé.
Viết script:
- Kịch bản :
Vào link https://shopee.vn/apple_flagship_store?page=0&shopCollection=10957665&sortBy=pop
Crawl thông tin các sản phẩm Macbook
Format text và gửi sang Slack
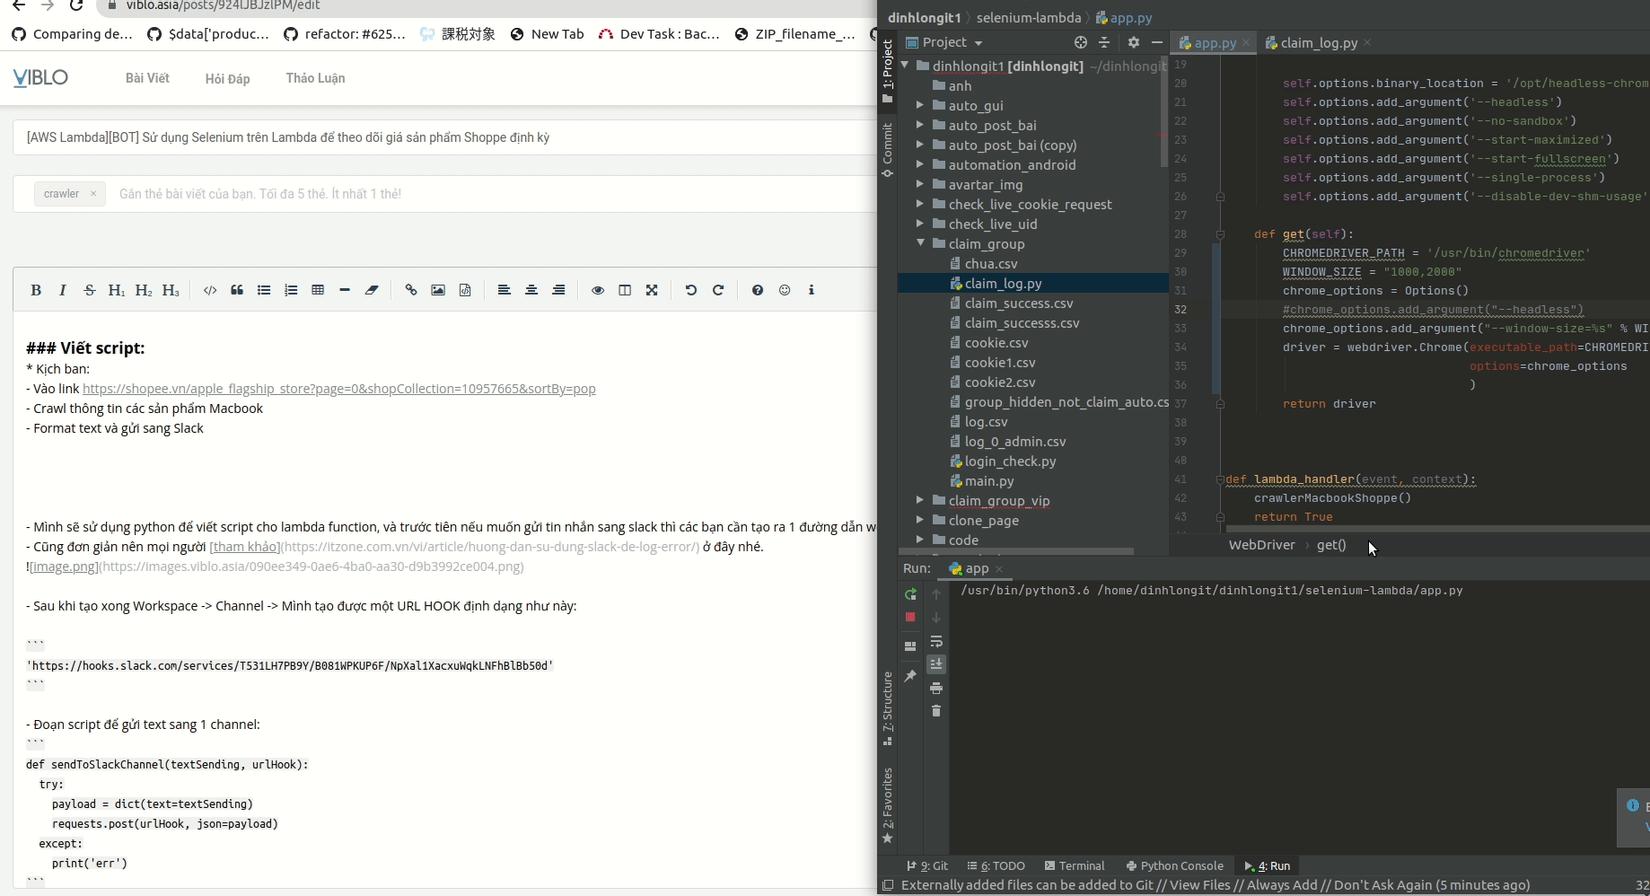
- Chạy với chế độ Non-Headless nó sẽ như thế này, nhưng trên lambda function thì chúng ta chạy với chế độ Headless nhé:
![]()
-
Mình sẽ sử dụng python để viết script cho lambda function, và trước tiên nếu muốn gửi tin nhắn sang slack thì các bạn cần tạo ra 1 đường dẫn webhook tới 1 channel. Khi bắn 1 POST request theo api của Slack thì Slack sẽ gửi tin nhắn đến cho channel ấy.
-
Cũng đơn giản nên mọi người tham khảo ở đây nhé.
![image.png]()
-
Sau khi tạo xong Workspace -> Channel -> Mình tạo được một URL HOOK định dạng như này:
'https://hooks.slack.com/services/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d'
- Đoạn script để gửi text sang 1 channel:
def sendToSlackChannel(textSending, urlHook):
    try:
        payload = dict(text=textSending)
        requests.post(urlHook, json=payload)
    except:
        print('err')
- Đoạn script để crawl giá sản phẩm Macbook trên Shoppe (nhớ thay đổi urlHook nhé):
def crawlerMacbookShoppe(link = 'https://shopee.vn/apple_flagship_store?page=0&shopCollection=10957665&sortBy=pop'):
    urlHook = 'https://hooks.slack.com/services/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d'
    instance_ = WebDriver()
    driver = instance_.get()
    driver.get(link)
    time.sleep(5)
    elements = driver.find_elements_by_xpath('//*[@id="main"]/div/div[2]/div[2]/div/div[2]/div/div[4]/div[2]/div[2]/div[1]/div[2]/div/div')
    for el in elements:
        infor = el.text.split('\n')
        discount = infor[0]
        productName = infor[2]
        price = infor[5]
        textInfor = productName + ' - ' + discount + ' - ' + price
        sendToSlackChannel(textInfor, urlHook)
        print(textInfor)

    sendToSlackChannel('--------------------------------------------------------------------------------------', urlHook)
    driver.close()
- Và đây là Full Script nhé:
import json
from selenium.webdriver import Chrome
from selenium.webdriver.chrome.options import Options
import os
import shutil
import uuid
import time
from datetime import datetime
import datetime
import requests

class WebDriver(object):

    def __init__(self):
        self.options = Options()

        self.options.binary_location = '/opt/headless-chromium'
        self.options.add_argument('--headless')
        self.options.add_argument('--no-sandbox')
        self.options.add_argument('--start-maximized')
        self.options.add_argument('--start-fullscreen')
        self.options.add_argument('--single-process')
        self.options.add_argument('--disable-dev-shm-usage')

    def get(self):
        driver = Chrome('/opt/chromedriver', options=self.options)
        return driver


def lambda_handler(event, context):
    crawlerMacbookShoppe()
    return True

def crawlerMacbookShoppe(link = 'https://shopee.vn/apple_flagship_store?page=0&shopCollection=10957665&sortBy=pop'):
    urlHook = 'https://hooks.slack.com/services/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'
    instance_ = WebDriver()
    driver = instance_.get()
    driver.get(link)
    time.sleep(5)
    elements = driver.find_elements_by_xpath('//*[@id="main"]/div/div[2]/div[2]/div/div[2]/div/div[4]/div[2]/div[2]/div[1]/div[2]/div/div')
    for el in elements:
        infor = el.text.split('\n')
        discount = infor[0]
        productName = infor[2]
        price = infor[5]
        textInfor = productName + ' - ' + discount + ' - ' + price
        sendToSlackChannel(textInfor, urlHook)
        print(textInfor)

    sendToSlackChannel('--------------------------------------------------------------------------------------', urlHook)
    driver.close()

def sendToSlackChannel(textSending, urlHook):
    try:
        payload = dict(text=textSending)
        requests.post(urlHook, json=payload)
    except:
        print('err')
Demo thử:
-
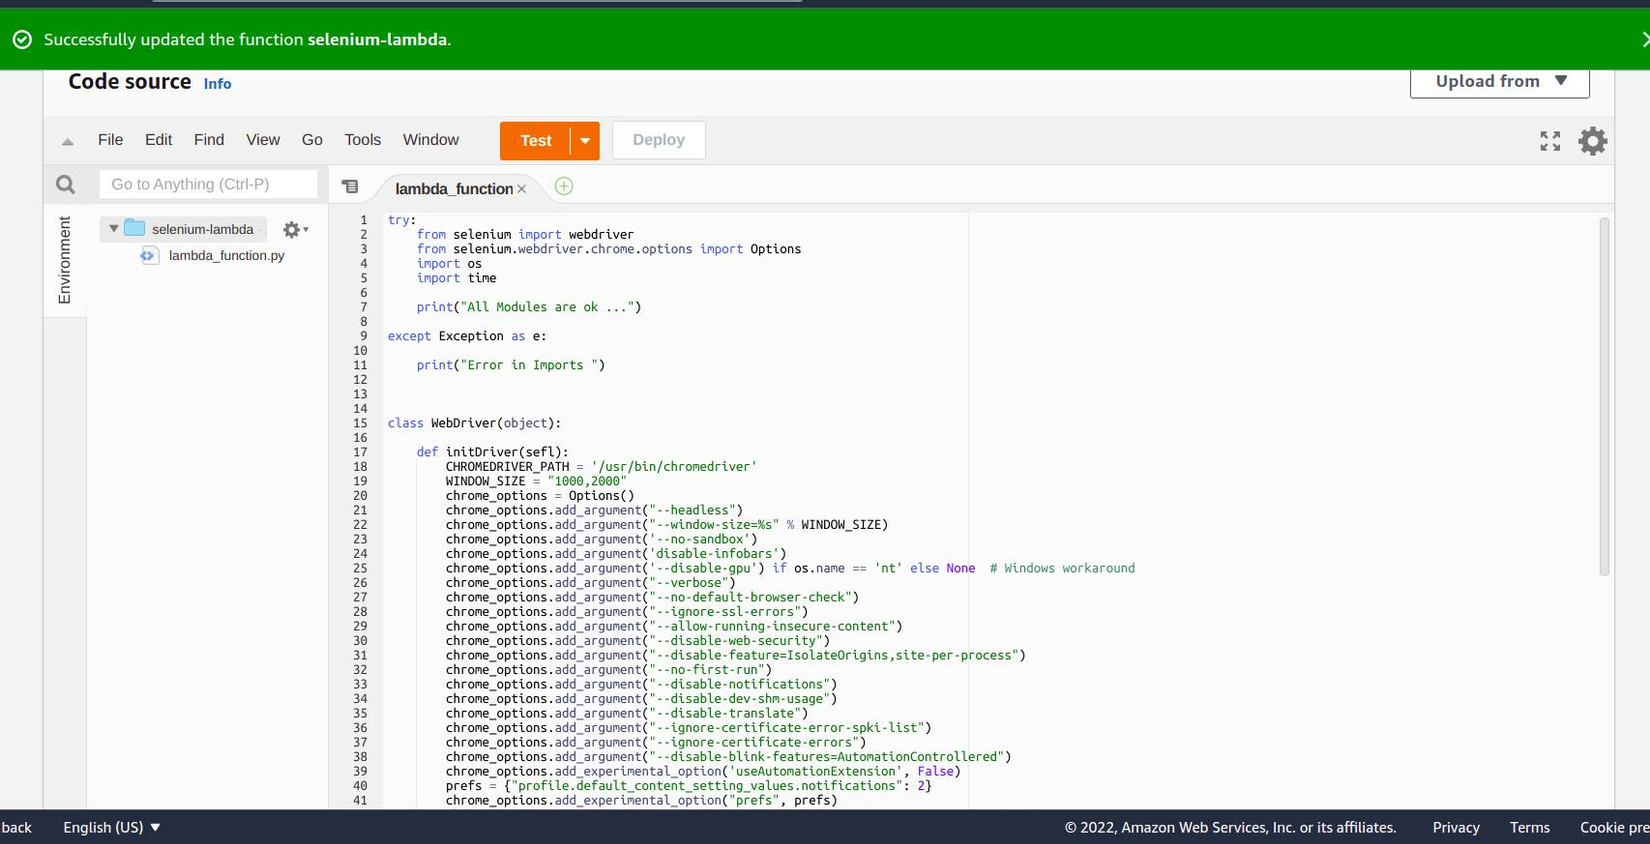
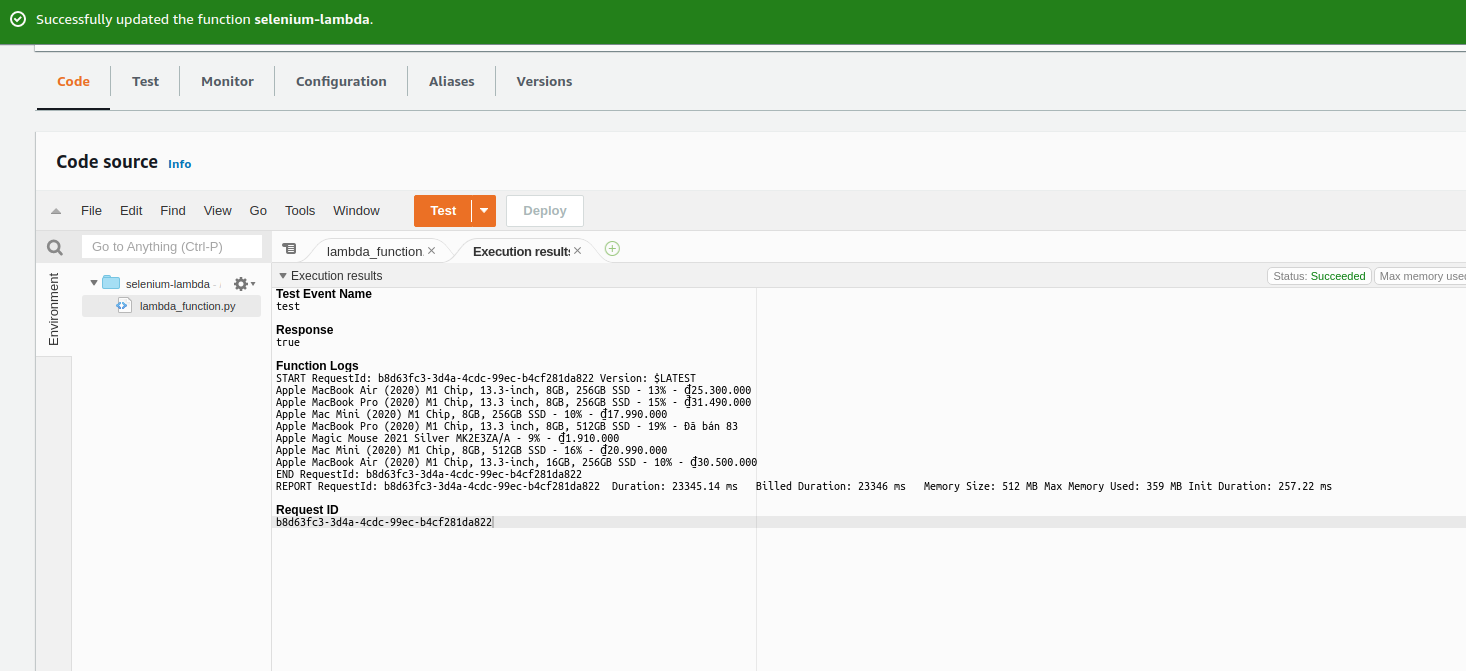
Mọi người dán script vào lambda function -> nhấn deploy -> sau đó nhấn test:
![image.png]()
-
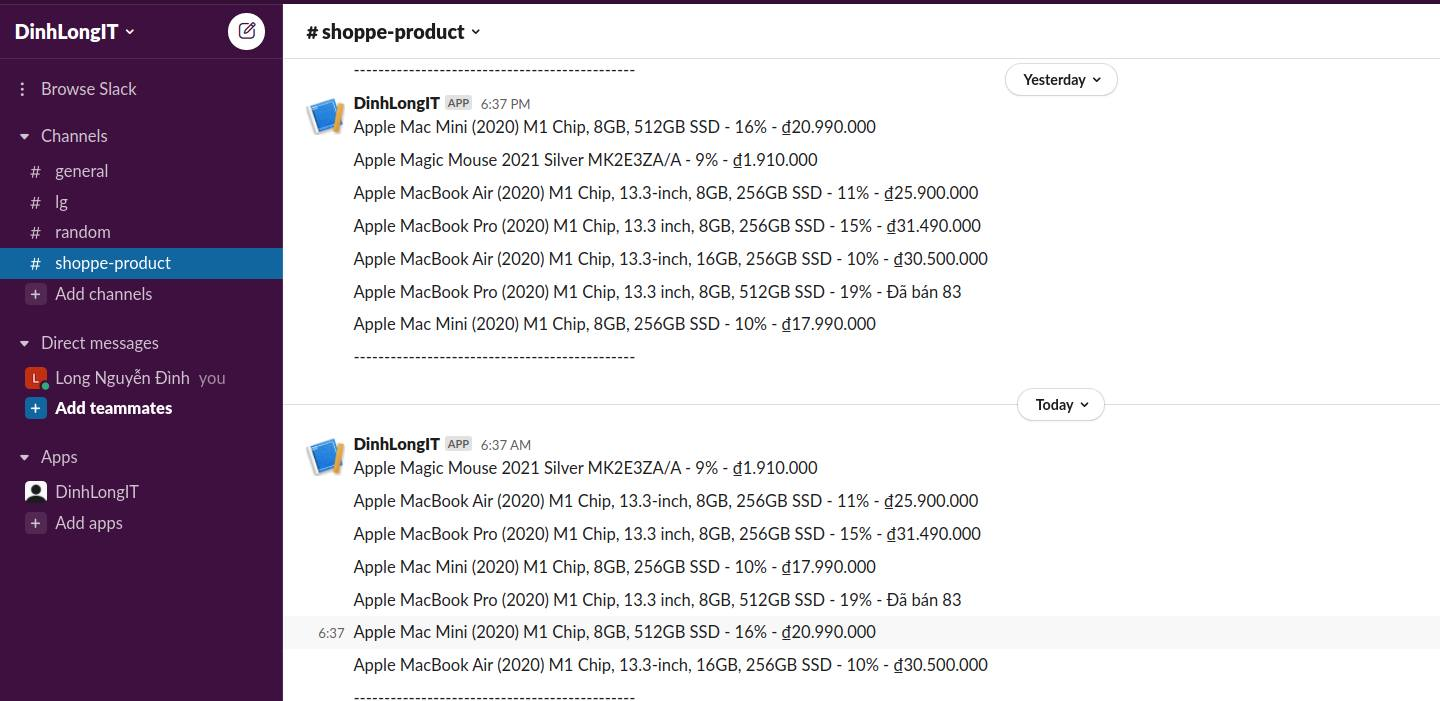
Và đây là kết quả nhá:
![image.png]()

Sử dụng Amazon EventBridge để cấu hình cronjob:
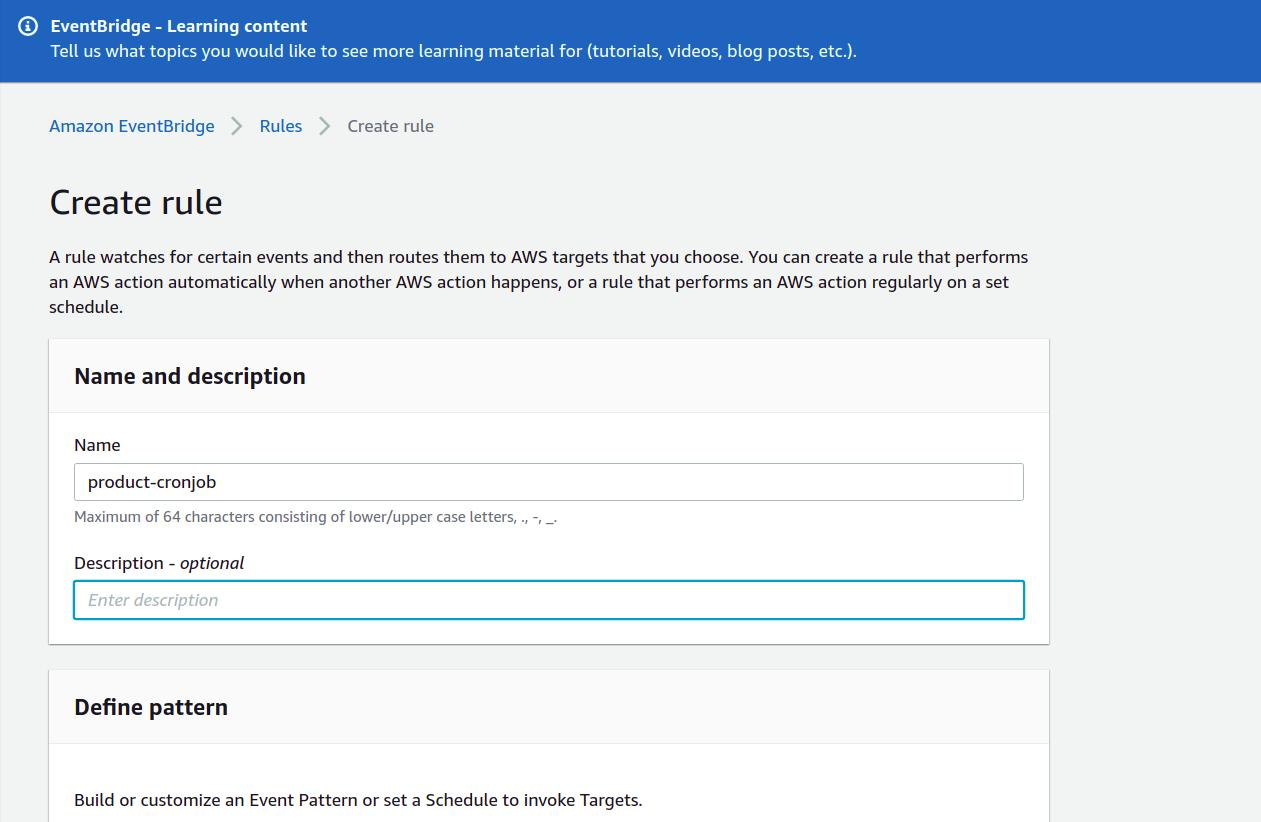
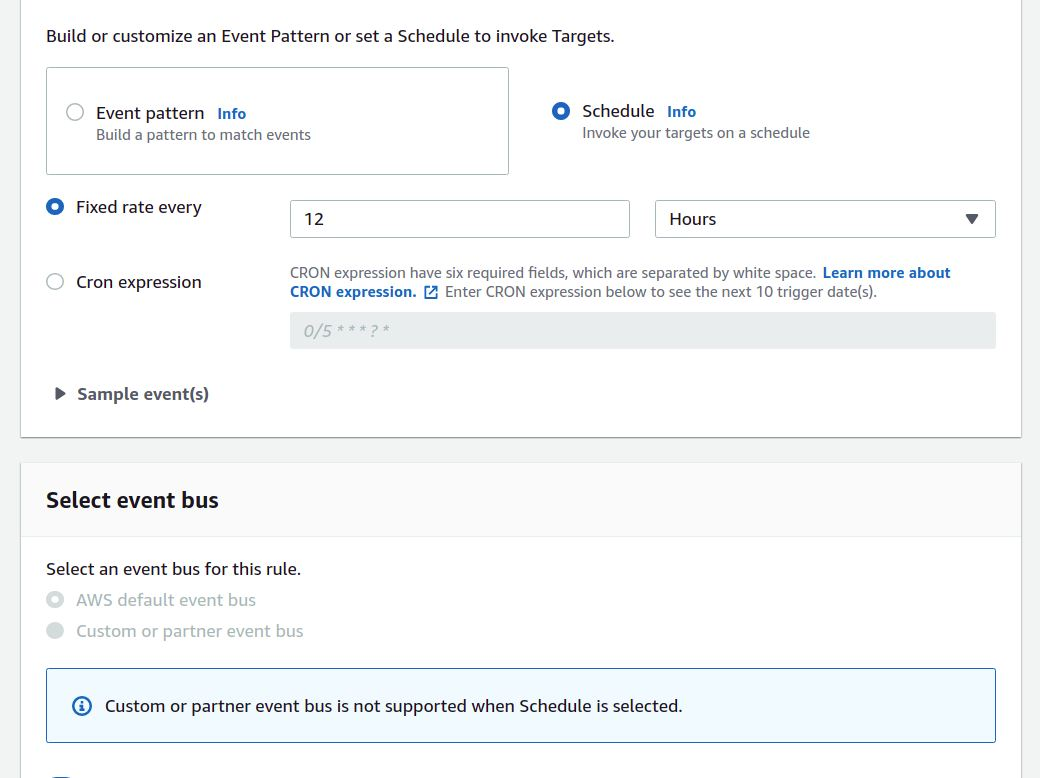
- Mục đích sử dụng Amazon EventBridge để có thể call lambda function một cách tự động, ở đây mình thiết lập 1 job là cứ 12 hours sẽ call lambda function 1 lần để bắn message về Slack.
Tổng kết:
- Cảm ơn mọi người đã đọc bài viết, hi vọng sẽ giúp ích cho mọi người trong công việc và học tập.
All rights reserved
