Bắt đầu với ReactJs với ví dụ mở đầu
Bài đăng này đã không được cập nhật trong 7 năm
Xin chào! Mới chân thấp chân cao tìm hiểu reactJs nhưng vẫn hổ báo chút, lần này mình xin đề cập đến Laravel 5.5 và ReactJS. Trong bài viết này chúng ta sẽ sử dụng React Preset và ReactJs trong Laravel app. Chiến luôn nào!
Cài đặt laravel 5.5
Với câu lệnh hầu như ai cũng biết dưới đây:
composer create-project --prefer-dist laravel/laravel LaravelReact "5.5.*"
Cài đặt ReactJS
Chúng ta sẽ cài ReactJS Preset bằng command sau:
php artisan preset react
Chúng ta sẽ có một tệp Example.js bên trong
resources/assets/js/components, một ví dụ React cơ bản.
Ngoài ra, resources/assets/js/app.js đã được cập nhật để sử dụng Ví dụ trên. Tiếp theo chạy command:
npm install && npm run dev
Tạo models và migrations
Tạo hai model như sau:
php artisan make:model Task -m
php artisan make:model Bug -m
Thêm -m vào để lệnh make:model sẽ tạo ra các migration tương ứng.
Trong file app/Task.php chúng ta sửa như sau:
<?php

namespace App;

use Illuminate\Database\Eloquent\Model;

class Task extends Model
{
    protected $fillable = [
    	'title',
    	'bug_id'
    ];
}
Và trong app/Bug.php sẽ là:
<?php

namespace App;

use Illuminate\Database\Eloquent\Model;

class Bug extends Model
{
    protected $fillable = [
    	'name',
    	'description'
    ];

    public function tasks()
    {
        return $this->hasMany(Task::class);
    }
}
Chúng ta sẽ tiếp tục với migration, Trong database/migrations/....create_tasks_table.php sẽ như sau:
<?php

use Illuminate\Support\Facades\Schema;
use Illuminate\Database\Schema\Blueprint;
use Illuminate\Database\Migrations\Migration;

class CreateTasksTable extends Migration
{
    /**
     * Run the migrations.
     *
     * @return void
     */
    public function up()
    {
        Schema::create('tasks', function (Blueprint $table) {
            $table->increments('id');
            $table->string('title');
            $table->unsignedInteger('bug_id');
            $table->timestamps();
        });
    }

    /**
     * Reverse the migrations.
     *
     * @return void
     */
    public function down()
    {
        Schema::dropIfExists('tasks');
    }
}
Và database/migrations/....create_bugs_table.php sẽ là:
<?php

use Illuminate\Support\Facades\Schema;
use Illuminate\Database\Schema\Blueprint;
use Illuminate\Database\Migrations\Migration;

class CreateBugsTable extends Migration
{
    /**
     * Run the migrations.
     *
     * @return void
     */
    public function up()
    {
        Schema::create('bugs', function (Blueprint $table) {
            $table->increments('id');
            $table->string('name');
            $table->text('description');
            $table->timestamps();
        });
    }

    /**
     * Reverse the migrations.
     *
     * @return void
     */
    public function down()
    {
        Schema::dropIfExists('bugs');
    }
}
Tiếp tục chạy những migration đã tạo ở trên, nhưng trước hết chúng ta config một chút file .env:
DB_CONNECTION=mysql
DB_HOST=127.0.0.1
DB_PORT=3306
DB_DATABASE=laravelReact
DB_USERNAME=root
DB_PASSWORD=1
Và run migrations:
php artisan migrate
Tạo các API
Trong routes/api.php chúng ta thêm vào như sau:
Route::resource('bugs, 'BugController');
Route::post('tasks', 'TaskController@store');
Tiếp theo tạo các controller:
php artisan make:controller TaskController
php artisan make:controller BugController
Mở app/Http/Controllers/Bugtroller.php và thay đổi như sau:
<?php

namespace App\Http\Controllers;

use App\Bug;
use Illuminate\Http\Request;

class BugController extends Controller
{
    public function index()
    {
        $bugs = Bug::all();

        return response()
            ->json($bugs);
    }

    public function store(Request $request)
    {
        $validatedData = $request->validate([
            'name' => 'required',
            'description' => 'required',
        ]);

        $bug = Bug::create([
            'name' => $validatedData['name'],
            'description' => $validatedData['description'],
        ]);

        return response()->json('bug created!');
    }

    public function show($id)
    {
        $bug = Bug::find($id);

        if (! $bug) {
            return response()
            ->json(['error' => 'The bug is not exists']);
        }
        return response()
            ->json($bug);
    }

    public function edit($id)
    {
        $bug = Bug::find($id);
        if (! $bug) {
            return response()
            ->json(['error' => 'The bug is not exists']);
        }
        return response()
            ->json($bug);
    }

    public function update(Request $request, $id)
    {
        $bug = Bug::find($id);
        if (! $bug) {
            return response()
            ->json(['error' => 'Error: bug not found']);
        }
        $bug->update($request->all());
        return response()
            ->json(['message' => 'Success: You have updated the bug']);
    }

    public function destroy($id)
    {
        $bug = Bug::find($id);
        if (! $bug) {
            return response()
            ->json(['error' => 'Error: bug not found']);
        }
        $bug->delete();
        return response()
            ->json(['message' => 'Success: You have deleted the bug']);
    }
}
Đoạn code trên với các mục đích sau:
- index: Lấy tất cả các bugs hiển thị ra ngoài list
- store: tạo bug
- show: hiển thị thông tin một bug
- edit: Lấy bug ra màn edit
- update: Cập nhật thông tin bug
- destroy: Xoá bug
Trong app/Http/Controllers/TaskController.php chỉnh sửa như sau:
<?php

namespace App\Http\Controllers;

use App\Task;
use Illuminate\Http\Request;

class TaskController extends Controller
{
    public function store(Request $request)
    {
        $validatedData = $request->validate(['title' => 'required']);

        $task = Task::create([
        	'title' => $validatedData['title'],
        	'bug_id' => $request->bug_id,
        ]);

        return response()
            ->json($task);
    }
}
React Routes
Trong routes/web.php: Chúng ta ta một view đại diện, tệp welcome.blade.php sẽ hiển thị tất cả các view khác mà nó render tới.
Route::view('/{path?}', 'welcome');
Sử dụng react js làm frontend
Thay đổi file resources/views/welcome.blade.php với nội dung:
<!doctype html>
<html lang="{{ app()->getLocale() }}">
    <head>
        <meta charset="utf-8">
        <meta http-equiv="X-UA-Compatible" content="IE=edge">
        <meta name="viewport" content="width=device-width, initial-scale=1">
        <meta name="csrf-token" content="{{ csrf_token() }}">
        <title>Laravel 5.5 - ReactJS Example</title>
        <link rel="stylesheet" type="text/css" href="{{ asset('css/app.css') }}">
        <script type="text/javascript">
            window.Laravel = {!! json_encode([
                'baseUrl' => url('/'),
                'csrfToken' => csrf_token(),
            ]) !!};
        </script>
    </head>
    <body>
        <div id="app"></div>
        <script type="text/javascript" src="{{ asset('js/app.js') }}"></script>
    </body>
</html>
Chúng ta có thêm tệp css, js vào file view ở trên. Với biến javascript window.Laravel sẽ chứa những giá trị động lấy từ Laravel sử dụng trong javascript. Chúng ta sẽ fill nội dung Reactjs vào thẻ div có id app.
Tạo các components
Đầu tiên là App.js trong resources/assets/js/components/App.js:
import React, { Component } from 'react'
import ReactDOM from 'react-dom'
import { BrowserRouter, Route, Switch } from 'react-router-dom'
import Header from './Header'

class App extends Component {
  render () {
    return (
      <BrowserRouter>
        <div>
          <Header />
        </div>
      </BrowserRouter>
    )
  }
}

ReactDOM.render(<App />, document.getElementById('app'))
Các bạn thấy ở trên mình có sử dụng react-route, vì thế cần cài đặt nó:
npm install react-router-dom
Tiếp theo sửa lại file resources/assets/js/app.js:
require('./bootstrap')
require('./components/App')
Thay vì sử dụng Example.js chúng ta render đến App.js.
Tiếp tục tạo Header.js trong resources/assets/js/components:
import React from 'react'
import { Link } from 'react-router-dom'

const Header = () => (
	<nav className='navbar navbar-expand-md navbar-light navbar-laravel'>
	    <div className='container'>
	      	<Link className='navbar-brand' to='/'>ReactJS Example</Link>
	    </div>
	</nav>
)

export default Header
Tạo list Bugs resources/assets/js/components/BugsList.js
import axios from 'axios'
import React, { Component } from 'react'
import { Link } from 'react-router-dom'

class BugsList extends Component {
  constructor () {
    super()
    this.state = {
      bugs: []
    }
  }

  componentDidMount () {
    axios.get('/api/bugs').then(response => {
      this.setState({
        bugs: response.data
      })
    })
  }

  render () {
    const { bugs } = this.state
    return (
      <div className='container py-4'>
        <div className='row justify-content-center'>
          <div className='col-md-8'>
            <div className='card'>
              <div className='card-header'>All bugs</div>
              <div className='card-body'>
                <Link className='btn btn-primary btn-sm mb-3' to='/create'>
                  Create new bug
                </Link>
                <ul className='list-group list-group-flush'>
                  {bugs.map(bug => (
                    <Link
                      className='list-group-item list-group-item-action d-flex justify-content-between align-items-center'
                      to={`/${bug.id}`}
                      key={bug.id}
                    >
                      {bug.name}
                      <!-- <span className='badge badge-primary badge-pill'>
                        {bug.tasks_count}
                      </span> -->
                    </Link>
                  ))}
                </ul>
              </div>
            </div>
          </div>
        </div>
      </div>
    )
  }
}

export default BugsList
Tiếp theo sẽ thay đổi lại file resources/assets/js/components/App.js:
import React, { Component } from 'react'
import ReactDOM from 'react-dom'
import { BrowserRouter, Route, Switch } from 'react-router-dom'
import Header from './Header'
import BugsList from './BugsList'

class App extends Component {
  render () {
    return (
      <BrowserRouter>
        <div>
          <Header />
          <Switch>
            <Route exact path='/' component={BugsList} />
          </Switch>
        </div>
      </BrowserRouter>
    )
  }
}

ReactDOM.render(<App />, document.getElementById('app'))
Khi đã có list ta cần một form để tạo được các bản ghi, tạo file resources/assets/js/components/NewBug.js
import axios from 'axios'
import React, { Component } from 'react'

class NewBug extends Component {
  constructor (props) {
    super(props)
    this.state = {
      name: '',
      description: '',
      errors: []
    }
    this.handleFieldChange = this.handleFieldChange.bind(this)
    this.handleCreateNewBug = this.handleCreateNewBug.bind(this)
    this.hasErrorFor = this.hasErrorFor.bind(this)
    this.renderErrorFor = this.renderErrorFor.bind(this)
  }

  handleFieldChange (event) {
    this.setState({
      [event.target.name]: event.target.value
    })
  }

  handleCreateNewBug (event) {
    event.preventDefault()

    const { history } = this.props

    const bug = {
      name: this.state.name,
      description: this.state.description
    }

    axios.post('/api/bugs', bug)
      .then(response => {
        // redirect to the homepage
        history.push('/')
      })
      .catch(error => {
        this.setState({
          errors: error.response.data.errors
        })
      })
  }

  hasErrorFor (field) {
    return !!this.state.errors[field]
  }

  renderErrorFor (field) {
    if (this.hasErrorFor(field)) {
      return (
        <span className='invalid-feedback'>
          <strong>{this.state.errors[field][0]}</strong>
        </span>
      )
    }
  }

  render () {
    return (
      <div className='container py-4'>
        <div className='row justify-content-center'>
          <div className='col-md-6'>
            <div className='card'>
              <div className='card-header'>Create new bug</div>
              <div className='card-body'>
                <form onSubmit={this.handleCreateNewBug}>
                  <div className='form-group'>
                    <label htmlFor='name'>bug name</label>
                    <input
                      id='name'
                      type='text'
                      className={`form-control ${this.hasErrorFor('name') ? 'is-invalid' : ''}`}
                      name='name'
                      value={this.state.name}
                      onChange={this.handleFieldChange}
                    />
                    {this.renderErrorFor('name')}
                  </div>
                  <div className='form-group'>
                    <label htmlFor='description'>bug description</label>
                    <textarea
                      id='description'
                      className={`form-control ${this.hasErrorFor('description') ? 'is-invalid' : ''}`}
                      name='description'
                      rows='10'
                      value={this.state.description}
                      onChange={this.handleFieldChange}
                    />
                    {this.renderErrorFor('description')}
                  </div>
                  <button className='btn btn-primary'>Create</button>
                </form>
              </div>
            </div>
          </div>
        </div>
      </div>
    )
  }
}

export default NewBug
Hai function: hasErrorFor, renderErrorFor sẽ giúp chúng ta biết được lỗi từ đâu mà ra :v
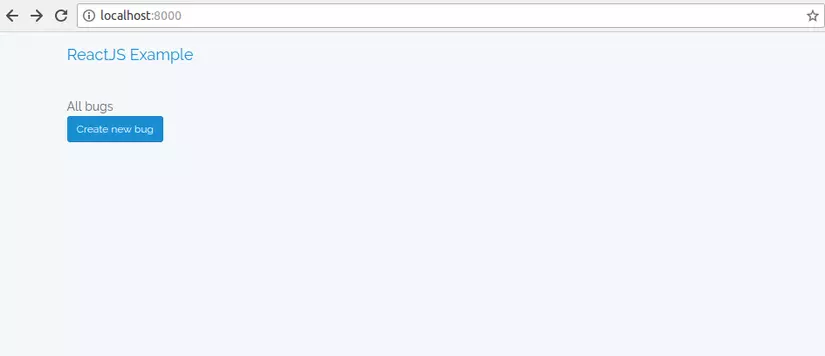
Tạm thời xong, chúng ta chạy:
npm run dev
và vào http://localhost:8000/
Đây là kết quả:
Click create new bug.
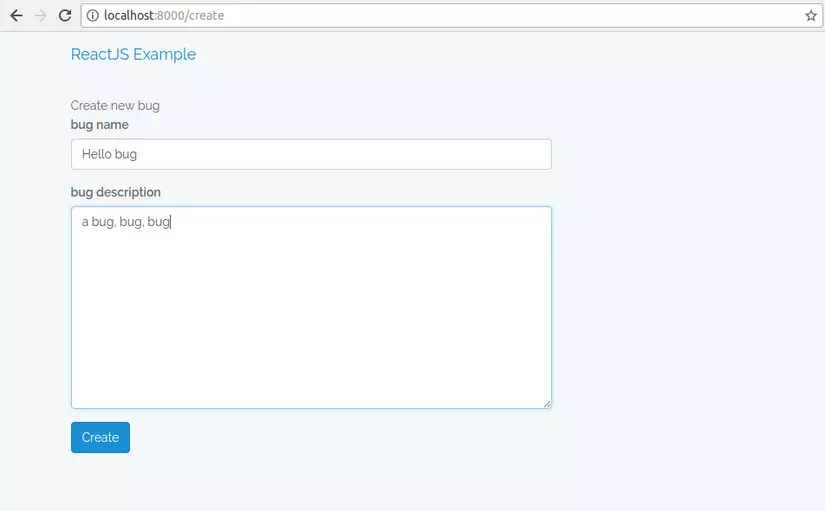
submit....
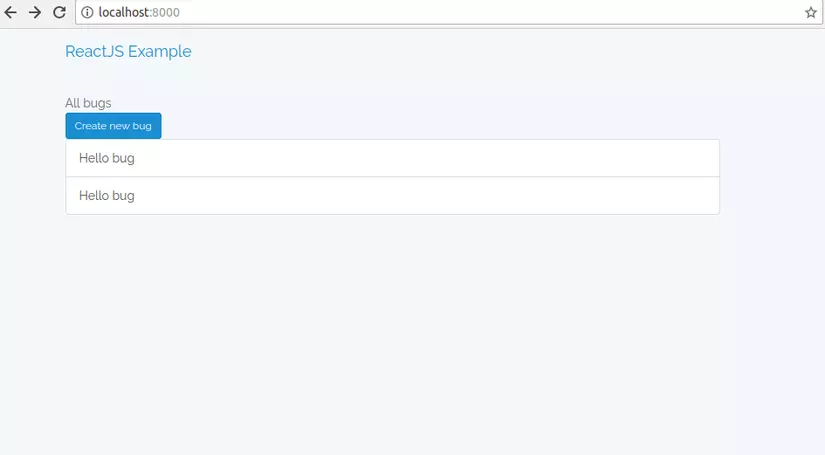
Và kết quả :
Do bài viết tương đối dài nên mình xin phép dừng lại ở đây, mình sẽ tiếp tục với bài viết tiếp theo, mong mọi người theo dõi.
Hy vọng những kiến thức nhỏ bé sẽ giúp các bạn trong việc học reactJs. Có điều gì sai sót mong mọi người chỉ giáo.
Cảm ơn và quyết thắng...
Tài liệu tham khảo
https://reactjs.org/docs/getting-started.html
https://viblo.asia/p/laravel-55-va-react-js-phan-1-cai-dat-va-hien-thi-vi-du-bJzKmkNBl9N
All rights reserved
