Basic Authentication với Golang
Bài đăng này đã không được cập nhật trong 5 năm
Ở bài trước, chúng ta đã cùng tìm hiểu một số kiến thức căn bản để lập trình web với Golang. Trong phần 2 này, chúng ta sẽ cùng tìm hiểu cách viết chức năng đăng ký, đăng nhập, authentication với json web token với Golang và cơ sở dữ liệu MongoDB. Toàn bộ mã nguồn của bài viết này các bạn có thể tham khảo tại đây
1. Khởi tạo thư mục
mkdir web-golang
cd web-golang
mkdir server
cd server
go mod init github.com/conglt10/web-golang
Câu lệnh go mod init [tên-module] sẽ tạo ra một file là go.mod, file này giúp quản lý các package của ứng dụng. Nó tương tự như việc thực hiện npm init bên Javascript và file go.mod tương tự như file package.json
2. Cấu trúc thư mục
Cấu trúc thư mục sẽ được tổ chức như sau
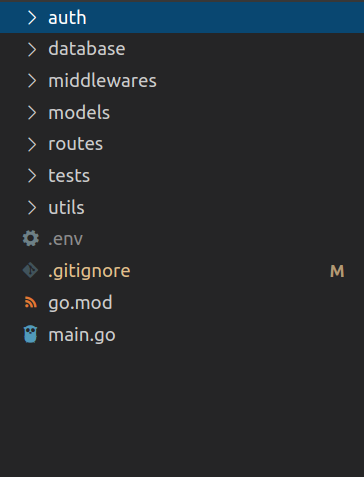
- File
main.golà file chúng ta thiết lập thông số kỹ thuật chung cho server, khi chạy ứng dụng thì sẽ chạy file này. - File
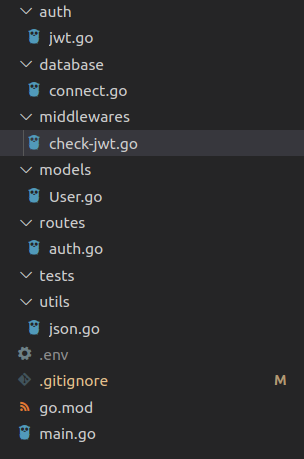
go.modquản lý cách package (như đã giới thiệu ở trên ). .envlưu các biến môi trường của ứng dụng -authchứa file xử lý json web tokendatabasechứa các file có nhiệm vụ thao tác với MongoDB (connect cơ sở dữ liệu ).modelsđịnh nghĩa là cấu trúc dữ liệu sẽ được lưu vào collection.routeschứa các hàm xử lý request ứng với từng routetestschứa các file unit testutilschứa một số hàm xử lý cần dùng (parse JSON, ...)
3. Coding Login and Register
main.go
package main

import (
	"fmt"
	"log"
	"net/http"
	"github.com/julienschmidt/httprouter"
    "github.com/joho/godotenv"
	"github.com/conglt10/web-golang/routes"
)

func main() {
	err := godotenv.Load()
	if err != nil {
		log.Fatalf("Error getting env, %v", err)
	}

	router := httprouter.New()

	router.POST("/auth/login", routes.Login)
	router.POST("/auth/register", routes.Register)

	fmt.Println("Listening to port 8000")
	log.Fatal(http.ListenAndServe(":8000", router))
}
- Dòng đầu tiên trong thân hàm
mainsử dụng thư viện godotenv để ứng dụng có thể trích xuất các biến môi trường. - Phần sau chỉ đơn giản là kiểm tra lỗi.
- Ứng dụng của chúng ta sẽ sử dụng
Multiplexerhttp/router thay vìMultiplexermặc định trong thư việnnet/http. - 2 dòng tiếp theo defined 2 route dùng để đăng nhập, đăng ký. Hàm xử lý của các route tương ứng là
LoginvàRegistertrong packageauth(folder routes) - Server sẽ listen ở port 8000
models/User.go: Định nghĩa cấu trúc dữ liệu trong db
package models

import (
	"html"
	"strings"
	"golang.org/x/crypto/bcrypt"
)

type User struct {
	username string
	email string
	password string
}


func Hash(password string) (string, error) {
	bytes, err := bcrypt.GenerateFromPassword([]byte(password), 14)
	return string(bytes), err
}

func CheckPasswordHash(hashedPassword, password string) error {
	return bcrypt.CompareHashAndPassword([]byte(hashedPassword), []byte(password))
}

func Santize(data string) string{
	data = html.EscapeString(strings.TrimSpace(data))
	return data
}
- struct
Usercơ bản gồm 3 trườngusername,emailvàpassword - hàm
Hashtruyền vào password dạng string, sau đó đưa vào hàmGenerateFromPasswordcủa thư viện brcypt để băm. Dưới đây là prototyped của hàmGenerateFromPassword.
func GenerateFromPassword(password []byte, cost int) ([]byte, error)
- hàm
CheckPasswordHashđể so sánh mật khẩu do người dùng submit có trúng khớp với mật khẩu dạng băm ở trong cơ sở dữ liệu hay không ?
func CompareHashAndPassword(hashedPassword, password []byte) error
- hàm
Santizedùng để loại bỏ các dấu cách thừa, encode các ký tự đặc biệt của dữ liệu (tránh phần nào các lỗ hổng injection) trước khi lưu vào db .
database/connect.go : Kết nối đến cơ sở dữ liệu
package db

import (
	"log"
	"context"
	"os"
	"go.mongodb.org/mongo-driver/mongo"
    "go.mongodb.org/mongo-driver/mongo/options"
)

func ConnectUsers() *mongo.Collection {
	clientOptions := options.Client().ApplyURI(os.Getenv("MONGODB_URI"))
	client, err := mongo.Connect(context.TODO(), clientOptions)

	if err != nil {
    	log.Fatal(err)
	}

	// Check the connection
	err = client.Ping(context.TODO(), nil)

	if err != nil {
    	log.Fatal(err)
	}

	collection := client.Database("golang").Collection("users")
	return collection
}
Như trong bài trước, chúng ta kết nối với mongoDB ngay trong hàm main và thực hiện truy vấn. Tuy nhiên, với cách viết chia module như thế này thì sẽ không phù hợp vì các hàm ở package khác sẽ không sử dụng được đối tượng collection được trả về khi kết nối thành công. Lẽ đó, chúng ta sẽ viết hàm connect đến DB ở 1 package riêng và các hàm có thể gọi đến bất cứ lúc nào để thực hiện.
utils/json.go
package res

import (
	"encoding/json"
	"fmt"
	"net/http"
)

func JSON(w http.ResponseWriter, statusCode int, data interface{}) {
	w.WriteHeader(statusCode)
	err := json.NewEncoder(w).Encode(data)

	if err != nil {
		fmt.Fprintf(w, "%s", err.Error())
	}
}

func ERROR(w http.ResponseWriter, statusCode int, err error) {
	if err != nil {
		JSON(w, statusCode, struct {
			Error string `json:"error"`
		}{
			Error: err.Error(),
		})
		return
	}
	JSON(w, http.StatusBadRequest, nil)
}
Vì chúng ta đang viết server bằng Golang thuần nên khi return response cho client cần thực thao tác set status code cho header, chuyển data sang dạng json. Để đơn giản hóa vấn đề thì chúng ta sẽ viết hàm, đặt tên package là res. Như vậy lúc return response sẽ là res.JSON (trông hao hao Express.JS  )
)
routes/auth.go: Đăng ký tài khoản
package auth

import (
    "fmt"
    "net/http"
    "context"
    "github.com/conglt10/web-golang/models"
    "github.com/conglt10/web-golang/auth"
    "github.com/conglt10/web-golang/utils"
    "github.com/conglt10/web-golang/database"
    "github.com/julienschmidt/httprouter"
    "github.com/asaskevich/govalidator"
    "go.mongodb.org/mongo-driver/bson"
)
Ban đầu, chúng ta import một loạt package như trên. Ngoài các package local thì còn một số package của bên thứ 3 khác.
govalidator: Giúp validate dữ liệu nhận được từ client.bson: Do dữ liệu trong MongoDB được lưu dưới dạngbsonnên cần định dạng dữ liệu trước khi truy vấn.
func Register(w http.ResponseWriter, r *http.Request, _ httprouter.Params) {
    username := r.PostFormValue("username")
    email := r.PostFormValue("email")
    password := r.PostFormValue("password")

    if govalidator.IsNull(username) || govalidator.IsNull(email) || govalidator.IsNull(password) {
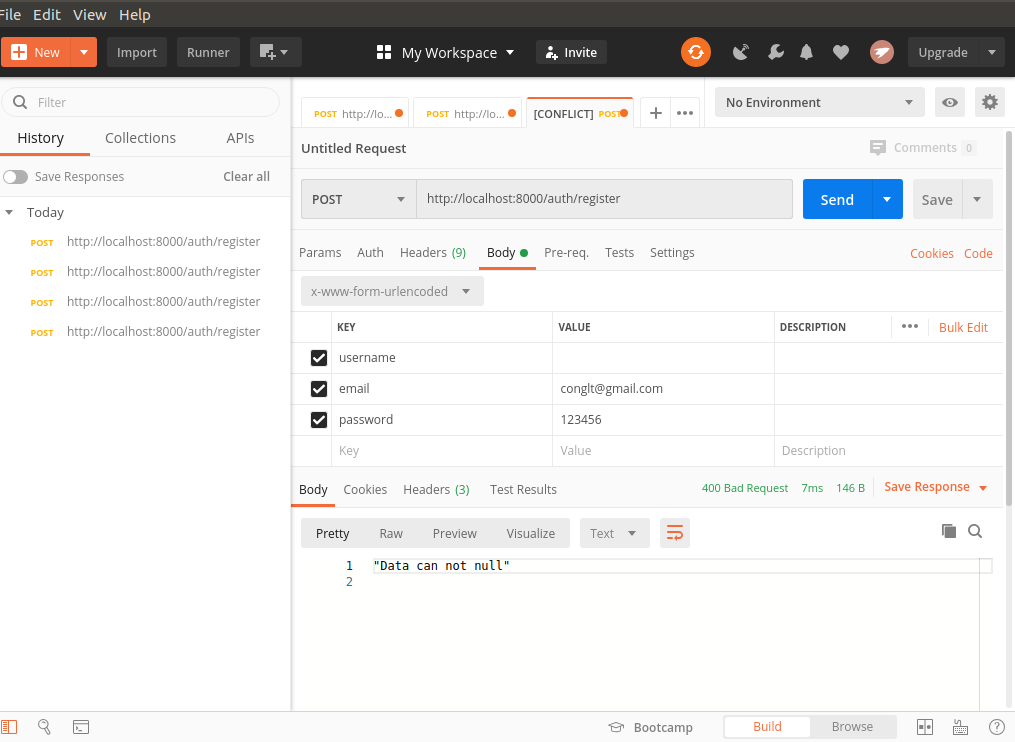
        res.JSON(w, 400, "Data can not empty")
        return
    }

    if !govalidator.IsEmail(email) {
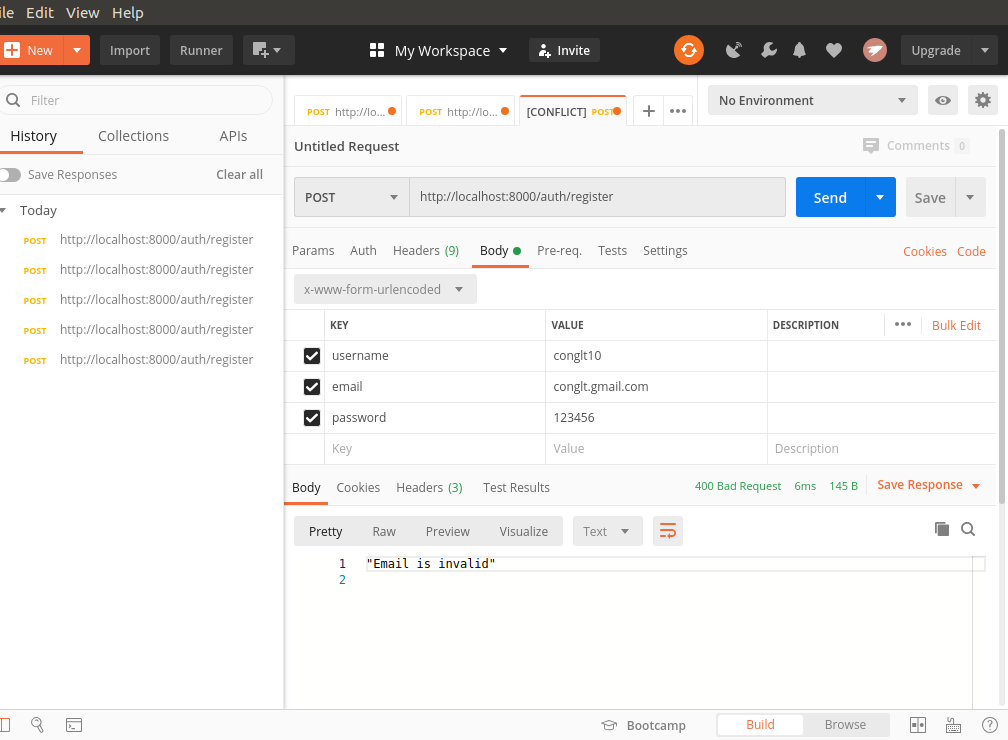
        res.JSON(w, 400, "Email is invalid")
        return
    }

    username = models.Santize(username)
    email = models.Santize(email)
    password = models.Santize(password)

    collection := db.ConnectUsers()
    var result bson.M
    errFindUsername := collection.FindOne(context.TODO(), bson.M{"username": username}).Decode(&result)
    errFindEmail := collection.FindOne(context.TODO(), bson.M{"email": email}).Decode(&result)

    if errFindUsername == nil || errFindEmail == nil {
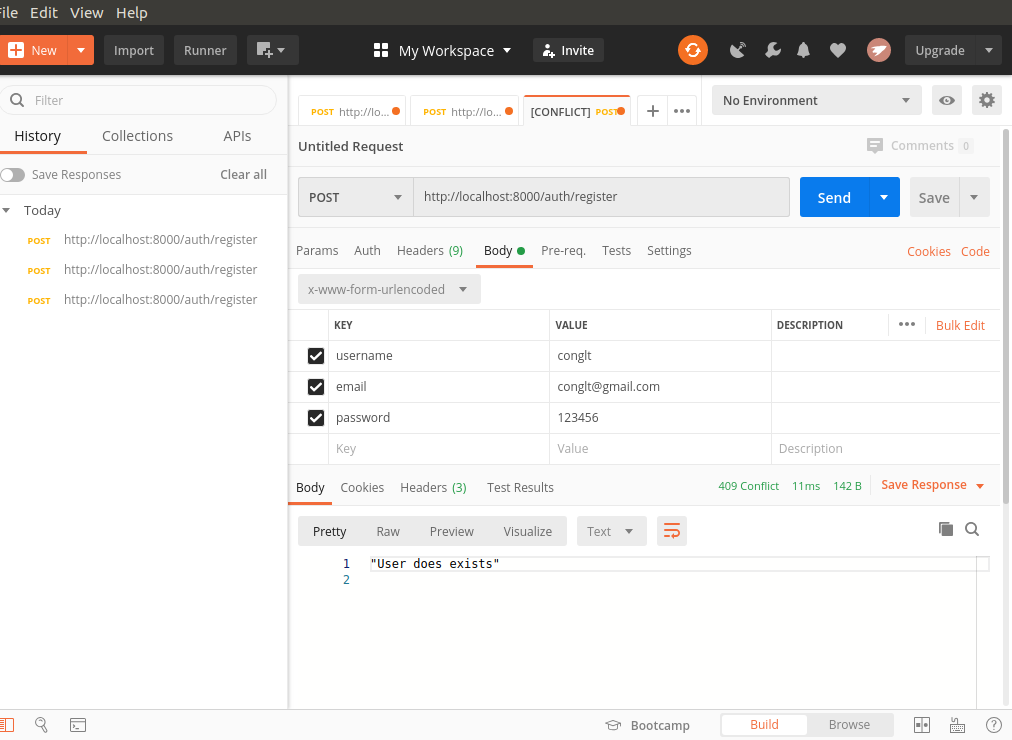
        res.JSON(w, 409, "User does exists")
        return
    }

    password, err := models.Hash(password)

    if err != nil {
        res.JSON(w, 500, "Register has failed")
        return
    }

    newUser := bson.M{"username": username, "email": email, "password": password}

    _, errs := collection.InsertOne(context.TODO(), newUser)

    if errs != nil {
        res.JSON(w, 500, "Register has failed")
        return
    }

    res.JSON(w, 201, "Register Succesfully")
}
- Hàm
Registertruyền vào 3 đối số theo đúng prototype đã được quy định của http/router. Trong route này chúng ta không cần dùng params nên để dấu_ở trước để bỏ qua.
type Handle func(http.ResponseWriter, *http.Request, Params)
- Hơn 10 dòng đầu của hàm làm công việc trích xuất dữ liệu gửi từ client lên và validate bằng govalidator, nếu data gửi lên không hợp lệ thì trả về lỗi
400. Sau đó là làm sạch dữ liệu với hàmSantize. collection := db.Connect(): Connect đến collectionusers- Tiếp theo cần check xem
usernamevàemailđã tồn tại trong hệ thống chưa, nếu đã tồn tại thì trả về lỗi cho client.bson.Mlà kiểu dữ liệu bson dạngmap(key-value). Chi tiết hơn các bạn có thể tham khảo bson go doc - Trước khi lưu user vào db thì password cần được băm với hàm
Hashtrongpackage models
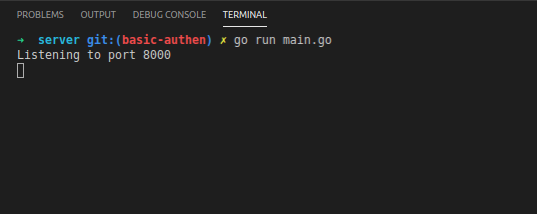
Chạy app lên
Cái hay của golang thì khi bạn go run main.go thì nó sẽ tự động cài các package đã được import luôn. Như bên Node.JS thì cần chạy npm install trước khi chạy app.
Test bằng PostMan
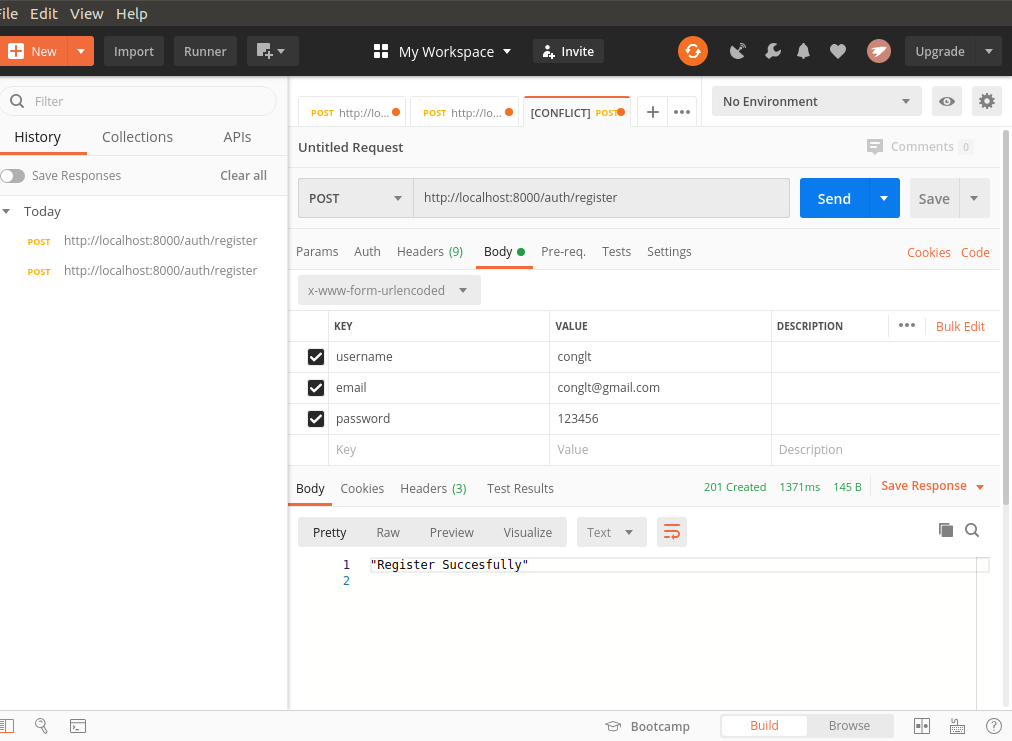
- Đăng ký thành công
![]()
Check trong database xem đã có bản ghi chưa ?
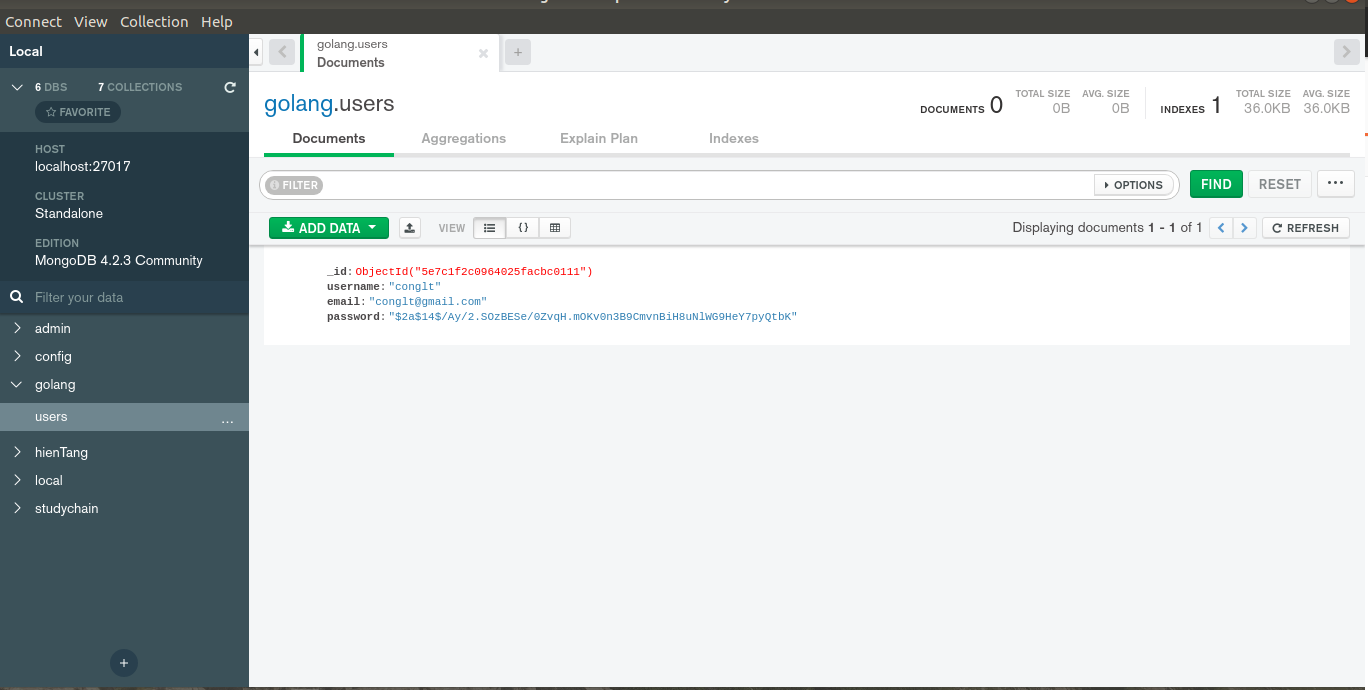
- Đăng ký thất bại do trùng thông tin (trả về status 409)
- Đăng ký thất bại do thiếu hoặc sai thông tin (trả về status 400)
auth/jwt.go: Tạo jsonwebtoken
Với chức năng đăng nhập, chúng ta sẽ sử dụng json web token, khi người dùng đăng nhập thành công, server sẽ trả về 1 token, client sẽ lưu token lại (vào localStorage chẳng hạn ) và gửi lên server cho những lần request sau nhằm định danh người dùng mà không cần phải đăng nhập lại.
package jwt

import (
	"os"
	"time"
	jwt "github.com/dgrijalva/jwt-go"
)

func Create(username string) (string, error) {
	claims := jwt.MapClaims{}
	claims["authorized"] = true
	claims["username"] = username
	claims["exp"] = time.Now().Add(time.Hour * 12).Unix() //Token hết hạn sau 12 giờ
	token := jwt.NewWithClaims(jwt.SigningMethodHS256, claims)
	return token.SignedString([]byte(os.Getenv("SECRET_JWT")))
}
Chúng ta sẽ dùng thư viện jwt-go để tạo json web token, token sẽ được mã hóa theo secret key lưu ở .env.
routes/auth.go: Đăng nhập
func Login(w http.ResponseWriter, r *http.Request, _ httprouter.Params) {
    username := r.PostFormValue("username")
    password := r.PostFormValue("password")

    if govalidator.IsNull(username) || govalidator.IsNull(password) {
        res.JSON(w, 400, "Data can not empty")
        return
    }

    username = models.Santize(username)
    password = models.Santize(password)

    collection := db.ConnectUsers()

    var result bson.M
    err := collection.FindOne(context.TODO(), bson.M{"username": username}).Decode(&result)


    if err != nil {
        res.JSON(w, 400, "Username or Password incorrect")
        return
    }

    // convert interface to string
    hashedPassword := fmt.Sprintf("%v", result["password"])

    err = models.CheckPasswordHash(hashedPassword, password)

    if err != nil {
        res.JSON(w, 401, "Username or Password incorrect")
        return
    }

    token, errCreate := jwt.Create(username)

    if errCreate != nil {
        res.JSON(w, 500, "Internal Server Error")
        return
    }

    res.JSON(w, 200, token)
}
- Phần lấy data từ form request và validate cũng tương tự như ở hàm
Registerchúng ta đã tìm hiểu ở trên. - Phần truy vấn cơ cở dữ liệu (FindOne) thì có khác thêm hàm
Decodeở phía sau. HàmDecodesẽ chuyển dữ liệu query về sang dạng map, giúp việc lấy giá trị băm của password ở phía sau dễ dàng hơn. Ví dụ biến result sau khi FindOne xong sẽ có dạng như thế này.
map[_id:ObjectID("5e7c1f2c0964025facbc0111") email:conglt@gmail.com password:$2a$14$/Ay/2.SOzBESe/0ZvqH.mOKv0n3B9CmvnBiH8uNlWG9HeY7pyQtbK username:conglt]
- Tiếp theo là gọi hàm
CheckPasswordHashđể xem password gửi từ client khi băm ra có giống với password được lưu trong db không ? - Cuối cùng là gọi hàm
jwt.Createđể tạo token, chúng ta cũng không quên việc kiểm tra lỗi có thể xảy ra.
Test với Postman
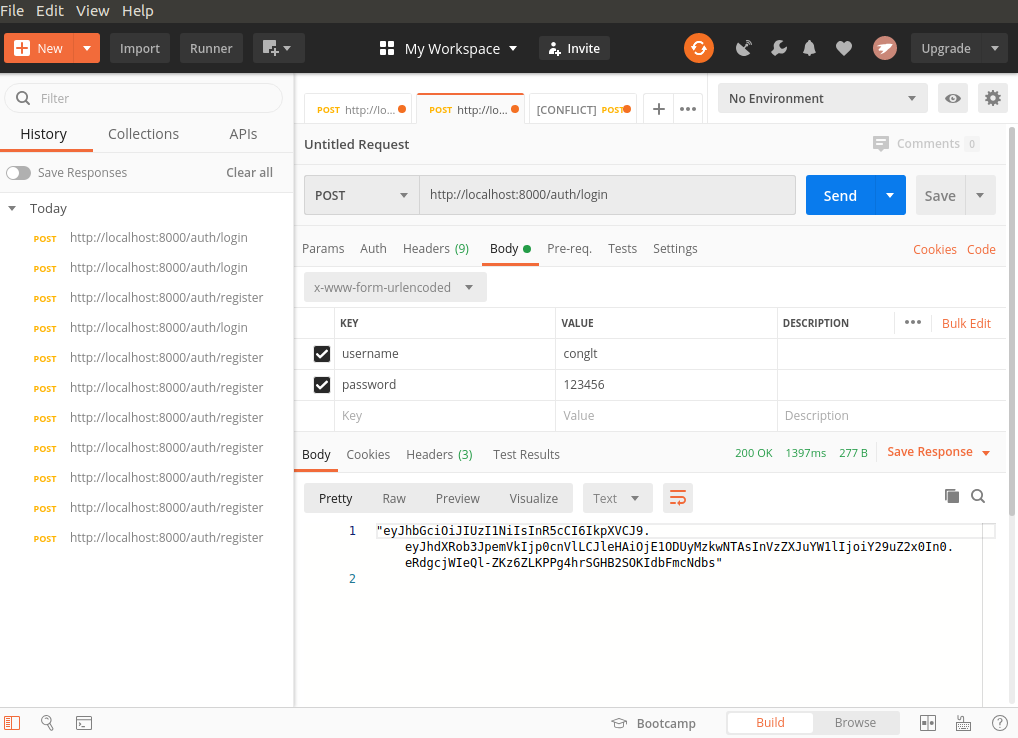
-
Đăng nhập thành công
![]()
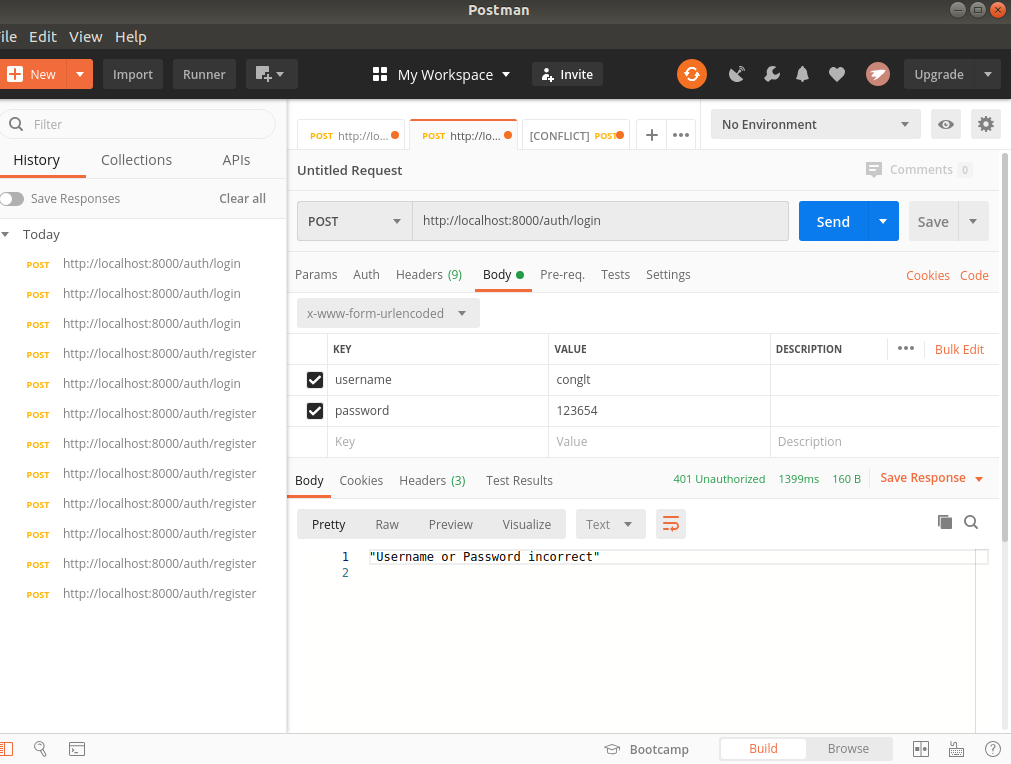
-
Sai mật khẩu
![]()
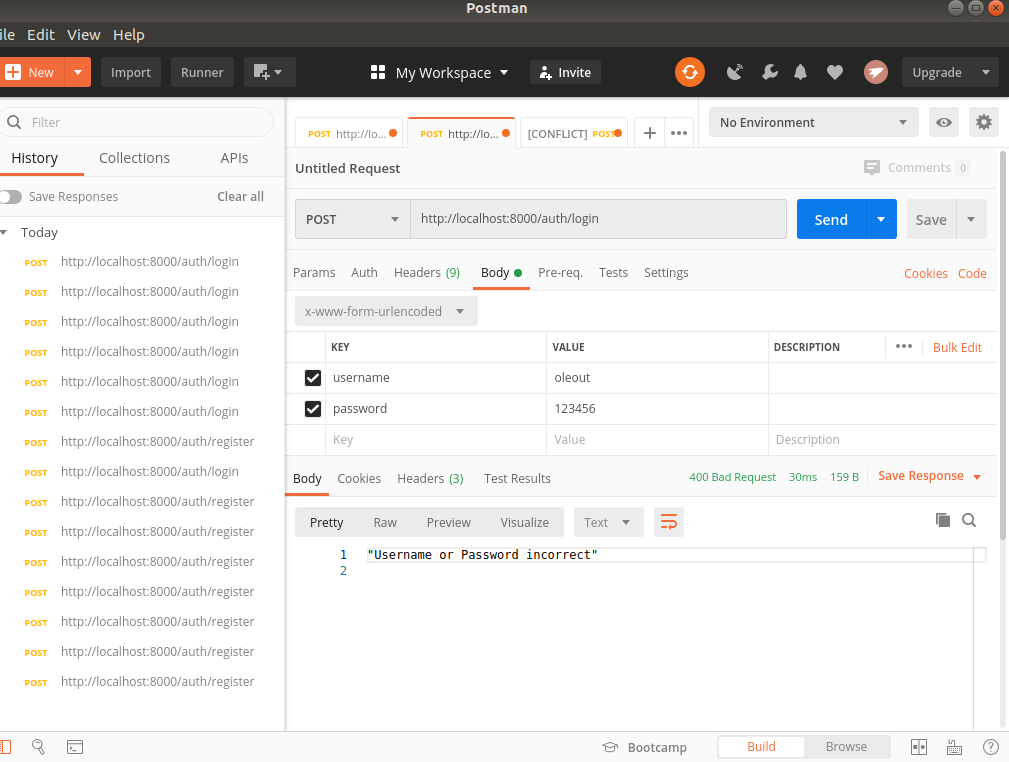
-
Username không tồn tại trong db
![]()
Tài liệu tham khảo
All rights reserved
