Bài 17: Phân quyền với Laravel và VueJS
Bài đăng này đã không được cập nhật trong 2 năm
Mình đã cập nhật lại tất cả các bài với các thay đổi ở hiện tại ở năm 2024: Vue 3, Vite, Laravel 11x,...
Cập nhật gần nhất: 09/06/2024
Chào mừng các bạn quay trở lại với series học Laravel với VueJS của mình, ở bài này mình sẽ hướng dẫn các bạn các phân quyền bằng Laravel và VueJS mà không cần cài đặt thêm bất kì package hay library nào khác.
Ở bài này ta sẽ tiếp nối bài trước gọi Laravel với axios từ VueJS, và ta sẽ phát triển thêm chút, chỉ cho phép Admin được thêm sửa xoá, còn user thường thì chỉ được xem danh sách sản phẩm thôi.
Trong bài hôm nay ta sẽ sử dụng Laravel Gate để check phần phân quyền nhé, ta sẽ làm nó ở mức độ cơ bản để mọi người cung hiểu được nhé. Lên thuyền thôi nào 🚀🚀
Setup
Ở bước setup này mình sẽ làm qua thật nhanh các bước setup để ta có kết quả như bài trước, sau đó ta tập trung vào phần phân quyền nhé. Nếu có gì thắc mắc ở bước setup các bạn giúp mình xem lại bài trước hoặc comment ở bài này cũng được nha
Laravel
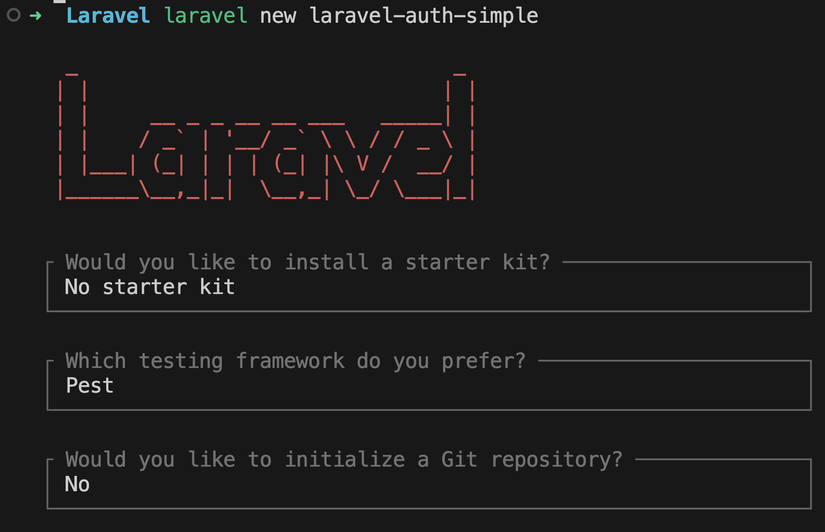
Đầu tiên ta tạo project mới:
composer create-project laravel/laravel laravel-rbac-simple

# hoặc
laravel new laravel-rbac-simple
Khi được hỏi thì ta cứ chọn mặc định nhé:
Tiếp đó ta cài phần setup cho VueJS nha:
composer require laravel/ui
php artisan ui vue --auth
npm install
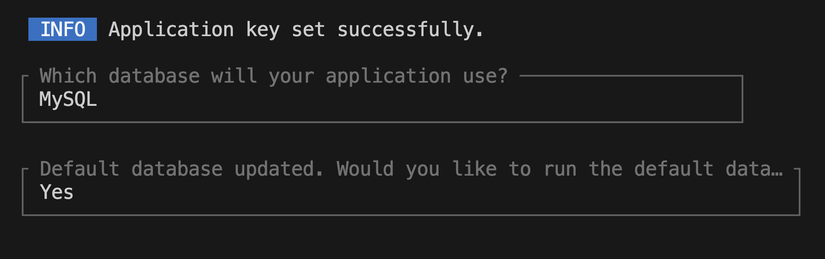
Sau đó các bạn update lại database ở .env cho đúng với của các bạn nha, ví dụ của mình:
DB_CONNECTION=mysql
DB_HOST=127.0.0.1
DB_PORT=3307
DB_DATABASE=laravel
DB_USERNAME=myuser
DB_PASSWORD=myuserpass
Nhớ tạo database tên là
laraveltrước nhé để tí ta còn migrate
Sau đó ta tạo model Product và migration cho nó:
php artisan make:model Product -m
Sau đó chúng ta vào database/migrations/create_products_table.php và sửa lại hàm up() như sau:
public function up(): void
{
    Schema::create('products', function (Blueprint $table) {
        $table->id();
        $table->string('name');
        $table->double('price');
        $table->timestamps();
    });
}
Tiếp theo ta vào database/migrations/create_users_table.php và sửa lại hàm up() như sau:
Schema::create('users', function (Blueprint $table) {
    $table->id();
    $table->string('name');
    $table->string('email')->unique();
    $table->timestamp('email_verified_at')->nullable();
    $table->string('password');
    $table->rememberToken();
    $table->boolean('is_admin')->default(false); // Thêm trường này
    $table->timestamps();
});
Ở trên ta thêm trường is_admin để đánh dấu user này có phải admin hay không
Tiếp đó ở database/seeders/DatabaseSeeder.php và sửa lại hàm run() như sau:
public function run(): void
{
    // User::factory(10)->create();

    User::factory()->create([
        'name' => 'Admin User',
        'email' => 'admin@example.com',
        'password' => bcrypt('12345678'),
        'is_admin' => true,
    ]);
}
Ở đây tí nữa ta sẽ tạo sẵn một admin user vào DB lúc migrate
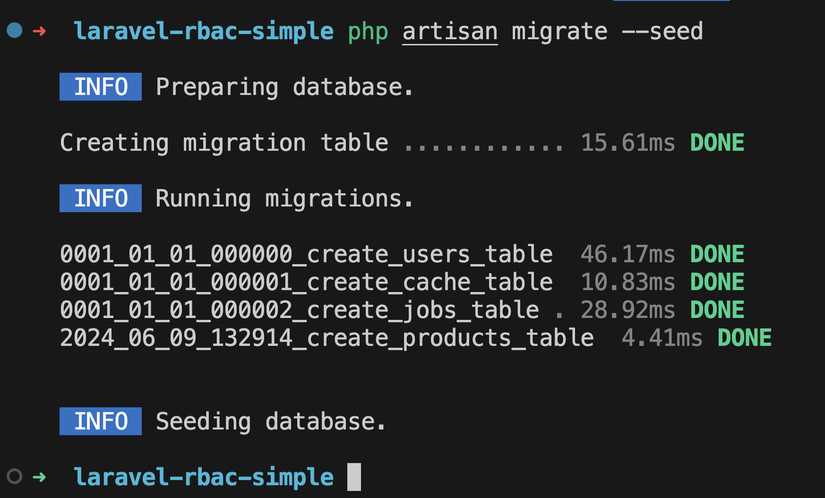
Bây giờ ta chạy migration nhé:
php artisan migrate --seed
Thấy in ra như sau là ổn rồi 😎:
Tiếp theo chúng ta vào app/Models/Product.php và sửa lại như sau
...

class Product extends Model
{
    use HasFactory;

    protected $fillable = [
    	'name', 'price'
    ];
}
Ở bài này ta sẽ dùng Laravel Resource Controller cho tiện nha, các bạn chạy command sau:
php artisan make:controller ProductController --resource
Sau đó các bạn mở file routes/web.php và sửa lại như sau:
<?php

use Illuminate\Support\Facades\Route;

Route::get('/', function () {
    return view('welcome');
})->middleware('auth');

Auth::routes();

Route::resource('products', App\Http\Controllers\ProductController::class)->middleware('auth');
Tiếp đó các bạn tạo cho mình file resources/views/products.blade.php:
@extends('layouts.app')
Rất đơn giản không có gì mấy ở file này 😂😂
Ở file resources/views/layouts/app.blade.php, các bạn sửa lại như sau:
<!doctype html>
<html lang="{{ str_replace('_', '-', app()->getLocale()) }}">
<head>
    <meta charset="utf-8">
    <meta name="viewport" content="width=device-width, initial-scale=1">

    <!-- CSRF Token -->
    <meta name="csrf-token" content="{{ csrf_token() }}">

    <title>{{ config('app.name', 'Laravel') }}</title>

    <!-- Fonts -->
    <link rel="dns-prefetch" href="//fonts.bunny.net">
    <link href="https://fonts.bunny.net/css?family=Nunito" rel="stylesheet">

    <!-- Scripts -->
    @guest
        @vite(['resources/sass/app.scss'])
    @else
        @vite(['resources/sass/app.scss', 'resources/js/app.js'])
    @endguest
</head>
<body>
    <div>
        <nav class="navbar navbar-expand-md navbar-light bg-white shadow-sm">
            <div class="container">
                <a class="navbar-brand" href="{{ url('/') }}">
                    {{ config('app.name', 'Laravel') }}
                </a>
                <button class="navbar-toggler" type="button" data-bs-toggle="collapse" data-bs-target="#navbarSupportedContent" aria-controls="navbarSupportedContent" aria-expanded="false" aria-label="{{ __('Toggle navigation') }}">
                    <span class="navbar-toggler-icon"></span>
                </button>

                <div class="collapse navbar-collapse" id="navbarSupportedContent">
                    <!-- Left Side Of Navbar -->
                    <ul class="navbar-nav me-auto">

                    </ul>

                    <!-- Right Side Of Navbar -->
                    <ul class="navbar-nav ms-auto">
                        <!-- Authentication Links -->
                        @guest
                            @if (Route::has('login'))
                                <li class="nav-item">
                                    <a class="nav-link" href="{{ route('login') }}">{{ __('Login') }}</a>
                                </li>
                            @endif

                            @if (Route::has('register'))
                                <li class="nav-item">
                                    <a class="nav-link" href="{{ route('register') }}">{{ __('Register') }}</a>
                                </li>
                            @endif
                        @else
                            <li class="nav-item dropdown">
                                <a id="navbarDropdown" class="nav-link dropdown-toggle" href="#" role="button" data-bs-toggle="dropdown" aria-haspopup="true" aria-expanded="false" v-pre>
                                    {{ Auth::user()->name }}
                                </a>

                                <div class="dropdown-menu dropdown-menu-end" aria-labelledby="navbarDropdown">
                                    <a class="dropdown-item" href="{{ route('logout') }}"
                                       onclick="event.preventDefault();
                                                     document.getElementById('logout-form').submit();">
                                        {{ __('Logout') }}
                                    </a>

                                    <form id="logout-form" action="{{ route('logout') }}" method="POST" class="d-none">
                                        @csrf
                                    </form>
                                </div>
                            </li>
                        @endguest
                    </ul>
                </div>
            </div>
        </nav>

        <main class="py-4" id="app">
            @yield('content')
        </main>
    </div>
</body>
</html>
Ở trên mình thêm vào đoạn @vite(['resources/sass/app.scss']) ở <head>, lí do là vì tí nữa ta sẽ mount app VueJS từ file app.js, nếu ta không sửa thì tí nữa trang Login/Register cũng sẽ hiển thị component của VueJS
Tiếp tục ở file app/Http/Controllers/Auth/LoginController.php và RegisterController.php ta sửa như sau để sau khi login/register thành công nó sẽ trả về trang chủ nhé:
protected $redirectTo = '/';
Cuối cùng là ta update lại file app/Http/Controllers/ProductController.php như bài trước:
<?php

namespace App\Http\Controllers;

use Illuminate\Http\Request;
use App\Models\Product;

class ProductController extends Controller
{
    /**
     * Display a listing of the resource.
     */
    public function index()
    {
        return Product::orderBy('created_at', 'desc')->paginate(5);
    }

    /**
     * Store a newly created resource in storage.
     */
    public function store(Request $request)
    {
        $validated = $request->validate([
            'name' => 'required|min:5',
            'price' => 'required|numeric|gt:0',
        ]);
        $product = Product::create([
            'name'     => $request->input('name'),
            'price'    => $request->input('price'),
        ]);
        return response([
            'product' => $product
        ], 200);
    }

    /**
     * Update the specified resource in storage.
     */
    public function update(Request $request, string $id)
    {
        $validated = $request->validate([
            'name' => 'required|min:5',
            'price' => 'required|numeric|gt:0',
        ]);

        $product = Product::find($id);

        $product->name = $request->input('name');
        $product->price = $request->input('price');

        $product->save();

        return response([
            'product' => $product
        ], 200);
    }

    /**
     * Remove the specified resource from storage.
     */
    public function destroy(string $id)
    {
        $product = Product::find($id);
        $product->delete();
        return response([
            'result' => 'success'
        ], 200);
    }
}
Vue
Tiếp theo tới phần setup cho VueJS
Các bạn tạo cho mình file resources/js/components/ProductList.vue:
<template>
  <div class="api-calling container mt-5">
    <h1>Create Product</h1>
    <transition name="fade">
      <div class="alert alert-danger alert-dismissible fade show" role="alert" v-if="error">
        <b>{{ error.message }}</b>
        <ul>
          <li v-for="(errorName, index) in error.errors" :key="index">
            {{ errorName[0] }}
          </li>
        </ul>
        <button type="button" class="btn-close" data-bs-dismiss="alert" aria-label="Close"
          @click="error = null"></button>
      </div>
    </transition>
    <div class="form-group">
      <label>Name</label>
      <input v-model="product.name" type="text" class="form-control" placeholder="Name...">
    </div>
    <div class="form-group">
      <label>Price</label>
      <input v-model="product.price" type="text" class="form-control" placeholder="Price...">
    </div>
    <button class="btn btn-primary mt-2" @click="createProduct">Create</button>

    <hr>
    <h1>List Products</h1>
    <table class="table">
      <thead>
        <tr>
          <th scope="col">ID</th>
          <th scope="col">Name</th>
          <th scope="col">Price</th>
          <th scope="col">Actions</th>
        </tr>
      </thead>
      <transition-group name="list" tag="tbody">
        <tr v-for="(product, index) in listProducts.data" :key="product.id">
          <th scope="row">{{ product.id }}</th>
          <td v-if="!product.isEdit">
            {{ product.name }}
          </td>
          <td v-else>
            <input type="text" v-model="selectedProduct.name" class="form-control">
          </td>
          <td v-if="!product.isEdit">
            {{ product.price }}
          </td>
          <td v-else>
            <input type="text" v-model="selectedProduct.price" class="form-control">
          </td>
          <td v-if="!product.isEdit">
            <button class="btn btn-primary" @click="selectProduct(product)">Edit</button>
            <button class="btn btn-danger ms-2" @click="deleteProduct(product, index)">Delete</button>
          </td>
          <!-- ... -->
          <td v-else>
            <button class="btn btn-primary" @click="updateProduct(index)">Save</button>
            <button class="btn btn-danger ms-2" @click="product.isEdit = false">Cancel</button>
          </td>
        </tr>
      </transition-group>
    </table>
    <div>
      {{ listProducts.from }} - {{ listProducts.to }} of {{ listProducts.total }}
    </div>
    <ul class="pagination">
      <li class="page-item" :class="{ 'disabled': listProducts.prev_page_url === null }"
        @click="listProducts.prev_page_url && getListProducts(listProducts.current_page - 1)">
        <a class="page-link" href="#">Previous</a>
      </li>
      <li class="page-item" v-if="listProducts.prev_page_url" @click="getListProducts(listProducts.current_page - 1)">
        <a class="page-link" href="#">{{ listProducts.current_page - 1 }}</a>
      </li>
      <li class="page-item active">
        <a class="page-link" href="#">{{ listProducts.current_page }}</a>
      </li>
      <li class="page-item" v-if="listProducts.next_page_url" @click="getListProducts(listProducts.current_page + 1)">
        <a class="page-link" href="#">{{ listProducts.current_page + 1 }}</a>
      </li>
      <li class="page-item" :class="{ 'disabled': listProducts.next_page_url === null }"
        @click="listProducts.next_page_url && getListProducts(listProducts.current_page + 1)">
        <a class="page-link" href="#">Next</a>
      </li>
    </ul>
  </div>
</template>

<script setup>

import axios from 'axios'
import { onBeforeMount, ref } from 'vue';

const product = ref({
  name: '',
  price: 0
})

const listProducts = ref({})
const error = ref(null)
const selectedProduct = ref(null)

onBeforeMount(() => {
  getListProducts()
})

const createProduct = async () => {
  try {
    error.value = null
    const response = await axios.post('/products', {
      name: product.value.name,
      price: product.value.price
    })
    listProducts.value.data.unshift({
      ...response.data.product,
      isEdit: false
    })

    // reset giá trị form về ban đầu
    product.value = {
      name: '',
      price: 0
    }
  } catch (e) {
    error.value = e.response.data
  }
}

const getListProducts = async (page = 1) => {
  try {
    const response = await axios.get('/products?page=' + page)
    listProducts.value = response.data
    listProducts.value.data.forEach(item => {
      item.isEdit = false
    })
  } catch (e) {
    error.value = e.response.data
  }
}

const selectProduct = (product) => {
  product.isEdit = true
  selectedProduct.value = { ...product }
}

const updateProduct = async (index) => {
  try {
    const response = await axios.put('/products/' + selectedProduct.value.id, {
      name: selectedProduct.value.name,
      price: selectedProduct.value.price
    })

    listProducts.value.data[index].name = response.data.product.name
    listProducts.value.data[index].price = response.data.product.price
    listProducts.value.data[index].isEdit = false
  } catch (e) {
    error.value = e.response.data
  }
}

const deleteProduct = async (product, index) => {
  try {
    await axios.delete('/products/' + product.id)
    listProducts.value.data.splice(index, 1)
  } catch (e) {
    error.value = e.response.data
  }
}
</script>

<style lang="scss" scoped>
.fade-enter-active,
.fade-leave-active {
  transition: opacity 0.5s ease;
}

.fade-enter-from,
.fade-leave-to {
  opacity: 0;
}

// ------ THÊM VÀO ĐOẠN BÊN DƯỚI
.list-enter-active,
.list-leave-active {
  transition: all 0.5s ease;
}

.list-enter-from,
.list-leave-to {
  opacity: 0;
  transform: translateX(30px);
}
</style>
Ở file resources/js/app.js ta sửa như sau:
import './bootstrap';
import { createApp } from 'vue';
import ProductList from './components/ProductList.vue';

const app = createApp(ProductList);

app.mount('#app');
Cuối cùng là ta start project lên thôi, ta chạy 2 command sau mỗi cái ở 1 terminal nhé:
php artisan serve

npm run dev
Sau đó truy cập từ trình duyệt ở địa chỉ http://localhost:8000, thấy lên trang Login là ngon rồi:
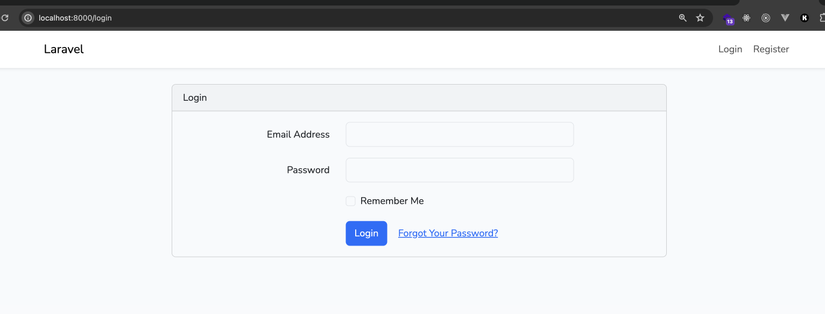
Login với account admin@example.com/12345678 như khi nãy ta tạo ở Seeder sau đó ta sẽ vào được app nha:
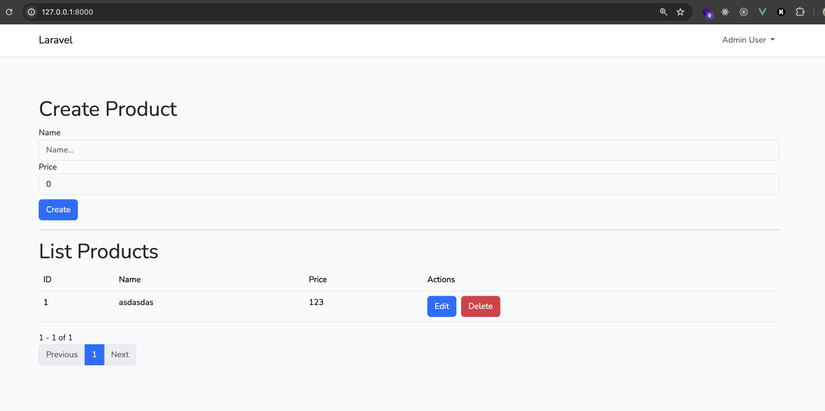
Ở bước này các bạn chạy lại các thao tác thêm sửa xoá xem oke không nhé
Phân quyền
Ở bài này ta sẽ dùng Laravel Gate để làm phân quyền nhé
Đầu tiên ở file app/Providers/AppServiceProvider.php ta tạo các quyền ta muốn:
<?php

namespace App\Providers;

use Illuminate\Support\ServiceProvider;
use Illuminate\Support\Facades\Gate;
use App\Models\User;

class AppServiceProvider extends ServiceProvider
{
    /**
     * Register any application services.
     */
    public function register(): void
    {
        //
    }

    /**
     * Bootstrap any application services.
     */
    public function boot(): void
    {
        Gate::define('create-products', function (User $user) {
            return $user->is_admin;
        });

        Gate::define('update-products', function (User $user) {
            return $user->is_admin;
        });

        Gate::define('delete-products', function (User $user) {
            return $user->is_admin;
        });
    }
}
Ở trên ta có 3 quyền là create-products/update-products/delete-products, cả 3 quyền đó đều yêu cầu user phải là admin is_admin=true
Sau đó ta sửa lại app/Http/Controllers/ProductController.php như sau:
<?php

namespace App\Http\Controllers;

use Illuminate\Http\Request;
use App\Models\Product;
use Illuminate\Support\Facades\Gate;

class ProductController extends Controller
{
    /**
     * Display a listing of the resource.
     */
    public function index()
    {
        return Product::orderBy('created_at', 'desc')->paginate(5);
    }

    /**
     * Store a newly created resource in storage.
     */
    public function store(Request $request)
    {
        if (!Gate::allows('create-products')) {
            return response()->json(['message' => 'Forbidden'], 403);
        }

        $validated = $request->validate([
            'name' => 'required|min:5',
            'price' => 'required|numeric|gt:0',
        ]);
        $product = Product::create([
            'name'     => $request->input('name'),
            'price'    => $request->input('price'),
        ]);
        return response([
            'product' => $product
        ], 200);
    }

    /**
     * Update the specified resource in storage.
     */
    public function update(Request $request, string $id)
    {
        if (!Gate::allows('update-products')) {
            return response()->json(['message' => 'Forbidden'], 403);
        }
        $validated = $request->validate([
            'name' => 'required|min:5',
            'price' => 'required|numeric|gt:0',
        ]);

        $product = Product::find($id);

        $product->name = $request->input('name');
        $product->price = $request->input('price');

        $product->save();

        return response([
            'product' => $product
        ], 200);
    }

    /**
     * Remove the specified resource from storage.
     */
    public function destroy(string $id)
    {
        if (!Gate::allows('delete-products')) {
            return response()->json(['message' => 'Forbidden'], 403);
        }

        $product = Product::find($id);
        $product->delete();
        return response([
            'result' => 'success'
        ], 200);
    }
}
Ở trên các bạn để ý rằng, ở mỗi method trong controller ta đều có bước đầu tiên là check quyền, dùng Gate::allows('...') để check xem user hiện tại có quyền tương ứng hay không, nếu có thì mới thực hiện tiếp, còn không thì trả về 403
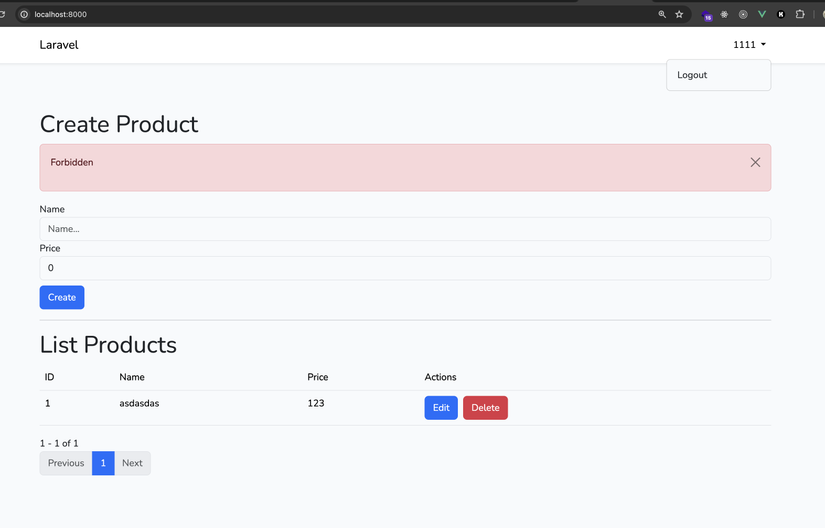
Giờ nếu ta quay lại trình duyệt, Logout ra ngoài, sau đó tạo 1 tài khoản bất kì, mặc định is_admin=false (user thường), sau đó vào trong app Vue và thực hiện bất kì thao tác thêm sửa xoá nào sẽ thấy báo lỗi:
Bước tiếp theo là với user thường thì ta cần ẩn hết form tạo product, các nút Edit/Delete đi, để làm điều đó thì ta cần phải lấy được thông tin user hiện tại và truyền vào phía app VueJS để nó biết, có 2 cách:
- gọi API để lấy thông tin user
- dùng trực tiếp auth user của Laravel
Rõ ràng ta nên chọn cách số 2, không cần phải gọi API, ngay lập tức khi app Vue load lên thì user đã có ở đó rồi, vì Laravel render file blade, file blade load app.js và tạo app Vue, mà ở file blade là ta có thể lấy được thông tin user rồi
Giờ ta sửa lại file resources/views/products.blade.php như sau nhé:
@extends('layouts.app')

@section('content')
<script>
  window.__user__ = @json($user);
</script>
@endsection
Tiếp đó ta sửa lại file routes/web.php như sau:
<?php

use Illuminate\Support\Facades\Route;

Route::get('/', function () {
    $user = auth()->user();
    return view('products', compact('user')); // -> ở đây
})->middleware('auth');

Auth::routes();

Route::resource('products', App\Http\Controllers\ProductController::class)->middleware('auth');
ở trên các bạn thấy, ở file route, thì ta đã lấy ra auth()->user() và return nó về cùng với view, ở file blade thì ta serialize nó thành json và gán nó vào biến global __user__
Giờ việc của ta đơn giản là vào ProductList.vue lấy ra user lưu lại thôi:
<script setup>
    ...
    const user = ref(window.__user__)
</script>
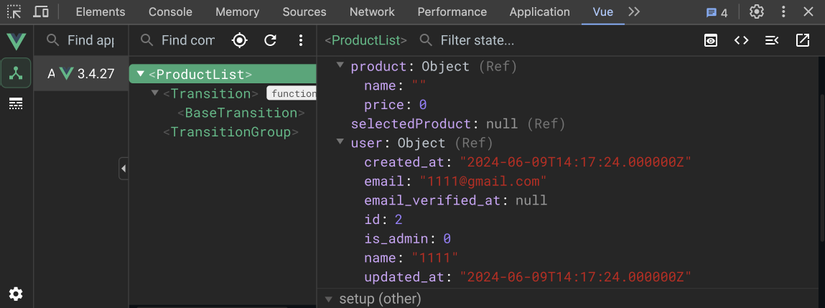
Sau đó F5 chạy app lên, mở Vue Devtool ta sẽ thấy thông tin user ở đó:
Giờ ta chỉ cần ẩn hết những phần UI để nếu user không phải admin thì sẽ không xem được, source code đầy đủ như sau:
<template>
  <div class="api-calling container mt-5">
    <template v-if="user.is_admin">
      <h1>Create Product</h1>
      <transition name="fade">
        <div class="alert alert-danger alert-dismissible fade show" role="alert" v-if="error">
          <b>{{ error.message }}</b>
          <ul>
            <li v-for="(errorName, index) in error.errors" :key="index">
              {{ errorName[0] }}
            </li>
          </ul>
          <button type="button" class="btn-close" data-bs-dismiss="alert" aria-label="Close"
            @click="error = null"></button>
        </div>
      </transition>
      <div class="form-group">
        <label>Name</label>
        <input v-model="product.name" type="text" class="form-control" placeholder="Name...">
      </div>
      <div class="form-group">
        <label>Price</label>
        <input v-model="product.price" type="text" class="form-control" placeholder="Price...">
      </div>
      <button class="btn btn-primary mt-2" @click="createProduct">Create</button>

      <hr>
    </template>
    <h1>List Products</h1>
    <table class="table">
      <thead>
        <tr>
          <th scope="col">ID</th>
          <th scope="col">Name</th>
          <th scope="col">Price</th>
          <th scope="col" v-if="user.is_admin">Actions</th>
        </tr>
      </thead>
      <transition-group name="list" tag="tbody">
        <tr v-for="(product, index) in listProducts.data" :key="product.id">
          <th scope="row">{{ product.id }}</th>
          <td v-if="!product.isEdit">
            {{ product.name }}
          </td>
          <td v-else>
            <input type="text" v-model="selectedProduct.name" class="form-control">
          </td>
          <td v-if="!product.isEdit">
            {{ product.price }}
          </td>
          <td v-else>
            <input type="text" v-model="selectedProduct.price" class="form-control">
          </td>
          <template v-if="user.is_admin">
            <td v-if="!product.isEdit">
              <button class="btn btn-primary" @click="selectProduct(product)">Edit</button>
              <button class="btn btn-danger ms-2" @click="deleteProduct(product, index)">Delete</button>
            </td>
            <!-- ... -->
            <td v-else>
              <button class="btn btn-primary" @click="updateProduct(index)">Save</button>
              <button class="btn btn-danger ms-2" @click="product.isEdit = false">Cancel</button>
            </td>
          </template>
        </tr>
      </transition-group>
    </table>
    <div>
      {{ listProducts.from }} - {{ listProducts.to }} of {{ listProducts.total }}
    </div>
    <ul class="pagination">
      <li class="page-item" :class="{ 'disabled': listProducts.prev_page_url === null }"
        @click="listProducts.prev_page_url && getListProducts(listProducts.current_page - 1)">
        <a class="page-link" href="#">Previous</a>
      </li>
      <li class="page-item" v-if="listProducts.prev_page_url" @click="getListProducts(listProducts.current_page - 1)">
        <a class="page-link" href="#">{{ listProducts.current_page - 1 }}</a>
      </li>
      <li class="page-item active">
        <a class="page-link" href="#">{{ listProducts.current_page }}</a>
      </li>
      <li class="page-item" v-if="listProducts.next_page_url" @click="getListProducts(listProducts.current_page + 1)">
        <a class="page-link" href="#">{{ listProducts.current_page + 1 }}</a>
      </li>
      <li class="page-item" :class="{ 'disabled': listProducts.next_page_url === null }"
        @click="listProducts.next_page_url && getListProducts(listProducts.current_page + 1)">
        <a class="page-link" href="#">Next</a>
      </li>
    </ul>
  </div>
</template>

<script setup>

import axios from 'axios'
import { onBeforeMount, ref } from 'vue';

const product = ref({
  name: '',
  price: 0
})

const listProducts = ref({})
const error = ref(null)
const selectedProduct = ref(null)
const user = ref(window.__user__)

onBeforeMount(() => {
  getListProducts()
})

const createProduct = async () => {
  try {
    error.value = null
    const response = await axios.post('/products', {
      name: product.value.name,
      price: product.value.price
    })
    listProducts.value.data.unshift({
      ...response.data.product,
      isEdit: false
    })

    // reset giá trị form về ban đầu
    product.value = {
      name: '',
      price: 0
    }
  } catch (e) {
    error.value = e.response.data
  }
}

const getListProducts = async (page = 1) => {
  try {
    const response = await axios.get('/products?page=' + page)
    listProducts.value = response.data
    listProducts.value.data.forEach(item => {
      item.isEdit = false
    })
  } catch (e) {
    error.value = e.response.data
  }
}

const selectProduct = (product) => {
  product.isEdit = true
  selectedProduct.value = { ...product }
}

const updateProduct = async (index) => {
  try {
    const response = await axios.put('/products/' + selectedProduct.value.id, {
      name: selectedProduct.value.name,
      price: selectedProduct.value.price
    })

    listProducts.value.data[index].name = response.data.product.name
    listProducts.value.data[index].price = response.data.product.price
    listProducts.value.data[index].isEdit = false
  } catch (e) {
    error.value = e.response.data
  }
}

const deleteProduct = async (product, index) => {
  try {
    await axios.delete('/products/' + product.id)
    listProducts.value.data.splice(index, 1)
  } catch (e) {
    error.value = e.response.data
  }
}
</script>

<style lang="scss" scoped>
.fade-enter-active,
.fade-leave-active {
  transition: opacity 0.5s ease;
}

.fade-enter-from,
.fade-leave-to {
  opacity: 0;
}

// ------ THÊM VÀO ĐOẠN BÊN DƯỚI
.list-enter-active,
.list-leave-active {
  transition: all 0.5s ease;
}

.list-enter-from,
.list-leave-to {
  opacity: 0;
  transform: translateX(30px);
}
</style>
Ở trên nếu các bạn để ý thì mình có gom nhóm các phần UI mà chỉ admin truy cập được và đặt vào <template> sau đó thêm v-if="user.is_admin" cho nó là xong
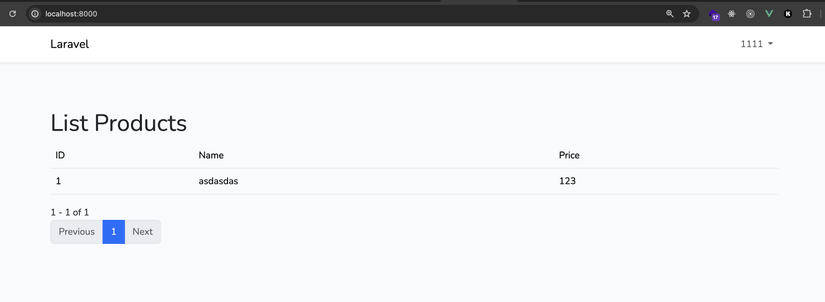
Kết quả cuối cùng cho ta như sau:
Kết luận
Vậy là ta đã hoàn thành bài về phân quyền với Laravel và VueJS rồi, mặc dù phần logics trong bài này cũng khá là dễ, nhưng hi vọng nó đã cho các bạn được ý tưởng cách áp dụng vào thực tế như thế nào
Ở một bài khác mình sẽ hướng dẫn các bạn cách sử dụng Laravel Passport dùng để authenticate ở mức chi tiết và mạnh mẽ hơn nhé.
Cám ơn các bạn đã theo dõi, có gì thắc mắc để lại dưới comment cho mình nhé ^^!
All rights reserved
