Android Navigation Architecture Component
Bài đăng này đã không được cập nhật trong 8 năm
Navigation( điều hướng) trên Android có thể khá phức tạp từ việc truyền data đến việc xử lý back stack có rất nhiều điều chúng ta cần để ý. Có rất nhiều giải pháp để giải quyết vấn đề này - thường là làm việc với single Activity, nhưng không phương pháp giải quyết nào mà làm tôi hài lòng. Chúng quá phức tạp hoặc không xử lý được nhứng vấn đề như Restoring state. Vì vậy khi Google công bố Navigation Architecture Component, tôi rất vui mừng và quyết định sử dụng nó.
Prerequisite
Android studio 3.2 preview Để sử dụng Navigation component chúng ta add 2 dependencies:
def navVersion = '1.0.0-alpha01'

implementation "android.arch.navigation:navigation-fragment-ktx:$navVersion"
implementation "android.arch.navigation:navigation-ui-ktx:$navVersion"
Implement navigation architecture
Đầu tiên, bận cần tạo 1 navigation resource directory với navigation graph file.
- Right click thư mục res, New -> Android Resource File
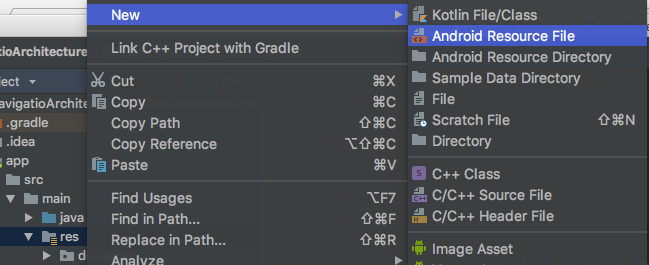
- Tạo mới Resource File như bên dưới ảnh
 Trên là các bước tạo được navigation resource directory và nav_graph.xml.
Navigation Editor tương tụ với Layout Editor nó có chứa một số thành phần
Trên là các bước tạo được navigation resource directory và nav_graph.xml.
Navigation Editor tương tụ với Layout Editor nó có chứa một số thành phần
- Destinations list: Liệt đê các màn hình hiện tại trên Graph Editor.
- Graph Editor : Hiển thị trực quan của navigation graph.
- Attributes Editor : Các thuộc tính và hành động của navigation graph.
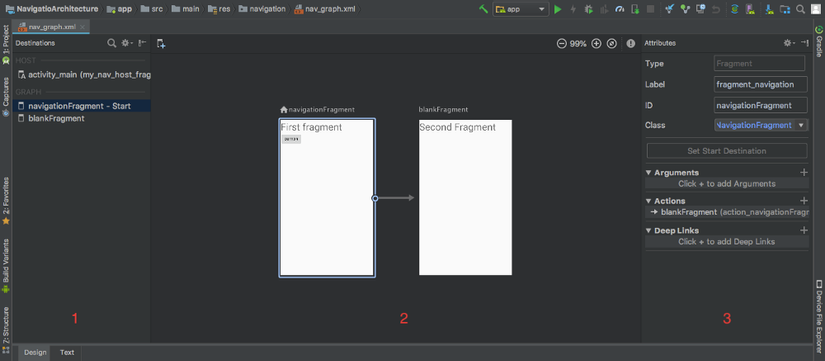
Lưu ý: Navigation Architecture Component được thiết kế cho nhưng ứng dụng có MainActivity với có chứa nhiều Fragments. Activity là "Host" lưu trữ biểu đồ điều hướng.
- Tiếp theo chúng ta sẽ tạo New Destination từ gaph editor pane. Click New Destination nó sẽ hiện thị Popup menu tạo.
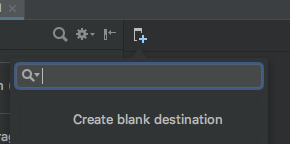 Click Create blank destination hoặc lick fragment hoặc Activity nó sẽ hiển thị New Android Component dialog.
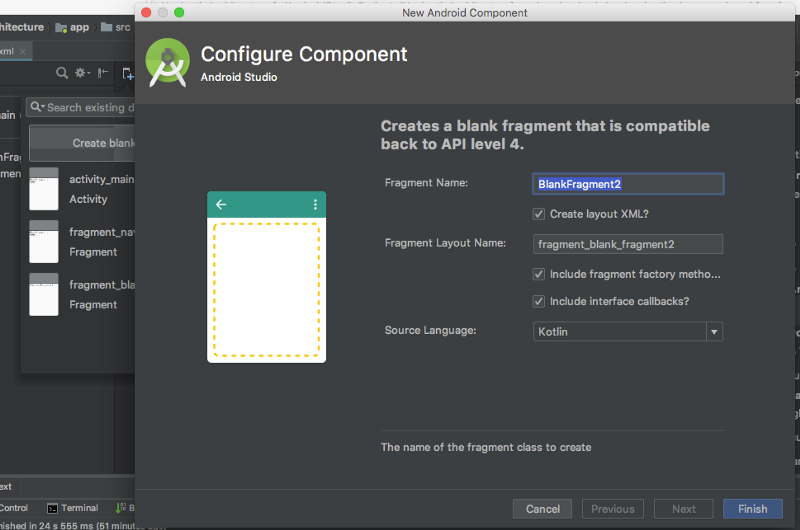 Điền thông tin màn hình cần tạo rồi click Finish. Khi thực hiện như trên nó sẽ tạo Fragment class và liên kết tới fragment layout file.
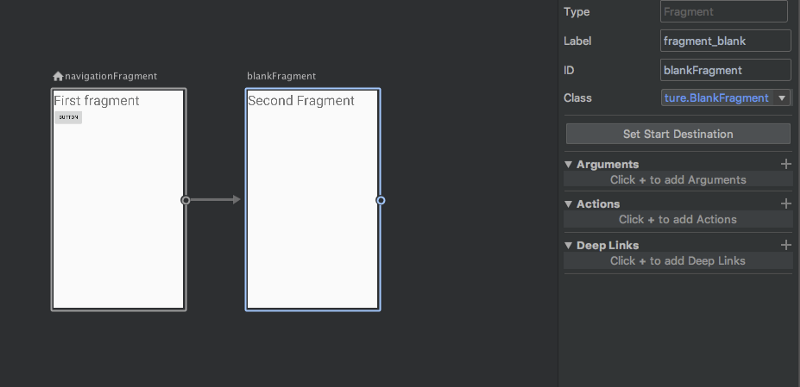
 - Click vào destination mới tạo hoặc từ graph editor pane bạn sẽ thấy các thuộc tính bên dưới trong Attribute Editor pane.
- Type — Fragment or Activity.
- Label — Name of the destination fragment or activity.
- ID — ID of the destination fragment.
- Class — Destination class. Bạn có thể sửa đổi id, name (class name), label và layout trong xml. Để sửa đổi, chọn tab Text trong Graph Editor pane và bạn sẽ thấy startDestination thuộc tính được thiết lập destination screen sẽ được start app:startDestination=”@id/navigationFragment”
<?xml version="1.0" encoding="utf-8"?>
<navigation xmlns:app="http://schemas.android.com/apk/res-auto"
    xmlns:android="http://schemas.android.com/apk/res/android"
    xmlns:tools="http://schemas.android.com/tools"
    app:startDestination="@id/navigationFragment">

    <fragment
        android:id="@+id/navigationFragment"
        android:name="com.aptus.navigatioarchitecture.NavigationFragment"
        android:label="fragment_navigation"
        tools:layout="@layout/fragment_navigation"/>
</navigation>
- Bạn có thể thực hiện lại bước 3 và 4 để tạo 1 destination khác và connect 2 destination với nhau.
 Trong file XML
<?xml version="1.0" encoding="utf-8"?>
<navigation xmlns:app="http://schemas.android.com/apk/res-auto"
    xmlns:android="http://schemas.android.com/apk/res/android"
    xmlns:tools="http://schemas.android.com/tools"
    app:startDestination="@id/navigationFragment">

    <fragment
        android:id="@+id/navigationFragment"
        android:name="com.aptus.navigatioarchitecture.NavigationFragment"
        android:label="fragment_navigation"
        tools:layout="@layout/fragment_navigation" >
        <action
            android:id="@+id/action_navigationFragment_to_blankFragment"
            app:destination="@id/blankFragment" />
    </fragment>
    <fragment
        android:id="@+id/blankFragment"
        android:name="com.aptus.navigatioarchitecture.BlankFragment"
        android:label="fragment_blank"
        tools:layout="@layout/fragment_blank" />
</navigation>
Chú ý: Navigation graph có connect giữa 2 destination được gọi là actions
- Nếu bạn muốn thay đổi điểm bắt đàu trong Graph Editor. Chọn điểm đích khác trong graph editor pane hoặc destination list pane, nút start destination sé được enable và click và sẽ đổi điểm đến bắt đầu.
Chú ý: Home icon sẽ đại diện cho màn hình start destination
- Cuối cùng, sửa đổi activity là host navigation cho app bằng cách implement NavHost interface.
<?xml version="1.0" encoding="utf-8"?>
<android.support.constraint.ConstraintLayout xmlns:android="http://schemas.android.com/apk/res/android"
    xmlns:app="http://schemas.android.com/apk/res-auto"
    xmlns:tools="http://schemas.android.com/tools"
    android:layout_width="match_parent"
    android:layout_height="match_parent"
    tools:context=".MainActivity">

    <fragment
        android:id="@+id/my_nav_host_fragment"
        android:name="androidx.navigation.fragment.NavHostFragment"
        android:layout_width="match_parent"
        android:layout_height="match_parent"
        app:defaultNavHost="true"
        app:navGraph="@navigation/nav_graph" />

</android.support.constraint.ConstraintLayout>
Chú ý: app:defaultNavHost:true là thưộc tính truy cập tới butotn back của hệ thống để bật các đích từ back stack trong cấu trúc LIFO. Đối với butotn Up bạn có thể overwrite AppCompatActivity.onSupportNavigateUp() và gọi NavController.navigateUp(). Ví dụ như bên dưới.
override fun onSupportNavigateUp(): Boolean {// Up button will work on this method
        return Navigation.findNavController(this, R.id.my_nav_host_fragment).navigateUp()
    }
To navigate using UI widgets
NavController được sử dụng để điều hướng từ 1 destination đế 1 destination khác , có thể được truy xuất bằng 1 trong các static method
NavHostFragment.findNavController(Fragment)Navigation.findNavController(Activity, @IdRes int viewId)Navigation.findNavController(View)Sau khi lấy được NavController, sử dụng navigate() method để điều hướng đến destination. Method navigate() nhận tham ố là Resource ID. ID có thể ID của destination xác định trong navigation graph hoặc là 1 actions trong navigation graph. Ví dụ
navigateToSecondFragment.setOnClickListener{
   Navigation.findNavController(this, R.id.my_nav_host_fragment).navigate(R.id.action_navigationFragment_to_blankFragment)
}
Moị người có thể tam khảo code tại đây
Mọi người tham khảo thêm tại đây
All rights reserved
