Android Jetpack Compose - Implement splash screen using Splash Screen API
Bài đăng này đã không được cập nhật trong 2 năm

TLDR
Tổng hợp cách thực hiện Splash screen trên Android
Technical stack sử dụng bao gồm:
- Android Jetpack Compose
- Splash Screen API
- Hỗ trợ targetSdk 34
Giới thiệu
Starting in Android 12, the SplashScreen API lets apps launch with animation, including an into-app motion at launch, a splash screen showing your app icon, and a transition to your app itself. A SplashScreen is a Window and therefore covers an Activity.
Nếu trước đây bạn đã triển khai Splash screen cho Android 11 trở xuống, thì bạn sẽ cần chuyển sang sử dụng SplashScreen API để đảm bảo rằng ứng dụng của bạn hiển thị chính xác cho Android 12 trở lên.
Bắt đầu từ Android 12, hệ thống mặc định sẽ luôn có Splash screen khi cold starts hay warn starts ứng dụng. Theo mặc định, Splash screen mặc định này được tạo bằng ic_launcher của ứng dụng và có màu nền là windowBackground (nếu đó là một màu).
Cách thực hiện
Đầu tiên chúng ta sẽ tạo Splash screen cho Android 11 trở xuống
Bước 1
Tạo drawable resource file với tên drawable/background_splash_screen.xml trong thư mục drawable.
<?xml version="1.0" encoding="utf-8"?>
<layer-list xmlns:android="http://schemas.android.com/apk/res/android">
    <item>
        <color android:color="@color/splash_screen_background_color" />
    </item>
    <item
        android:width="200dp"
        android:height="200dp"
        android:drawable="@drawable/ic_launcher"
        android:gravity="center" />
</layer-list>
Trong đó:
@color/splash_screen_background_colorlà màu nền sử dụng choSplash screen(Số 4 trong ảnh bên dưới)@drawable/ic_launcherlà hình mà bạn muốn hiển thị trênSplash screen(Số 1 trong ảnh bên dưới)widthvàheightở đây mình để là 200dp, là kích thước của hình hiển thị trênSplash screen
Bước 2
Tạo Theme cho Splash screen tại res/values/themes.xml. Nếu bạn không tìm thấy hãy tạo một file là themes.xml nhé.
<?xml version="1.0" encoding="utf-8"?>
<resources>

    <style name="Theme.Mail" parent="android:Theme.Material.Light.NoActionBar">
        <!-- Custom style for app-->
    </style>

    <style name="Theme.Mail.SplashScreen" parent="Theme.Mail">
        <item name="android:windowBackground">@drawable/background_splash_screen</item>
    </style>

</resources>
Trong đó:
- Style
name="Theme.Mail"là theme cho toàn bộ ứng dụng - Style
name="Theme.Mail.SplashScreen"là theme mà bạn cần thêm vào để sử dụng choSplash screenvới thuộc tínhandroid:windowBackgroundsử dụng@drawable/background_splash_screenmà bạn đã tạo ởbước 1
Bước 3
Tạo SplashActivity, đây sẽ là nơi mà bạn thêm các logic cần chạy trong thời gian khởi động ứng dụng, trước khi vào MainActivity, ví dụ: kiểm tra app version để thực hiện thông báo nâng cấp ứng dụng, kiểm tra token của user để diều hướng đến login,...
@SuppressLint("CustomSplashScreen")
class SplashActivity: ComponentActivity() {
    override fun onCreate(savedInstanceState: Bundle?) {
        super.onCreate(savedInstanceState)
        lifecycleScope.launch {
            lifecycle.repeatOnLifecycle(Lifecycle.State.CREATED) {
                delay(3000)

                val intent = Intent(this@SplashActivity, MainActivity::class.java)
                startActivity(intent)
                finish()
            }
        }
    }
}
Trong đó:
delay(3000)sau 3 giây nó sẽ điều hướng đến MainActivity.
Hãy nhớ khai báo SplashActivity trong AndroidManifest.xml nhé, nó sẽ trông như sau:
<?xml version="1.0" encoding="utf-8"?>
<manifest xmlns:android="http://schemas.android.com/apk/res/android"
    xmlns:tools="http://schemas.android.com/tools">
    <application
        ...
        android:icon="@mipmap/ic_launcher"
        android:theme="@style/Theme.Mail">
        <activity
            android:name=".screen.splash.SplashActivity"
            android:exported="true">
            <intent-filter>
                <action android:name="android.intent.action.MAIN" />
                <category android:name="android.intent.category.LAUNCHER" />
            </intent-filter>
        </activity>
        <activity android:name=".MainActivity" />
    </application>
</manifest>
-
Tới đây bạn có thể build để xem kết quả trên Android 11 trở xuống. Từ Android 12 trở lên, bạn cần thực hiện thêm các bước sau.
-
Trước đó hãy đảm bảo rằng ứng dụng của bạn
targetSdk31 trở lên
Bước 4
Khai báo phụ thuộc Splashscreen API trong build.gradle ở tầng app
dependencies {
  	...
    // Splash screen Api
    implementation("androidx.core:core-splashscreen:1.0.1")
}
Bước 5
Tạo drawable resource file với tên drawable/background_splash_screen.xml trong thư mục drawable-v31 để sử dụng cho Android 12 trở lên
<?xml version="1.0" encoding="utf-8"?>
<layer-list xmlns:android="http://schemas.android.com/apk/res/android">
    <item>
        <color android:color="@color/splash_screen_background_color" />
    </item>
    <item
        android:width="100dp"
        android:height="100dp"
        android:drawable="@drawable/ic_launcher"
        android:gravity="center" />
</layer-list>
Trong đó:
@color/splash_screen_background_colorlà màu nền cho hình hiển thị trênSplash screen(Số 2 trong ảnh bên dưới). Lưu ý đây không phải màu nền củaSplash screen, tuy nhiên ở đây sử dụng cùng màu với màu nền, bạn có thể thay đổi màu khác tuỳ theo thiết kế@drawable/ic_launcherlà hình mà bạn muốn hiển thị trênSplash screen(Số 1 trong ảnh bên dưới)widthvàheightở đây mình để là 100dp, là kích thước của hình hiển thị trênSplash screen. Kích thước này sẽ nhỏ hơn kích thước mà bạn đã dùng ởbước 1. Lưu ý, bạn nên chỉnh sửa thông số để phù hợp với thiết kế.
Bước 6
Tạo Theme cho Splash screen tại res/values/themes.xml trong thư mục values-v31 để sử dụng cho Android 12 trở lên.
<?xml version="1.0" encoding="utf-8"?>
<resources>

    <style name="Theme.Mail.SplashScreen" parent="Theme.SplashScreen">
        <item name="windowSplashScreenBackground">@color/splash_screen_background_color</item>
        <item name="windowSplashScreenAnimatedIcon">@drawable/background_splash_screen</item>
        <item name="postSplashScreenTheme">@style/Theme.Mail</item>
    </style>

</resources>
Trong đó:
- Style
parent="Theme.SplashScreen"là theme dàng riêng cho Splash screen, nên lưu ý để sử dụng đúng. - Style
Theme.Mail.SplashScreenlà theme mà bạn cần thêm vào để sử dụng choSplash screentrên Android 12 với các thuộc tínhwindowSplashScreenBackgroundsử dụng@drawable/background_splash_screenmà bạn đã tạo ởbước 1, chính là màu nền của Splash screen.windowSplashScreenAnimatedIconsử dụng@drawable/background_splash_screenlà drawable bạn đã tạo ở bước 5postSplashScreenThemesử dụng@style/Theme.Maillà theme của màn hình tiếp theo mà bạn sẽ diều hướng đến sau màn hìnhSplash screen
- Xem thêm về các thuộc tính này tại
Bước 7
Khai báo theme cho Splash screen trong AndroidManifest.xml - thêm dòng android:theme="@style/Theme.Mail.SplashScreen". Bây giờ nó sẽ trông như thế này:
<?xml version="1.0" encoding="utf-8"?>
<manifest xmlns:android="http://schemas.android.com/apk/res/android"
    xmlns:tools="http://schemas.android.com/tools">
    <application
        ...
        android:icon="@mipmap/ic_launcher"
        android:theme="@style/Theme.Mail">
        <activity
            android:name=".screen.splash.SplashActivity"
            android:exported="true"
            android:theme="@style/Theme.Mail.SplashScreen"> <!-- Add this line -->
            <intent-filter>
                <action android:name="android.intent.action.MAIN" />
                <category android:name="android.intent.category.LAUNCHER" />
            </intent-filter>
        </activity>
        <activity android:name=".MainActivity" />
    </application>
</manifest>
Bước 8
Thiết lập SplashScreen API trong SplashActivity. Thêm đoạn code sau vào đầu hàm onCreate
if (Build.VERSION.SDK_INT >= Build.VERSION_CODES.S){
	val splashScreen = installSplashScreen()
	splashScreen.setKeepOnScreenCondition { true }
}
Bây giờ SplashActivity sẽ trong như thế này:
@SuppressLint("CustomSplashScreen")
class SplashActivity: ComponentActivity() {
    override fun onCreate(savedInstanceState: Bundle?) {
        if (Build.VERSION.SDK_INT >= Build.VERSION_CODES.S){
            val splashScreen = installSplashScreen()
            splashScreen.setKeepOnScreenCondition { true }
        }
        super.onCreate(savedInstanceState)
        lifecycleScope.launch {
            lifecycle.repeatOnLifecycle(Lifecycle.State.CREATED) {
                delay(3000)

                val intent = Intent(this@SplashActivity, MainActivity::class.java)
                startActivity(intent)
                finish()
            }
        }
    }
}
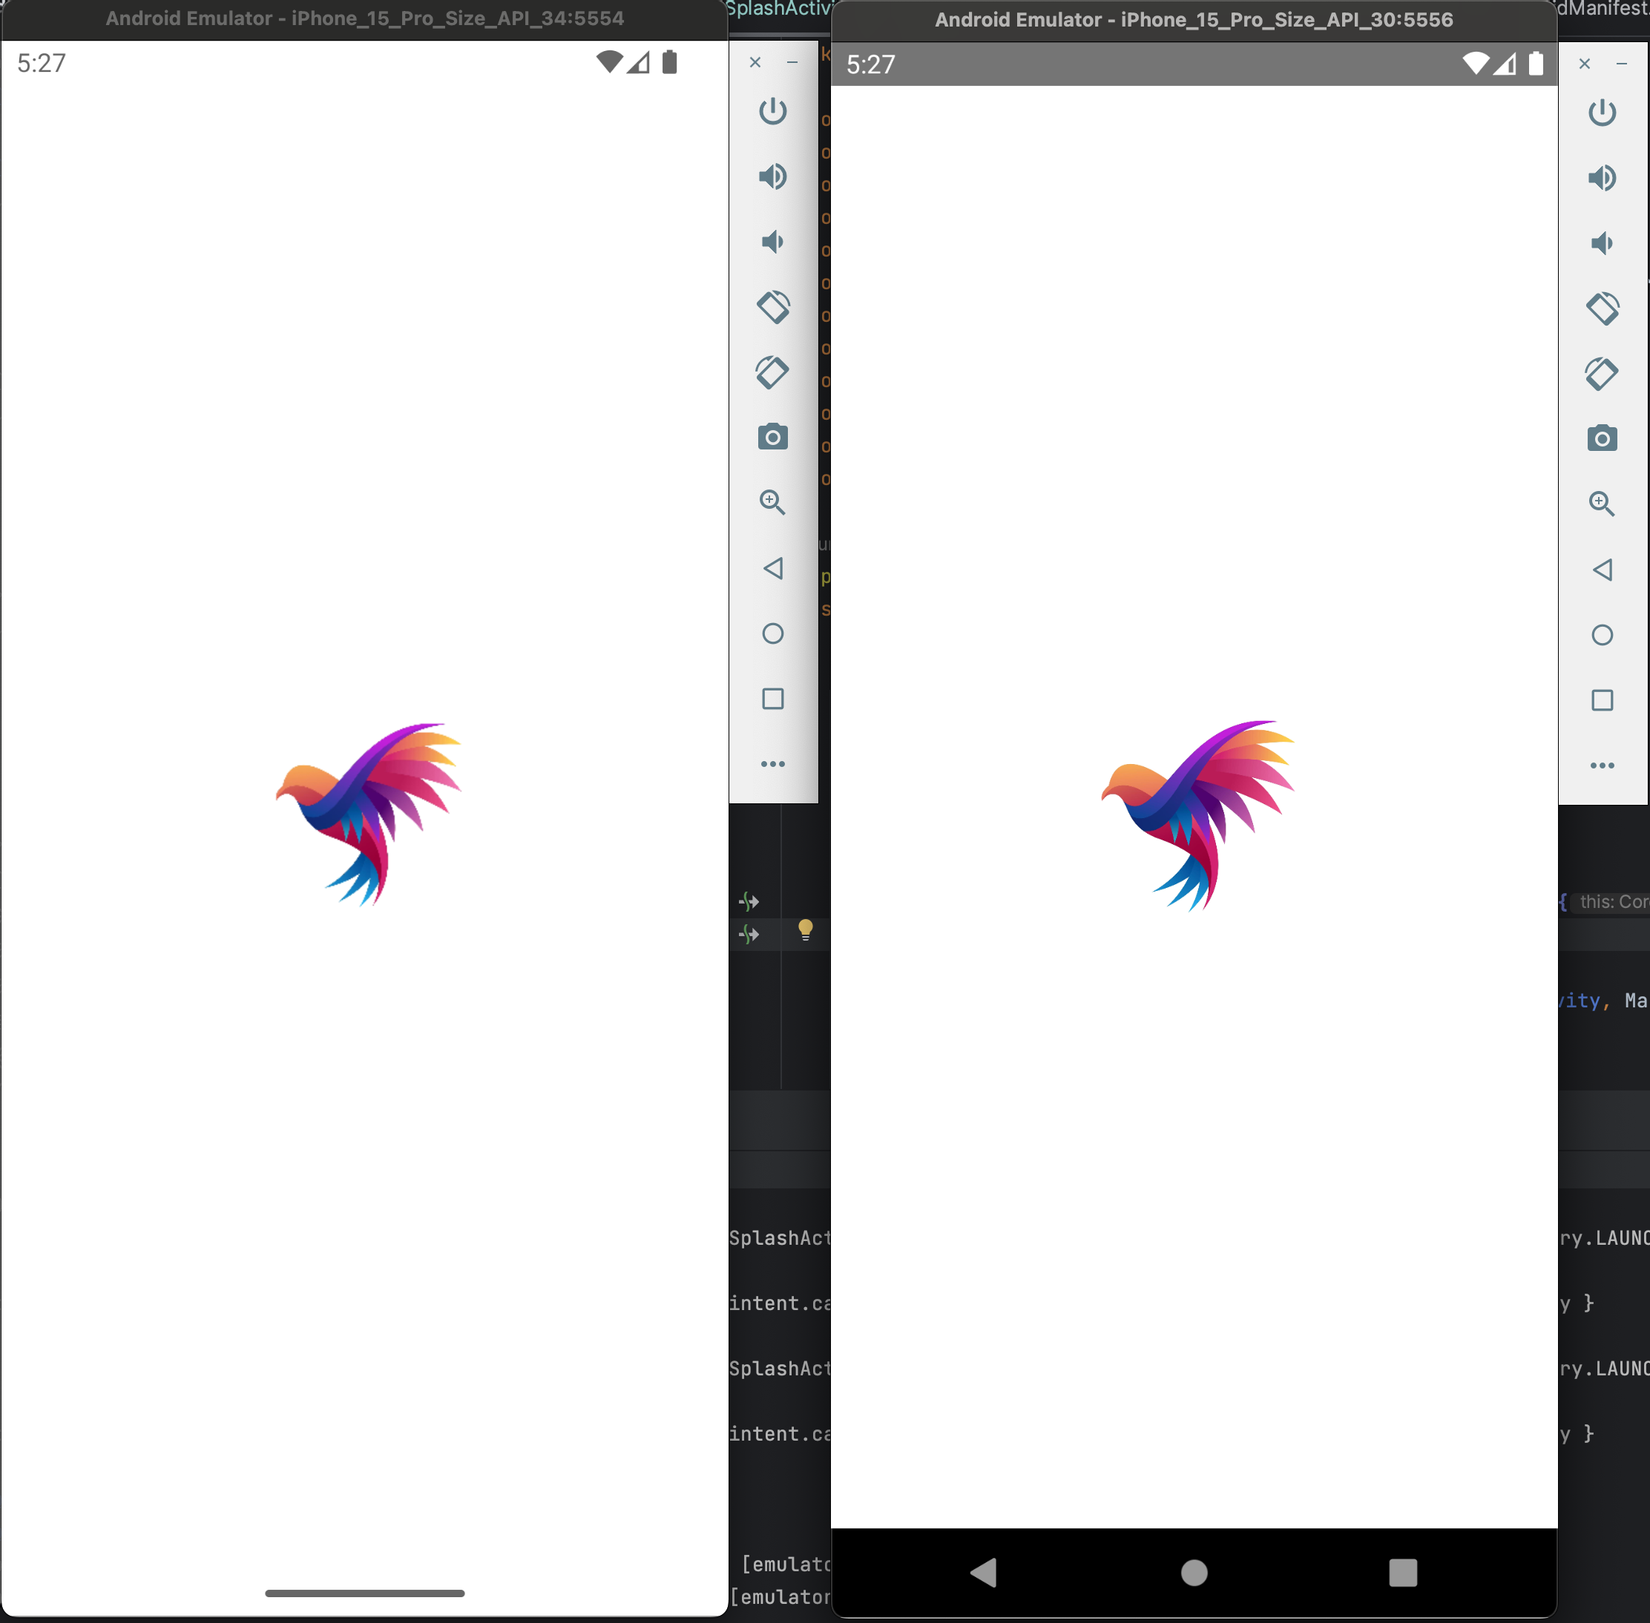
Kết quả
Bạn có thể thấy, trên Android 14 (bên trái) hay Android 11 (bên phải) mọi thứ đều gần như giống nhau.
Chúc bạn thành công!
Tham khảo
All rights reserved
