Android : AutoCompleteTextView với Suggestions lấy từ trên mạng
Bài đăng này đã không được cập nhật trong 6 năm
Mở đầu
Có bao giờ bạn sử dụng AutoCompleteTextView với suggestions không phải là các giữ liệu từ local mà cần load từ trên mạng về không? Bài viết này mình sẽ chia sẻ về cách đó.
Trong bài viết này ta sẽ làm một ví dụ sử dụng AutoCompleteTextView với suggestions là tiêu đề của cuốn sách được lấy từ Google Books.Để thêm phần awesome mình sẽ thêm một vài yêu cầu cho ví dụ này :
- Việc tìm dữ liệu suggestions phải được thực hiện trong một luồng riêng biệt.
- Việc tìm dữ liệu chỉ được bắt đầu khi người dùng ngừng gõ.
- Suggestions chỉ được hiển thị nếu người dùng nhập một chuỗi có độ dài tối thiểu.
- Một thanh progess phải được hiển thị ở phía bên phải khi quá trình tìm đề xuất đang diễn ra.
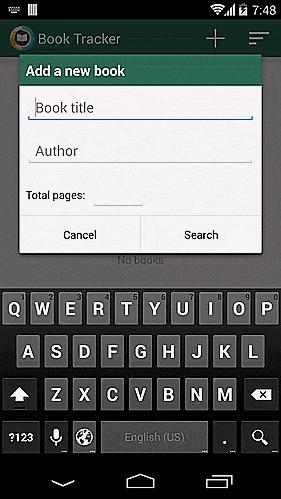
Nếu làm theo những điều trên bạn sẽ có được kết quả này :
Các bước thực hiện
Lan man nhiều rồi, bây giờ chúng ta vào vấn đề chính thôi
Bước 1 : Viết một Adapter cho AutoCompleteTextView
Adapter cho AutoCompleteTextView là thành phần cốt lõi nơi các đề xuất được tải và lưu trữ. BookAutoCompleteAdapter phải implement interface Filterable để bạn có thể nắm bắt đầu vào của người dùng từ AutoCompleteTextView và truyền nó cho hàm tìm kiếm của mình. Một method duy nhất của interface Filterable là getFilter() phải trả về một Filter . Lớp con của Filer phải implement 2 methods : performFiltering (CharSequence constraint) và publishResults (CharSequence constraint, Filter.FilterResults results)
Phương thức performFiltering được gọi trong một worker thread, do đó không cần phải tạo và bắt đầu một Thread mới nào nữa.
BookAutoCompleteAdapter:
public class BookAutoCompleteAdapter extends BaseAdapter implements Filterable {

    private static final int MAX_RESULTS = 10;
    private Context mContext;
    private List<Book> resultList = new ArrayList<Book>();

    public BookAutoCompleteAdapter(Context context) {
        mContext = context;
    }

    @Override
    public int getCount() {
        return resultList.size();
    }

    @Override
    public Book getItem(int index) {
        return resultList.get(index);
    }

    @Override
    public long getItemId(int position) {
        return position;
    }

    @Override
    public View getView(int position, View convertView, ViewGroup parent) {
        if (convertView == null) {
            LayoutInflater inflater = (LayoutInflater) mContext
                    .getSystemService(Context.LAYOUT_INFLATER_SERVICE);
            convertView = inflater.inflate(R.layout.simple_dropdown_item_2line, parent, false);
        }
        ((TextView) convertView.findViewById(R.id.text1)).setText(getItem(position).getTitle());
        ((TextView) convertView.findViewById(R.id.text2)).setText(getItem(position).getAuthor());
        return convertView;
    }

    @Override
    public Filter getFilter() {
        Filter filter = new Filter() {
            @Override
            protected FilterResults performFiltering(CharSequence constraint) {
                FilterResults filterResults = new FilterResults();
                if (constraint != null) {
                    List<Books> books = findBooks(mContext, constraint.toString());

                    // Assign the data to the FilterResults
                    filterResults.values = books;
                    filterResults.count = books.size();
                }
                return filterResults;
            }

            @Override
            protected void publishResults(CharSequence constraint, FilterResults results) {
                if (results != null && results.count > 0) {
                    resultList = (List<Books>) results.values;
                    notifyDataSetChanged();
                } else {
                    notifyDataSetInvalidated();
                }
            }};
        return filter;
    }

    /**
     * Returns a search result for the given book title.
     */
    private List<Book> findBooks(Context context, String bookTitle) {
        // GoogleBooksProtocol is a wrapper for the Google Books API
        GoogleBooksProtocol protocol = new GoogleBooksProtocol(context, MAX_RESULTS);
        return protocol.findBooks(bookTitle);
    }
}
Bước 2 : Tạo layout cho list suggestions
Khi các đề xuất đã tìm được, một danh sách các kết quả sẽ được hiển thị . Mỗi kết quả gồm hai dòng: tên sách và tác giả.
<?xml version="1.0" encoding="utf-8"?>
<TwoLineListItem xmlns:android="http://schemas.android.com/apk/res/android"
                 android:layout_width="match_parent"
                 android:layout_height="wrap_content"
                 android:minHeight="?android:attr/listPreferredItemHeight"
                 android:mode="twoLine"
                 android:paddingStart="?android:attr/listPreferredItemPaddingStart"
                 android:paddingEnd="?android:attr/listPreferredItemPaddingEnd">

    <TextView android:id="@+id/text1"
              android:layout_width="match_parent"
              android:layout_height="wrap_content"
              android:layout_marginTop="@dimen/margin_default"
              android:textAppearance="?android:attr/textAppearanceLargePopupMenu"/>

    <TextView android:id="@+id/text2"
              android:layout_width="match_parent"
              android:layout_height="wrap_content"
              android:layout_below="@id/text1"
              android:layout_alignStart="@id/text1"
              android:layout_marginBottom="@dimen/margin_default"
              android:textAppearance="?android:attr/textAppearanceSmall"/>

</TwoLineListItem>
Bước 3 : Thêm delay trước khi gửi yêu cầu dữ liệu đến web service.
Với AutoCompleteTextView tiêu chuẩn, quá trình lọc được bắt đầu sau mỗi ký tự được nhập. Điều này là không cần thiết và gây tốn tài nguyên do đó ta thêm một khoảng delay trước khi gửi một yêu cầu đến web service. Nếu trong thời gian này, người dùng nhập ký tự tiếp theo, yêu cầu cho chuỗi tìm kiếm trước đó sẽ bị hủy và ta sẽ đặt lại thời gian delay. Để làm được điều này ta cần tạo một lớp custom của AutoCompleteTextView và override lại phương thức : performFiltering(CharSequence text, int keyCode) . Biến mAutoCompleteDelay xác định thời gian tính bằng mili giây là thời gian yêu cầu sẽ được gửi đến máy chủ nếu người dùng không thay đổi chuỗi tìm kiếm.
public class DelayAutoCompleteTextView extends AutoCompleteTextView {

    private static final int MESSAGE_TEXT_CHANGED = 100;
    private static final int DEFAULT_AUTOCOMPLETE_DELAY = 750;

    private int mAutoCompleteDelay = DEFAULT_AUTOCOMPLETE_DELAY;
    private ProgressBar mLoadingIndicator;

    private final Handler mHandler = new Handler() {
        @Override
        public void handleMessage(Message msg) {
            DelayAutoCompleteTextView.super.performFiltering((CharSequence) msg.obj, msg.arg1);
        }
    };

    public DelayAutoCompleteTextView(Context context, AttributeSet attrs) {
        super(context, attrs);
    }

    public void setLoadingIndicator(ProgressBar progressBar) {
        mLoadingIndicator = progressBar;
    }

    public void setAutoCompleteDelay(int autoCompleteDelay) {
        mAutoCompleteDelay = autoCompleteDelay;
    }

    @Override
    protected void performFiltering(CharSequence text, int keyCode) {
        if (mLoadingIndicator != null) {
            mLoadingIndicator.setVisibility(View.VISIBLE);
        }
        mHandler.removeMessages(MESSAGE_TEXT_CHANGED);
        mHandler.sendMessageDelayed(mHandler.obtainMessage(MESSAGE_TEXT_CHANGED, text), mAutoCompleteDelay);
    }

    @Override
    public void onFilterComplete(int count) {
        if (mLoadingIndicator != null) {
            mLoadingIndicator.setVisibility(View.GONE);
        }
        super.onFilterComplete(count);
    }
}
Bước 4 : Thêm một progess thể hiện trạng thái đang tìm kiếm. Điều này giúp nâng cao trải nghiệm người dùng. Chúng ta phải hiển thị một progess để nói với người dùng "Này, các đề xuất đang được tải hãy chờ một chút". Theo cách này, người dùng sẽ biết có điều gì sắp xảy ra và có thể đợi cho đến khi nhận được phản hồi.
<FrameLayout android:layout_width="match_parent"
                 android:layout_height="wrap_content"
                 android:layout_margin="@dimen/margin_default">

    <com.melnykov.booktracker.ui.DelayAutoCompleteTextView
            android:id="@+id/et_book_title"
            android:inputType="textCapSentences"
            android:layout_width="match_parent"
            android:layout_height="wrap_content"
            android:paddingRight="@dimen/padding_auto_complete"
            android:imeOptions="flagNoExtractUi|actionSearch"/>
    <ProgressBar
            android:id="@+id/pb_loading_indicator"
            style="?android:attr/progressBarStyleSmall"
            android:layout_width="wrap_content"
            android:layout_height="wrap_content"
            android:layout_gravity="center_vertical|right"
            android:layout_marginRight="@dimen/margin_default"
            android:visibility="gone"/>
</FrameLayout>
Bước 5 : Lắp ráp các phần bên trên lại với nhau thôi nào 
DelayAutoCompleteTextView bookTitle = (DelayAutoCompleteTextView) findViewById(R.id.et_book_title);
bookTitle.setThreshold(THRESHOLD);
bookTitle.setAdapter(new BookAutoCompleteAdapter(this)); // 'this' is Activity instance
bookTitle.setLoadingIndicator(
            (android.widget.ProgressBar) findViewById(R.id.pb_loading_indicator));
bookTitle.setOnItemClickListener(new AdapterView.OnItemClickListener() {
        @Override
        public void onItemClick(AdapterView<?> adapterView, View view, int position, long id) {
            Book book = (Book) adapterView.getItemAtPosition(position);
            bookTitle.setText(book.getTitle());
        }
    });
- bookTitle.setLoadingIndicator (THRESHOLD) chỉ định số lượng ký tự tối thiểu mà người dùng phải nhập vào hộp chỉnh sửa trước khi danh sách thả xuống được hiển thị.
- bookTitle.setLoadingIndicator((android.widget.ProgressBar) findViewById(R.id.pbloadingindicator)) liên kết ProgressBar với DelayAutoCompleteTextView
Điều quan trọng là phải đặt OnItemClickListener cho DelayAutoCompleteTextView và đặt giá trị chính xác cho trường đầu vào đích. Nếu không làm điều đó, một chuỗi thu được thông qua việc gọi phương thức toString () của một đối tượng được chọn sẽ được dán vào trường AutoCompleteTextView .
Trên đây là cách sử dụng AutoCompleteTextView với suggestions là giữ liệu load từ trên mạng. Mong đã giúp được các bạn phần nào đó. 
Bài viết này được tham khảo từ Đây.
All rights reserved
