Unit test Network Layer in iOS
Bài đăng này đã không được cập nhật trong 2 năm
Đa số các ứng dụng mobile đều thực hiện kết nối đến server để lấy hay gởi thông tin, vì vậy việc viết unit test cho network layer cũng vô cùng quan trọng đối với ứng dụng của bạn. Bài viết sau sẽ giới thiệu cách test network layer, các bạn cũng sẽ biết được cách thiết kế code phù hợp để việc quản lý code và viết test được dễ dàng hơn.
Demo project này sẽ thực hiện việc gởi một request đến trang github để lấy thông tin của user:
GET https://api.github.com/users/:username
Nếu click vào https://api.github.com/users/trentm bạn sẽ nhận được response theo định dạng json như sau:
{
  "login": "trentm",
  "id": 46866,
  "avatar_url": "https://avatars.githubusercontent.com/u/46866?v=3",
  "gravatar_id": "",
  "url": "https://api.github.com/users/trentm",
  "html_url": "https://github.com/trentm",
  "followers_url": "https://api.github.com/users/trentm/followers",
  "following_url": "https://api.github.com/users/trentm/following{/other_user}",
  "gists_url": "https://api.github.com/users/trentm/gists{/gist_id}",
  "starred_url": "https://api.github.com/users/trentm/starred{/owner}{/repo}",
  "subscriptions_url": "https://api.github.com/users/trentm/subscriptions",
  "organizations_url": "https://api.github.com/users/trentm/orgs",
  "repos_url": "https://api.github.com/users/trentm/repos",
  "events_url": "https://api.github.com/users/trentm/events{/privacy}",
  "received_events_url": "https://api.github.com/users/trentm/received_events",
  "type": "User",
  "site_admin": false,
  "name": "Trent Mick",
  "company": "Joyent",
  "blog": "http://trentm.com/",
  "location": "Vancouver, Canada",
  "email": null,
  "hireable": null,
  "bio": null,
  "public_repos": 117,
  "public_gists": 65,
  "followers": 229,
  "following": 4,
  "created_at": "2009-01-15T18:20:48Z",
  "updated_at": "2017-01-05T10:14:44Z"
}
Bây giờ, hãy bắt đầu triển khai việc code và test.
1. Thiết kế protocol
Ta khai báo class APIServiceProtocol chứa các thiết lập chung và tạo request cho toàn bộ ứng dụng, trong demo này ta sử dụng framework Alamofire để gởi request lên server:
protocol APIServiceProtocol {
    func requestUserWithUsername(input: UserDataInput, completion: @escaping (_ result: UserDataResult) -> Void)
}
class APIService: APIServiceProtocol {

    private func request(input: APIInputBase, completion: @escaping (_ value: AnyObject?, _ error: NSError?) -> Void) {
        func request() {
            print("Request: ", input.url)
            let url = input.url
            Alamofire.request(url, method: input.requestType, parameters: input.body, encoding: input.encoding)
                .responseJSON (completionHandler: {(response) in
                    switch response.result {
                    case .success(let value):
                        completion(value as AnyObject, nil)
                    case .failure(let error):
                        completion(nil, error as NSError?)
                    }
                })
        }

        request()
    }

    func requestUserWithUsername(input: UserDataInput, completion: @escaping (_ result: UserDataResult) -> Void) {
        request(input: input, completion: {(value, error) -> Void in
            if let value = value as? [String: AnyObject], let userData = UserData(JSON: value) {
                completion(UserDataResult.success(user: userData))
            }
            else if let error = error {
                completion(UserDataResult.failure(error: error))
            }
            else {
                completion(UserDataResult.failure(error: nil))
            }
        })
    }
}
Trong đó APIInputBase được khai báo như sau:
import UIKit
import Alamofire

class APIInputBase: NSObject {

    var url = ""
    var requestType = Alamofire.HTTPMethod.get
    var body: [String: AnyObject]?
    var headers = ["Content-Type": "application/json; charset=utf-8"]

    var encoding: ParameterEncoding {
        switch requestType {
        case .get:
            return URLEncoding()
        default:
            return JSONEncoding()
        }
    }

    func setup(url: String, requestType: Alamofire.HTTPMethod) {
        self.url = url
        self.requestType = requestType
    }
}
UserDataResult là một enum khai báo các trường hợp closuer success và error:
enum UserDataResult {
    case success(user: UserData)
    case failure(error: NSError?)
}
Và UserData là một model class lưu trữ các thông tin của user lấy được từ kết quả json, class này kế thừa từ Mappble class của ObjectMapper giúp map dữ liệu một cách nhanh chóng từ json object sang model object:
import UIKit
import ObjectMapper

class UserData: Mappable {

    var name: String = ""
    var bio: String = ""
    var email: String = ""
    var numberOfFollowers: Int = 0
    var numberOfFollowings: Int = 0

    init() {}

    required init?(map: Map) {}

    func mapping(map: Map) {
        name <- map["name"]
        bio <- map["bio"]
        email <- map["email"]
        numberOfFollowers <- map["followers"]
        numberOfFollowings <- map["following"]
    }
}
Tiếp theo, để request thông tin user, ta tạo ra protocol UserServiceProtocol để gọi đến phương thức getUser:
protocol UserServiceProtocol {
    func getUserWithName(username: String, completion: @escaping (_ result: UserData?, _ error: NSError?) -> Void)
}
2. Thực thi protocol:
class UserService: UserServiceProtocol {
    let api = APIService()

    func getUserWithName(username: String, completion: @escaping (_ result: UserData?, _ error: NSError?) -> Void) {
        let input = UserDataInput(username: username)
        api.requestUserWithUsername(input: input, completion: { (result) in
            switch result {
            case .success(let user):
                completion(user, nil)
            case .failure(let error):
                completion(nil, error)
            }
        })
    }
}
3. Sử dụng protocol:
Bây giờ ta chỉ cần khai báo một biến thuộc class UserService và gọi đến phương thức getUserWithName() là có thể lấy được thông tin về user đó:
let userService = UserService()
userService.getUserWithName(username: "trentm", completion: { (user, error) in
            print("Username: ", user.name)
})
4. Viết unit test:
Việc test sẽ tập trung vào những vấn đề sau:
- Request có gọi đến đúng url không?
- Khi request thành công, kết quả json có được chuyển đổi đúng sang model tương ứng không?
- Khi request thất bại, nó có trả về lỗi tương ứng không?
Ta sẽ sử dụng một framework HTTP stubbing là Mockingjay, ta có thể nói:
Stub request với url A và trả về json file B, hay Stub request với url A và trả về error B.
Stub có thể hiểu là:
Stub event A và thực hiện custom action B (Khi event A xảy ra, đừng làm theo cách cũ, mà hãy thực hiện một custom action B)
Khi đó ta có thể dịch câu:
Stub request với url A và trả về json file B
Sang:
Khi có một request được gởi đến url A, đừng gởi nó thông qua network. Thay vào đó, sử dụng một file B có sẵn ở local để làm response trả về.
Vì vậy để viết unit test cho network request, ta cần thực hiện các việc theo thứ tự sau:
- Stub request và trả về custom json file
- Gởi network request thật sự sử dụng protocol
- Mô tả kết quả mong đợi cho cả hai trường hợp thành công và thất bại
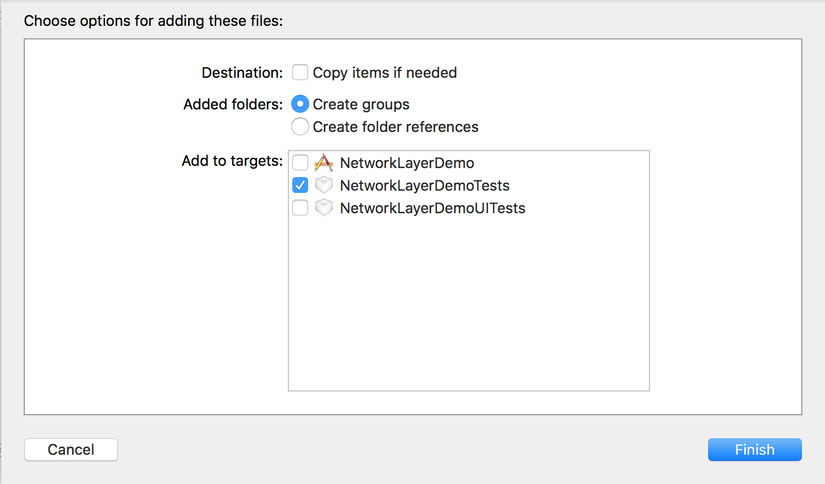
Thiết lập project cho unit test Thêm những pods sau vào test target trong Podfile và cài lên:
- Quick: Behavior-driven development (BDD) framework cho Swift
- Nimble: giúp viết test assertion dễ đọc như ngôn ngữ con người
- Mockingjay: stub network request trong Swift
Tạo file spec Tạo file UserServiceSpec trong test target để viết các test case:
import Quick
import Nimble
import Mockingjay

class UserServiceSpec : QuickSpec {
  override func spec() {
    super.spec()

    describe("first test") {
      it("should pass") {
        expect(1).to(equal(1))
      }
    }
  }
}
Nhấn Cmd + U để chạy thử test file. Viết test gởi network request thật Ta sẽ bắt đầu với trường hợp thành công trước.
override func spec() {
  super.spec()

  describe("getUserWithName") {
    context("success") {
      it("returns UserData") {
      }
    }
  }
}
Gọi đến network request thật bên trong it closure, lưu lại userData khi request trả về thành công và expect userData có value:
it("returns UserData") {
    var userData: UserData?
    let userService = UserService()
    userService.getUserWithName(username: "trentm", completion: { (user, error) in
        userData = user
    })

    expect(userData).toEventuallyNot(beNil())
}
Nếu chạy test case lên, kết quả sẽ fail do request này gởi đến network nên sẽ mất một khoảng thời gian trước khi response về, nên câu lệnh so sánh sẽ bị fail. Nếu ta thêm timeout vào, test case này sẽ chạy thành công:
expect(userData).toEventuallyNot(beNil(), timeout: 20)
Tuy nhiên ta sẽ không gởi request thật mà sẽ trả về response là file json được lưu local.
Tạo stubbed response file Tạo trong test target Response folder để chứa file response json. Ta có thể sử dụng terminal để tạo mới file bằng cách sau:
cd NetworkLayerDemoTests
touch GetUserSuccess.json
open GetUserSuccess.json
Lấy kết quả trả về từ đường link https://api.github.com/users/trentm đưa vào file GetUserSucccess.json và kéo file này vào Response folder trong Xcode.
Stub network response Quay trở lại với test case ta đã viết ở trên, ta sẽ stub network request để trả về response là file GetUserSucccess.json thay vì phải gởi request thật đến network.
it("returns UserData") {

    var userData: UserData?

    // 1.
    let path = Bundle(for: type(of: self)).path(forResource: "GetUserSuccess", ofType: "json")!

    // 2.
    let data = NSData(contentsOfFile: path)!

     // 3.
     self.stub(uri("https://api.github.com/users/trentm"), jsonData(data as Data))

     let userService = UserService()
     userService.getUserWithName(username: "trentm", completion: { (user, error) in
         userData = user
     })

     expect(userData).toEventuallyNot(beNil())
}
Trong đoạn code trên ta đã thực hiện một số việc sau:
- Lấy đường dẫn của file GetUserSuccess.json
- Đọc nội dung file sang NSData
- Stub url để mỗi lần có request đến đường link https://api.github.com/users/trentm, nó sẽ không gởi request thật mà trả về file json data như ta mong đợi.
Bấm Cmd + U, test case sẽ chạy thành công.
Expect protocol sẽ parse file json đúng Ta sẽ viết thêm một số expectation để kiểm tra xem protocol có parse đúng file json sang UserData model không.
expect(userData?.name) == "Trent Mick"
expect(userData?.numberOfFollowers) == 229
expect(userData?.numberOfFollowings) == 4
Test trường hợp xảy ra lỗi Trước hết, ta khai báo error context:
override func spec() {
  super.spec()

  describe("getUserWithName") {
    context("success") {
      it("returns UserData") {
        //...
      }
    }

    context("error") {
      it("returns error") {

      }
    }
  }
}
Stub request bằng custom error:
let error = NSError(domain: "Describe your error here", code: 404, userInfo: nil)
self.stub(uri("https://api.github.com/users/trentm"), failure(error))
Test case sẽ giống như sau:
it("returns error") {
    var returnedError: NSError?

     let error = NSError(domain: "Describe your error here", code: 404, userInfo: nil)

     self.stub(uri("https://api.github.com/users/trentm"), failure(error))

     let userService = UserService()
     userService.getUserWithName(username: "trentm", completion: { (user, error) in
         returnedError = error
     })

    expect(returnedError).toEventuallyNot(beNil())
 }
Đến đây, ta đã nắm được cơ bản cách stub và test network layer cho ứng dụng iOS, hy vọng bài viết này sẽ giúp các bạn hiểu được cách viết và có thể áp dụng vào dự án của mình.
All rights reserved
