Hướng dẫn Angular 2 cho người mới bắt đầu - Phần 2
Bài đăng này đã không được cập nhật trong 9 năm
PHẦN 2: TẠO ỨNG DỤNG VỚI ANGULAR 2 + TYPESCRIPT
Phần 1 mình đã hướng dẫn bạn cài đặt môi trường để có thể phát triển ứng dụng với Angular 2. Trong phần này, chúng ta sẽ đi vào thực hành Angular 2. Để bắt đầu tạo ứng dụng thực hành với Angular 2, các bạn có thể tham khảo về cách học một công nghệ mới và xin hãy chia sẽ với mình về ý kiến của bạn.
OK, bắt đầu thực hành thôi nào.
Bước 1: tạo thư mục vơi tên “AngularDemo“.
Bước 2: Mở Visual Studio Code (VS Code) > File > Open Folder… > tìm và chọn thư mục “AngularDemo”.
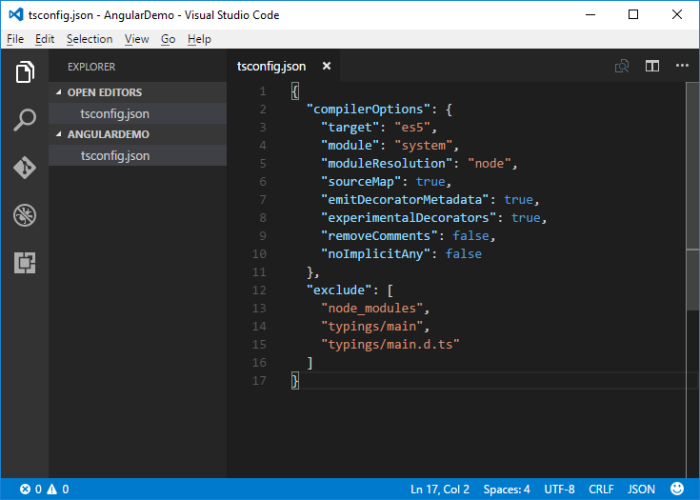
Bước 3: Click vào button New File > đặt tên file là tsconfig.json với nội dung như sau:
{
  "compilerOptions": {
    "target": "es5",
    "module": "system",
    "moduleResolution": "node",
    "sourceMap": true,
    "emitDecoratorMetadata": true,
    "experimentalDecorators": true,
    "removeComments": false,
    "noImplicitAny": false
  },
  "exclude": [
    "node_modules",
    "typings/main",
    "typings/main.d.ts"
  ]
}
Bước 4: Tạo file typings.json với nội dung:
{
"globalDependencies": {
"core-js": "registry:dt/core-js#0.0.0+20160602141332",
"jasmine": "registry:dt/jasmine#2.2.0+20160621224255",
"node": "registry:dt/node#6.0.0+20160621231320"
}
}
Bước 5: Tạo file package.json với nội dung như sau:
{
"name": "angular2-demo",
"version": "1.0.0",
"scripts": {
"start": "concurrent \"npm run tsc:w\" \"npm run lite\" ",
"tsc": "tsc",
"tsc:w": "tsc -w",
"lite": "lite-server",
"typings": "typings",
"postinstall": "typings install"
},
"license": "ISC",
"dependencies": {
"angular2": "2.0.0-beta.7",
"systemjs": "0.19.22",
"es6-promise": "^3.0.2",
"es6-shim": "^0.33.3",
"reflect-metadata": "0.1.2",
"rxjs": "5.0.0-beta.2",
"zone.js": "0.5.15"
},
"devDependencies": {
"concurrently": "^2.0.0",
"lite-server": "^2.1.0",
"typescript": "^1.7.5",
"typings":"^0.6.8"
}
}
Bước 6: Nhấn Ctrl + ` để mở chế độ Terminal trong VS Code. Gõ lệnh: npm install
Bước 7: Trong VS Code nhấn nút tạo thư mục và đặt tên là app
Bước 8: Trong VS Code chọn thư mục app > nhấn nút tạo file và đặt tên appComponent.ts với nội dung:
import { Component, View } from "angular2/core";

@Component({
    selector: 'my-app'
})

@View({
    template: '<h2>My First Angular 2 App</h2>'
})

export class AppComponent{}
Bước 9: Tạo file với tên main.ts nội dung như sau:
import {bootstrap} from "angular2/platform/browser"
import {AppComponent} from "./environment_app.component"

bootstrap(AppComponent);
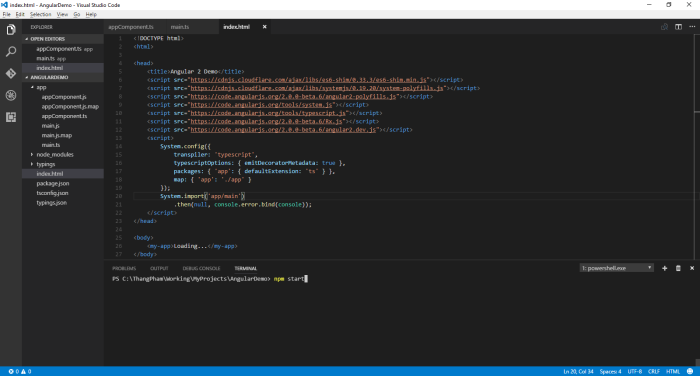
Bước 10: Tạo file index.html trong thư mục AngularDemo với nội dung như sau:
<!DOCTYPE html>
<html>

<head>
    <title>Angular 2 Demo</title>
    <script src="https://cdnjs.cloudflare.com/ajax/libs/es6-shim/0.33.3/es6-shim.min.js"></script>
    <script src="https://cdnjs.cloudflare.com/ajax/libs/systemjs/0.19.20/system-polyfills.js"></script>
    <script src="https://code.angularjs.org/2.0.0-beta.6/angular2-polyfills.js"></script>
    <script src="https://code.angularjs.org/tools/system.js"></script>
    <script src="https://code.angularjs.org/tools/typescript.js"></script>
    <script src="https://code.angularjs.org/2.0.0-beta.6/Rx.js"></script>
    <script src="https://code.angularjs.org/2.0.0-beta.6/angular2.dev.js"></script>
    <script>
        System.config({
            transpiler: 'typescript',
            typescriptOptions: { emitDecoratorMetadata: true },
            packages: { 'app': { defaultExtension: 'ts' } },
            map: { 'app': './app' }
        });
        System.import('app/main')
            .then(null, console.error.bind(console));
    </script>
</head>

<body>
    <my-app>Loading...</my-app>
</body>

</html>
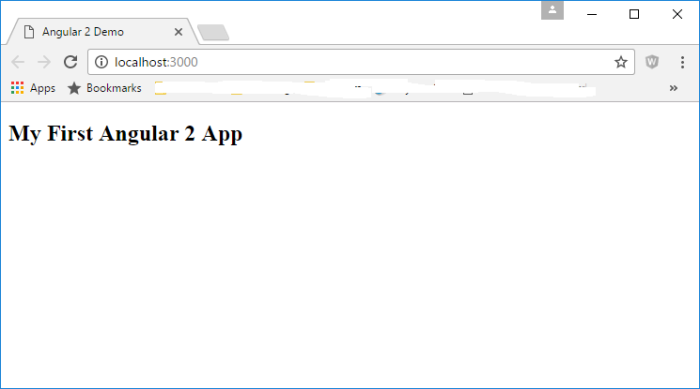
Bước 11: Để chạy ứng dụng bạn gõ lệnh: npm start trong Terminal. Sau đó nhấn Enter.
Đây là kết quả của chúng ta:
Trong phần phần 3, mình sẽ giải thích cho các bạn hiểu rõ các tại sao và ý nghĩa mà chúng ta làm ở từng bước trên.
Tham khảo: https://thangphampt.wordpress.com
All rights reserved
