Dynamic Table View Cell Height and Auto Layout Part 1
Bài đăng này đã không được cập nhật trong 4 năm
Dựa theo tài liệu: http://www.raywenderlich.com/73602/dynamic-table-view-cell-height-auto-layout
iOS7 giới thiệu 1 delegate method rất quan trọng trong UITableViewDelegate:
- (CGFloat)tableView:(UITableView *)tableView estimatedHeightForRowAtIndexPath:(NSIndexPath *)indexPath;
Method này cho phép 1 table view tính toán chiều cao thực tế của mỗi cell cho đến khi mà table cần đến. Sau cùng, auto layout sẽ thực hiện công việc tính toán nặng nề 1 cách động chiều cao của cell
Đầu tiên chúng ta cần download starter project ở đây: http://cdn4.raywenderlich.com/wp-content/uploads/2014/07/DeviantArtBrowser_Starter.zip
Project được sử dụng như 1 ứng dụng để duyệt trang web http://deviantart.com/, đây là 1 dạng blog nơi các nghệ sĩ chia sẻ tác phẩm của họ. Nó cung cấp 1 Media RSS endpoint: https://www.deviantart.com/developers/rss, giúp chúng ta có thể sử dụng để truy nhập các deviations và post của các nghệ sĩ.
Project này sử dụng CocoaPods, vì thế bạn hãy open file DeviantArtBrowser.xcworkspace, pods đã nằm trong project nên ta ko cần phải run pod install. Starter project đã hoàn toàn download nội dung từ Deviant Art RSS feed, nhưng chưa hiển thị dúng cách, và đây sẽ là phần việc của chúng ta. Open file Main.storyboard (trong group Views), và bạn sẽ thấy 4 scenes như sau:
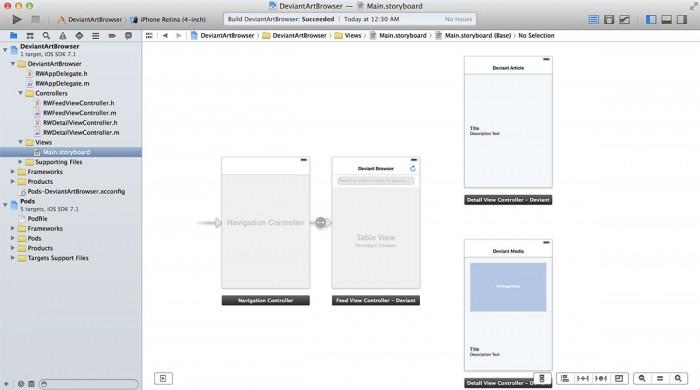
Từ trái sang phải, các scene lần lượt là:
- top-level navigation controller
- RWFeedViewController, titled: Deviant Browser
- 2 scenes for RWDetailViewController (1 là để display chỉ text, và 1 là để display cả text và image), với tên là Deviant Article và Deviant Media
Build và run. Bạn có thể thấy console log output, nhưng chưa có gì hoạt động. Log output sẽ trông như sau:
2014-05-28 00:52:01.588 DeviantArtBrowser[1191:60b] GET 'http://backend.deviantart.com/rss.xml?q=boost%3Apopular'

2014-05-28 00:52:03.144 DeviantArtBrowser[1191:60b] 200 'http://backend.deviantart.com/rss.xml?q=boost%3Apopular' [1.5568 s]
Nếu bạn chạy Xcode7 trên simulator iOS9 thì bạn cần thêm đoạn code sau vào file .plist để khắc phục lỗi về http:
	<key>NSAppTransportSecurity</key>
	<dict>
		<key>NSAllowsArbitraryLoads</key>
		<true/>
		<key>NSExceptionDomains</key>
		<dict>
			<key>http://backend.deviantart.com</key>
			<dict>
				<key>NSIncludesSubdomains</key>
				<true/>
				<key>NSTemporaryExceptionAllowsInsecureHTTPLoads</key>
				<true/>
				<key>NSTemporaryExceptionMinimumTLSVersion</key>
				<string>TLSv1.1</string>
			</dict>
		</dict>
	</dict>
App gọi 1 network request và nhận về 1 response, nhưng không làm gì với response đó cả. Bây giờ, open file RWFeedViewController.m, và chú ý tới hàm parseForQuery:
  [self.parser parseRSSFeed:RWDeviantArtBaseURLString
                 parameters:[self parametersForQuery:query]
                    success:^(RSSChannel *channel) {
                      [weakSelf convertItemsPropertiesToPlainText:channel.items];
                      [weakSelf setFeedItems:channel.items];

                      [weakSelf reloadTableViewContent];
                      [weakSelf hideProgressHUD];
                    } failure:^(NSError *error) {
                      [weakSelf hideProgressHUD];
                      NSLog(@"Error: %@", error);
                    }];
self.parser là 1 thể hiện của RSSParser, mà là 1 phần của MediaRSSParser: https://github.com/JRG-Developer/MediaRSSParser
Method này bắt đầu 1 network request tới Deviant Art để nhận về RSS feed, và trả về 1 RSSChannel tới success block. Sau khi formatting: chuyển từ HTML sang text thông thường, success sẽ được lưu trong channel.items như 1 local property và đc gọi là feedItems. Mảng channel.items chứa các RSSItem objects, mà mỗi 1 object đó đại diện cho 1 item riêng lẻ trong 1 RSS feed. Như vậy là chúng ta đã biết những gì chúng ta phải display trên table view: mảng feedItems.
Create a Basic Custom Cell: Add thêm 1 class mới voà DeviantArtBrowser và đặt tên là RWBasicCell, và là subclass của UITableViewCell, chắc chắn là tạo cả file xib nữa (đương cmn nhiên ngôn ngữ là objective-C).
Open RWBasicCell.h, và thêm 2 properties sau ngày dưới dòng @interface:
@property (nonatomic, weak) IBOutlet UILabel *titleLabel;
@property (nonatomic, weak) IBOutlet UILabel *subtitleLabel;
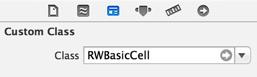
Open Main.storyboard, drag&drop a new UITableViewCell vào trong table view của RWFeedViewController. Set "Custom Class" của cell là RWBasicCell.
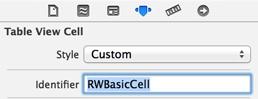
Set "Indentifier" (Reuse Identifier) là RWBasicCell.
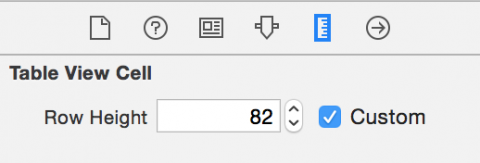
Set Row Height của cell là 82
Drap&drop a new UILabel vào trong cell, set text cho nó là "Title".
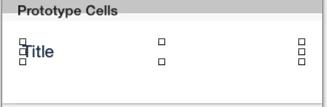
Set title label's lines là 0 (tức là unlimited)
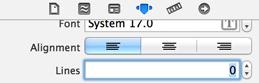
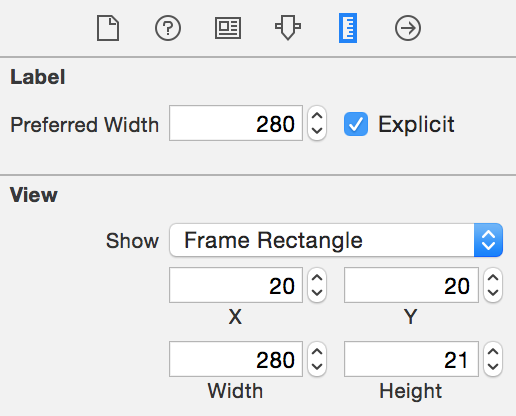
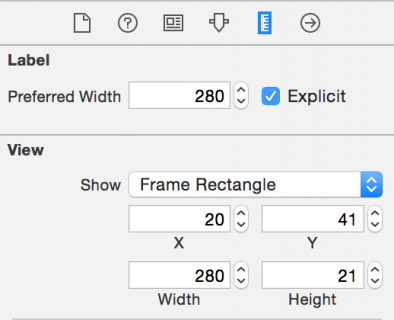
Set title label's preferred width và frame như hình dưới, và chắc chắn là đã check vào explicit:
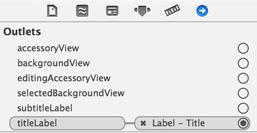
Conect titlelabel outlet của RWBasicCell tới title label trong cell
Tiếp theo, drag&drop 1 UILabel nữa vào cell, ngay bên dưới title Label, và set text là "Subtitle"
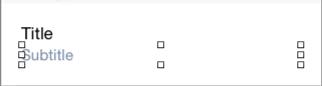
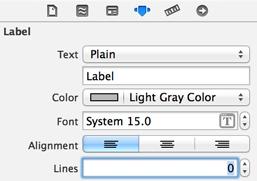
Change the preferred width, frame, label's color, font, Lines và connect outlet như RWBasicCell

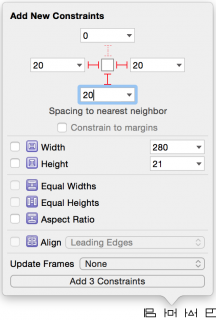
Chúng ta đã lên layout và configured RWBasicCell. Bây h chúng ta sẽ cần phải add auto layout constraints, như hình sau:
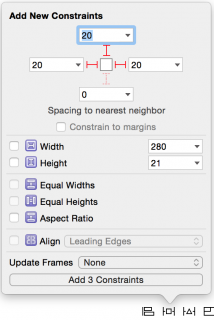
Autolayout như trên sẽ chắc chắn rằng, ko cần biết cell to nhỏ ntn, title label sẽ luôn luôn:
- cách top 20 points
- trải dài toàn bộ chiều rộng của cell, trừ đi 2- point padding mỗi bên trái phải
Còn autolayout cóntraints của subtitle label như sau:
Chú ý: điẻu quan trọng để có thể auto layout trong 1 UITableViewCell đó là đảm bảo rằng nhưgx constraint phải pin mỗi subview theo tất cả các hướng - tức là mỗi subview phải có leading, top, trailing và bottom cónstraints. Hơn nữa, cần phải có 1 "clear line" của constraints đi từ top tới bottom của contentView. Theo cách đó. autolayout sẽ tính toán chính xác chiều cao của contnentView, dựa trên subviews của nó.
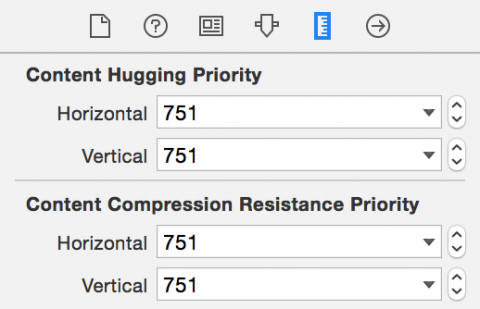
Tiếp theo set Vertical Spacing để pin top của subtitle label với bottom của title label. Trên title label, set Horizontal và Vertical constrains cho Content Hugging Priority và Content Compression Resistance Priority là 751.
Trên subtitle label, set Horizontal và Vertical constrains cho Content Hugging Priority và Content Compress Resistance Priority là 750
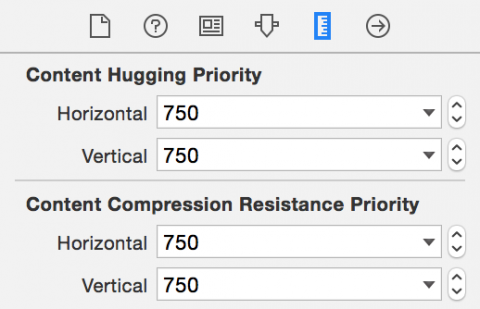
Điều này để nói cho autolayout biết rằng ta muốn các labels có kích thước fit với text của chúng, và ưu tiên constraints của title label hơn so với constraints của subtitle label. Cuối cùng, auto layout constrains của RWBasicCell sẽ nhìn như sau:
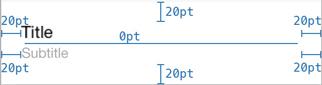
Chúng ta có thể thấy rằng: tất cả các subview của cell (2 label) để đã có constraint đc pin theo cả 4 phía, và constraint đi từ top xuống bottom như sau: titleLabel cách top 20 points, titleLabel lại connect với subtitleLabel bằng khoảng cách 0 point, và subtitleLabel connects tới bottom 2 point. Như vậy autolayout đã có thể tính toán chiều cao của cell.
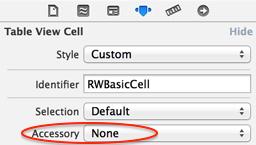
Tiếp theo ta cần phải tạo 1 segue từ RWBasicCell tới scene Deviant Article: Chọn RWBasicCell và control-drag tới DeviantArricle scene. Chọn push từ Selection Segue options. Interface Builder sẽ tự động chuyển cell Accessory thành Disclosure Indicator, và trông sẽ ko đc đẹp mắt với design của app. Chuyển accessory thành None.
Implement UITableView Delegate and Data Source
thêm đoạn code sau vào file RWFeedViewController.m, ngay bên dưới đoạn #import:
#import "RWBasicCell.h"
static NSString * const RWBasicCellIdentifier = @"RWBasicCell";
Chúng ta sử dụng RWBasicCell trong cả data source và delegate methods và cầnn phải identify nó bằng Reuse identify mà ta đã set trong RWBasicCellIdentifier trong StoryBoard. Tiếp theo, implement các methods của data source:
- (NSInteger)tableView:(UITableView *)tableView numberOfRowsInSection:(NSInteger)section {
  return [self.feedItems count];
}
- (UITableViewCell *)tableView:(UITableView *)tableView cellForRowAtIndexPath:(NSIndexPath *)indexPath {
    return [self basicCellAtIndexPath:indexPath];
}

- (RWBasicCell *)basicCellAtIndexPath:(NSIndexPath *)indexPath {
  RWBasicCell *cell = [self.tableView dequeueReusableCellWithIdentifier:RWBasicCellIdentifier forIndexPath:indexPath];
  [self configureBasicCell:cell atIndexPath:indexPath];
  return cell;
}

- (void)configureBasicCell:(RWBasicCell *)cell atIndexPath:(NSIndexPath *)indexPath {
  RSSItem *item = self.feedItems[indexPath.row];
  [self setTitleForCell:cell item:item];
  [self setSubtitleForCell:cell item:item];
}

- (void)setTitleForCell:(RWBasicCell *)cell item:(RSSItem *)item {
  NSString *title = item.title ?: NSLocalizedString(@"[No Title]", nil);
  [cell.titleLabel setText:title];
}

- (void)setSubtitleForCell:(RWBasicCell *)cell item:(RSSItem *)item {
  NSString *subtitle = item.mediaText ?: item.mediaDescription;

  // Some subtitles can be really long, so only display the
  // first 200 characters
  if (subtitle.length > 200) {
    subtitle = [NSString stringWithFormat:@"%@...", [subtitle substringToIndex:200]];
  }

  [cell.subtitleLabel setText:subtitle];
}
- Trong method tableView:cellForRowAtIndexPath:, ta gọi basicCellAtIndexPath: để lấy đc RWBasicCell. Method này nhằm mục đích giúp chúng ta dễ dàng hơn trong việc thêm vào các loại custom cell về sau nếu như tạo ra 1 helper method thay vì return cell trực tiếp bởi datasource method.
- Trong method basicCellAtIndexPath: , ta đã dequeue 1 RWBasicCell, và config nó với configureBasicCell:atIndexPath:, và cuối cùng return Cell đã đc configure.
- Trong method configureBasicCell:atIndexPath:, ta lấy 1 tham chiếu tới item ở vị trị indexPath, mà sẽ get và set titleLabel và subtitleLabel text trong Cell.
Tiếp theo, thay thế method tableView:heightForRowAtIndexPath: với đoạn code dưới đây:
- (CGFloat)tableView:(UITableView *)tableView heightForRowAtIndexPath:(NSIndexPath *)indexPath {
  return [self heightForBasicCellAtIndexPath:indexPath];
}

- (CGFloat)heightForBasicCellAtIndexPath:(NSIndexPath *)indexPath {
  static RWBasicCell *sizingCell = nil;
  static dispatch_once_t onceToken;
  dispatch_once(&onceToken, ^{
    sizingCell = [self.tableView dequeueReusableCellWithIdentifier:RWBasicCellIdentifier];
  });

  [self configureBasicCell:sizingCell atIndexPath:indexPath];
  return [self calculateHeightForConfiguredSizingCell:sizingCell];
}

- (CGFloat)calculateHeightForConfiguredSizingCell:(UITableViewCell *)sizingCell {
  [sizingCell setNeedsLayout];
  [sizingCell layoutIfNeeded];

  CGSize size = [sizingCell.contentView systemLayoutSizeFittingSize:UILayoutFittingCompressedSize];
  return size.height + 1.0f; // Add 1.0f for the cell separator height
}
- Trong method tableView:heightForRowAtIndexPath:, tương tự như trong data source method, chúng ta gọi 1 method khác mà sẽ thực hiện việc tính toán, heightForBasicCellAtIndexPath:. 1 lần nữa, điều này giúp cho ghúng ta dễ dàng hơn trong việc thêm vào các custom cells sau này.
- method heightForBasucCellAtIndexPath: khá là thú vị
- method này khởi tạo 1 sizngCell using GCD để chắc chắn rằng nó sẽ chỉ tạo 1 lần duy nhất
- gọi method configureBasicCell:atIndexPath: để configure cell
- Giá trị trả về là việc tinnhs toán của hàm calculateHeightForConfiguredSizingCell:,
- Cuối cùng trong method calculateHeightForConfiguredSizingCell:,
- Yêu cầu cell thực hiện layout content của nó bằng cách gọi setNeedsLayout và layoutIfNeeded.
- Yêu cầu auto layout tính toán systemLayoutSizeFittingSize:, với parameter triuyeenf vào là UILayoutFittingCompressedSize, và nó có nghĩa là " sử dụng size nhỏ nhất có thể" mà fit với auto layout constraints.
- Return height của cell đã được tính toán cộng thêm cho 1 chiều cao của separator.
Build&Run app, bạn sẽ thấy 1 table vew như sau: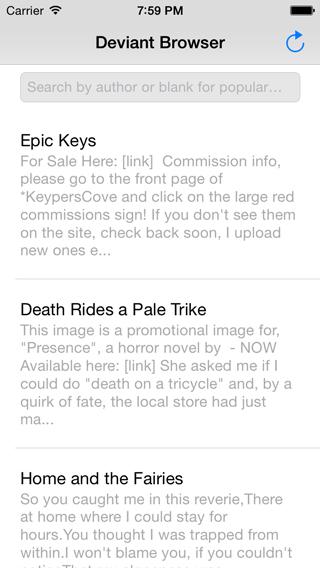
All rights reserved
