Xây dụng web app sử dụng Python Flask và Google App Engine
Bài đăng này đã không được cập nhật trong 6 năm
 Nếu bạn xây dụng môt trang web với thời gian rất ngắn sử dụng Python thì Flask là lựa chọn tuyệt vời.
Flask là một web framework(còn biết đến là microframework) nhỏ và mạnh mẽ. Nó rất dễ để học và code rất đơn giản. Nó rất dễ để cho người mới bắt đầu.
Trước khi vào project, hiểu biết của tôi về Python chủ yếu là về Data Science. Và tôi xây dựng ứng dụng này chỉ trong vài giờ.

 Trong bài hướng dẫn này, làm cách nào để xây dụng một ứng dụng thời tiết đơn giản với dữ liệu động với một API. Bài hướng dẫ này là điểm khởi đầu tuyệt với cho người mới bắt đầu. Bạn sẽ học xậy dụng nội dung động bằng API và deploy nó lên google cloud.
Để tạo ứng dụng thời tiết, chúng ta sẽ cần một API key từ Open Weather Map. Ở phiên bản miễn phí cho phép gọi 60 lần mỗi phút, nhưng thế là quá đủ cho ứng dụng này. The Open Weather Map có icon khá là xấu. Chúng ta sẽ thay thế chúng bằng 200+ icon thời tiết từ Erik Flowers.
Trong bài hướng dẫn này, làm cách nào để xây dụng một ứng dụng thời tiết đơn giản với dữ liệu động với một API. Bài hướng dẫ này là điểm khởi đầu tuyệt với cho người mới bắt đầu. Bạn sẽ học xậy dụng nội dung động bằng API và deploy nó lên google cloud.
Để tạo ứng dụng thời tiết, chúng ta sẽ cần một API key từ Open Weather Map. Ở phiên bản miễn phí cho phép gọi 60 lần mỗi phút, nhưng thế là quá đủ cho ứng dụng này. The Open Weather Map có icon khá là xấu. Chúng ta sẽ thay thế chúng bằng 200+ icon thời tiết từ Erik Flowers.
Bài hướng dẫn này chúng ta tập trung vào: (1) css cơ bản, (2) HTML cơ bản với Jinja, và (3) deploy nó lên Google clound Các bước thực hiện sẽ được liệt kê dưới đây:
- Bước 0: cài đặt Flask
- Bước 1: Xây dựng cấu trúc app
- Bước 2: Tạo code chính với API request
- Bước 3: tạo 2 page ứng dụng với Jinja
- Bước 4: Deploy ở local
- Bước 5: Deploy ở google cloud
Bước 0 - cài đặt Flask và thư viện chúng ta sẽ sử dụng
Chúng ta sẽ xây dụng ứng dụng sử dụng một virtual environment
- Chạy cmd với quyền admin. Không sử dụng quyền admin thì chúng ta không thế sử dụng pip
- Cài đặt virtualenv and virtualenvwrapper-win với PIP. Nếu bạn đẵ có system libraries thì hãy nhảy sang bước tiếp theo.
#Optional
pip install virtualenvwrapper-win
pip install virtualenv
- Tạo thư mục WeatherApp và tạo virtual env
#Mandatory
mkdir WeatherApp
cd WeatherApp
virtualenv venv
- active virtual enviroment bằng lện call trên window
call venv\Scripts\activate.bat
- Tạo file requirements.txt bao gồm các thư viện sử dụng
Flask==0.12.3
click==6.7
gunicorn==19.7.1
itsdangerous==0.24
Jinja2==2.9.6
MarkupSafe==1.0
pytz==2017.2
requests==2.13.0
Werkzeug==0.12.1
- Cài đặt các thư viện
pip install -r requiremnet.txt
Bước 1 - Xây dựng cấu trúc của ứng dụng
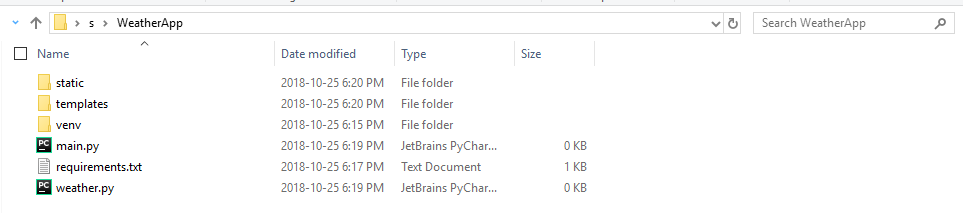
- Tạo 2 file Python (main.py, weather.py) và 2 thư mục (static và templates)
![]()
Bước 2 - Tạo phần code chính với API request
- Chỉnh file main.py theo code dưới và lưu lại
#!/usr/bin/env python
from pprint import pprint as pp
from flask import Flask, flash, redirect, render_template, request, url_for
from weather import query_api
app = Flask(__name__)
@app.route('/')
def index():
    return render_template(
        'weather.html',
        data=[{'name':'Toronto'}, {'name':'Montreal'}, {'name':'Calgary'},
        {'name':'Ottawa'}, {'name':'Edmonton'}, {'name':'Mississauga'},
        {'name':'Winnipeg'}, {'name':'Vancouver'}, {'name':'Brampton'},
        {'name':'Quebec'}])
@app.route("/result" , methods=['GET', 'POST'])
def result():
    data = []
    error = None
    select = request.form.get('comp_select')
    resp = query_api(select)
    pp(resp)
    if resp:
       data.append(resp)
    if len(data) != 2:
        error = 'Bad Response from Weather API'
    return render_template(
        'result.html',
        data=data,
        error=error)
if __name__=='__main__':
    app.run(debug=True)
- Tạo key miễn phí trên Open Weather Map
![]()
- Chỉnh sửa file weather.py theo code dưới (cập nhật API_KEY) và lưu lại

from datetime import datetime
import os
import pytz
import requests
import math
API_KEY = 'XXXXXXXXXXXXXXXXXXXXXXXXXXX'
API_URL = ('http://api.openweathermap.org/data/2.5/weather?q={}&mode=json&units=metric&appid={}')
def query_api(city):
    try:
        print(API_URL.format(city, API_KEY))
        data = requests.get(API_URL.format(city, API_KEY)).json()
    except Exception as exc:
        print(exc)
        data = None
    return data
Bước 3 - tạo page với jinja, Html, và css
- Tạo trang Html trong templates (weather.html)
<!doctype html>
<link rel="stylesheet" type="text/css" href="{{ url_for('static', filename='style.css') }}">
<div class="center-on-page">
<h1>Weather in a City</h1>
<form class="form-inline" method="POST" action="{{ url_for('result') }}">
   <div class="select">
    <select name="comp_select" class="selectpicker form-control">
    {% for o in data %}
     <option value="{{ o.name }}">{{ o.name }}</option>
    {% endfor %}
    </select>
   </div>
    <button type="submit" class="btn">Go</button>
</form>
- Tạo trang Html thứ 2 trong thư mục templates (result.html)
<!doctype html>
<link rel="stylesheet" type="text/css" href="{{ url_for('static', filename='style.css') }}">
<div class="center-on-page">
{% for d in data %}
 {% set my_string = "static/img/" + d['weather'][0]['icon']+ ".svg" %}
    <h1>
  <img src="{{ my_string }}" class="svg" fill="white" height="100" vertical-align="middle" width="100">
 </h1>
 <h1>Weather</h1>
 <h1>{{ d['name'] }}, {{ d['sys']['country'] }}</h1>
    <h1>{{ d['main']['temp']|round|int}} °C</h1>
{% endfor %}
- Thêm file css trong thư mục static (style.css)
body {
  color: #161616;
  font-family: 'Roboto', sans-serif;
  text-align: center;
  background-color: currentColor;
}
.center-on-page {
  position: absolute;
  top:50%;
  left: 50%;
  transform: translate(-50%,-50%);
}
h1 {
  text-align: center;
  color:#FFFFFF;
}
img {
  vertical-align: middle;
}
/* Reset Select */
select {
  -webkit-appearance: none;
  -moz-appearance: none;
  -ms-appearance: none;
  appearance: none;
  outline: 0;
  box-shadow: none;
  border: 0 !important;
  background: #2c3e50;
  background-image: none;
}
/* Custom Select */
.select {
  position: relative;
  display: block;
  width: 20em;
  height: 3em;
  line-height: 3;
  background: #2c3e50;
  overflow: hidden;
  border-radius: .25em;
}
select {
  width: 100%;
  height: 100%;
  margin: 0;
  padding: 0 0 0 .5em;
  color: #fff;
  cursor: pointer;
}
select::-ms-expand {
  display: none;
}
/* Arrow */
.select::after {
  content: '\25BC';
  position: absolute;
  top: 0;
  right: 0;
  bottom: 0;
  padding: 0 1em;
  background: #34495e;
  pointer-events: none;
}
/* Transition */
.select:hover::after {
  color: #f39c12;
}
.select::after {
  -webkit-transition: .25s all ease;
  -o-transition: .25s all ease;
  transition: .25s all ease;
}
button{
  -webkit-appearance: none;
  -moz-appearance: none;
  -ms-appearance: none;
  appearance: none;
  outline: 0;
  box-shadow: none;
  border: 0 !important;
  background: #2c3e50;
  background-image: none;
  width: 100%;
  height: 40px;
  margin: 0;
  margin-top: 20px;
  color: #fff;
  cursor: pointer;
  border-radius: .25em;
}
.button:hover{
  color: #f39c12;
}
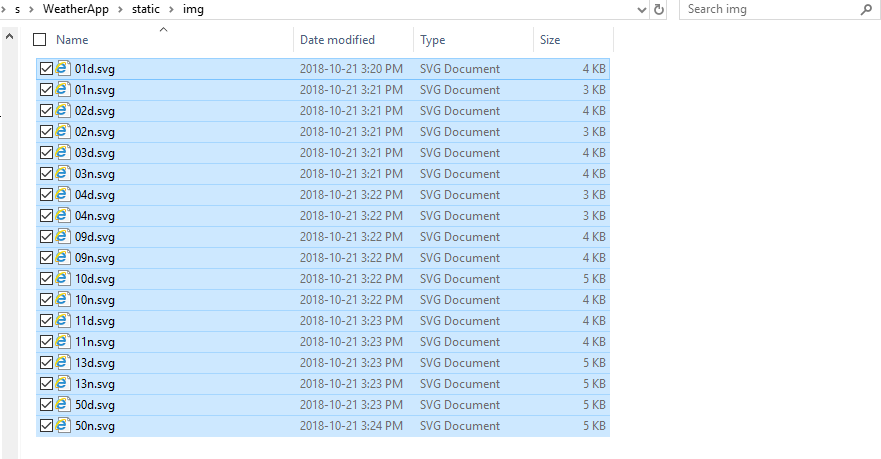
- Download ảnh vào thư mục con img trong static link
![]()
![]()
Bước 4 - Deploy và test ở local
Ở giai đoạn này, bạn đã thiết lập môi trường, cấu trúc, phụ trợ và giao diện. Điều duy nhất còn lại là khởi chạy ứng dụng của bạn và thưởng thức nó trên localhost của bạn.
- Chỉ cần khởi chạy main.py với Python
![]()

python main.py
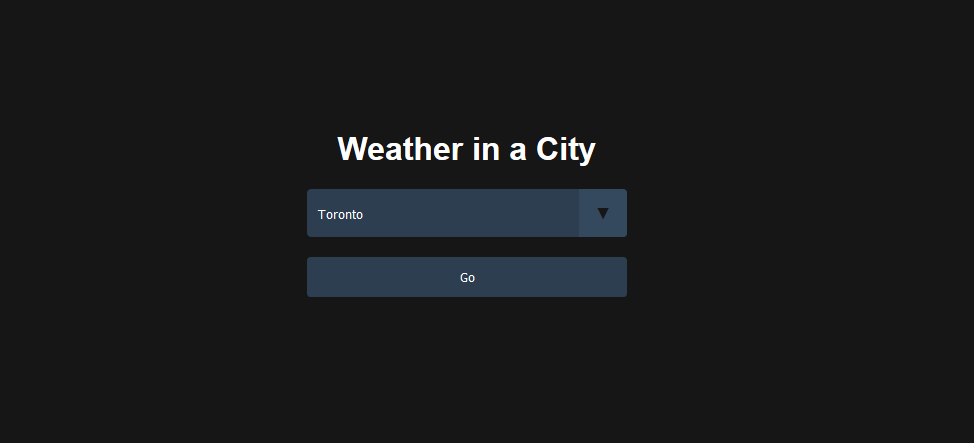
- Truy cập liên kết localhost được đề xuất trên cmd bằng Trình duyệt web của bạn (Chrome, Mozilla, v.v.). Bạn sẽ thấy ứng dụng thời tiết mới của bạn trực tiếp trên laptop của bạn
![]()
Bước 5 - Deploy lên google cloud
- Cài đặt SDK
- Kết nối với tài khoản Google Cloud Account
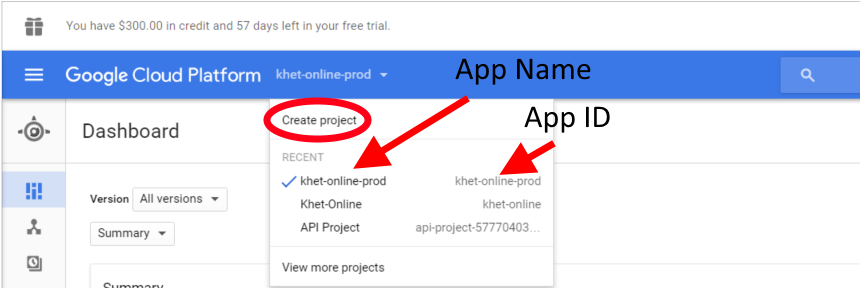
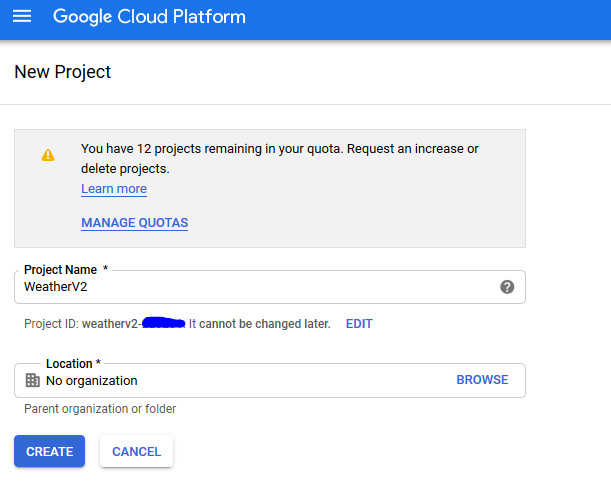
- Tạo project mới và lưu lại project id
![]()
![]()
- Tạo file app.yaml trong thư mục chính
runtime: python27
api_version: 1
threadsafe: true
handlers:
- url: /static
  static_dir: static
- url: /.*
  script: main.app

libraries:
  - name: ssl
    version: latest
- Tạo một file appengine_config.py trong thư mục chính
from google.appengine.ext import vendor
# Add any libraries installed in the "lib" folder.
vendor.add('lib')
- Cài đặt thư viện
pip install -t lib -r requirements.txt
- Deploy lên Google cloud sử dụng project ID
gcloud auth application-default login
gcloud config set project <PROJECT_ID>
gcloud init
gcloud app deploy app.yaml
link bài viết gốc
All rights reserved
