Xây dựng một trang web xinh đẹp với Angular 8 - Hướng dẫn từ A tới Z (phần cuối)
Bài đăng này đã không được cập nhật trong 6 năm
Phần 1: Xây dựng một trang web xinh đẹp với Angular 7 - Hướng dẫn từ A tới Z (phần 1)
Phần 2: Xây dựng một trang web xinh đẹp với Angular 8 - Hướng dẫn từ A tới Z (phần 2)
Trang thêm thành phố
Tiếp của phần trước, ta đã đi qua file HTML, CSS, giờ đến phần quan trọng nhất add.component.ts, đọc trước, mình sẽ giải thích phía dưới nhé
import {Component, OnDestroy, OnInit} from '@angular/core';
import {HttpClient} from '@angular/common/http';
import {WeatherService} from '../../services/weather/weather.service';
import {FbService} from '../../services/fb/fb.service';
import {first} from 'rxjs/operators';

@Component({
  selector: 'app-add',
  templateUrl: './add.component.html',
  styleUrls: ['./add.component.css']
})
export class AddComponent implements OnInit, OnDestroy {

  temp: number;
  city = 'Rome';
  state: string;
  capitals = [];
  selectedCity;
  cardCity;
  showNote = false;
  followedCM = false;
  sub1;


  constructor(public http: HttpClient, public weather: WeatherService, public fb: FbService) {
  }

  ngOnInit() {

    this.weather.getWeather(this.city).subscribe((payload: any) => {
      this.state = payload.weather[0].main;
      this.temp = Math.ceil(Number(payload.main.temp));
    });

    this.http.get('https://restcountries.eu/rest/v2/all').pipe((first())).subscribe((countries: Array<any>) => {
      countries.forEach((country: any) => {
        if (country.capital.length) {
          this.capitals.push(country.capital);
        }
      });
      this.capitals.sort();
    });

    this.sub1 = this.fb.getCities().subscribe((cities) => {
      Object.values(cities).forEach((city: any) => {
        if (city.name === 'Rome') {
          this.followedCM = true;
        }
      });
    });
  }

  selectCity(city) {
    if (this.capitals.includes(city)) {
      this.cardCity = city;
      this.showNote = false;
    } else if (city.leading > 0) {
      this.showNote = true;
    }
  }

  addCityOfTheMonth() {
    this.fb.addCity('Rome').subscribe(() => {
      this.followedCM = true;
    });
  }

  ngOnDestroy() {
    this.sub1.unsubscribe();
  }
}
Trên cùng, chúng ta import các thư viện cần thiết từ HttpClient và cả WeatherService cùng FbService, sau đó khai báo trong constructor.
Nếu bạn chưa biết đến khái niệm Lifecycle Hooks trong Angular, thì có thể hiểu đơn giản nó là các hàm được gọi đến vào các thời điểm cụ thể trong vòng đời của component. Ví dụ, ngOnInit() được khi vừa khởi tạo component, là nơi tuyệt vời để thực hiện các lệnh gọi API. Tương tự, ngOnDestroy() sẽ được gọi đến khi component bị destroy (khi người ta chuyển sang page khác), là nơi để unsubscribe khỏi mọi subscriptions đang diễn ra, để tránh rò rỉ bộ nhớ, kiểu như đang gọi API chưa xong mà chuyển trang chẳng hạn.
ngOnInit
this.weather.getWeather() : gọi hàm getWeather() của WeatherService để lấy thông tin thời tiết của thành phố người dùng tìm kiếm và lưu vào biến this.state và this.temp
this.http.get('https://restcountries.eu/rest/v2/all') : dùng HttpClient để gọi API resetcountries, trả về list các thành phố mà người dùng có thể tìm kiếm để hiện suggest khi người dùng gõ text.
this.sub1 = this.fb.getCities() : gọi đến database firebase để kiểm tra xem người dùng đã theo dõi thành phố của thàng chưa để hiển thị (Followed hoặc Follow +) bên trong button cũng như đổi style với [ngClass]
<button> {{followedCM ? "FOLLOWED" : "FOLLOW"}} </button>
Các hàm khác
selectCity : gọi đến khi người dùng gõ tên thành phố, nếu nó hợp lệ thì hiển thị thẻ thêm thành phố, nếu không thì hiển thị ghi chú cảnh báo cho người dùng (xem trong file HTML có đoạn *ngIf="showNote").
addCityOfTheMonth : gọi phương thức addCity trong fb.service.ts để thêm thành phố của tháng vào trong danh sách các thành phố của người dùng, lưu trong database Firebase Firestore
ngOnDestroy : như đã nói ở trên, dùng để unsubscribe các component đang subscribe.
Bước 3: Authentication thông qua AngularFire Lite 🔥
Installing AngularFire Lite 🔑
- Chạy lệnh:
npm i angularfire-lite - Lưu các config trong file
enviroment.ts
config: {
  apiKey: 'xxxxxxxxxxxxxxxxxxxxxxxxxxxxxxxxxxxxxxx',
  authDomain: 'xxxxxxxxxxxxxxxxxxxxxxxxxxxxxxx',
  databaseURL: 'xxxxxxxxxxxxxxxxxxxxxxxxxxxxxxxxxxxxxx',
  projectId: 'xxxxxxxxxxxxxx',
  storageBucket: 'xxxxxxxxxxxxxxxxxxxxxxxxxxxx',
  messagingSenderId: 'xxxxxxxxxxxx'
}
- Thêm dòng sau vào file
app.modul.ts:AngularFireLite.forRoot(environment.config)
Auth Service 🔒
Chúng ta sẽ xử lý phần Authentication trong fb.service.ts.
Đầu tiên import AngularFireLiteAuth từ angularfire-lite, sau đó chỉ cần 3 hàm đơn giản như sau:
- isAuth: trả về trạng thái đăng nhập của user
- signin: nhận 2 tham số email và password để đăng nhập
- signup cũng nhận 2 tham số email và mật khẩu nhưng sẽ đăng ký người dùng mới (đừng quên enable phương thức email/password trong dashboard trong filebase)
import {Injectable} from '@angular/core';
import {AngularFireLiteAuth, AngularFireLiteFirestore} from 'angularfire-lite';
import {first, switchMap} from 'rxjs/operators';

@Injectable({
  providedIn: 'root'
})
export class FbService {

  constructor(public auth: AngularFireLiteAuth, public fs: AngularFireLiteFirestore) {
  }

  isAuth() {
    return this.auth.isAuthenticated();
  }

  signin(email, pass) {
    return this.auth.signin(email, pass);
  }

  signup(email, pass) {
    return this.auth.signup(email, pass);
  }


  getCities() {
    return this.auth.uid().pipe(switchMap((uid) => {
      return this.fs.read(`${uid}`);
    }));
  }

  addCity(name: string) {
    return this.auth.uid()
      .pipe(switchMap((uid) => {
        return this.fs
          .write(`${uid}/${name}`, {name, added: new Date()})
          .pipe(first());
      }), first());
  }

}
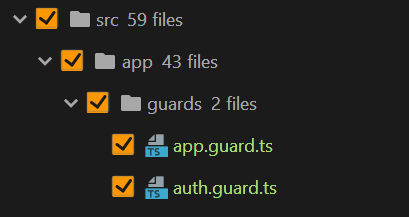
Route Guards 🚦
Tạo file theo cấu trúc thư mục như dưới đây. Bạn có thể sử dụng CLI để generate: ng g guard auth và ng g guard app.
Sao chúng ta lại cần file này?
Để ngăn người dùng chưa đăng nhập truy cập vào các route chính (home/add city...) và mặt khác để ngăn người dùng đã đăng nhập truy cập vào các linh đăng nhập, đăng ký, chúng ta cần sử dụng 1 cái trong Angular gọi là "route grads". Về cơ bản thì nó cũng giống như các service khác thôi, nhưng có chứ 1 hàm canActivete được kích hoạt khi người dùng di chuyển giữa các trang và phụ thuốc vào 1 giá trị Boolean để cho phép hay từ chối truy cập vào router cụ thể, thậm chí có thể điều hướng người dùng đến đúng trang.
import {Injectable} from '@angular/core';
import {ActivatedRouteSnapshot, CanActivate, Router, RouterStateSnapshot} from '@angular/router';
import {FbService} from '../services/fb/fb.service';
import {Observable} from 'rxjs';
import {map} from 'rxjs/operators';

@Injectable({
  providedIn: 'root'
})
export class AppGuard implements CanActivate {
  constructor(public fb: FbService, public router: Router) {
  }

  canActivate(
    route: ActivatedRouteSnapshot,
    state: RouterStateSnapshot): Observable<boolean> | boolean {
    return this.fb.isAuth().pipe(map(
      auth => {
        if (auth) {
          return true;
        } else {
          this.router.navigate(['/login']);
          return false;
        }
      }
    ));
  }

}
Chúng ta sử dụng hàm isAuth() đã tạo trong fb.service.ts để kiểm tra xem người dùng đã đăng nhập chưa, nếu rồi thì cho phép truy cập, nếu không thì sử dụng router.naviate để chuyển về trang đăng nhập. Tương tự, file auth.gaurd.ts thì ngược lại
import {Injectable} from '@angular/core';
import {ActivatedRouteSnapshot, CanActivate, Router, RouterStateSnapshot} from '@angular/router';
import {FbService} from '../services/fb/fb.service';
import {Observable} from 'rxjs';
import {map} from 'rxjs/operators';

@Injectable({
  providedIn: 'root'
})
export class AuthGuard implements CanActivate {
  constructor(public fb: FbService, public router: Router) {
  }

  canActivate(
    route: ActivatedRouteSnapshot,
    state: RouterStateSnapshot): Observable<boolean> | boolean {
    return this.fb.isAuth().pipe(map(
      auth => {
        if (!auth) {
          return true;
        } else {
          this.router.navigate(['/']);
          return false;
        }
      }
    ));
  }

}
Giờ để chúng hoạt động, ta sẽ gán guard cho từng đường dẫn trong module app-routing.module.ts:
const routes: Routes = [
  {path: '', component: HomeComponent, canActivate: [AppGuard]},
  {path: 'details/:city', component: DetailsComponent, canActivate: [AppGuard]},
  {path: 'add', component: AddComponent, canActivate: [AppGuard]},
  {path: 'login', component: LoginComponent, canActivate: [AuthGuard]},
  {path: 'signup', component: SignupComponent , canActivate: [AuthGuard]},
  {path: '**', redirectTo: ''}
];
Auth Components
Bây giờ, để sử dụng các phương thức vừa viết phía trên, ta cần tạo component login và signup.
Login component
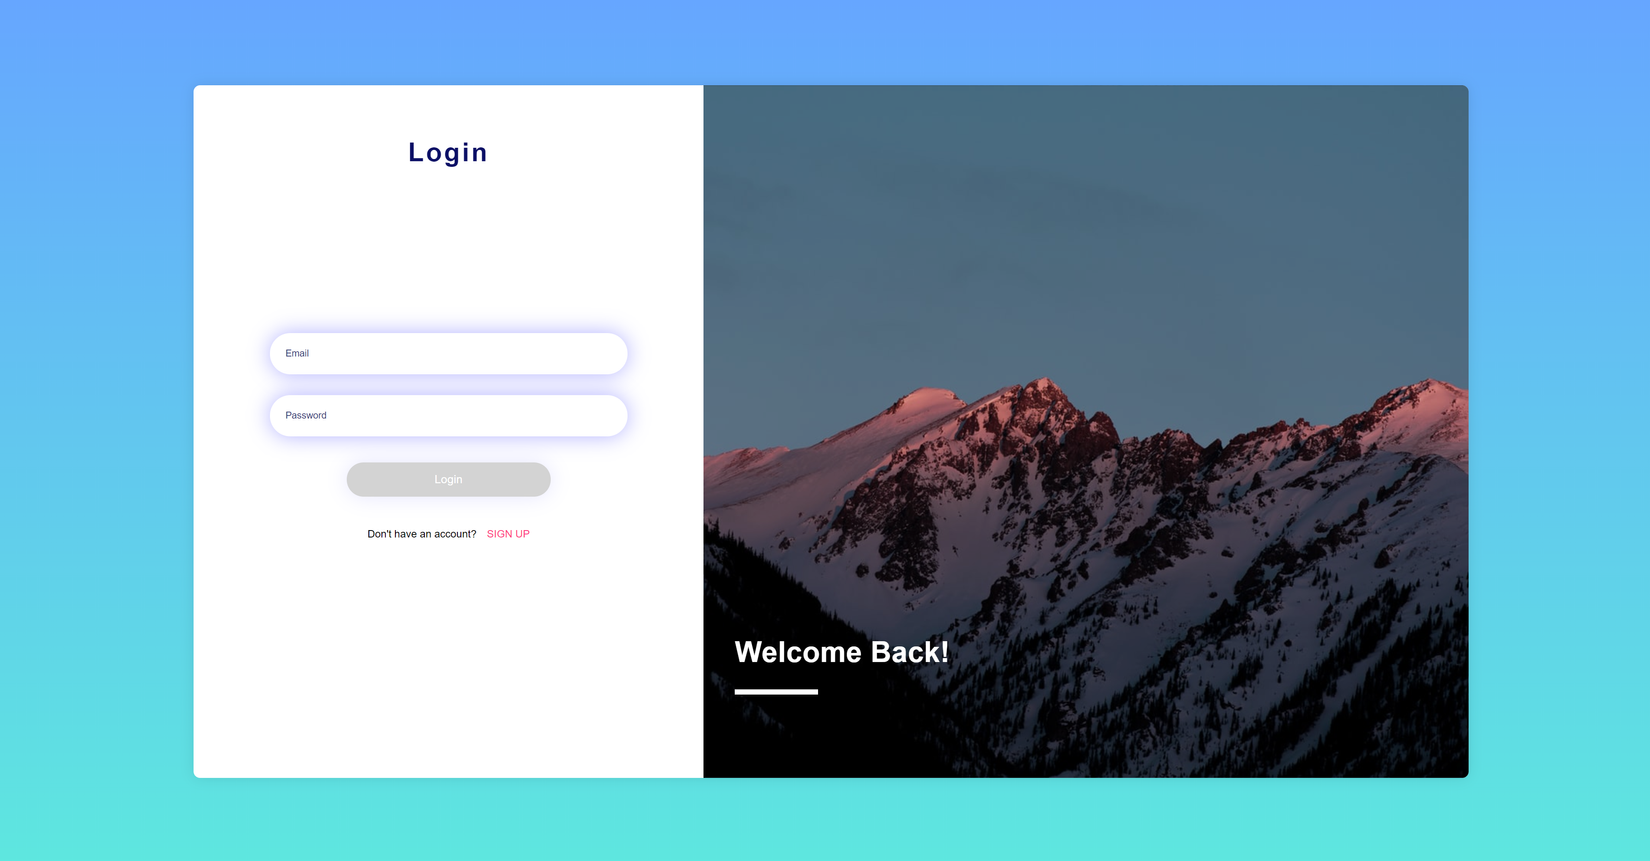
Điều khá quan trọng trong thiết kế là phải đảm bảo tính nhất quán, trang đăng nhập cũng không phải ngoại lệ. Chúng ta có 1 card được tách thành 2 phần, bên phải là 1 hình động được thay đổi mỗi lần refresh, được lấy trực tiếp từ Unspash. Bên trái là ô nhập email và password với phần shadow màu xanh để thu hút sự chú ý, nút đăng nhập được để mặc định disabled, chỉ được bật lên người dùng nhập email và mật khẩu.
<div class="main__container">
  <div class="login-card">

    <main class="login-content">
      <span class="login-header">Login</span>
      <!-- login form -->

      <form class="login-form" (ngSubmit)="login($event)" #authform="ngForm">
        <input ngModel type="email" autofocus placeholder="Email" name="email" class="login-input" required>
        <input ngModel type="password" placeholder="Password" name="password" class="login-input" minlength="6"
               required>
        <input type="submit" name="submit" value="Login" class="login-btn" [class.btn-disabled]="!authform.form.valid"
               [disabled]="!authform.form.valid">
      </form>
      <div class="signup-link-wrapper">
        <span class="signup-notice">Don't have an account?</span>
        <a class="signup-link" routerLink="/signup">Sign up</a>
      </div>

    </main>

    <!-- linking to signup -->
    <aside class="login-aside">
      <div class="login-aside-overlay"></div>
      <h1 class="login-welcome-text">Welcome Back!</h1>
      <hr class="login-aside-hr">
    </aside>
  </div>
</div>


<app-error [message]="errorMessage"></app-error>
File này khá đơn giản nên không giải thích từng phần nữa nha.
.main__container {
  min-height: 90vh;
  width: 90vw;
  display: flex;
  justify-content: center;
  align-items: center;
  overflow: hidden;
}

.login-card {
  position: relative;
  display: flex;
  background-color: #ffffff;
  border-radius: 10px;
  box-shadow: 0 0 20px rgba(0, 0, 0, 0.1);
  width: 85%;
  min-height: 80vh;
  animation: fadein 1s ease-in-out;
}

.login-header {
  font-size: 2.5rem;
  display: block;
  margin-bottom: 2rem;
  color: #0c1066;
  letter-spacing: 0.2rem;
  font-weight: bold;
  animation: fadein 1.75s ease-in-out;
}

.login-content {
  flex: 2 2;
  display: flex;
  flex-flow: column;
  justify-content: center;
  align-items: center;
  animation: fadein 1.5s ease-in-out;
  min-height: 100%;
}

.login-form {
  display: flex;
  flex-flow: column;
  width: 80%;
  align-items: center;
  animation: slidedown 2s ease-in-out;
}

.login-aside {
  animation: fadein 2.25s ease-in-out;
  flex: 3 3;
  display: flex;
  justify-content: flex-end;
  flex-flow: column;
  min-height: 100%;
  border-radius: 0 10px 10px 0;
  background: url("https://source.unsplash.com/random/1200x900?mountain") no-repeat center center;
  background-size: cover;
  position: relative;
}

.login-aside-overlay {
  position: absolute;
  top: 0;
  left: 0;
  height: 100%;
  width: 100%;
  background-color: rgba(0, 0, 0, 0.15);
  border-radius: 0 10px 10px 0;
}

.login-aside-hr {
  height: 0.5rem;
  width: 8rem;
  border: none;
  outline: none;
  background-color: white;
  position: relative;
  z-index: 5;
  margin: 0 0 8rem 3rem;
  animation: slideright 4s ease-out;
}

.login-welcome-text {
  color: white;
  letter-spacing: 0.03rem;
  margin: 0 0 2rem 3rem;
  font-size: 2.75rem;
  position: relative;
  z-index: 5;
  animation: slideright 2s ease-out;
}

.login-input {
  margin: 1rem 0;
  padding: 1.5rem;
  border-radius: 2rem;
  outline: none;
  border: none;
  box-shadow: 0 0 2rem rgba(0, 0, 255, 0.3);
  width: 80%;
}


.login-btn {
  background-color: #00ff9b;
  padding: 1rem;
  border-radius: 2rem;
  outline: none;
  border: none;
  color: white;
  font-size: 1.1rem;
  cursor: pointer;
  margin-top: 1.5rem;
  width: 50%;
  box-shadow: 0 0 2rem rgba(0, 0, 255, 0.1);
}

.login-btn:hover {
  background: linear-gradient(to right, #03a9f4, #00ff9b);
}

.login-input::placeholder {
  color: #39437a;
  font-size: 0.9rem;
}

.btn-disabled {
  background-color: lightgray;
}

.btn-disabled:hover {
  background: lightgray;
}


.signup-link-wrapper {
  margin-top: 3rem;
  animation: slideup 1s ease-in-out;
}

.signup-link {
  text-transform: uppercase;
  margin-top: 1rem;
  text-decoration: none;
  color: #ff3a82;
  margin-left: 1rem;
}


@media screen and (max-width: 959px) {
  .login-aside {
    display: none;
  }
}
Bài trước chưa kịp giải thích, bài này mình sẽ giải thích qua về 1 vài thuộc tính css hay được dùng:
- Chúng ta sử dụng flexbox bằng
display: flexvà căn lề thông quajustify-contentđể căn theo chiều ngang vàalign-itemđể căn theo chiều dọc. (nếuflex-flow: columnthì ngược lại) marginvàpaddingđể căn khoảng cách xung quanh itemcolor,background-colorđể set màu cho text và màu nền. Trong file này còn sử dụng thêm 1 cái
background: url("https://source.unsplash.com/random/1200x900?mountain") no-repeat center center;
để set background là các bức ảnh được lấy ngẫu nhiên từ Unsplash.
border-radiusđể bo tròn gócoverflowdùng để kiểm soát dữ liệu khi nó tràn dòng, ẩn đi, hoặc scroll,...letter/word-spacingđể tăng khoảng cách giữa các chữ hoặc từ. Thủ thuật này được dùng trong thiết kế để tăng khả năng đọc hoặc nhấn mạnh văn bản.box-shadowđể thêm hiệu ứng bóng đổ, khiến vật thể nổi bật lên.
File ts cũng khá đơn giản
import {Component, OnInit} from '@angular/core';
import {FbService} from '../../services/fb/fb.service';
import {first, tap} from 'rxjs/operators';
import {Router} from '@angular/router';

@Component({
  selector: 'app-login',
  templateUrl: './login.component.html',
  styleUrls: ['./login.component.css']
})
export class LoginComponent implements OnInit {
  errorMessage = '';
  constructor(public fb: FbService, public router: Router) {
  }

  ngOnInit() {
  }

  login(e) {
    this.fb.signin(e.target.email.value, e.target.password.value).pipe(first()).subscribe(() => {
      this.router.navigateByUrl('');
    },(err) => {
      this.errorMessage = err;
      setTimeout(() => this.errorMessage = '', 2000);
    });
  }

}
Signup component
Trang này về cơ bản thì khá giống và có thể copy lại từ trang login, chỉ thay đổi 4 điều
- tất cả class css sẽ được bắt đầu bằng
signupthay vìlogin - Text Welcome sẽ là "Join Minimus Today" thay vì "Welcome back"
- Button submit sẽ gọi đến hàm signup thay vì login
- Text ở header là "Signup" thay vì "Login"
Thực ra nếu chỉ thay đổi thế này thì ta có thể viết 1 cái component chung, nhưng để về sau có thể phát triển thêm form signup, thường thì chẳng ai đăng ký chỉ mỗi email và password cả, nên cứ viết riêng ra nha.
Bắt lỗi
Trang nào cũng sẽ có 1 số cách để thông báo cho người dùng nếu có lỗi xảy ra. Lại dùng CLI để generate nào
ng g c ui/error
Trong bài viết này, component error sẽ như 1 pop-up bar nhảy lên từ cuối trang trong vài giây và tự động ẩn đi

Phần HTML cho nó
<div class="error-wrapper" [ngClass]="{'error-wrapper-active': message}">
  <span class="error-message">{{message}}</span>
  <button class="error-btn">{{action}}</button>
</div>
Ở đây ta dùng ngClass để thêm css cho popup ẩn hiện, nội dung thì được cập nhật động thông qua {{ }}. Về css thì không có gì đặc biệt lắm, chỉ là cố định nó ở dưới cùng và sử dụng z-index để nó trồng lên trên cùng các thành phần. Class error-message có thêm thuộc tính text-overflow: ellipsis để thay thế phần văn bản bị tràn ra ngoài bằng dấu ... nếu thông báo lỗi quá dài so với màn hình.
.error-wrapper {
  position: fixed;
  left: 50%;
  bottom: 0;
  transform: translate(-50%, 5rem);
  width: 70%;
  background-color: crimson;
  color: white;
  height: 4rem;
  border-radius: 0.25rem 0.25rem 0 0;
  display: flex;
  justify-content: space-between;
  align-items: center;
  padding: 0.5rem 3rem;
  transition: transform 1s ease-in-out;
  z-index: 9999999999;
}

.error-wrapper-active {
  transform: translate(-50%, 0);
}

.error-message {
  font-size: 1.25rem;
  letter-spacing: 0.1rem;
  text-transform: capitalize;
  line-height: 1.25rem;
  display: block;
  text-overflow: ellipsis;
  overflow: hidden;
  white-space: nowrap;
  width: 80%;
}

.error-btn {
  outline: none;
  border: none;
  padding: 1rem 1.5rem;
  background-color: rgba(255, 255, 255, 0.3);
  font-size: 1rem;
  font-weight: bold;
  color: white;
}
Trong file error.component.ts thì chỉ cần thêm 2 biến input ở trên cùng (tất nhiên dưới đoạn import)
@Input() message: string;
@Input() action = 'GOT IT';
để sử dụng thì chỉ cần ở component cha truyền vào message lỗi
<app-error [message]="errorMessage"></app-error>
Về cơ bản là xong rồi đó, hy vọng bạn có thể thực hiện được theo những gì mình hướng dẫn, chỗ nào không hiểu thì có thể comment để mình giải thích nhé! Còn một phần liên quan đến deploy lúc nào có thời gian mình sẽ bổ sung thêm nha!
All rights reserved
