Xây dựng api cho ứng dụng đơn giản với NodeJS
Bài đăng này đã không được cập nhật trong 4 năm
Tổng quan
Trong bài trước mình đang có kết hoạch viết 1 loạt các bài từng bước để tạo lên website Single Page Application với Docker, Rails api và ReactJS. Bài viết này mình tham khảo từ https://start.jcolemorrison.com/authorized-resources-and-database-migrations-with-strongloops-loopback/ thấy học được rất nhiều điều. Từ việc dùng Docker để cài đặt môi trường phát triển đến việc sử dụng Loopback https://loopback.io/ (một thư viện trên nền tảng Nodejs) để xây dựng Api cơ bản.
Bài viết này mình sẽ xây dựng Api xác thực người dùng trước, bài tiếp theo mình sẽ viết về sử dụng Api đó để kết hợp với React, Redux và Redux sagas để code frontend cho ứng dụng xác thực người dùng này
Nào chúng ta hay code thôi 
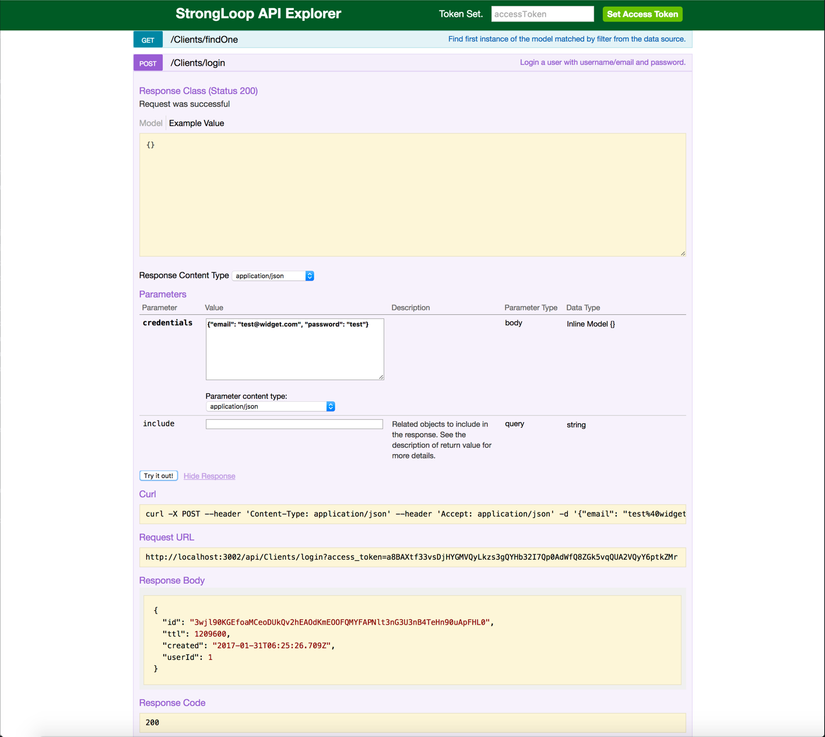
À chúng ta sẽ code ra cái này :upside_down:
Cài đặt môi trường phát triển với Docker
 Nhiệm vụ đầu tiên ( đơn giản và thành công )
Tạo 1 folder có tên là happy_coding trong đó có bao gồm 2 project nhỏ: api và app react
Chúng ta sẽ chia project này thành 2 repo nhỏ. Folder api để code auth_api và forder auth_app để code phía frontend.
Trong các project lớn thì chúng ta lên chia nhỏ ra vì như vậy sẽ làm tăng tính độc lập và mở rộng.
auth
├── auth_api
└── auth_app
Bước thứ 2: Tạo các folder và các file chính cho docker
Chúng ta làm việc với folder đầu tiên trước
.
├── containers
│   └── db
│       └── Dockerfile
├── docker-compose.yml
└── Dockerfile
Dockerfile
Api được build trên base là image nodejs Cài thêm yarn, nodemon và loopback-cli
# auth/auth_api/Dockerfile

From node:6.9.4

RUN curl -o- -L https://yarnpkg.com/install.sh | bash

ENV PATH="/root/.yarn/bin:${PATH}"

RUN yarn && yarn global add loopback-cli && yarn global add nodemon

WORKDIR /usr/src/api
Database được build trên base là image mysql
# auth/auth_api/containers/db/Dockerfile

FROM mysql:5.7
docker-compose.yml
Giờ thì tạo file docker-compose.yml để kết nối giữa các image Api chạy trên cổng 3000 và db chạy trên công 3306
# auth/auth_api/docker-compose.yml


version: '2'

services:
  api:
    build: ./containers/loopback
    ports:
      - 3001:3000
    volumes:
      - .:/usr/src/api
    command: nodemon .

  db:
    build: ./containers/db
    ports:
      - 3306:3306
    volumes:
      - db-data:/var/lib/mysql
    env_file: .env

volumes:
  db-data:
.env file
Bước tiếp theo là khai báo các biến môi trường cho Mysql
# auth/auth_api/.env

MYSQL_ROOT_PASSWORD=root
MYSQL_DATABASE=auth_loopback
MYSQL_USER=happycoding
MYSQL_PASSWORD=abc123
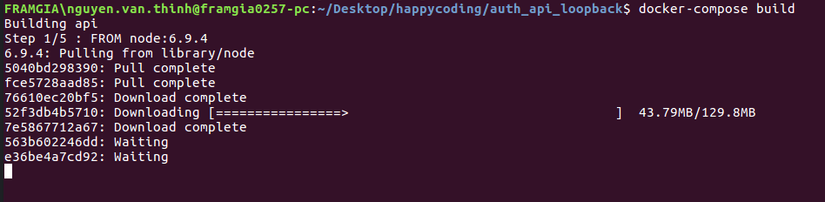
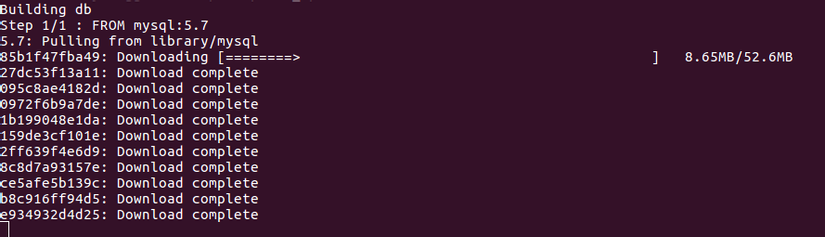
- Build các images và containers
docker-compose build
docker-compose up
Bắt đầu với Loopback
docker-compose run api lb
Trả lời một số câu hỏi trong quá trình generate của loopback
- What's the name of your application? Nhấn enter nó sẽ default là auth_api_loopback
- Which version of LoopBack would you like to use? Use 3.x
- What kind of application do you have in mind? api-server
docker-compose run api yarn
docker-compose up
Mở trình duyệt localhost:3001/explorer
docker-compose run api yarn add loopback-connector-mysql
File server/datasources.json
# /auth/auth_api/server/datasources.json

{
  "db": {
    "name": "db",
    "connector": "memory"
  },
  "mysql": {
    "name": "mysql",
    "connector": "mysql",
    "database": "strongdevdb",
    "password": "strongdevpwd",
    "user": "strongdevuser",
    "port": 3306,
    "host": "mysqlDb"
  }
}
Scaffolding các model
docker-compose run api lb model Client
- Enter the model name: press enter here to use Client
- Select the data-source to attach Client to: Use mysql
- Select model's base class: Scroll down and select User
- Expose Client via the REST API? press y and enter
- Custom plural form (used to build REST URL) just press enter, it will default to clients
- Common model or server only? use server
docker-compose run api lb model Widget
- Enter the model name: press enter here to use Widget
- Select the data-source to attach Client to: Use mysql
- Select model's base class: Scroll down and select Persisted Model
- Expose Client via the REST API? press y and enter
- Custom plural form (used to build REST URL) just press enter, it will default to widgets
- Common model or server only? use server
For Properties, for the first one:
- Property Name: name
- Property Type: string
- Required: n
- Default Value: leave blank for none
- For the second:
- Property Name: description
- Property Type: string
- Required: n
- Default Value: leave blank for none
docker-compose run api lb relation
- Select the model to create the relationship from: select Client
- Relation type: select hasMany
- Choose a model to create a relationship with select Widget
- Enter the property name for the relation: press enter to accept widgets
- Optionally enter a custom foreign key: press enter and it will by default use widgetId
- Require a through model? type n and press enter
File server/model-config.json
{
  "_meta": {
    "sources": [
      "loopback/common/models",
      "loopback/server/models",
      "../common/models",
      "./models"
    ],
    "mixins": [
      "loopback/common/mixins",
      "loopback/server/mixins",
      "../common/mixins",
      "./mixins"
    ]
  },
  "User": {
    "dataSource": "mysql",
    "public": true
  },
  "AccessToken": {
    "dataSource": "mysql",
    "public": false
  },
  "ACL": {
    "dataSource": "mysql",
    "public": false
  },
  "RoleMapping": {
    "dataSource": "mysql",
    "public": false
  },
  "Role": {
    "dataSource": "mysql",
    "public": false
  },
  "Client": {
    "dataSource": "mysql",
    "public": true
  },
  "Widget": {
    "dataSource": "mysql",
    "public": true
  }
}
Tự động migration và migrate database
File bin/migrate.js
'use strict'

const path = require('path')

// import our app for one time usage
const server = require(path.resolve(__dirname, '../server/server.js'))

// reference to our datasource that we named 'mysql'
const mysql = server.dataSources.mysql

// the basic loopback model tables
const base = ['User', 'AccessToken', 'ACL', 'RoleMapping', 'Role']

// our custom models
const custom = ['Widget', 'Client']
const lbTables = [].concat(base, custom)

// Run through and create all of them
mysql.automigrate(lbTables, function (err) {
  if (err) throw err
  console.log(' ')
  console.log('Tables [' + lbTables + '] reset in ' + mysql.adapter.name)
  console.log(' ')
  mysql.disconnect()
  process.exit(0)
})
docker-compose run api node bin/migrate.js
File server/boot/base.migration.js
'use strict'

// the base loopback models
const models = ['User', 'AccessToken', 'ACL', 'RoleMapping', 'Role']

module.exports = function updateBaseModels (app, next) {
  // reference to our datasource
  const mysql = app.dataSources.mysql

  // check to see if the model is out of sync with DB
  mysql.isActual(models, (err, actual) => {
    if (err) {
      throw err
    }

    let syncStatus = actual ? 'in sync' : 'out of sync'
    console.log('')
    console.log(`Base models are ${syncStatus}`)
    console.log('')

    // if the models are in sync, move along
    if (actual) return next()

    console.log('Migrating Base Models...')

    // update the models
    mysql.autoupdate(models, (err, result) => {
      if (err) throw err
      console.log('Base models migration successful!')
      console.log('')
      next()
    })
  })
}
Phân quyền cho các model
- $owner - only the resource owner may access
- $everyone - anyone may access
- $authenticated - only logged in users may access
- $unauthenticated - logged out users
- custom - we can define our own roles!
File client.json
{
  "name": "Client",
  "base": "User",
  "idInjection": true,
  "options": {
    "validateUpsert": true
  },
  "properties": {},
  "validations": [],
  "relations": {
    "widgets": {
      "type": "hasMany",
      "model": "Widget",
      "foreignKey": ""
    }
  },
  "acls": [
    {
      "accessType": "EXECUTE",
      "principalType": "ROLE",
      "principalId": "$authenticated",
      "permission": "ALLOW",
      "property": ["__create__widgets"]
    },
    {
      "accessType": "READ",
      "principalType": "ROLE",
      "principalId": "$owner",
      "permission": "ALLOW",
      "property": ["__get__widgets", "__findById__widgets"]
    }
  ],
  "methods": {}
}
File widget.json
{
  "name": "Widget",
  "base": "PersistedModel",
  "idInjection": true,
  "options": {
    "validateUpsert": true
  },
  "properties": {
    "name": {
      "type": "string"
    },
    "description": {
      "type": "string"
    },
    "size": {
      "type": "number"
    }
  },
  "validations": [],
  "relations": {},
  "acls": [
    {
      "accessType": "*",
      "principalType": "ROLE",
      "principalId": "$everyone",
      "permission": "DENY"
    }
  ],
  "methods": {}
}
Kết luận
Vậy là mình là chỉ các bạn cách sử dụng Docker và Loopback để xây dựng Api xác thực người dùng.  Chúc các bạn có nhiều niềm vui và hạnh phúc trong khi code.
 Happy Coding
All rights reserved
