Write a webpack plugin (part 1)
Bài đăng này đã không được cập nhật trong 6 năm
In this post, I'm going to show you how to write a simple webpack plugin. By creating this very simple plugin, we will learn a couple of concepts of webpack and start to build up our knowledges about how webpack works. Now, let's jump in.
1. Setup project
First, create a folder named YouCleanWebpackPlugin (or MyCleanWebpackPlugin or whatever you want).
Next, run npm init -y to create a package.json file.
Next, run npm i webpack webpack-cli to install webpack and its command-line-interface.
Next, create two files a.js and b.js inside the src folder at the root.
//src/a.js
console.log('a');

//src/b.js
console.log('b');
Next, create the webpack.config.js file
module.exports = {
  entry: {
    a: './src/a.js',
    b: './src/b.js'
  },
  output: {
    filename: '[name].js'
  }
}
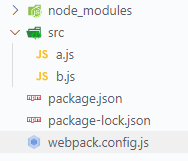
At this point, your folder structure should be similar to this:
Cool! That's all for the setup. Now is the main part, creating the plugin.
2. Init plugin
A webpack plugin is simply a class with the apply method. At the root, create a plugin folder and inside, create the YouCleanWebpackPlugin.js file.
//plugins/YouCleanWebpackPlugin.js
class YouCleanWebpackPlugin {
  apply() {
    console.log('hello, plugin here');
  }
}

module.exports = YouCleanWebpackPlugin;
That's it! Simple right?
3. Load plugin
Next thing is loading our plugin. In the webpack.config.js, require our plugin file and initiate it in the plugins array, like so:
//webpack.config.js
const YouCleanWebpackPlugin = require('./plugins/YouCleanWebpackPlugin');

module.exports = {
  .
  .
  .
  ,
  plugins: [
    new YouCleanWebpackPlugin()
  ]
}
Now, run npx webpack to see the result.
$ npx webpack
hello, plugin here
Hash: 6704d7aafb311be76e75
Version: webpack 4.43.0
Time: 88ms
Built at: 06/19/2020 7:53:30 PM
Asset       Size  Chunks             Chunk Names
 a.js  946 bytes       0  [emitted]  a
 b.js  947 bytes       1  [emitted]  b
Entrypoint a = a.js
Entrypoint b = b.js
[0] ./src/a.js 16 bytes {0} [built]
[1] ./src/b.js 16 bytes {1} [built]

WARNING in configuration
The 'mode' option has not been set, webpack will fallback to 'production' for this value. Set 'mode' option to 'development' or 'production' to enable defaults for each environment.
You can also set it to 'none' to disable any default behavior. Learn more: https://webpack.js.org/configuration/mode/
See the hello, plugin here message. It is loaded. Awesome!
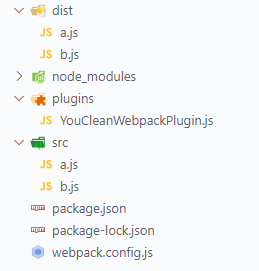
The next thing to do is implementing our main functionality of the plugin, which is removing all the file in the output folder before every build to keep it clean. At this point, your folder structure should be similar to this:
4. Implement plugin feature
We will need the help of another package, lets run npm i del. Then, update our YouCleanWebpackPlugin.js like so:
const del = require('del');
class YouCleanWebpackPlugin {
  apply(compiler) {
    let outputPath = compiler.options.output.path;
    del.sync(['**/*'], { cwd: outputPath })
  }
}

module.exports = YouCleanWebpackPlugin;
Then run npx webpack again to see the result. You probably can't see anything yet, everything stay the same. In order to see the difference, let's remove the b entry point from the webpack.config.js. Then, run npx webpack again and you will see the b.js file in the dist folder ...gone! Which means...it works!
5. Conclusion
In conclusion, we did we learn? We learn that, a webpack plugin is simple a javascript class with a apply method which receive the compiler parameter. To load a plugin, we need to instantiate it inside the plugins array of the webpack.config.js file.
In the next post, we will explore more about how these plugins are being called and also about the compiler parameter that we receive in the apply method. Thanks for reading.
6. Inspiration
clean-webpack-plugin: https://github.com/johnagan/clean-webpack-plugin
All rights reserved
