Webpack - thử debug một vài chiếc loader xem có gì nào
Bài đăng này đã không được cập nhật trong 5 năm
Hi mọi người, đối với các frontend dev, chắc hẳn ai cũng biết và dùng qua webpack phải không nào. Ít nhất thì cũng đọc qua những đoạn config kiểu như thế này:
module.exports = {
  ...,
  module: {
    rules: [
      {
        test: /\.(eot|otf|ttf|woff|woff2)$/,
        use: 'file-loader',
      },
      {
        test: /\.(jpg|png|gif)$/,
        use: [
          {
            loader: 'url-loader',
            options: {
              // Inline files smaller than 10 kB
              limit: 10 * 1024,
            },
          },
        ],
      },
      ...
    ],
  },
};
Lúc đầu thì mình cũng chỉ xem. Về sau rãnh rỗi init source thì cũng copy + paste => app chạy ok. Sau đó ko quan tâm nữa 
Tuy nhiên, hôm nay mình sẽ thử debug nhẹ một số loader xem chúng hoạt động như thế nào, và vì sao mỗi loại file khác nhau lại phải dùng các loader khác nhau nhé. Cụ thể, trong bài viết này mình sẽ thử debug file-loader, url-loader,... khác nhau nhé. OK, let's go 
Chuẩn bị
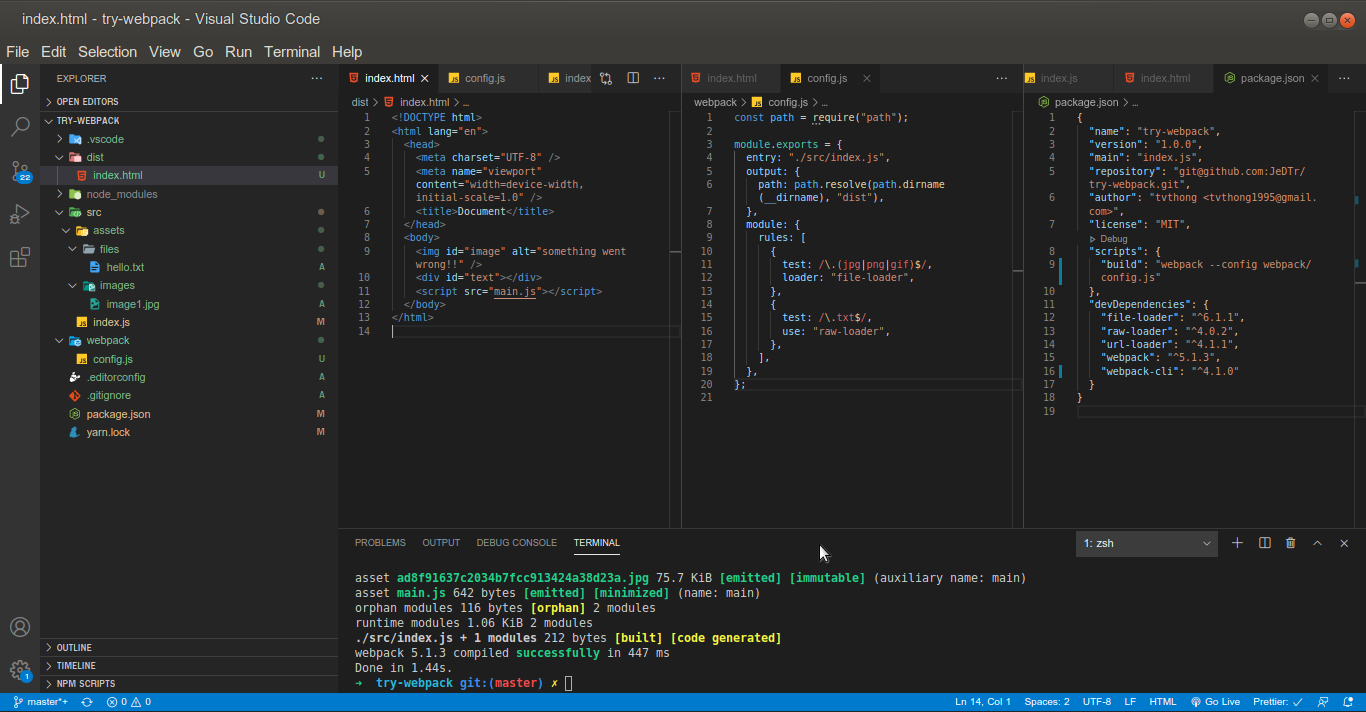
Đầu tiên mình sẽ tạo một vài files + folders như sau.
├── dist/
│   └── index.html // script mình trỏ tới main.js (default lúc build ra)
├── src/
│   └── assets/
│   │   └── (file và ảnh linh tinh gì cũng được)
│   └── index.js (file trống, tý thêm code sau)
├── webpack/
│   └── config.js
├── ...
├── package.json
Mọi người nhớ thêm đoạn script build nha
"scripts": {
  "build": "webpack --config webpack/config.js"
}
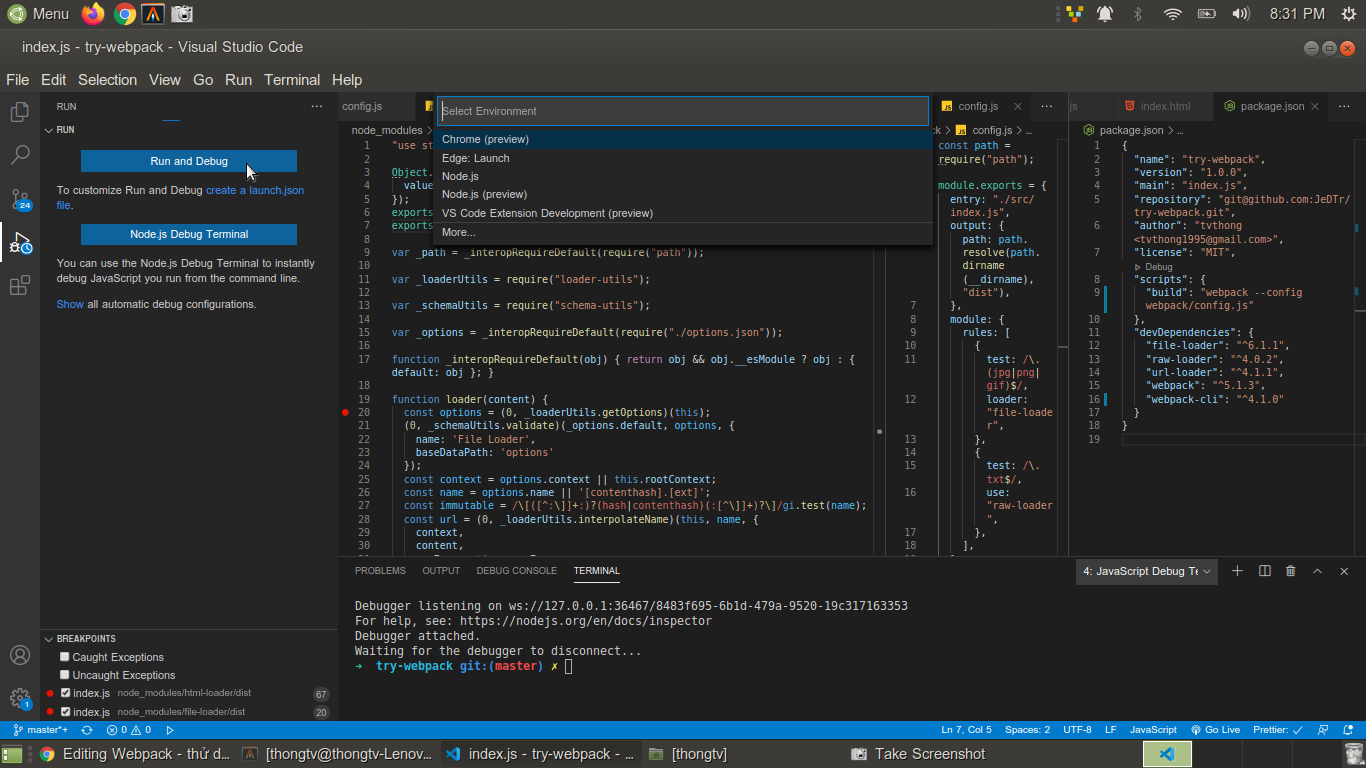
Tiếp theo chúng ta sẽ vào tab debug => create file launch.json => chọnNode js để debug mấy file loader
Chúng ta sẽ update file launch.json lại như sau (ở đây mình dùng yarn)
{
  // Use IntelliSense to learn about possible attributes.
  // Hover to view descriptions of existing attributes.
  // For more information, visit: https://go.microsoft.com/fwlink/?linkid=830387
  "version": "0.2.0",
  "configurations": [
    {
      "type": "node",
      "request": "launch",
      "name": "Launch build",
      "cwd": "${workspaceFolder}",
      "runtimeExecutable": "yarn",
      "runtimeArgs": ["build"]
    }
  ]
}
Giờ thì debug thôi nào >>
Tham khảo nodejs debug: https://code.visualstudio.com/docs/nodejs/nodejs-debugging
file-loader
Đầu tiên, chúng ta sẽ thử với file-loader
Docs: https://webpack.js.org/loaders/file-loader/
The file-loader resolves import/require() on a file into a url and emits the file into the output directory.
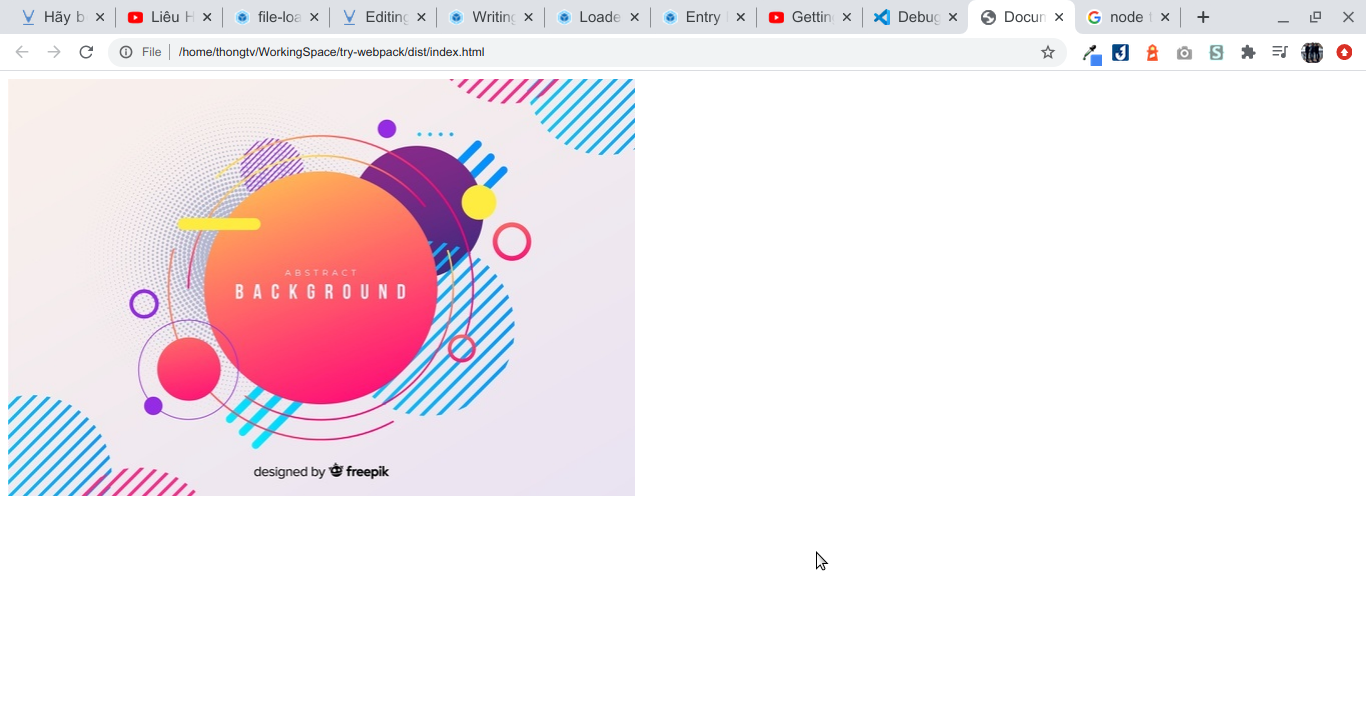
Theo như docs thì file-loader có 2 công dụng đó là: emit (copy + hash file name,...) file từ folder src qua folder dist và trả về url của file để chúng ta import
Chúng ta sẽ thêm đoạn code sau vào file index.js để test
import imgUrl from "./assets/images/image1.jpg";

document.getElementById("image").src = imgUrl;
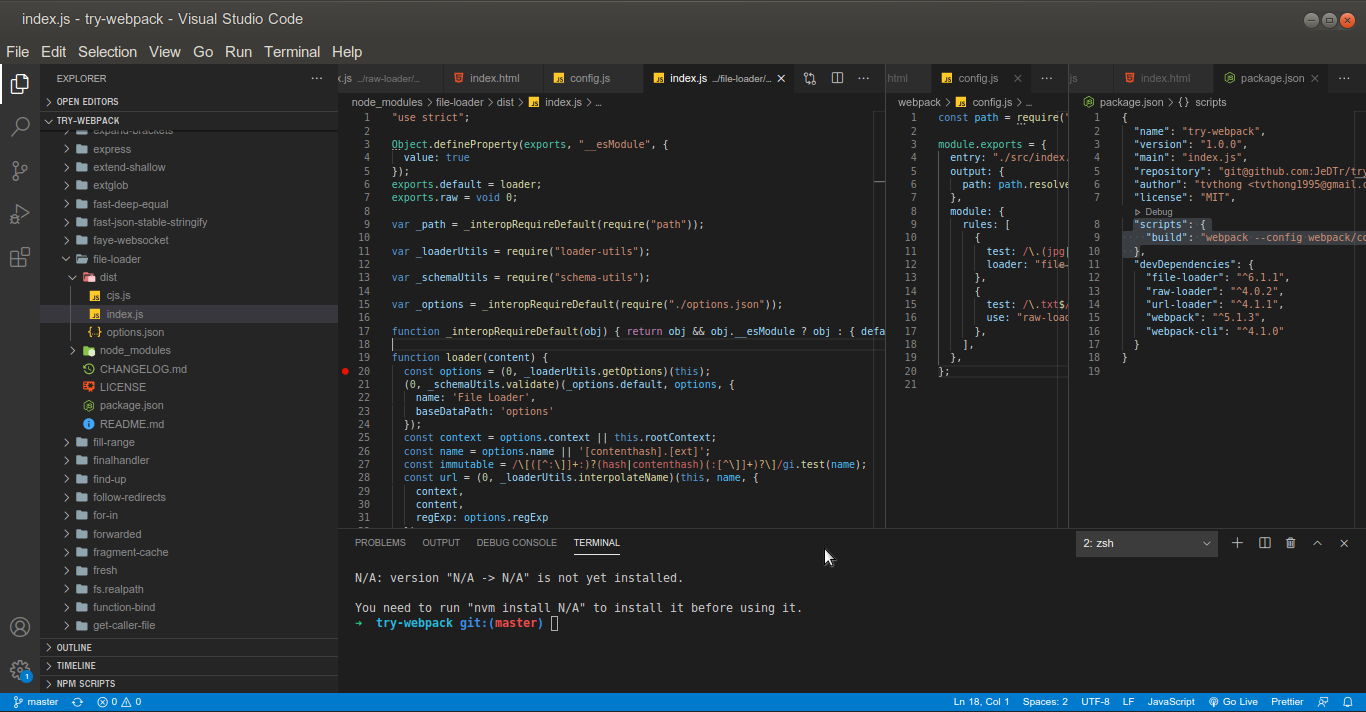
Để debug thì chúng ta sẽ vào node_modules tìm đến folder file-loader để đặt breakpoint nhé
Sau đó vào tab debug và run launch build
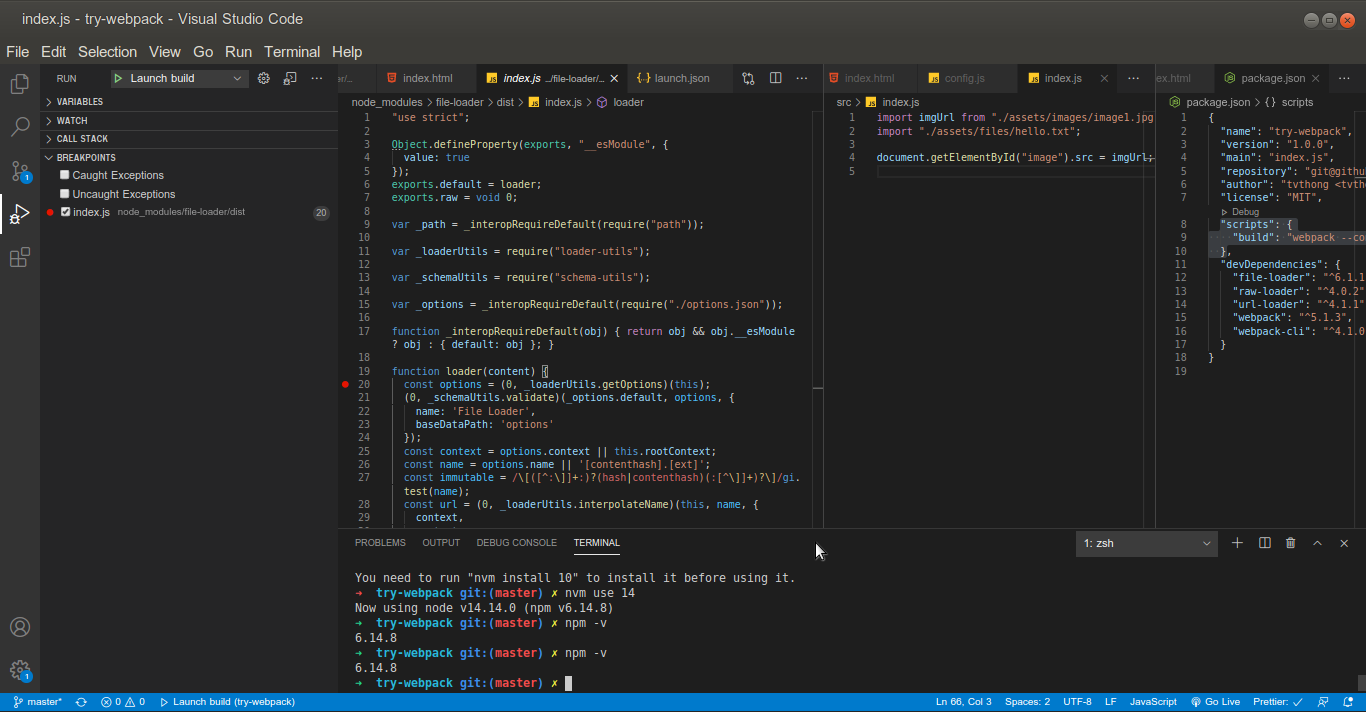
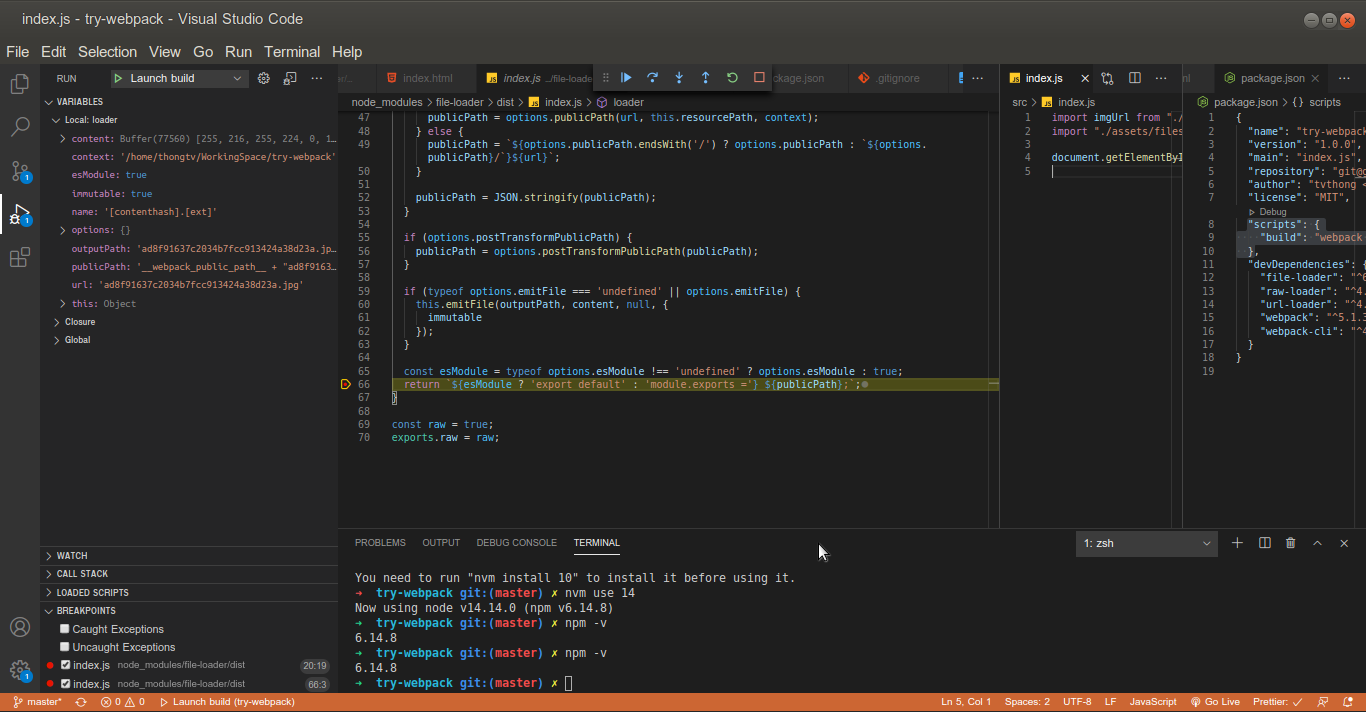
Mọi người có thể để ý file name đã được đổi lại theo cấu trúc mặc định là [contenthash].[ext] và sau đó được emit vào outputPath (hàm này được webpack cung cấp sẵn).
this.emitFile(outputPath, content, null, {
  immutable
});
Đoạn return sẽ có đạng export default ${outputPath}, theo mình nghĩ thì webpack sẽ eval đoạn string này (đoán thôi :v)
Kết quả:
Tham khảo cấu trúc củaloader: https://webpack.js.org/contribute/writing-a-loader/
Tham khảo loaders interface: https://webpack.js.org/api/loaders/#thisemitfile
url-loader
Docs: https://webpack.js.org/loaders/url-loader/
url-loader works like file-loader, but can return a DataURL if the file is smaller than a byte limit.
url-loader cũng tương tự như file-loader, chỉ có thêm chức năng return base64 url thay vì url thông thường đối với các file kích thước nhỏ
Chúng ta sẽ update file webpack.config.js lại như sau
  {
        test: /\.(jpg|png|gif)$/,
        use: [
          {
            loader: "url-loader",
            options: {
              // limit 100 KB
              limit: 1024 * 100,
            },
          },
        ],
      },
Và debug:
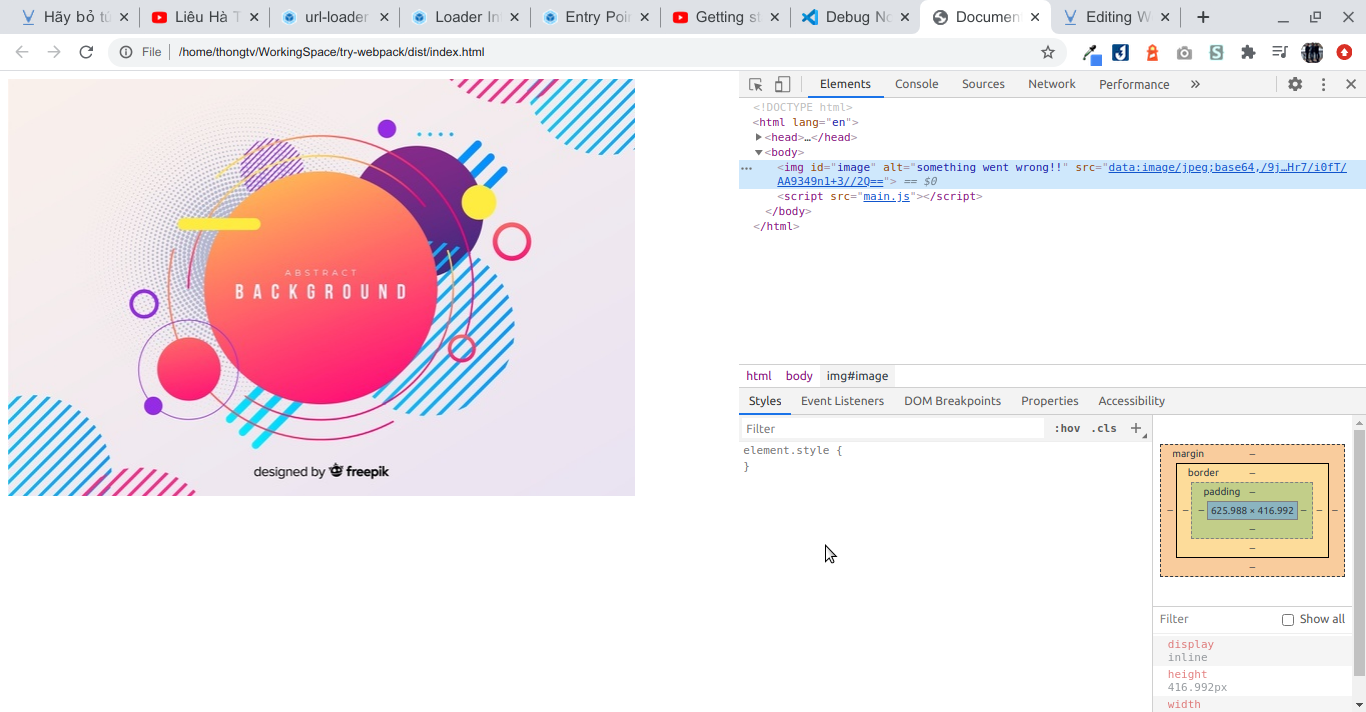
 Mọi người có thể thấy rằng, vì file ảnh của mình nhỏ (<100kb) nên
 url-loader đã encode và trả về dạng base64url. Cool!!
Kết quả
raw-loader
Giờ mình sẽ thử thêm phát cuối rồi kết bài nhé >>
Giờ chúng ta sẽ import file hello.txt và dùng raw-loader để load content nhé
// src/index.js
import imgUrl from "./assets/images/image1.jpg";
import content from "./assets/files/hello.txt";

document.getElementById("image").src = imgUrl;
document.getElementById("text").textContent = content;
// webpack/config.js
...
{
    test: /\.txt$/,
    use: "raw-loader",
},
debug tương tự 2 loader trước, chúng ta sẽ thấy raw-loader sẽ trả về nội dung bên trong file thay vì url
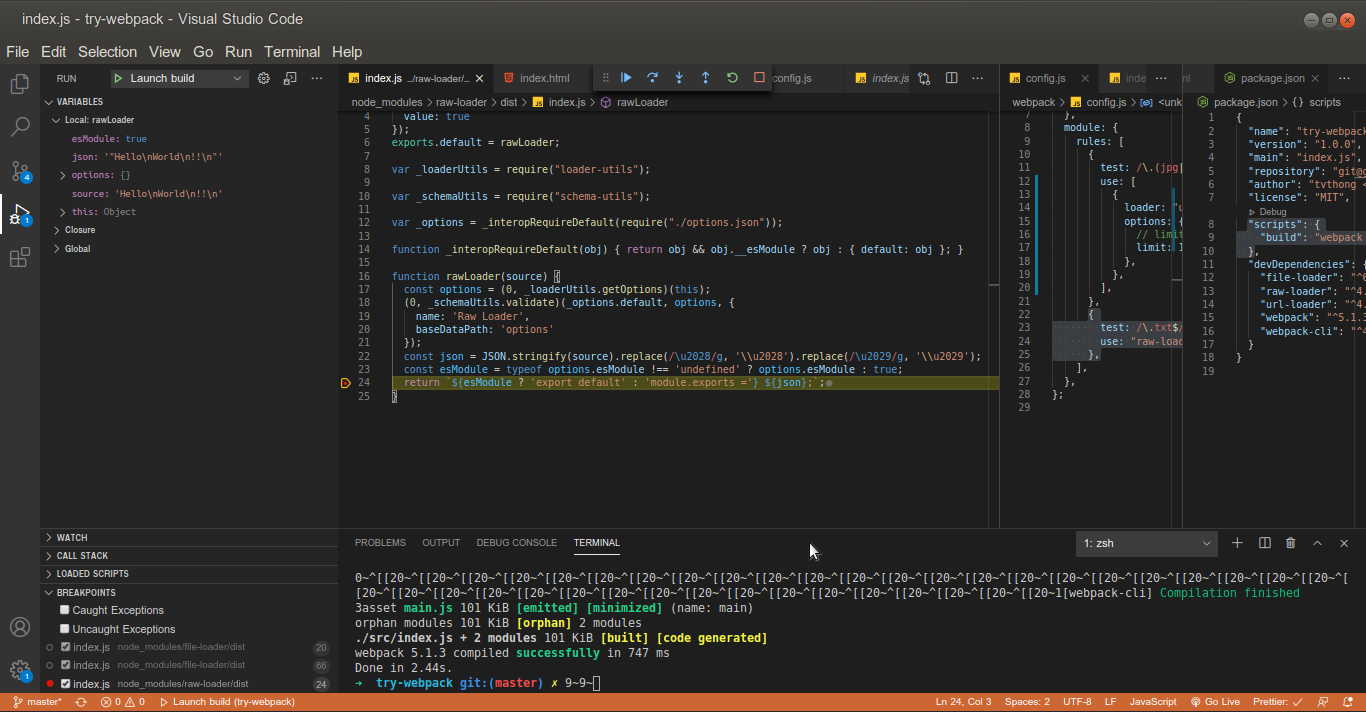
Kết quả:
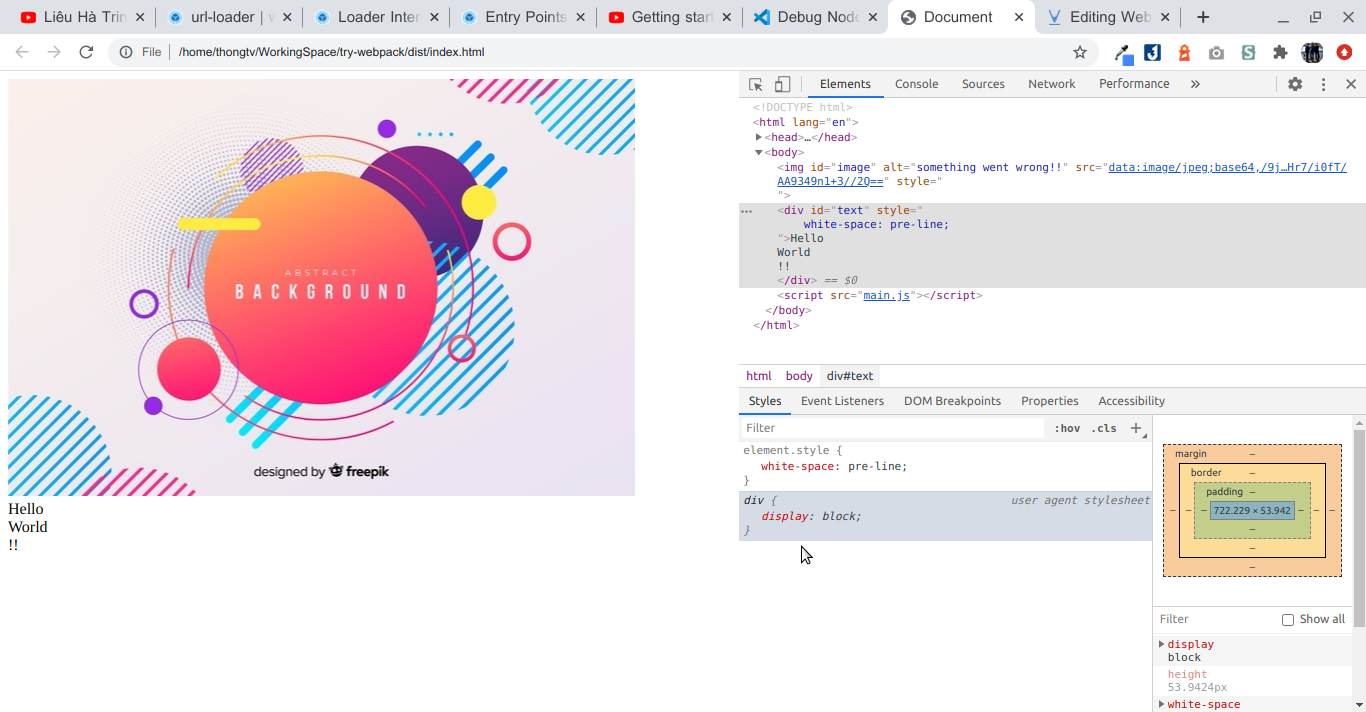
Ở đây, mình thêm white-space: pre-line để xuống dòng nhé.
OK. xong 
Kết
Bài viết đến đây thôi. Hy vọng sẽ giúp mọi người hiểu thêm về webpack loader và cách mà chúng hoạt động. Chúc mọi người thành công 
All rights reserved
