Using ReactJS with Rails Action Cable
Bài đăng này đã không được cập nhật trong 4 năm
Introduction
Action Cable integrates websocket based real-time communication in Ruby on Rails applications. It allows building realtime applications like Chats, Status updates, etc.
Action Cable provides real time communication. ReactJS is a good tool to manage view complexity on the client side. Together they make it easy to develop snappy web applications which requires state management on the client side without too much work.
Anytime data changes the new data is instantly provided by Action Cable and the new data is shown on the view without user doing anything on the application by ReactJS.
In this post, I won't detail on Action Cable and Reactjs, but I will code a Simple Chat Application using both.
If you are a newbie for them, please read about actioncable and reactjs to understand about theirs basic first.
Install react-rails
gem 'react-rails
then bundle install
Next, run the installation script:
rails g react:install
More detail about how to install reactjs-rails, see the following link: react-rails
Create MessageBox Component
React is all about modular, composable components. For our message emple, we'll have the following component structure:
- MessageBox
- MessageList
- MessageForm
Let's starting from the children of the Components.
Add following components to app/assets/javascripts/components/message.js.jsx
MessageList Component:
var MessageList = React.createClass({
  render: function() {
    var messages = this.props.messages.map(function(message) {
      return(
        <li key={message.id}>{message.content}</li>
      )
    });
    return(
      <ul>{messages}</ul>
    )
  }
});
MessageForm Component:
var MessageForm = React.createClass({
  getInitialState: function() {
    return {content: ""};
  },
  handleContentChange: function(e) {
    this.setState({content: e.target.value});
  },
  handleSubmit: function(e) {
    e.preventDefault();
    var content = this.state.content.trim();
    if (!content) {
      return;
    }
    this.props.onMessageSubmit({content: content});
    this.setState({content: ""});
  },
  render: function() {
    return(
      <div>
        <form className="message" onSubmit={this.handleSubmit}>
          <input type="text" name="content" placeholder="Chat here ..."
            value={this.state.content} onChange={this.handleContentChange}/>
          <input type="submit" value="Send" />
        </form>
      </div>
    )
  }
});
MessageBox Component:
var MessageBox = React.createClass({
  loadMessages: function() {
    $.ajax({
      url: "/messages",
      dataType: "json",
      cache: false,
      success: function(data) {
        this.setState({messages: data});
      }.bind(this),
      error: function(xhr, status, err) {
        console.error("Cannot load data.");
      }.bind(this)
    });
  },
  handleMessageSubmit: function(data) {
    $.ajax({
      url: "/messages",
      dataType: "json",
      type: "POST",
      data: {message: data},
      success: function(data) {
        this.setState({messages: data});
      }.bind(this),
      error: function(xhr, status, err) {
        console.error("Cannot load data.");
      }.bind(this)
    });
  },
  getInitialState: function() {
    return {messages: []};
  },
  componentDidMount: function() {
    this.loadMessages();
  },
  render: function() {
    return(
      <div>
        <MessageList messages={this.state.messages}/>
        <MessageForm onMessageSubmit={this.handleMessageSubmit}/>
      </div>
    )
  }
});
After building complete Component, don't forget that we have to have controller to response to the ajax request.
class MessagesController < ApplicationController
  def index
    load_messages
  end

  def new
  end

  def create
    @message = Message.new message_attributes
    @message.save
    load_messages
  end

  private
  def message_attributes
    params.require(:message).permit :content
  end

  def load_messages
    @messages = Message.all
    render json: @messages
  end
end
Now we get the complete MessageBox Component. So we can render this reactjs component in view using:
<%= react_component("MessageBox") %>
Now you can start running your server:
rails server
And go to localhost: 3000, you will get your Chat Application is running. But it is not realtime yet. We will apply action cable for it later.
Apply ActionCable to React Component
First, add this code to routes to tell where it will listen to:
mount ActionCable.server => "/cable"
Create MessageChannel
rails g channel Message
User will stream from a channel is called: channel_public_message
class MessageChannel < ApplicationCable::Channel
  def subscribed
    stream_from "channel_public_message"
  end

  def unsubscribed
  end
end
Then we will have to edit the following code in MessageBox Component to append message each time when we get broadcast.
  # ...
  setSubscription: function() {
    App.message = App.cable.subscriptions.create("MessageChannel", {
      connected: function() {},
      disconnected: function() {},
      received: function(data) {
        this.appendNewMessage(data);
      },
      appendNewMessage: this.appendNewMessage
    });
  },
  # ...
Then we should create Job to broadcast the message:
rails g job Message
After message is saved, we will start broadcast:
class Message < ApplicationRecord
  after_commit :broadcast

  private
  def broadcast
    MessageJob.perform_later self
  end
end
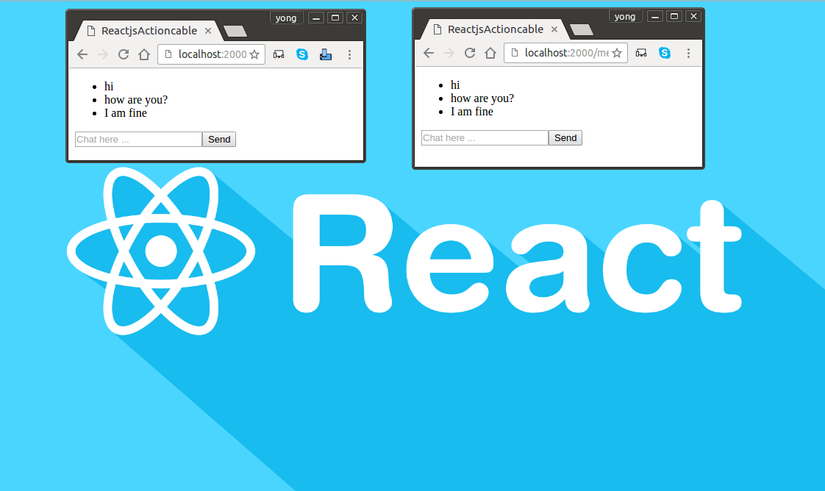
Now you have a full Simple Chat Application that realtime using Reactjs and ActionCable.
Conclusion
In this post, I don't explain too detail, but I give you the real example on how to apply action cable with Reactjs.
Complete Code and Demo https://github.com/yongsokheng/reactjs-actioncable
References
All rights reserved
