Ứng dụng ios nhận dạng qua bản vẽ( Part 1)
Bài đăng này đã không được cập nhật trong 6 năm
Ứng dụng ios nhận dạng qua bản vẽ
Sự ra đời của iPad Pro và Apple Pencil giúp cho việc vẽ ngay trên các thiết bị di động của Apple trở nên rất phổ biến (VD: Procreate - Ứng dụng được xây dựng hỗ trợ chuyên nghiệp cho vẽ tranh điện tử ngay trên thiết bị di động) Nhận diện phân loại qua một bản sẽ thực sự hữu ích chẳng hạn như tạo ra một trò chơi thao tác qua những bản vẽ trực tiếp hay biến nhưng gì đã vẽ thành một biểu tượng cảm xúc chẳng hạn.
Vấn đề và cách tiếp cận
Các bản vẽ bằng tay thực sự rất thú vị và nó sẽ thú vị hơn nếu chúng ta có thể nhận diện rằng chúng ta đã vẽ gì. Đó sẽ là một tính năng thú vị cung cấp cho ứng dụng hoặc trò chơi của bạn trở nên đặc biệt hơn một chút . Để giải quyết vấn đề đã đặt ra chúng ta sẽ phải thực hiện theo một số bước không thể thiếu sau đây :
- Xây dựng ứng dụng cho phép người dùng chụp ảnh các bản vẽ và thực hiện phân loại nó.
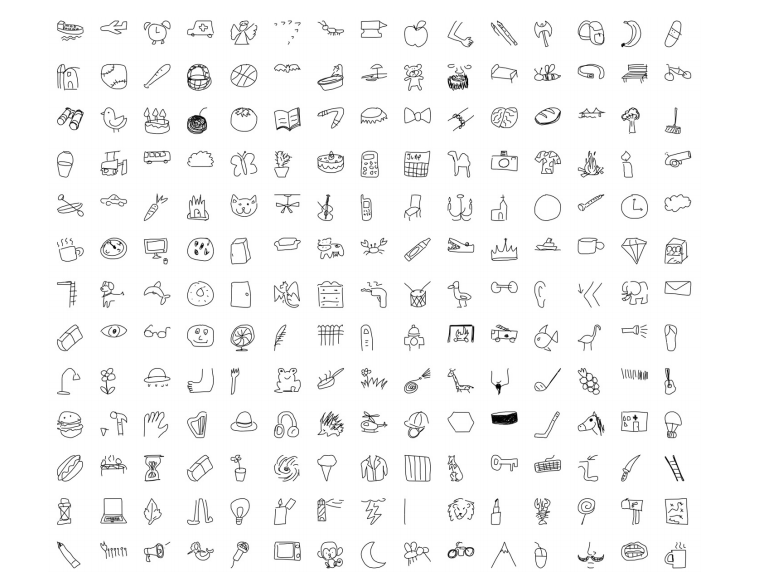
- Tìm kiếm tập dữ liệu và xây dựng mô hình có thể phân loại các bản vẽ từ các hình ảnh bitmap.
- Và một vài bước để hiệu chỉnh phân loại bản vẽ tốt nhất. Chúng ta sẽ xây dựng được một ứng dụng có thể xác định những gì chúng ta đã vẽ từ một bức ảnh của một bản vẽ nguệch ngoạc đen trắng.


Creating a model
Như đã giới thiệu mình sẽ dùng Turi Create của apple để xây dựng mô hình dữ liệu và cũng đồng nghĩa với chúng ta sẽ cần cài đặt môi trường Python :
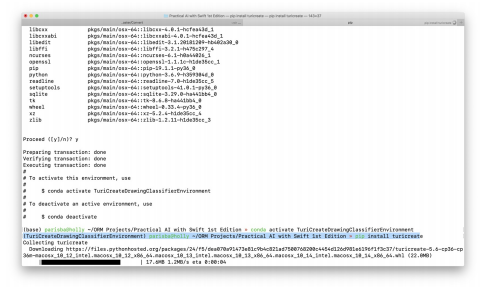
- Cài đặt môi trường Python và cài đặt Turi Create thông qua Pip theo cú pháp sau:
conda create -n TuriCreateDrawingClassifierEnvironment
python=3.6
conda activate TuriCreateDrawingClassifierEnvironment
pip install turicreate

- Tạo một tập lệnh Python mới có tên là: "train_drawing_groupifier.py" và import một số thư viện hỗ trợ sau:
    #!/usr/bin/env python
    import os
    import json
    import requests
    import numpy as np
    import turicreate as tc
- Thêm một số biến cài đặt và danh sách các danh mục mà chúng ta cần xây dựng :
    # THE CATEGORIES WE WANT TO BE ABLE TO DISTINGUISH
    categories = [
        'apple', 'banana', 'bread', 'broccoli', 'cake', 'carrot', 'coffee
        cup',
        'cookie', 'donut', 'grapes', 'hot dog', 'ice cream', 'lollipop',
        'mushroom', 'peanut', 'pear', 'pineapple', 'pizza', 'potato',
        'sandwich', 'steak', 'strawberry', 'watermelon'
    ]

# CONFIGURE AS REQUIRED
    this_directory = os.path.dirname(os.path.realpath(__file__))
    quickdraw_directory = this_directory + '/quickdraw'
    bitmap_directory = quickdraw_directory + '/bitmap'
    bitmap_sframe_path = quickdraw_directory + '/bitmaps.sframe'
    output_model_filename = this_directory + '/DrawingClassifierModel'
    training_samples = 10000
- Thêm function để tạo thư mục cho dữ liệu đào tạo:
# MAKE SOME FOLDERS TO PUT TRAINING DATA IN
    def make_directory(path):
        try:
            os.makedirs(path)
        except OSError:
            if not os.path.isdir(path):
               raise
    make_directory(quickdraw_directory)
    make_directory(bitmap_directory)
- Lấy dữ liệu bitmap mà chúng ta đã chuẩn bị sử dụng để đào tạo:
# FETCH SOME DATA
    bitmap_url = (
        'https://storage.googleapis.com/quickdraw_dataset/full/numpy_bitmap'
    )
    total_categories = len(categories)
    for index, category in enumerate(categories):
        bitmap_filename = '/' + category + '.npy'
        with open(bitmap_directory + bitmap_filename, 'w+') as bitmap_file:
            bitmap_response = requests.get(bitmap_url + bitmap_filename)
            bitmap_file.write(bitmap_response.content)
       print('Downloaded %s drawings (category %d/%d)' % (category, index + 1, total_categories))
   random_state = np.random.RandomState(100)
- Thêm một function để tạo SFrames từ hình ảnh:
    def get_bitmap_sframe():
      labels, drawings = [], []
    for category in categories:
      data = np.load(
        bitmap_directory + '/' + category + '.npy',
        allow_pickle = True
      )
    random_state.shuffle(data)
    sampled_data = data[: training_samples]
    transformed_data = sampled_data.reshape(
      sampled_data.shape[0], 28, 28, 1)
    for pixel_data in transformed_data:
      image =
      tc.Image(_image_data = np.invert(pixel_data).tobytes(),
        _width = pixel_data.shape[1],
        _height = pixel_data.shape[0],
        _channels = pixel_data.shape[2],
        _format_enum = 2,
        _image_data_size = pixel_data.size)
    drawings.append(image)
    labels.append(category)
    print('...%s bitmaps complete' % category)
    print('%d bitmaps with %d labels' % (len(drawings), len(labels)))
    return tc.SFrame({
      'drawing': drawings,
      'label': labels
    })
- Thêm một vài thứ để lưu những SFrames đó vào files
    # Save intermediate bitmap SFrame to file
    bitmap_sframe = get_bitmap_sframe()
    bitmap_sframe.save(bitmap_sframe_path)
    bitmap_sframe.explore()
- Và cuối cùng sẽ thực hiện đào tạo mô hình phân loại bản vẽ:
    bitmap_model = tc.drawing_classifier.create(
    bitmap_sframe, 'label', max_iterations=1000)
- Xuất mô hình sang định dạng CoreML
bitmap_model.export_coreml(output_model_filename + '.mlmodel')
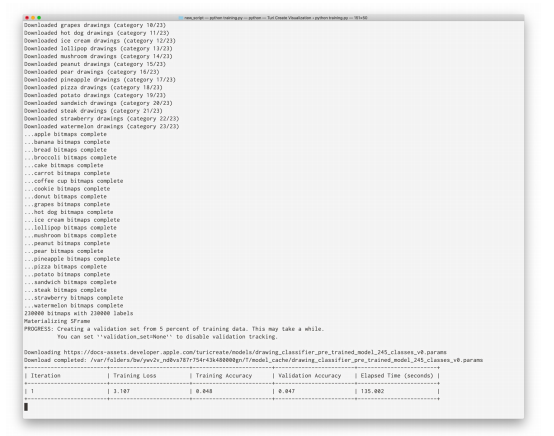
- Run tập lệnh:
python train_drawing_classifier.py

Sau khi quá trình đào tạo mô hình hoàn tất bạn sẽ có được mô hình với tên: "DrawingClassifierModel.mlmodel" Bạn có thể sử dụng mô hình này giống như bất kỳ CoreML nào khác.
Building the App
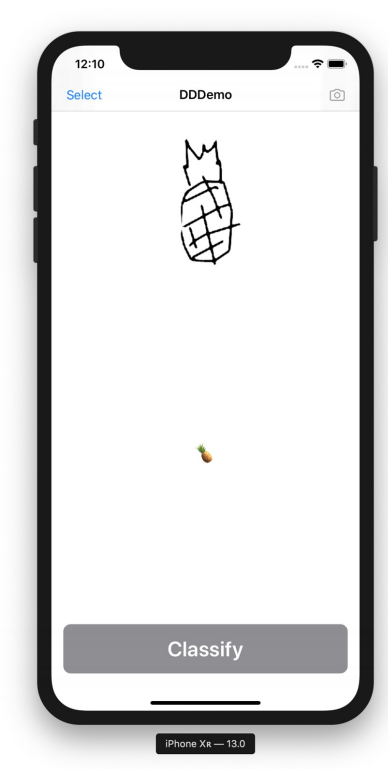
Đến đây chắc cũng thực sự đơn giản với mọi người chúng ta sẽ không tập trung vào chi tiết việc xây dựng UI của ứng dụng mà chỉ cần đảm bảo một số thành phần cần thiết:
- NavigationViewController sẽ hiển thị tiêu đề của ứng dụng, cũng như nút để chọn ảnh
- UIImage hiển thị hình ảnh đã chọn (chứa bản vẽ)
- UIButton để kích hoạt phân loại bản vẽ
- UIText hiển thị kết quả quá trình
Khi đã xong xây dựng UI chúng ta cùng đến với thực hiện logic cho ứng dụng:
- Trước hết cần kéo file mô hình đã tạo "DrawingClassifierModel.mlmodel"vào thư mục của project
- Thêm file Image.swift vào dự án để thêm một số hàm hỗ trợ cho UIImage.
extension UIImage {
    func applying(filter: CIFilter) -> UIImage? {
        filter.setValue(CIImage(image: self), forKey: kCIInputImageKey)
        let context = CIContext(options: nil)
        guard let output = filter.outputImage,
        let cgImage = context.createCGImage(
            output, from: output.extent) else {
            return nil
        }
        return UIImage(
            cgImage: cgImage,
            scale: scale,
            orientation: imageOrientation)
    }

    func fixOrientation() -> UIImage? {
        UIGraphicsBeginImageContext(self.size)
        self.draw(at: .zero)
        let newImage = UIGraphicsGetImageFromCurrentImageContext()
        UIGraphicsEndImageContext()
        return newImage
    }

    var cgImageOrientation: CGImagePropertyOrientation {
        switch self.imageOrientation {
            case .up: return .up
            case .down: return .down
            case .left: return .left
            case .right: return .right
            case .upMirrored: return .upMirrored
            case .downMirrored: return .downMirrored
            case .leftMirrored: return .leftMirrored
            case .rightMirrored: return .rightMirrored
        }
    }
}
- Tạo một tệp Swift mới khác có tên là Draw.swift và thêm một số framework sau:
import UIKit
import Vision
import Foundation
- Thêm một số enum sau:
enum Drawing: String, CaseIterable {
/// These only include those the model was trained on. For others
that
/// can be included in the training phase, see the full list of
/// categories in the dataset:
/// https://raw.githubusercontent.com/googlecreativelab/
/// quickdraw-dataset/master/categories.txt
case apple, banana, bread, broccoli, cake, carrot, coffee, cookie
case donut, grapes, hotdog, icecream, lollipop, mushroom, peanut,
pear
case pineapple, pizza, potato, sandwich, steak, strawberry,
watermelon
init?(rawValue: String) {
if let match = Drawing.allCases
.first(where: {
$0.rawValue == rawValue
})
{
self = match
}
else {
switch rawValue {
case "coffee cup": self = .coffee
case "hot dog": self = .hotdog
case "ice cream": self = .icecream
default: return nil
}
}
}
var icon: String {
switch self {
case .apple: return " "
case .banana: return " "
case .bread: return " "
case .broccoli: return " "
case .cake: return " "
case .carrot: return " "
case .coffee: return " "
case .cookie: return " "
case .donut: return " "
case .grapes: return " "
case .hotdog: return " "
case .icecream: return " "
case .lollipop: return " "
case .mushroom: return " "
case .peanut: return " "
case .pear: return " "
case .pineapple: return " "
case .pizza: return " "
case .potato: return " "
case .sandwich: return " "
case .steak: return " "
case .strawberry: return " "
case .watermelon: return " "
}
}
}
- Bạn cũng cần một extension cho VNImageRequestHandler:
extension VNImageRequestHandler {
    convenience init?(uiImage: UIImage) {
        guard let ciImage = CIImage(image: uiImage) else {
            return nil
        }
        let orientation = uiImage.cgImageOrientation
        self.init(ciImage: ciImage, orientation: orientation)
    }
}
- Thêm một extension khác trên DrawClassifierModelBitmap
extension DrawingClassifierModel {
    func configure(image: UIImage?) -> UIImage? {
        if let rotatedImage = image?.fixOrientation(),
        let grayscaleImage = rotatedImage
        .applying(filter: CIFilter.noir),
        // account for paper photography making everything dark :/
        let brightenedImage = grayscaleImage
        .applying(filter: CIFilter.brighten(amount: 0.4)),
        let contrastedImage = brightenedImage
        .applying(filter: CIFilter.contrast(amount: 10.0)) {
            return contrastedImage
        }
        return nil
    }

    func classify(_ image: UIImage?,
                  completion: @escaping (Drawing?) -> ()) {
        guard let image = image,
        let model = try? VNCoreMLModel(for: self.model) else {
            return completion(nil)
        }
        let request = VNCoreMLRequest(model: model)
        DispatchQueue.global(qos: .userInitiated).async {
            if let handler = VNImageRequestHandler(uiImage: image) {
                try? handler.perform([request])
                let results = request.results
                as? [VNClassificationObservation]
                let highestResult = results?.max {
                    $0.confidence < $1.confidence
                }
                print(results?.list ?? "")
                completion(
                    Drawing(rawValue: highestResult?.identifier ?? ""))
            }
            else {
                completion(nil)
            }
        }
    }
}
- Thêm function để thực hiện phân loại
private func classify() {
    print("Analysing drawing...")
    classifier.classify(self.image) {
        result in
        self.classification = result?.icon
    }
}
Bây giờ bạn có thể sử dụng ứng dụng phân loại bản vẽ của mình hãy vẽ một số thứ trên giấy, chụp ảnh và xem ứng dụng của bạn xác định bản vẽ của bạn (miễn là bản vẽ phù hợp với các loại bạn đã đào tạo mô hình)

Tổng kết
Đây chỉ là một cách bạn có thể thực hiện tính năng phân loại bản vẽ. Các bản vẽ thường sẽ được tạo trực tiếp trên các thiết bị iOS, điều đó có nghĩa là chúng ta bỏ qua một số bước để chụp hoặc chọn ảnh vậy tại sao không cho phép người dùng vẽ trực tiếp trong ứng dụng ? Bài viết tiếp theo mình sẽ xây dựng một trình phân loại các bản vẽ được tạo ngay trên ứng dụng.
Nếu bạn quan tâm đến source code demo có thể tham khảo tại link
All rights reserved