Tự tay build một React boilerplate "xịn sò" với Babel và Webpack
Bài đăng này đã không được cập nhật trong 7 năm
Yêu cầu chung
Thực hiện
init project
- mkdir react-boilerplate && cd react-boilerplate
- yarn init -y
- mkdir -p src/components test
- touch index.html
- touch src/index.js
- touch src/components/App.js
React
Đầu tiền, thêm thư viện React quen thuộc vào node modules:
yarn add react react-dom
mở project bằng 1 IDE hoặc editor bất kỳ (trong bài mình sẽ dùng visual studio code
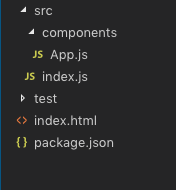
Tới đây thư mục project sẽ như hình:
 Mở file App.js và thêm vào component helloworld kinh điển:
import React, { Component } from 'react'

export default class App extends Component {
    render() {
        return (
            <div>
                <h1>Welcome to boilerplate</h1>
            </div>
        )
    }
}
Tiếp tục với file index.js
import React from 'react'
import ReactDOM from 'react-dom'
import App from './components/App'

ReactDOM.render(
    <App />,
    document.getElementById('app')
)
index.html:
<!DOCTYPE html>
<html lang="en">
<head>
    <meta charset="UTF-8">
    <meta name="viewport" content="width=device-width, initial-scale=1.0">
    <meta http-equiv="X-UA-Compatible" content="ie=edge">
    <title>react boiler plate</title>
</head>
<body>
    <div id="app"></div>
</body>
</html>
Babel
Install: yarn add @babel/core @babel/cli @babel/preset-env @babel/preset-react -D
Đầu tiên tạo file babel config: touch .babelrc trong thư mục gốc của project, sau đó thêm vào config:
  {
      "presets": ["@babel/env", "@babel/react"]
  }
Webpack
Install: yarn add webpack webpack-cli -D
Tạo file config cho webpack trong thư mục gốc của project: touch webpack.config.js
Thêm vào các config sau:
    const path = require('path')

    module.exports = {
        entry: {
            main: './src/index.js',
        },
        output: {
            filename: '[name].[hash].js',
            path: path.resolve('./dist'),
        }
    }
Thêm babel-loader: yarn add babel-loader -D
update webpack.config.js:
    const path = require('path')

    module.exports = {
        entry: {
            main: './src/index.js',
        },
        output: {
            filename: '[name].[hash].js',
            path: path.resolve('./dist'),
        },
        module: {
            rules: [
                {
                    test: /\.js$/,
                    exclude: /node_modules/,
                    use: [{ loader: 'babel-loader' }],
                }
            ]
        }
    }
Tiếp theo là phần webpack plugins quen thuộc:
yarn add html-webpack-plugin clean-webpack-plugin -D
update lại file webpack.config.js
    const CleanWebpackPlugin = require('clean-webpack-plugin')
    const HtmlWebpackPlugin = require('html-webpack-plugin')
    const path = require('path')

    module.exports = {
        entry: {
            main: './src/index.js',
        },
        output: {
            filename: '[name].[hash].js',
            path: path.resolve('./dist'),
        },
        module: {
            rules: [
                {
                    test: /\.js$/,
                    exclude: /node_modules/,
                    use: [{ loader: 'babel-loader' }],
                }
            ]
        },
        plugins: [
            new HtmlWebpackPlugin({
                template: 'index.html'
            }),
            new CleanWebpackPlugin()
        ]
    }
Phần mong chờ nhất là chạy thử xem project hoạt động ra sao với webpack-dev-server, đầu tiên là cài đặt thư node package: yarn add webpack-dev-server -D
Tiếp tục với việc config trên webpack.config.js:
    const CleanWebpackPlugin = require('clean-webpack-plugin')
    const HtmlWebpackPlugin = require('html-webpack-plugin')
    const path = require('path')

    module.exports = {
        entry: {
            main: './src/index.js',
        },
        output: {
            filename: '[name].[hash].js',
            path: path.resolve('./dist'),
        },
        module: {
            rules: [
                {
                    test: /\.js$/,
                    exclude: /node_modules/,
                    use: [{ loader: 'babel-loader' }],
                }
            ]
        },
        plugins: [
            new HtmlWebpackPlugin({
                template: 'index.html'
            }),
            new CleanWebpackPlugin()
        ],
        devServer: {
            host: 'localhost',
            port: 3000,
            open: true,
        }
    }
cuối cùng thêm config yarn start vào package.json
   {
       "scripts": {
           "start": "webpack-dev-server"
       }
    }
Chạy thử project bằng yarn start
Tới đây ta đã có 1 project reactjs với tính năng hot reload (bạn có thể test bằng cách thay đổi text trong App component để thấy view update). Để project thêm phần "xịn sò" cần add thêm unit test.
Tests
Unit test hiện nay gần như là bắt buộc với các dự án nên chúng ta cũng cần set up để project có thể chạy được unit test, ở đây ta sẽ dùng jest và enzyme
Trước tiên là add các node modules:
yarn add jest enzyme enzyme-adapter-react-16 react-test-renderer -D
tạo thêm file config cho Enzyme: touch ./test/enzyme.setup.js trong thư mục gốc của project, thêm vào đoạn code (bạn có thể tìm thấy các config này trong docs của enzyme)
import Enzyme from 'enzyme'
import Adapter from 'enzyme-adapter-react-16'

Enzyme.configure({
    adapter: new Adapter()
})
thêm đoạn config sau vào file package.json
    {
        "jest": {
            "setupFilesAfterEnv": [
                  "<rootDir>/test/enzyme.setup.js"
            ]
          }
    }
Tiếp theo sẽ test file App.js, đầu tiên tạo file App.test.js:
mkdir -p src/components/tests
touch src/components/tests/App.test.js
thêm vào một vài unit tests đơn giản:
import App from '../App'
import React from 'react'
import { shallow } from 'enzyme'

describe('<App />', () => {
    const wrapper = shallow(<App />)
    test('match snapshot', () => {
        expect(wrapper).toMatchSnapshot()
    })
     test('should render correct text', () => {
        expect(wrapper.find('h1').text()).toBe('Welcome to boilerplate')
    })
})
sau đó update lệnh chạy unit test trong package.json
{
    "scripts": {
        "start": "webpack-dev-server",
        "test": "jest ./test"
    }
}
Vậy là tới đây project đã đáp ứng các yêu cầu căn bản là hot reload và write unit test. Tuy nhiên, config hiện tại chưa tối ưu cho việc build cho production mode, hãy cùng nhau làm việc đó nhé.
Development and production mode
Công cụ chúng ta dùng ở đây là webpack-merge
yarn add webpack-merge -D
đổi tên webpack.config.js thành webpack.common.js(chứa các config chung cho project) và tạo thêm 2 file mới:
    mv webpack.config.js webpack.common.js
    touch webpack.prod.js
    touch webpack.dev.js
thay đổi nội dung file webpack.common.js thành như sau:
    const CleanWebpackPlugin = require('clean-webpack-plugin')
    const HtmlWebpackPlugin = require('html-webpack-plugin')
    const path = require('path')

    module.exports = {
        entry: {
            main: './src/index.js',
        },
        output: {
            filename: '[name].[hash].js',
            path: path.resolve('./dist'),
        },
        module: {
            rules: [
                {
                    test: /\.js$/,
                    exclude: /node_modules/,
                    use: [{ loader: 'babel-loader' }],
                }
            ]
        },
        plugins: [
            new HtmlWebpackPlugin({
                template: 'index.html'
            }),
            new CleanWebpackPlugin()
        ]
    }
File webpack.dev.js sẽ như sau:
const merge = require('webpack-merge')
const common = require('./webpack.common.js')

module.exports = merge(common, {
    mode: 'development',
    devServer: {
        host: 'localhost',
        port: 3000,
        open: true,
    }
})
và webpack.prod.js:
    const merge = require('webpack-merge')
    const common = require('./webpack.common.js')

    module.exports = merge(common, {
        mode: 'production'
    })
Bước cuối là cập nhật lại package.json
{
    "scripts": {
        "start": "webpack-dev-server --config webpack.dev.js",
        "test": "jest ./test",
        "build": "webpack --config webpack.prod.js"
    }
}
Dành vài phút để tận hưởng thành quả cuối cùng với yarn start, yarn test && yarn build nhé.
Hẹn gặp lại các bạn trong bài tới.
All rights reserved
