Tự làm blog với Keystone CMS và Next.js
Bài đăng này đã không được cập nhật trong 7 năm
KeystoneJS là một trong những CMS ( Content Management System) tốt nhất được viết bằng Nodejs. Với CLI riêng, nó sẽ auto-generated tất cả các thành phần cần thiết để tạo ra 1 trang web với tính tùy biến cao, dễ dàng chỉnh sửa tùy theo nhu cầu sử dụng. Tuy nhiên, về phần frontend thì Keystone đang sử dụng template engine và chúng ta sẽ tìm hiểu cách tích hợp React vào trong CMS này.
Next.js is a popular React SSR (Server Side Rendering) framework which allows you to build an SEO friendly React website with minimal configuration. With server side rendering, you can set SEO meta tags on the server before returning to the client. So search engine can crawl the data without running any Javascript, which is especially important for blogs and news websites.
Next.js là một framework React SSR ( Server Side Rendering ) nổi tiếng, cho phép bạn xây dựng một SEO-friendly website với phần cài đặt nhỏ nhất. Với SSR, bạn có thể đặt các thẻ <meta> ở trên server trước khi mà chúng được trả về cho client. Điều này sẽ giúp search engine lấy được thông tin web của bạn.
Chuẩn bị
node & npm đã được cài đặt từ trước
Cài đặt KeystoneJS
Đầu tiên, hãy cài đặt mongoDB, bạn đọc có thể lấy về tại đây
Tiếp đến, cài đặt Keystone với Yeoman
npm install yo -g
npm install -g generator-keystone
yo keystone
Sau khi cài đặt thành công thì sẽ hiện bảng thông báo như này:
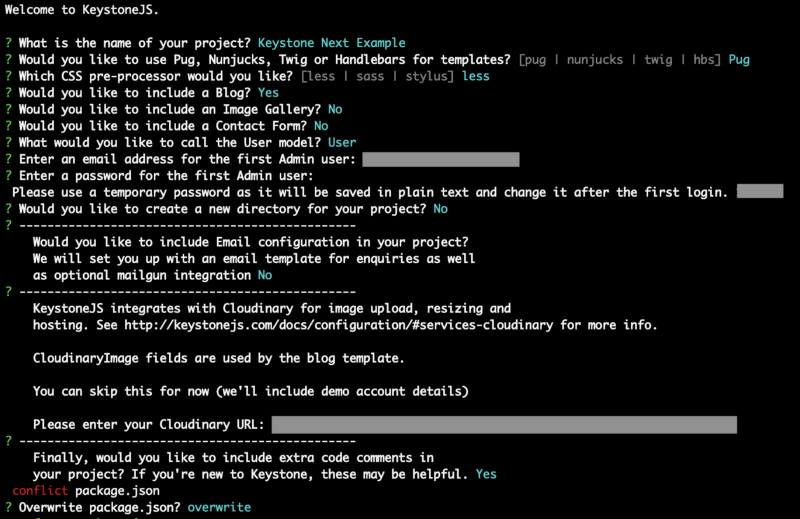
... và cấu trúc thư mục sẽ như thế này:
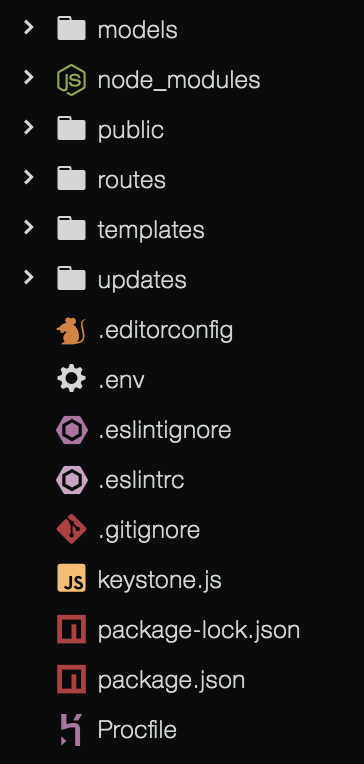
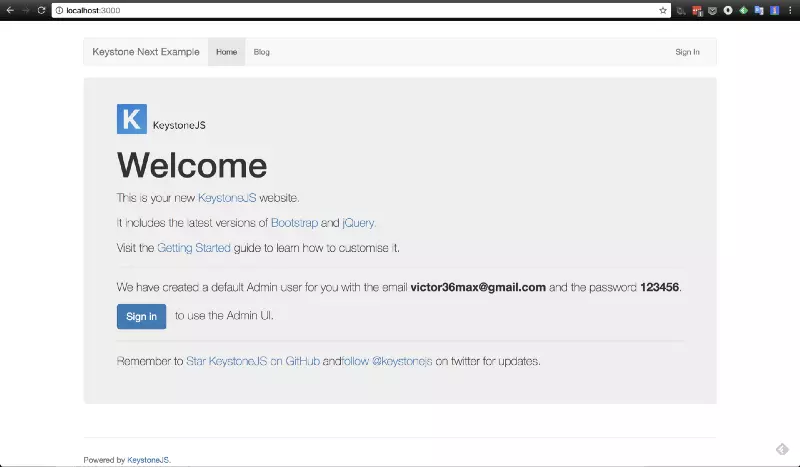
Chúng ta sẽ thử chạy project bằng
node keystone
Cài đặt Next.JS
Chúng ta sẽ cài đặt một số module sau:
npm install next react react-dom axios --save
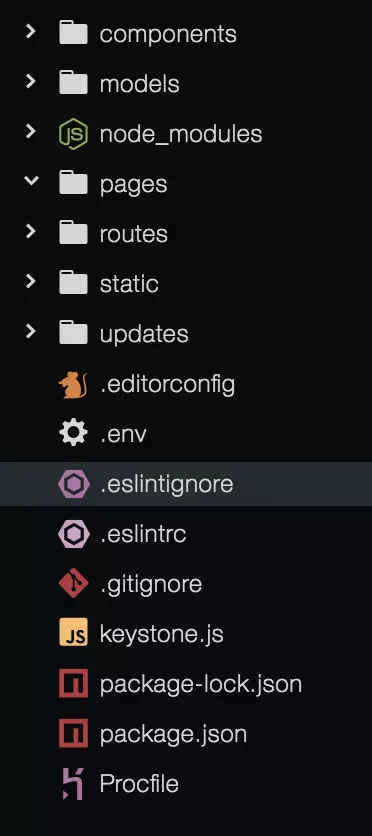
Tiếp theo, chúng ta xoá 2 thư mục templates & public, thay thế bằng pages , components và static. Project sẽ trông như thế này:
Tiếp theo, ở file keystone.js, thêm dòng này để init next
// Next app
const next = require('next');
const dev = process.env.NODE_ENV !== 'production';
const app = next({ dev });
// Start Next app
app.prepare()
 .then(() => {

  // Setup common locals for your templates. The following are required for the
  // bundled templates and layouts. Any runtime locals (that should be set uniquely
  // for each request) should be added to ./routes/middleware.js
  keystone.set('locals', {
   _: require('lodash'),
   env: keystone.get('env'),
   utils: keystone.utils,
   editable: keystone.content.editable,
  });

  // Load your project's Routes
  keystone.set('routes', require('./routes'));

  // Configure the navigation bar in Keystone's Admin UI
  keystone.set('nav', {
   posts: ['posts', 'post-categories'],
   users: 'users',
  });

  keystone.start();
 });
File sẽ thành như sau:
// Simulate config options from your production environment by
// customising the .env file in your project's root folder.
require('dotenv').config();

// Next app
const next = require('next');
const dev = process.env.NODE_ENV !== 'production';
const app = next({ dev });

// Require keystone
const keystone = require('keystone');

// Initialise Keystone with your project's configuration.
// See http://keystonejs.com/guide/config for available options
// and documentation.
keystone.init({
 'name': 'Keystone Next Example',
 'brand': 'Keystone Next Example',
 'auto update': true,
 'session': true,
 'auth': true,
 'user model': 'User',
});

// Load your project's Models
keystone.import('models');

// Start Next app
app.prepare()
 .then(() => {

  // Load your project's Routes
  keystone.set('routes', require('./routes')(app));

  // Configure the navigation bar in Keystone's Admin UI
  keystone.set('nav', {
   posts: ['posts', 'post-categories'],
   users: 'users',
  });

  keystone.start();
 });
Tiếp đến ở folder routes, xoá folder views và file middleware.js
Ở routes/index.js, chúng ta sẽ viết api từ keystone rồi để Next.js xử lí vụ routes
const keystone = require('keystone');

// Setup Route Bindings
exports = module.exports = nextApp => keystoneApp => {

	// Next request handler
	const handle = nextApp.getRequestHandler();

	keystoneApp.get('/api/posts', (req, res, next) => {
		const Post = keystone.list('Post');
		Post.model
			.find()
			.where('state', 'published')
			.sort('-publishedDate')
			.exec(function (err, results) {
				if (err) throw err;
				res.json(results);
			});
	});

	keystoneApp.get('*', (req, res) => {
		return handle(req, res);
	});
};
Sau khi sửa keystone.js và routes/index.js, chạy lại keystone
Tiếp đến là phần React, tạo thử 1 trang App.js ở /pages
import { Component } from 'react';

class App extends Component {
  render() {
    return (
      <div>Hello World</div>
    );
  };
}

export default App;
Implement React và Keystone
Tạo một bài viết mới ở localhost:3000/keystone
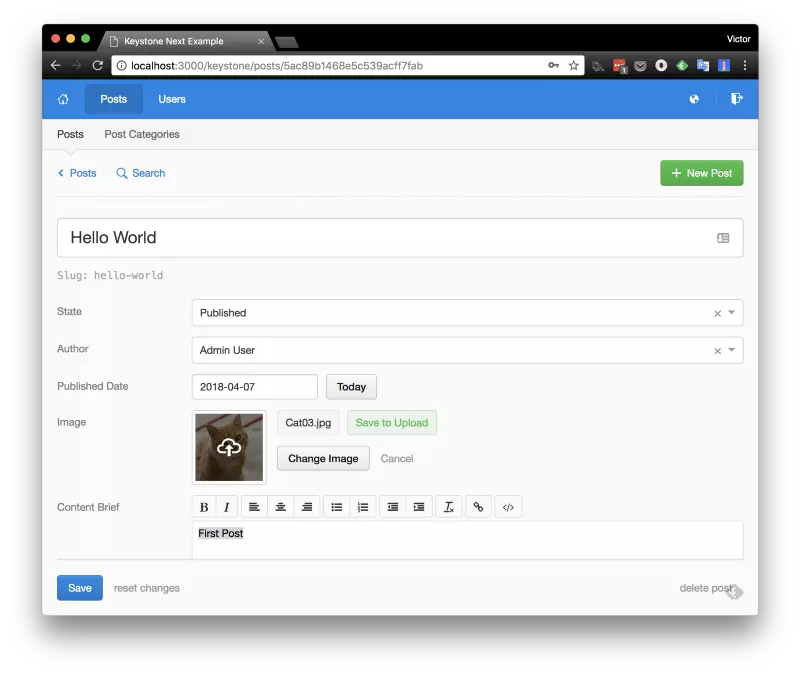
Tiếp đến ở folder /pages, tạo 1 file mới tên là _document.js, thêm thư viện Boostrap:
import Document, { Head, Main, NextScript } from 'next/document'
import flush from 'styled-jsx/server'

export default class MyDocument extends Document {
  static getInitialProps({ renderPage }) {
    const { html, head, errorHtml, chunks } = renderPage()
    const styles = flush()
    return { html, head, errorHtml, chunks, styles }
  }

  render() {
    return (
      <html>
        <Head>
          <meta name='viewport' content='width=device-width, initial-scale=1.0' />
          <link rel='stylesheet' href='https://maxcdn.bootstrapcdn.com/bootstrap/4.0.0-beta.3/css/bootstrap.min.css' integrity='sha384-Zug+QiDoJOrZ5t4lssLdxGhVrurbmBWopoEl+M6BdEfwnCJZtKxi1KgxUyJq13dy' crossOrigin='anonymous' />
        </Head>
        <body>
          <Main />
          <script src='https://code.jquery.com/jquery-3.2.1.slim.min.js' integrity='sha384-KJ3o2DKtIkvYIK3UENzmM7KCkRr/rE9/Qpg6aAZGJwFDMVNA/GpGFF93hXpG5KkN' crossOrigin='anonymous'></script>
          <script src='https://maxcdn.bootstrapcdn.com/bootstrap/4.0.0-beta.3/js/bootstrap.min.js' integrity='sha384-a5N7Y/aK3qNeh15eJKGWxsqtnX/wWdSZSKp+81YjTmS15nvnvxKHuzaWwXHDli+4' crossOrigin='anonymous'></script>
          <NextScript />
        </body>
      </html>
    )
  }
}
Call api ở App.js
import { Component } from 'react';
import axios from 'axios'

class App extends Component {

  static async getInitialProps() {
    let response = await axios.get('http://localhost:3000/api/posts');
    return { posts: response.data };
  }

  render() {
    return (
      <div className='container'>
        <style jsx>{`
            .header {
              padding: 16px 16px;
            }
            .content {
              padding: 16px 16px;
            }
            .post {
              margin-bottom: 16px;
            }
        `}</style>
        <div className='header'>
          <h1>Keystone Next Example</h1>
        </div>
        <div className='content'>
          { this.props.posts.map((post, i) => {
              return (
                <div className='post' key={i}>
                  <div className='row'>
                    <div className='col-12 col-md-4'>
                      <img className='img-fluid' src={post.image.secure_url}/>
                    </div>
                    <div className='col-12 col-md-8'>
                      <h2>{post.title}</h2>
                      <div dangerouslySetInnerHTML={{__html: post.content.brief}}></div>
                    </div>
                  </div>
                </div>
              );
            }) }
        </div>
      </div>
    );
  };
}

export default App;
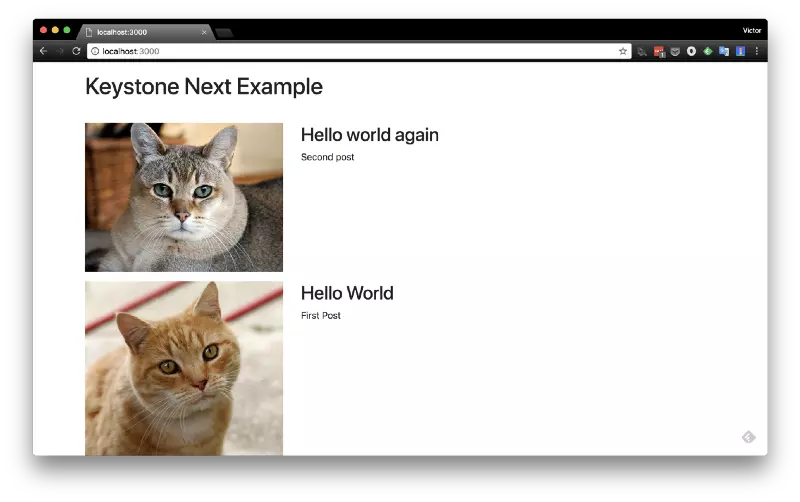
Tada !
====================
Bài viết được dịch từ https://medium.com/@victor36max/how-to-build-a-react-driven-blog-with-next-js-and-keystonejs-cae3cd9fb804
All rights reserved