Tìm hiểu về InApp Purchase trên iOS (P2)
Bài đăng này đã không được cập nhật trong 7 năm
Nội dung
- Giới thiệu
- Cài đặt Project
- Listing In-App Purchases
- Purchased Items
- Making a Sandbox Purchase
- Kết Luận
Giới thiệu

Ở phần 1 chúng ta đã tìm hiểu về các khái niệm và tiến hành các bước chuẩn bị: tạo app, tạo In-App Purchase Products, tạo Sandbox User tester... Ở phần 2, chúng ta sẽ tiếp tục đi sâu hơn ở các bước tạo project, viết code...
Nào chúng ta cùng tìm hiểu nhé!
Cài đặt Project
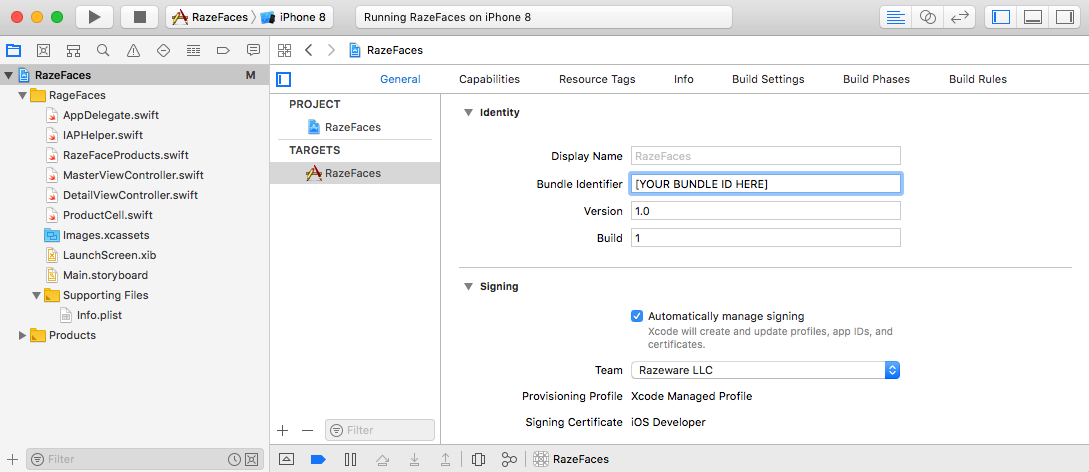
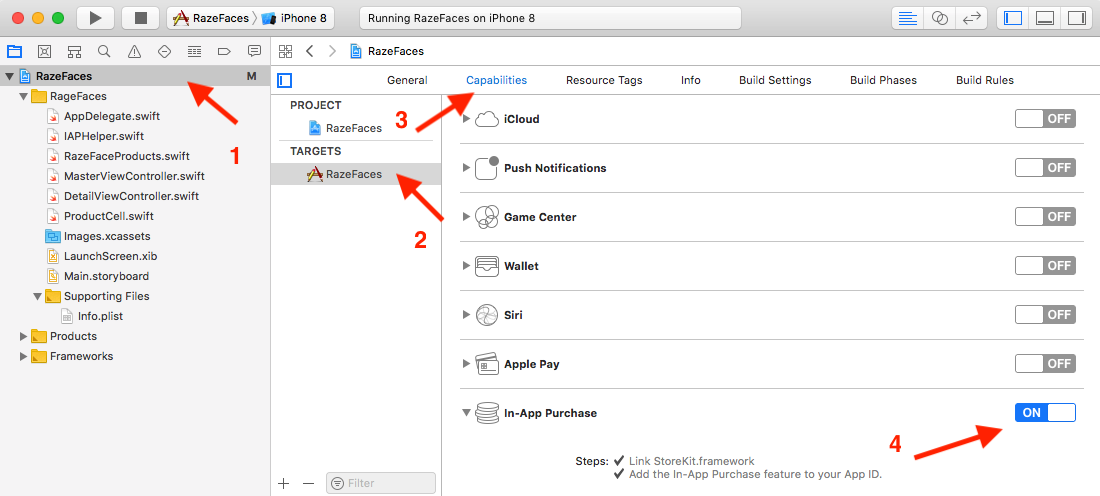
Để mọi thứ làm việc chính xác, chúng ta cần cấu hình bundle identifier và product identifiers trên app giống với bạn đã tạo trên Developer Center và App Store connect. Chúng ta cùng theo dõi ví dụ về project RazeFaces dưới đây:
Mở file RazeFaceProducts.swift, chú ý cài đặt đúng Product ID tương ứng với đã config trên App Store Connect:
public static let SwiftShopping = "com.theNameYouPickedEarlier.razefaces.swiftshopping"
Chú ý: Thông thường danh sách với bài toán thực tế có nhiều Product ID. Chúng ta thường quản lý trên server và sẽ call API để lấy về. Tuy nhiên đây là ví dụ đơn giản nên tôi sẽ mô phỏng để các bạn hiểu dễ dàng nhất.
Listing In-App Purchases
Thuộc tính store của RazeFaceProducts là một instance của IAPHelper. Đối tượng sẽ tương tác với StoreKit API để liệt kê danh sách và tiến hành purchase.
Mở file IAPHelper.swift. Sau đó chúng ta thêm các private property dưới đây:
private let productIdentifiers: Set<ProductIdentifier>
private var purchasedProductIdentifiers: Set<ProductIdentifier> = []
private var productsRequest: SKProductsRequest?
private var productsRequestCompletionHandler: ProductsRequestCompletionHandler?
Tiếp theo, trong hàm init(productIds:), trước khi gọi super.init() chúng ta thêm dòng sau:
productIdentifiers = productIds
Tiếp theo chúng ta tiến hành thay thế implementation của requestProducts(_ dưới đây:
public func requestProducts(completionHandler: @escaping ProductsRequestCompletionHandler) {
  productsRequest?.cancel()
  productsRequestCompletionHandler = completionHandler

  productsRequest = SKProductsRequest(productIdentifiers: productIdentifiers)
  productsRequest!.delegate = self
  productsRequest!.start()
}
Phần code trên giúp cho việc tạo và cài đặt request tới Apple thông qua SKProductsRequest object. Tiếp theo chúng ta sẽ cài đặt delegate của request thông qua SKProductsRequestDelegate protocol:
// MARK: - SKProductsRequestDelegate

extension IAPHelper: SKProductsRequestDelegate {

  public func productsRequest(_ request: SKProductsRequest, didReceive response: SKProductsResponse) {
    print("Loaded list of products...")
    let products = response.products
    productsRequestCompletionHandler?(true, products)
    clearRequestAndHandler()

    for p in products {
      print("Found product: \(p.productIdentifier) \(p.localizedTitle) \(p.price.floatValue)")
    }
  }

  public func request(_ request: SKRequest, didFailWithError error: Error) {
    print("Failed to load list of products.")
    print("Error: \(error.localizedDescription)")
    productsRequestCompletionHandler?(false, nil)
    clearRequestAndHandler()
  }

  private func clearRequestAndHandler() {
    productsRequest = nil
    productsRequestCompletionHandler = nil
  }
}
Purchased Items
Nếu bạn muốn biết được chính xác items nào đã được purchased. Để làm việc này, bạn sẽ sử dụng purchasedProductIdentifiers property. Nếu một product identifier nằm trong danh sách này, nghĩa là user đã mua nó.
return purchasedProductIdentifiers.contains(productIdentifier)
Tiếp theo trong IAPHelper.swift, chúng ta cài đặt init(productIds:) như dưới đây:
public init(productIds: Set<ProductIdentifier>) {
  productIdentifiers = productIds
  for productIdentifier in productIds {
    let purchased = UserDefaults.standard.bool(forKey: productIdentifier)
    if purchased {
      purchasedProductIdentifiers.insert(productIdentifier)
      print("Previously purchased: \(productIdentifier)")
    } else {
      print("Not purchased: \(productIdentifier)")
    }
  }
  super.init()
}
Making Purchases
Chúng ta tiến hành cài đặt trong func buyProduct(_
public func buyProduct(_ product: SKProduct) {
  print("Buying \(product.productIdentifier)...")
  let payment = SKPayment(product: product)
  SKPaymentQueue.default().add(payment)
}
SKPayment tiến hành tạo một payment object sử dụng SKProduct. Tuy nhiên để handle được phần respone trả về, chúng ta cần implement SKPaymentTransactionObserver protocol.
// MARK: - SKPaymentTransactionObserver

extension IAPHelper: SKPaymentTransactionObserver {

  public func paymentQueue(_ queue: SKPaymentQueue,
                           updatedTransactions transactions: [SKPaymentTransaction]) {
    for transaction in transactions {
      switch transaction.transactionState {
      case .purchased:
        complete(transaction: transaction)
        break
      case .failed:
        fail(transaction: transaction)
        break
      case .restored:
        restore(transaction: transaction)
        break
      case .deferred:
        break
      case .purchasing:
        break
      }
    }
  }

  private func complete(transaction: SKPaymentTransaction) {
    print("complete...")
    deliverPurchaseNotificationFor(identifier: transaction.payment.productIdentifier)
    SKPaymentQueue.default().finishTransaction(transaction)
  }

  private func restore(transaction: SKPaymentTransaction) {
    guard let productIdentifier = transaction.original?.payment.productIdentifier else { return }

    print("restore... \(productIdentifier)")
    deliverPurchaseNotificationFor(identifier: productIdentifier)
    SKPaymentQueue.default().finishTransaction(transaction)
  }

  private func fail(transaction: SKPaymentTransaction) {
    print("fail...")
    if let transactionError = transaction.error as NSError?,
      let localizedDescription = transaction.error?.localizedDescription,
        transactionError.code != SKError.paymentCancelled.rawValue {
        print("Transaction Error: \(localizedDescription)")
      }

    SKPaymentQueue.default().finishTransaction(transaction)
  }

  private func deliverPurchaseNotificationFor(identifier: String?) {
    guard let identifier = identifier else { return }

    purchasedProductIdentifiers.insert(identifier)
    UserDefaults.standard.set(true, forKey: identifier)
    NotificationCenter.default.post(name: .IAPHelperPurchaseNotification, object: identifier)
  }
}
Making a Sandbox Purchase
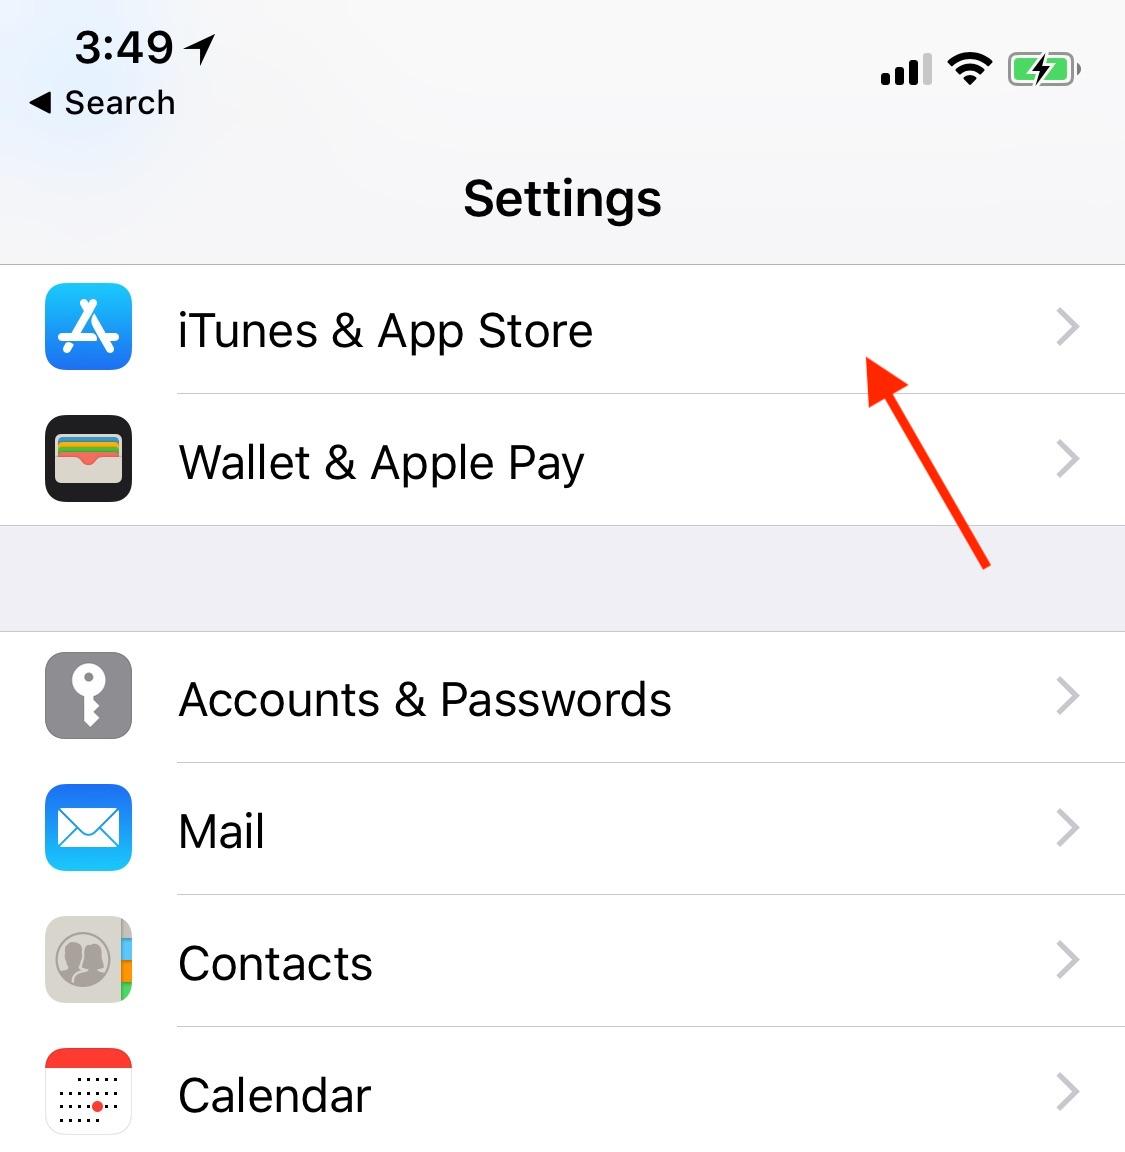
Build và run app trên device thật. Account sandbox tester trước chúng ta có thể sử dụng để mua. Trước hết chúng ta cần thoát account thật chúng ta sử dụng để download app trên Store trước:
Sau đó tiến hành mua và nhập thông tin account sanbox tester như dưới đây:
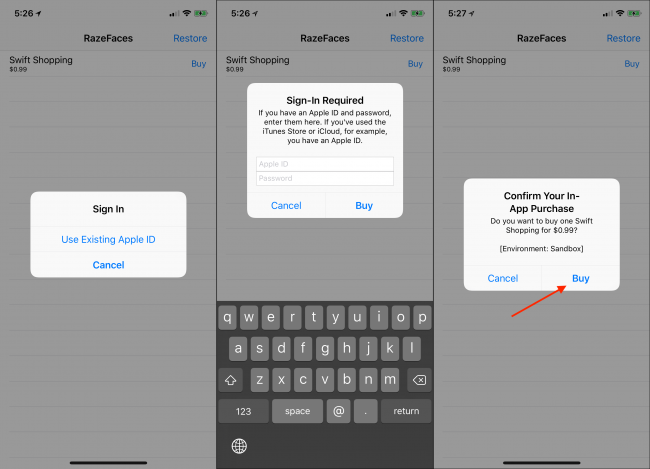
Sau khi thanh toán thành công sẽ có alert thông báo bạn đã mua item này thành công.
Kết Luận
Quả thật In-App Purchase đã giúp mong muốn tích hợp thanh toán lên ứng dụng iOS trở nên tương đối đơn giản và dễ dàng. Người dùng sử dụng luôn tài khoản Apple để thanh toán cho item mình muốn mua một cách rất tiện dụng.
Cám ơn bạn đã dành thời gian cho bài viết!
Nguồn:
https://www.raywenderlich.com/5456-in-app-purchase-tutorial-getting-started
All rights reserved
