Tìm hiểu PHP CLI (P2)
Bài đăng này đã không được cập nhật trong 4 năm
Mở đầu
Trong bài viết Tìm hiểu PHP CLI (P1), tôi đã cùng với các bạn tìm hiểu sơ lược về PHP CLI, cũng như sử dụng một số câu lệnh căn bản. Hôm nay, chúng ta sẽ dùng những hiểu biết đã có để xây dựng lên một vài console command của riêng mình. Từ đó hiểu hơn về các framework hay thư viện có thành phần này.
Giới thiệu
Trước khi bắt tay vào code, chúng ta sẽ phân tích một chút xem làm thế nào để lấy được các tham số truyền vào của một console command. Để thực hiện ví dụ lần này, tôi cần chạy một tập các lệnh trong một tệp thực thi. Như vậy cú pháp cơ bản sẽ như sau:
# <file> là đường dẫn đến tệp thực thi của chúng ta.
# [inputs] là các tham số được người dùng truyền vào.
php <file> [inputs]
Vấn đề là làm thế nào để lấy ra được các inputs để có thực thi các tác vụ phù hợp? Rất may mắn, php đã cung cấp cho chúng ta một super global variable, nơi chúng ta có thể lấy ra mọi dữ liệu của hệ thống bao gồm cả thông số đầu vào của console command (nếu có). Ngay bây giờ, tôi sẽ tạo ra một thư mục php-cli và tệp display_inputs.php để chứng minh điều này.
Tôi tạo ra một tệp php ngắn gọn có nội dung như sau:
<?php
// Mọi tham số truyền vào của php cli đều được lưu trữ và truy xuất tại $GLOBALS['argv']
// In ra màn hình những thông số mà người dùng truyền vào.
print_r($GLOBALS['argv']);
Sau đó, tôi chạy lệnh trên màn hình console để thấy rõ kết quả:
$ php display_inputs.php first_argument second_argument third_argument
Array
(
    [0] => display_inputs.php
    [1] => first_argument
    [2] => second_argument
    [3] => third_argument
)
Các bạn có thể thấy, php đã lấy các tham số trong console command lưu trữ vào biến $GLOBALS['argv'], theo thứ tự chúng ta gõ trên màn hình console. Lưu ý một chút, vì chúng ta thực thi tập lệnh trong một tệp .php nên tham số đầu tiên luôn là tên tệp đó (có cả phần mở rộng), theo sau sẽ là những tham số kế tiếp. Dựa vào đây, chúng ta hoàn toàn có thể làm những công việc khác. Nào, hãy bắt đầu "build your command".
Thực hiện
1. Tạo tệp thực thi
- Để đua đòi giống php framework đình đám hiện nay là Laravel, tôi xin phép lấy tên tệp thực thi là artisan.
- Tiếp theo, như đã nói trong phần giới thiệu, khi lấy inputs mà người dùng truyền vào, chúng ta luôn có tên tệp đầu tiên. Vì vậy tôi sẽ bỏ luôn phần này khi lấy ra các argv:
<?php

// Lấy tất cả đầu vào từ lệnh console command đang thực thi.
$argv = $GLOBALS['argv'];

// Xóa bỏ tên tệp thực thi ra khỏi danh sách đầu vào.
unset($argv[0]);
- Vì mục đích chỉ là tìm hiểu sơ lược nên tôi sẽ làm thật đơn giản. Ở đây, tôi quy định tham số thứ 2 (sau tên tệp) sẽ là tên command, tất cả những đầu vào còn lại sẽ là arguments.
// Kiểm tra xem người dùng có truyền vào tên command không?
if (! isset($argv[1])) {
    throw \RuntimeException("Missing command's name.");
}

// Lấy ra tên command.
$commandName = array_shift($argv);

// Cho tất cả các đầu vào còn lại là tham số.
$arguments = $argv;
- Khi đã lấy được các thông số cần thiết từ command's inputs, chúng ta sẽ kiểm tra xem command này đã được đăng ký trong hệ thống chưa.
// Lấy thông tin từ routes.php
$routes = require 'routes.php';

// Kiểm tra xem tên command được gọi đã được đăng ký chưa?
if (! isset($routes[$commandName])) {
    throw new \Exception("Command [{$commandName}] was not registerd.");
}
- Cuối cùng chúng ta sẽ thực thi command của mình.
// Gọi kịch bản khai báo base command.
require 'Commands/Command.php';

// Gọi kịch bản khai báo class tương ứng với tên command.
require $file = $routes[$commandName]['file'];

// Lấy ra tên của class, cái mà sẽ thực thi command này.
$commandClassName = $routes[$commandName]['class'];

// Lấy ra mô tả của command.
$description = $routes[$commandName]['description'];

// Khởi tạo đối tượng command và truyền vào mảng tham số.
$command = new $commandClassName($commandName, $arguments, $description);

// Thực thi command và trả về mã trạng thái (0: thực thi thành công; 1: có lỗi xảy ra).
$status = $command->execute();

// Kết thúc kịch bản với mã trạng thái nhận được.
exit($status);
- Cuối cùng, tôi có một tệp artisan hoàn chỉnh như thế này đây:
<?php

// Lấy tất cả đầu vào từ lệnh console command đang thực thi.
$argv = $GLOBALS['argv'];

// Xóa bỏ tên tệp thực thi ra khỏi danh sách đầu vào.
unset($argv[0]);

// Kiểm tra xem người dùng có truyền vào tên command không?
if (! isset($argv[1])) {
    throw new \RuntimeException("Missing command's name.");
}

// Lấy ra tên command.
$commandName = array_shift($argv);

// Cho tất cả các đầu vào còn lại là tham số.
$arguments = $argv;

// Lấy thông tin từ routes.php
$routes = require 'routes.php';

// Kiểm tra xem tên command được gọi đã được đăng ký chưa?
if (! isset($routes[$commandName])) {
    throw new \Exception("Command [{$commandName}] was not registerd.");
}

// Gọi kịch bản khai báo base command.
require 'Commands/Command.php';

// Gọi kịch bản khai báo class tương ứng với tên command.
require $file = $routes[$commandName]['file'];

// Lấy ra tên của class, cái mà sẽ thực thi command này.
$commandClassName = $routes[$commandName]['class'];

// Lấy ra mô tả của command.
$description = $routes[$commandName]['description'];

// Khởi tạo đối tượng command và truyền vào mảng tham số.
$command = new $commandClassName($commandName, $arguments, $description);

// Thực thi command và trả về mã trạng thái (0: thực thi thành công; 1: có lỗi xảy ra).
$status = $command->execute();

// Kết thúc kịch bản với mã trạng thái nhận được.
exit($status);
2. Tạo tệp routes.php
- Tôi định nghĩa một command cần những thông tin sau:
- Tên command.
- Đường dẫn đầy đủ đến tệp định nghĩa command.
- Class đại diện cho command.
- Mô tả cho command.
- Như vậy, tệp routes của tôi sẽ được định nghĩa như sau:
<?php

return [
   '--help' => [
       'file' => __DIR__ . '/Commands/HelpCommand.php',
       'class' => \Commands\HelpCommand::class,
       'description' => 'Please execute syntax: <commandName> [arguments]',
   ],

   'make:file' => [
       'file' => __DIR__ . '/Commands/MakeFileCommand.php',
       'class' => \Commands\MakeFileCommand::class,
       'description' => 'Make a new local file if it does not exist.'
   ],
];
3. Khai báo commands
- Trước hết tôi tạo ra tệp định nghĩa base command như sau:
<?php

namespace Commands;

abstract class Command
{
   protected $name;

   protected $arguments;

   protected $description;

   public function __construct($name, array $arguments, $description = '')
   {
       $this->name = $name;
       $this->arguments = $arguments;
       $this->description = $description;
   }
}
- Dựa vào tệp routes.php, tôi tạo ra hai tệp tương ứng với --help command và make:file command lần lượt như sau:
<?php

namespace Commands;

class HelpCommand extends Command
{
   public function execute()
   {
       if (! empty($this->arguments)) {
           throw new \RuntimeException('Too many arguments attempted to command [' . $this->name . ']');
       }

       if (count($this->arguments) === 0) {
           echo $this->description, PHP_EOL;
       }

       return 0;
   }
}
<?php

namespace Commands;

class MakeFileCommand extends Command
{
   public function execute()
   {
       if (count($this->arguments) > 1) {
           throw new \RuntimeException('Too many arguments attempted to command [' . $this->name . ']');
       }

       if ($this->expectedHelp()) {
           echo $this->description, PHP_EOL;

           return 0;
       }

       try {
           $filePath = array_shift($this->arguments);

           if (! is_file($filePath)) {
               $resource = fopen($filePath, 'w');
               fclose($resource);
           }

           echo "File [$filePath] was created sucessfully.", PHP_EOL;
       } catch (\Exception $e) {
           return 1;
       }

       return 0;
   }

   protected function expectedHelp()
   {
       return (bool) array_filter($this->arguments, function ($argument) {
           return $argument === '--help';
       });
   }
}
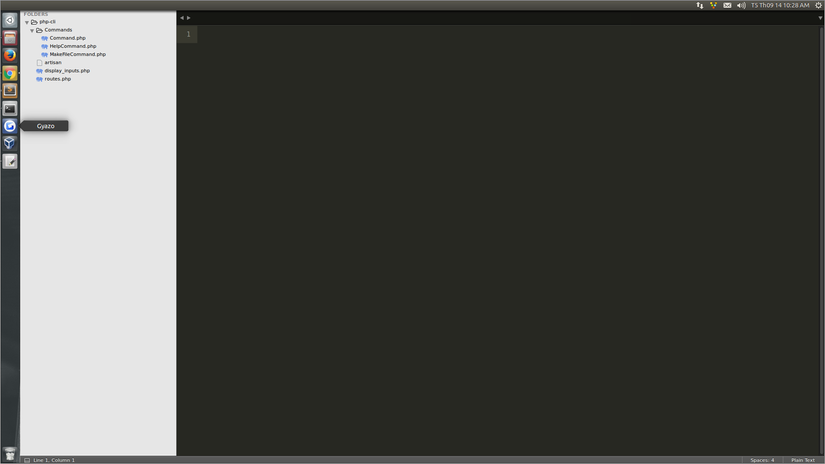
- Cấu trúc thư mục mà tôi tạo ra nó sẽ trông như thế này:
4. Thực thi commands
- Bây giờ chúng đa đã có hai commands, hãy thực thi và kiểm nghiệm một số kết quả:
- Gọi đến một command chưa được đăng ký.
$ php artisan non-register
PHP Fatal error:  Uncaught Exception: Command [non-register] was not registerd. in /home/nguyen.xuan.quynh/Code/learning/php-cli/artisan:25
Stack trace:
#0 {main}
 thrown in /home/nguyen.xuan.quynh/Code/learning/php-cli/artisan on line 25

Fatal error: Uncaught Exception: Command [non-register] was not registerd. in /home/nguyen.xuan.quynh/Code/learning/php-cli/artisan:25
Stack trace:
#0 {main}
 thrown in /home/nguyen.xuan.quynh/Code/learning/php-cli/artisan on line 25
- Truyền quá nhiều arguments cho một command.
php artisan make:file first second
PHP Fatal error:  Uncaught RuntimeException: Too many arguments attempted to command [make:file] in /home/nguyen.xuan.quynh/Code/learning/php-cli/Commands/MakeFileCommand.php:10
Stack trace:
#0 /home/nguyen.xuan.quynh/Code/learning/php-cli/artisan(44): Commands\MakeFileCommand->execute()
#1 {main}
  thrown in /home/nguyen.xuan.quynh/Code/learning/php-cli/Commands/MakeFileCommand.php on line 10

Fatal error: Uncaught RuntimeException: Too many arguments attempted to command [make:file] in /home/nguyen.xuan.quynh/Code/learning/php-cli/Commands/MakeFileCommand.php:10
Stack trace:
#0 /home/nguyen.xuan.quynh/Code/learning/php-cli/artisan(44): Commands\MakeFileCommand->execute()
#1 {main}
  thrown in /home/nguyen.xuan.quynh/Code/learning/php-cli/Commands/MakeFileCommand.php on line 10
- Thực thi thành công một số commands.
$ php artisan --help
Please execute syntax: <commandName> [arguments]
$ php artisan make:file --help
Make a new local file if it does not exist.
$ php artisan make:file hello.txt
File [hello.txt] was created sucessfully.
Symfony Console
Như vậy, chúng ta đã vừa xây dựng được 2 commands vô cùng đơn giản và thử nghiệm với chúng. Và tôi xin nhắc lại rằng, nó chỉ nhằm mục đích tìm hiểu là chính, chứ để xây dựng commands sử dụng được trong dự án thực tế thì rất khó. Hai năm về trước, khi mới làm quen với Laravel, tôi bị mê hoặc bởi những chức năng "thần thánh" của nó và quyết định mò vào để đọc mã nguồn. Thật bất ngờ vì không phải tất cả những gì Laravel làm được đều do tự Taylor (Người sáng lập Laravel) và đội ngũ của mình đề xuất và xây dựng lên mà nó kế thừa phần lớn từ một "thế lực khác". Vâng, đó chính là Symfony, một php framework gạo cội với những thư viện độc lập (standalone library) khổng lồ. Symfony không chỉ đem lại một framewok tốt mà còn tạo ra vô cùng nhiều thành phần hay, được sử dụng rộng rãi trong các dự án php khác. Không phải chỉ riêng Console, Laravel yêu cầu rất nhiều thư viện từ Symfony và tạo một cái "mặt nạ" phù hợp hơn cho chính mình. Vậy nên, tôi quyết định tìm hiểu symfony. Và bây giờ, tôi xin giới thiệu sơ lược về thành phần này.
1. Cài đặt
- Đầu tiên chúng ta cần cài đặt symfony/console (nên cài thông qua composer). Vì vậy, hãy vào trong thư mục mà các bạn đang sử dụng (với tôi là php-cli) chạy lệnh composer init và nhập các thông số cần thiết để tạo ra một tệp composer.json. Sau đó, chạy lệnh composer require symfony/console để cài đặt package mong muốn:
# Tạo một tệp composer.json
composer init
# Cài đặt package symfony/console
composer require symfony/console
- Sau khi cài đặt xong, để kiểm tra xem việc cài đặt đã ổn chưa các bạn tạo một tệp symfony như sau:
<?php

require __DIR__.'/vendor/autoload.php';

// Create a new Symfony Console Application.
$application = new \Symfony\Component\Console\Application;

// Run Console Application.
$application->run();
- Cuối cùng, trên màn hình console, chạy lệnh php symfony để thấy kết quả. Nếu như hình vẽ bên dưới thì có nghĩa rằng chúng ta đã cài đặt thành công.
$ php symfony
Console Tool

Usage:
  command [options] [arguments]

Options:
  -h, --help            Display this help message
  -q, --quiet           Do not output any message
  -V, --version         Display this application version
      --ansi            Force ANSI output
      --no-ansi         Disable ANSI output
  -n, --no-interaction  Do not ask any interactive question
  -v|vv|vvv, --verbose  Increase the verbosity of messages: 1 for normal output, 2 for more verbose output and 3 for debug

Available commands:
  help       Displays help for a command
  list       Lists commands
2. Tạo command
- Symfony đã cung cấp cho chúng ta một bộ công cụ khá hữu hiệu. Việc khai báo console command cũng tương đối dễ dàng. Để minh chức điều này, tôi sẽ tạo ra một MakeFileCommand mới như sau. Tôi sẽ viết chú thích chi tiết trên code để các bạn dễ nhận ra.
<?php
// Tệp tên MakeFileCommand.php
namespace Commands
{

    use Symfony\Component\Console\Command\Command;
    use Symfony\Component\Console\Input\InputArgument;
    use Symfony\Component\Console\Input\InputInterface;
    use Symfony\Component\Console\Output\OutputInterface;

    class MakeFileCommand extends Command
    {
        protected function configure()
        {
            // Set command's name.
            $this->setName('make:file');
            // Set short description that is shown while running "list"
            $this->setDescription('Create a new file if not exist.');
            // The full command's description when use option "--help"
            $this->setHelp('This command allows you to create a new file...');

            // Add an required argument.
            $this->addArgument('path', InputArgument::REQUIRED, 'The file\'s path should be created.');
        }

        protected function execute(InputInterface $input, OutputInterface $output)
        {
            echo 'Create a new file that will be located at [' . $input->getArgument('path') . ']', PHP_EOL;
        }
    }
}
- Sau đó, tôi require tệp vừa tạo và đăng ký command mới. Tệp symfony sau khi cập nhật sẽ như thế này:
<?php

require __DIR__.'/vendor/autoload.php';

// Create a new Symfony Console Application.
$application = new \Symfony\Component\Console\Application;

// Require registered console command.
require __DIR__ . '/MakeFileCommand.php';
// Add a new console's command.
$application->add(new \Commands\MakeFileCommand);

// Run Console Application.
$application->run();
- Để kiểm tra việc khai báo thì một lần lữa, tôi chạy lệnh php symfony. Các bạn có thể nhìn thấy lệnh make:file command mà tôi đăng ký đã được thêm vào danh sách.
$ php symfony
Console Tool

Usage:
  command [options] [arguments]

Options:
  -h, --help            Display this help message
  -q, --quiet           Do not output any message
  -V, --version         Display this application version
      --ansi            Force ANSI output
      --no-ansi         Disable ANSI output
  -n, --no-interaction  Do not ask any interactive question
  -v|vv|vvv, --verbose  Increase the verbosity of messages: 1 for normal output, 2 for more verbose output and 3 for debug

Available commands:
  help       Displays help for a command
  list       Lists commands
 make
  make:file  Create a new file if not exist
- Việc thực thi thì có lẽ đã quá quen thuộc.
$ php symfony make:file /full/path/to/hello.txt
Create a new file that will be located at [/full/path/to/hello.txt]
Lời kết
Như vậy, chúng ta đã cũng nhau tìm hiểu thêm và có thể tự tạo command cho riêng mình. Có thể thấy rằng, việc viết một php package về console khá phức tạp đúng không nào? Và không chỉ riêng gì console, theo tôi nếu muốn viết một thự viện "đáng dùng" thì phải bỏ ra cực kì nhiều thời gian, công sức và thậm chí cả tâm huyết. Qua đó, chúng ta sẽ hiểu hơn ý nghĩa của một thư viện, nó có thể làm gì? nó tiết kiệm công sức như thế nào? Chúc các bạn học tập và làm việc vui vẻ.
Tham khảo
All rights reserved
