Tìm hiểu CMS Wordpress P4 - Lập trình theme WordPress - Css cho theme, sử dụng js và bổ sung các template phụ
Bài đăng này đã không được cập nhật trong 4 năm
Lời Nói Đầu
Phần tiếp theo này của loạt bài lập trình theme cho WordPress, mình sẽ giới thiệu cách thêm css, js cho theme của WordPress - vì mỗi người có thể có cách style css khác nhau cho theme nên mình chỉ giới thiệu cách register các file css, js trong WordPress. Ngoài ra sẽ bổ sung thêm các template phụ cũng như sử dụng action hook để thêm các nội dung khác cho trang WordPress
Bổ sung thêm các template phụ
1.Template 404.php
Template 404.php được sử dụng để thông báo về một bài viết không được tìm thấy theo truy vấn được tạo bởi url, hay khi bạn click vào link một bài viết nhưng bài viết đó không tồn tại trong cơ sở dữ liệu.
<?php get_header(); ?>
<div class="content">
    <section id="main-content">
        <div class="not-found">
            <?php
                _e('<h2> 404 NOT FOUND</h2>','example' );
                _e('<p>The article you were looking for was not found.</p>','example');
                ?>
            <img src="<?php echo home_url('/').'wp-content/uploads/2016/05/404.jpeg'; ?>" alt="404 not found">
        </div>
    </section>

    <section id="sidebar">
        <?php get_sidebar(); ?>
    </section>
</div>
<?php get_footer(); ?>
Ta thấy cấu trúc khá tương tự template index.php tuy nhiên do bài viết không tồn tại nên phân nội dung chúng ta sẽ hiển thị không tìm thấy bài viết.
2.Viết code cho phần template archive.php
Template được sử dụng cho việc phân loại và lưu trữ các bài viết theo thời gian, kiểu bài viết hoặc theo các tag của mà bài viết đó được đánh dấu.
<?php get_header(); ?>
<?php ?>
<div class="content">
    <section id="main-content">
        <div class="archive-post">
            <h2><?php printf(__('%1$s Archive','example'), single_cat_title('',false)); ?></h2>
            <?php
                if( have_posts()) :
                    while( have_posts()) :
                        the_post();
                        get_template_part('content', get_post_format());
                    endwhile;
                    custom_pagination();
                else :
                        get_template_part('content','none');
                endif;
                    ?>
        </div>
    </section>

    <section id="sidebar">
        <?php get_sidebar(); ?>
    </section>
</div>
<?php get_footer(); ?>
Ta thấy nó rất giống với template index.php ngoài trừ việc nó có thêm tiêu đề chỉ ra đây là template archive.php. Để tạo sự khác biệt với template index.php ta sẽ sử dụng class khác cho phần nội dung là archve-post.
3.Viết code cho template sidebar.php
Ở phần viết code cho functions.php chúng ta đã có tạo một sidebar với đoạn code thế này:
$sidebar = array(
  'name' => __('Main Sidebar', 'thachpham'),
  'id' => 'main-sidebar',
  'description' => 'Main sidebar for Thachpham theme',
  'class' => 'main-sidebar',
  'before_title' => '<h3 class="widgettitle">',
  'after_sidebar' => '</h3>'
);
register_sidebar( $sidebar );
Hãy để ý ở tham số ID trong biến $sidebar, chúng ta có main-sidebar, và đây chính là cái tên slug của sidebar mà chúng ta đã tạo trong functions.php. Sau khi một sidebar được khởi tạo tại đây, bạn sẽ thấy nó được hiển thị trong Appearance -> Widgets, bạn tạo ra nhiều sidebar thì nó sẽ hiển thị ra nhiều cái trong đó.
Tuy nhiên, không phải cứ tạo ra sidebar với đoạn code ở trên thì website bạn đã hiển thị ra, mà phải thông qua một bước nữa để chúng ta có thể cho nó hiển thị đó là sử dụng hàm dynamic_sidebar() để hiển thị nó ra ngoài giao diện.
Trong các file như index.php, single.php, archive.php,…chúng ta đều có một hàm để hiển thị sidebar là get_sidebar(). Hàm này sẽ load file sidebar.php có trong theme, hoặc nếu bạn ghi là get_sidebar('index') thì nó sẽ tiến hành load file sidebar-index.php có trong theme.
Bây giờ để sidebar hiển thị ra bên ngoài, bạn hãy mở file sidebar.php đã tạo lên và chèn đoạn code dưới đây vào:
<?php
    if ( is_active_sidebar('right-sidebar')) {
        dynamic_sidebar('right-sidebar' );
    } else {
        _e('This is widget area. Go to Appearance -> Widget to add some widget.','translate');
    }
 ?>
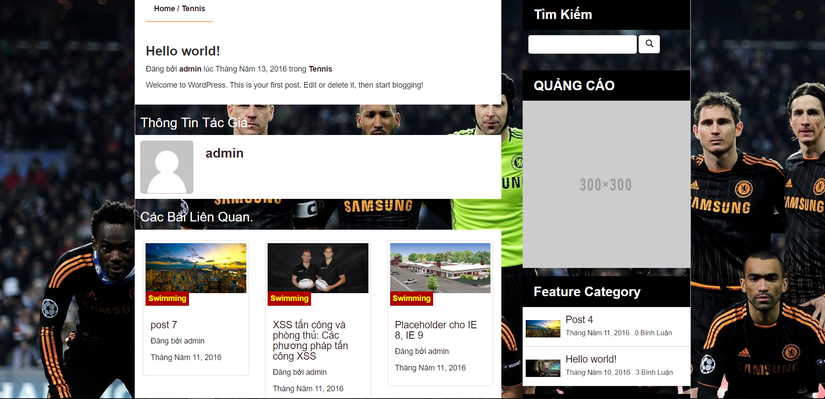
4. Viết code cho template author.php
File này là một phần trong template archive.php, nếu file author.php không tồn tại thì nó sẽ load file archive.php ra, mục đích là hiển thị các bài viết của một tác giả dựa theo truy vấn đang truy cập.
<?php get_header(); ?>

<div id="content">
        <div class="author-box"><?php
                // Hiển thị avatar của tác giả
                echo '<div class="author-avatar">'. get_avatar( get_the_author_meta( 'ID' ) ) . '</div>';

                // hiển thị tên tác giả
                printf( '<h3>'. __( 'Posts by %1$s', 'thachpham' ) . '</h3>', get_the_author() );

                // Hiển thị giới thiệu của tác giả
                echo '<p>'. get_the_author_meta( 'description' ) . '</p>';

                // Hiển thị field website của tác giả
                if ( get_the_author_meta( 'user_url' ) ) : printf( __('<a href="%1$s" title="Visit to %2$s website">Visit to my website</a>', 'thachpham'),
                        get_the_author_meta( 'user_url' ), get_the_author() );
                endif;
        ?></div>
        <section id="main-content">
                <?php if ( have_posts() ) : while ( have_posts() ) : the_post(); ?>
                        <?php get_template_part( 'content', get_post_format() ); ?>
                <?php endwhile; ?>
                <?php thachpham_pagination(); ?>
                <?php else : ?>
                        <?php get_template_part( 'content', 'none' ); ?>
                <?php endif; ?>
        </section>
        <section id="sidebar">
                <?php get_sidebar(); ?>
        </section>

</div>

<?php get_footer(); ?>
Ta thấy template này có cấu trúc tương tự archive.php, tuy nhiên phần content ta sẽ hiển thị thông tin về tác giả. Trong đó, các hàm lấy thông tin của tác giả (user) là hàm get_the_author_meta().
Chèn tệp css, js cho theme của WordPress
Ở phần này mình không đi sau vào cách style css cho các template của WordPress, tất cả các style mình cùng của bootstrap và có custom một vài phần nhỏ thôi. Khi đã có các tệp js và css ta muốn theme vào để style hoặc sử dụng javascript cho WordPress, để tiện cho việc quản lý ta sẽ tạo hai thư mục /css và /js là con của thư mục theme của chúng ta. Hai tệp này sẽ chứa css và js cho WordPress (nếu có nhiều tệp css, các thư viện js thì ta có thể chia nhỏ các tệp đó và các thư mục con của thư mục /css và /js). Khi đó muốn chèn các tệp css và js ta khai báo trong functions.php như sau:
//register style, script file
function insert_styles(){
    wp_register_style('main-style',get_template_directory_uri().'/style.css','all');
    wp_enqueue_style('main-style');

    wp_register_style('bootstrap-css',get_template_directory_uri().'/css/bootstrap/css/bootstrap.min.css','all');
    wp_enqueue_style('bootstrap-css');
    wp_register_script('bootstrap-js',get_template_directory_uri().'/js/bootstrap/js/bootstrap.min.js',array('jquery'));
    wp_enqueue_script('bootstrap-js');

    wp_register_style('superfish-css',get_template_directory_uri().'/css/superfish/css/superfish.css','all');
    wp_enqueue_style('superfish-css');

    wp_register_script('superfish-js',get_template_directory_uri().'/js/superfish/js/superfish.js',array('jquery'));
    wp_enqueue_script('superfish-js');
    wp_register_script('custom-js',get_template_directory_uri().'/js/custom/custom.js',array('jquery'));
    wp_enqueue_script('custom-js');
}
add_action('wp_enqueue_scripts','insert_styles');
Như khai báo ở trên mình sử dụng wp_register_style() và wp_register_script() để đăng ký các tệp css và js cần thêm vào. Sau đó sử dụng wp_enqueue_style() và wp_enqueue_script() để đưa các tệp css và js vào queue để đưa ra giao diện. Ngoài ra ta sẽ 'móc' hàm insert_styles vừa tạo vào hook wp_enqueue_script WordPress sẽ chèn các tệp css và js trong queue vào giao diện.
Chèn theme nội dung vào các template sử dụng action hook
Action hook là cách cho phép chúng ta chèn các nội dung tạo trong functions.php vào các template nhằm sinh ra các content 'động' cho WordPress. Có hai hàm cần chú ý trong việc sử dụng action hook:
- add_action(param1, param2): trong đó param1 là tên action hook (bất kỳ), param2 là tên hàm sẽ thực thi khi action hook được gọi. Hàm này được gọi trong functions.php
- do_action(param1): param1 là tên của action hook ở hàm add_action, được sử dụng trong template mà chúng ta muốn chèn nôi dung vào.
Ví dụ trong theme mình có chèn vào carousel vào template index.php thì code như sau:
//add carousel
if (! function_exists('add_carousel')) {
    function add_carousel($id,$number) {
        $i = 0;
        $args_query = array (
            'posts_per_page' => $number,
            'post_type' => array ('post'),
            'order' => 'DESC',
            'orderby' => 'rand');
        $my_query = new WP_Query($args_query);
        if($my_query->have_posts()) : ?>
            <div id="carousel-sticky-posts-<?php echo $id;?>" class="carousel slide" data-ride="carousel">
                <ol class="carousel-indicators">
                    <?php while ($my_query->have_posts()) :?>
                    <?php $my_query->the_post(); ?>
                        <li class="" data-target="#carousel-sticky-posts-<?php echo $id;?>" data-slide-to="<?php echo $i++; ?>"></li>
                    <?php endwhile; ?>
                </ol>

                <div class="carousel-inner" role="listbox">
                    <?php while( $my_query->have_posts()) :?>
                    <?php $my_query->the_post(); ?>
                        <div class="item" >
                            <?php if (has_post_thumbnail()): ?>
                                    <?php the_post_thumbnail('full'); ?>
                            <?php else: ?>
                                <img src="http://placehold.it/1200x600">
                            <?php endif; ?>
                            <div class="carousel-caption">
                                <?php if($id==1) :?>
                                <h3><?php the_title(); ?></h3>
                            <?php else : ?>
                                <h4><?php the_title(); ?></h4>
                            <?php endif; ?>
                            </div>
                        </div>
                    <?php endwhile; ?>
                </div>

                <a class="left carousel-control" href="#carousel-sticky-posts-<?php echo $id;?>" role="botton" data-slide="prev">
                <span class="glyphicon glyphicon-chevron-left" aria-hidden="true"></span>
                <span class="sr-only">Previous</span>
                </a>

                <a class="right carousel-control" href="#carousel-sticky-posts-<?php echo $id;?>" role="botton" data-slide="next">
                <span class="glyphicon glyphicon-chevron-right" aria-hidden="true"></span>
                <span class="sr-only">Next</span>
                </a>
            </div>

        <?php
        else :
            do_action('default_carousel_hook');
        endif;
    }
}
add_action('carousel_hook','add_carousel',10,2);

if (! function_exists('default_carousel')) {
    function default_carousel($id) {?>
        <div id="carousel-sticky-posts-<?php echo $id;?>" class="carousel slide" data-ride="carousel">
            <ol class="carousel-indicators">
                <li class="active" data-target="#carousel-sticky-posts-<?php echo $id;?>" data-slide-to="0"></li>
                <li class="" data-target="#carousel-sticky-posts-<?php echo $id;?>" data-slide-to="1"></li>
                <li class="" data-target="#carousel-sticky-posts-<?php echo $id;?>" data-slide-to="2"></li>
            </ol>

            <div class="carousel-inner" role="listbox">
                <div class="item active" >
                    <img src="http://placehold.it/1200x600" alt="">
                    <div class="carousel-caption">

                    </div>
                </div>

                <div class="item">
                    <img src="http://placehold.it/1200x600" alt="">
                    <div class="carousel-caption">
                        1
                    </div>
                </div>

                <div class="item">
                    <img src="http://placehold.it/1200x600" alt="">
                    <div class="carousel-caption">
                        2
                    </div>
                </div>
            </div>

            <a class="left carousel-control" href="#carousel-sticky-posts-<?php echo $id;?>" role="botton" data-slide="prev">
                <span class="glyphicon glyphicon-chevron-left" aria-hidden="true"></span>
                <span class="sr-only">Previous</span>
            </a>

            <a class="right carousel-control" href="#carousel-sticky-posts-<?php echo $id;?>" role="botton" data-slide="next">
                <span class="glyphicon glyphicon-chevron-right" aria-hidden="true"></span>
                <span class="sr-only">Next</span>
            </a>
        </div>
    <?php }
}
add_action('default_carousel_hook','default_carousel',10,1);
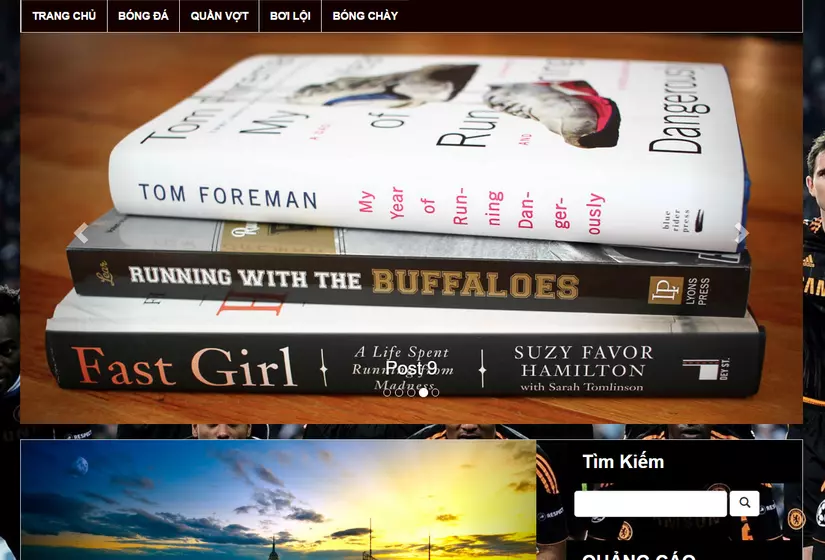
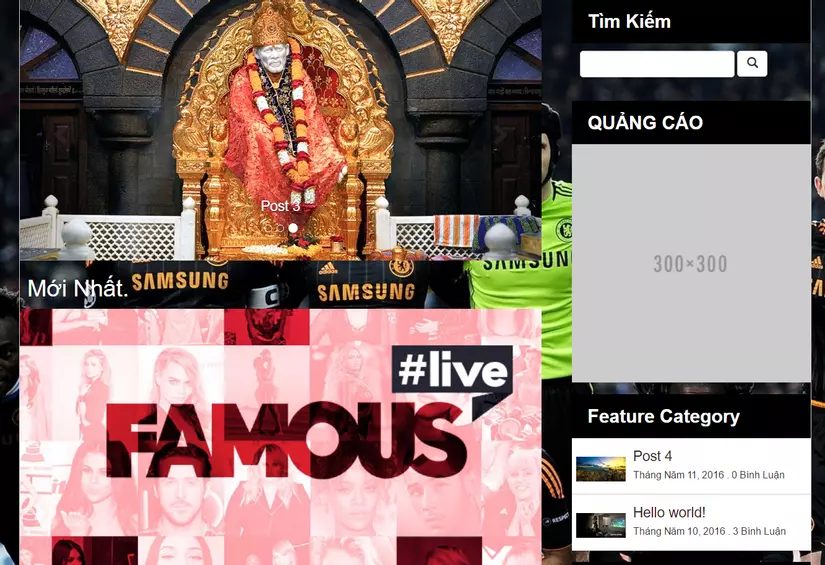
Sau đó trong trong index.php sẽ chèn carousel bằng do_action('carousel_hook').
Hình ảnh của trang wordpress sau khi cài theme
Kết Luận
Như vậy chúng ta viết code được cơ bản code cho theme của WP. Tuy nhiên theme mình viết ở đây chỉ ở mức đơn giản (do phần css mình cũng không được mạnh lắm @@), nhưng cũng là cái sườn có thể tham khảo qua đó mở rộng và phát triển theme cho wordpress sau này. Mã nguồn của theme có thể tải ở đây.
Tài Liệu Tham Khảo
All rights reserved
