Tích hợp ckeditor vào vuejs trong laravel
Bài đăng này đã không được cập nhật trong 6 năm
Chắc hẳn các bạn thường làm create/edit form dữ liệu. Nhưng đối với dữ liệu input đầu vào có thể đa dạng không như đơn thuần chỉ text mà muốn chứa ảnh, thẻ, màu chữ .... thì các bạn phải làm sao. Rất may chúng ta có các thư viện hỗ trợ tận răng nhưng tính năng đó và hôm nay mình xin giới thiệu với mọi người 1 thư viện ckeditor. (thư viện này mình thường áp dụng vào trong dự án đơn giản vì nó dễ apply và cũng dễ sử dụng cũng như tùy chỉnh). Thôi không vòng vo nữa. Bắt đầu nào!
I.Tạo project
composer create-project --prefer-dist laravel/laravel CkeditorDemo
II. Tạo route, controller, view
1.Tạo route:
Vào file web.php thêm:
Route::get('ckeditor-demo', 'TestController@index');
2.Tạo Controller
-Tạo TestController.php
php artisan make:controller TestController
-Sửa file TestController với nội dung như dưới:
<?php

namespace App\Http\Controllers;

class TestController extends Controller
{
    public function index()
    {
        return view('ckeditor_test');
    }
}
3.Tạo view
-Đầu tiên mình sẽ cài ckeditor4:
npm install ckeditor4-vue
- Sau khi cài xong ckeditor4 thì các bạn thêm nội dung bên dưới vào file public/js/app.js
Vue.component('ckeditor', require('./components/Ckeditor.vue').default);
import Vue from 'vue';
import CKEditor from 'ckeditor4-vue';

Vue.use( CKEditor );
- Tiếp đó tạo ra file resource/js/component/Ckeditor.vue với nội dung như sau:
<template>
    <div>
        <ckeditor v-model="editorData" :config="editorConfig" :editor-url="editorUrl" ></ckeditor>
    </div>
</template>

<script>
    export default {
        name: "Ckeditor",
        data() {
            return {
                editorUrl: "https://cdn.ckeditor.com/4.14.1/full-all/ckeditor.js",
                editorData: '',
                editorConfig: {
                    toolbarGroups : [
                        { name: 'document', groups: [ 'mode', 'document', 'doctools' ] },
                        { name: 'clipboard', groups: [ 'clipboard', 'undo' ] },
                        { name: 'editing', groups: [ 'find', 'selection', 'spellchecker', 'editing' ] },
                        { name: 'forms', groups: [ 'forms' ] },
                        { name: 'basicstyles', groups: [ 'basicstyles', 'cleanup' ] },
                        { name: 'paragraph', groups: [ 'list', 'indent', 'blocks', 'align', 'bidi', 'paragraph' ] },
                        { name: 'links', groups: [ 'links' ] },
                        { name: 'insert', groups: [ 'insert' ] },
                        { name: 'styles', groups: [ 'styles' ] },
                        { name: 'colors', groups: [ 'colors' ] },
                        { name: 'tools', groups: [ 'tools' ] },
                        { name: 'others', groups: [ 'others' ] },
                        { name: 'about', groups: [ 'about' ] }
                    ],
                    removeButtons: 'NewPage,Print,Save,Templates,Replace,Find,SelectAll,Scayt,Form,Checkbox,Radio,TextField,Textarea,Select,Button,ImageButton,HiddenField,CreateDiv,Anchor,Flash,Smiley,PageBreak,ShowBlocks,About,Language,Iframe,Image'
                }
            };
        }
    }
</script>

<style scoped>

</style>
-Và cuối cùng tạo ra file ckeditor_test.blade để nạp file vue js (ckeditor) với nội dung như sau:
<!doctype html>
<html lang="{{ str_replace('_', '-', app()->getLocale()) }}">
<head>
    <meta charset="utf-8">
    <meta name="viewport" content="width=device-width, initial-scale=1">
    <title>Ckeditor Demo</title>
</head>
<body>
<div class="container">
    <div class="" style="margin-bottom: 50px; margin-top: 20px">Ckeditor Demo</div>
    <div class="row" id="app" >
        <ckeditor></ckeditor>
    </div>
</div>
</body>
</html>
<script type="text/javascript" src="{{ asset('js/app.js') }}"></script>
III. Giải thích các thuộc tính của ckeditor
Như các bạn đã thấy ở trên file Ckeditor.vue có đoạn:
<ckeditor v-model="editorData" :config="editorConfig" :editor-url="editorUrl" ></ckeditor>
Ở đây mình dùng 3 thuộc tính: editorData, editorConfig, editorUrl
- editorData: nó là 1 biến bình thường để ta lưu dữ liệu của ckeditor (chắc hẳn nhìn thấy v-model thì cũng k lạ gì @@.)
- editorUrl: link để load các standard-all preset khi tạo trình soạn thảo, ở chế độ mặc định nó sẽ tự động load bản mới nhất về và mình có thể tùy chỉnh phiên bản load về bằng cách thêm editorUrl vào .
- editorConfig: Dùng để cấu hình và tùy chỉnh các option trong trình soạn thảo cụ thể các bạn có thể tham khảo ở đây: trong này có thể custom rất trực quan.
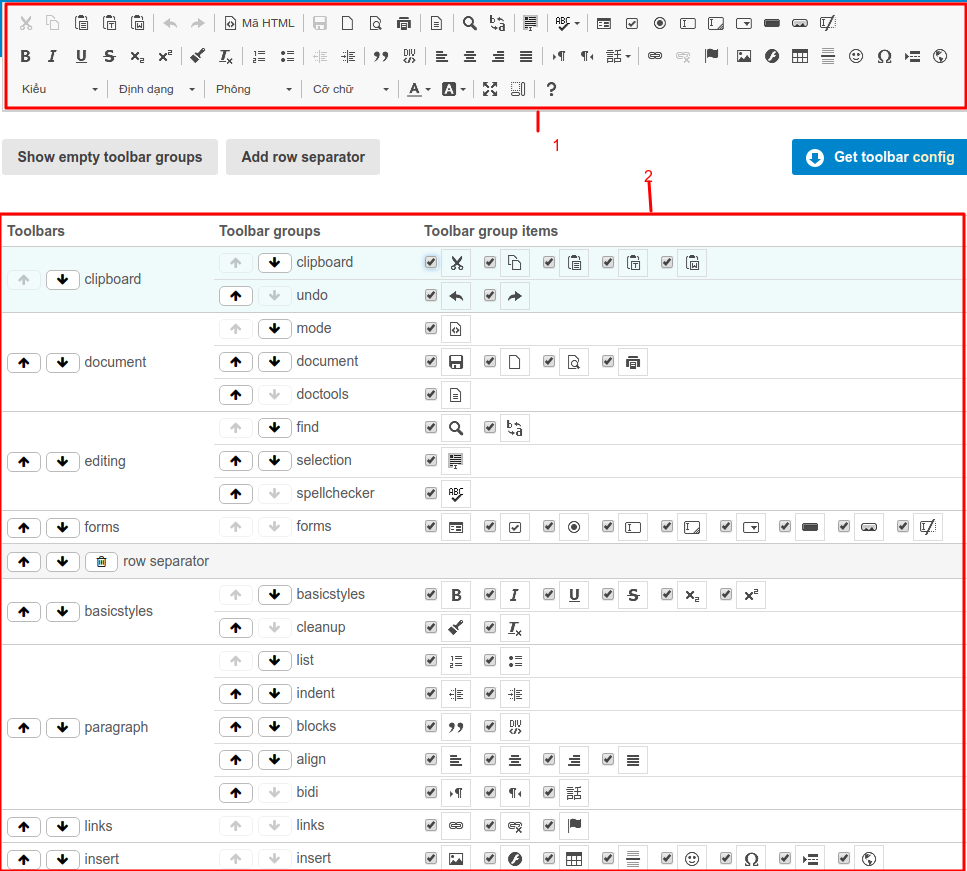
Ví dụ các bạn có thể tùy chỉnh thứ tự vị trí các button ở toolbar hoặc ẩn hiện chúng ở mục 2 và mọi sự thay đổi ở mục 2 sẽ phản ánh lên mục 1 như ảnh dưới.
![]()
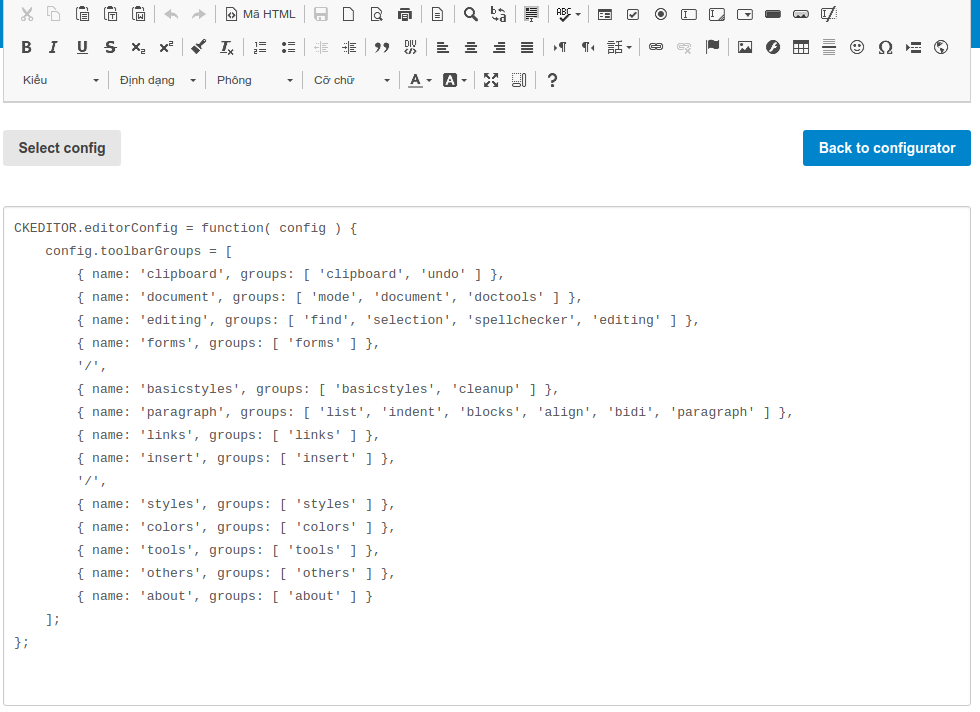
Oke khi thay đổi xong các bạn sẽ ấn vào Get toolbar config để lấy ra nội dung như bên dưới vào paste vào code sử dụng là oke.
![]()
Đơn giản phải không nào.
Cuối cùng các bạn chạy mấy lệnh dưới đây:
npm install
npm run watch
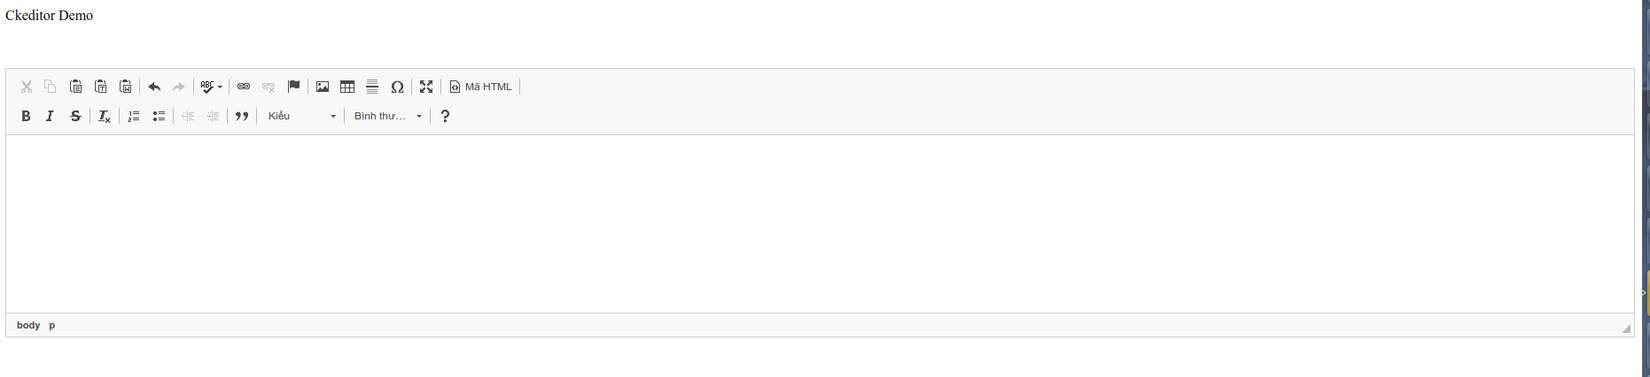
Vào link http://localhost:8000/ckeditor-demo thấy thành quả nào:
Tài liệu tham khảo: https://ckeditor.com/docs/ckeditor4/latest/guide/dev_vue.html#using-es6-modules
All rights reserved
