Thực hiện Push Notification với CloudKit
Bài đăng này đã không được cập nhật trong 7 năm
Bạn muốn làm ứng dụng xử lý Notification nhanh chóng và đơn giản mà không cần quan tâm đến certificates, device tokens, hay không muốn sử dụng thư viện Firebase SDK (vẫn phải tạo certificates, keys để sử dụng) khá rắc rối khi thực hiện debug. Rất may mắn khi hiện tại CloudKit của Apple đã có thể xử lý tất cả những thứ trên cho bạn một cách đơn giản và miến phí bạn không cần quan tâm đến certificates / keys / device tokens / APNS nếu bạn sử dụng CloudKit.
Tutorial:
- App của bạn không dựa trên máy chủ để push Notification
- Bạn đã đăng ký Apple Developer Program
- Bạn có thiết bị iOS ( không hoạt động trên Simulator)
- Thiết bị iOS của bạn được đăng nhập bằng tài khoản iCloud
Bước 1 - Bật push Notifications và CloudKit capabilities trong app của bạn
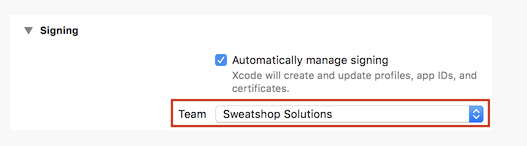
Trong Xcode Project chọn team đã đăng kí Apple Developer Program:
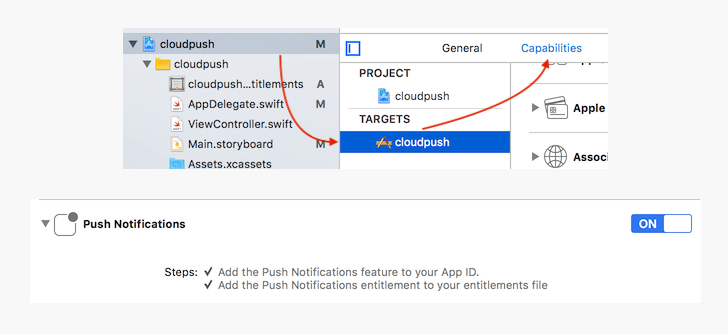
Bật Push Notification trong TARGETS > Capabilities:
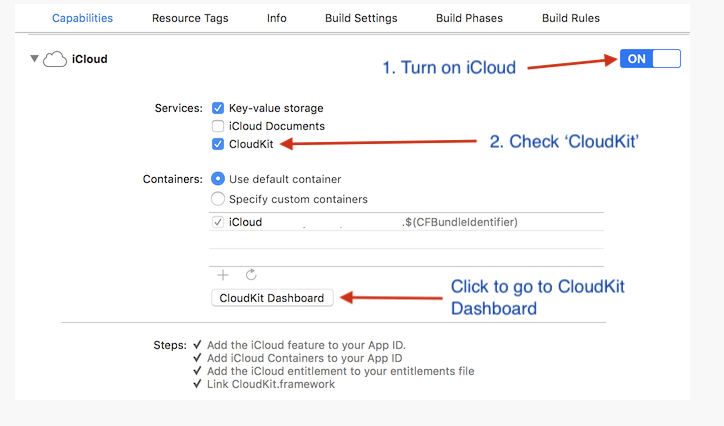
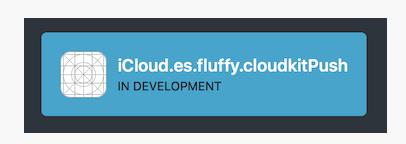
Bật iCloud in App Targets > Capabilities, and check CloudKit :
Bước 2 - Tạo Record types trong CloudKit:
Select Cloudkit Dashboard https://icloud.developer.apple.com/dashboard
Select Development > Data,
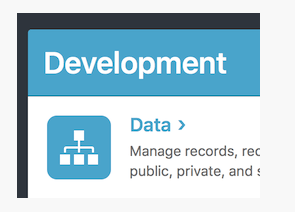
Development Data tách riêng Production Data, Development được dùng khi đang phát triển trên Mac/iphone. Production dùng khi app trên App store.
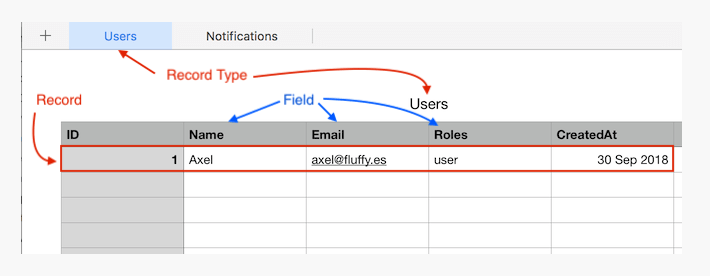
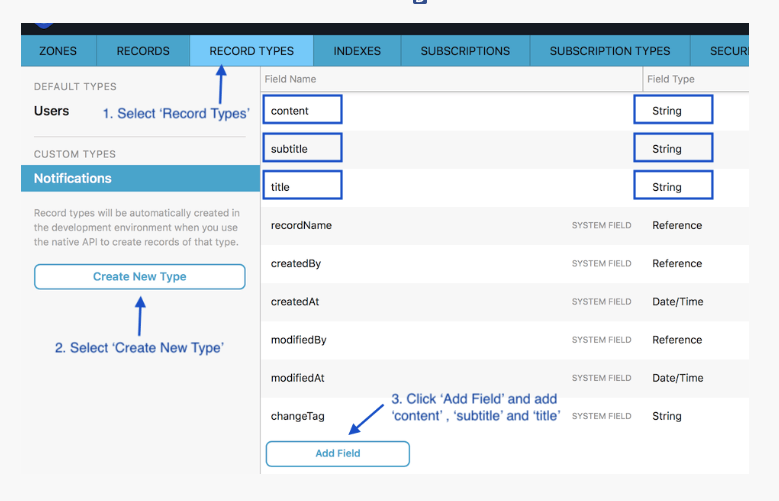
Chọn Record Types, tạo 1 type mới Notifications add fields named content, subtitle and title. chọn Save.
Next. Chúng ta xử lý code để khi có 1 record mới được tạo ở CloudKIt dashboard sẽ được đẩy lên thông báo lên app.
Bước 3 - Add Push notification handling code
Thêm đoạn mã sau vào file AppDelegate.swift trong method didFinishLaunchingWithOptions để yêu cầu gửi notifications:
// AppDelegate.swift
func application(_ application: UIApplication, didFinishLaunchingWithOptions launchOptions: [UIApplicationLaunchOptionsKey: Any]?) -> Bool {
// Override point for customization after application launch.

// set self (AppDelegate) to handle notification
UNUserNotificationCenter.current().delegate = self

// Request permission from user to send notification
UNUserNotificationCenter.current().requestAuthorization(options: [.alert, .badge, .sound], completionHandler: { authorized, error in
if authorized {
DispatchQueue.main.async(execute: {
application.registerForRemoteNotifications()
})
}
})
return true
}
extension protocol UNUserNotificationCenterDelegate.
extension AppDelegate: UNUserNotificationCenterDelegate{
// This function will be called when the app receive notification
func userNotificationCenter(_ center: UNUserNotificationCenter, willPresent notification: UNNotification, withCompletionHandler completionHandler: @escaping (UNNotificationPresentationOptions) -> Void) {
// show the notification alert (banner), and with sound
completionHandler([.alert, .sound])
}
  // This function will be called right after user tap on the notification
  func userNotificationCenter(_ center: UNUserNotificationCenter, didReceive response: UNNotificationResponse, withCompletionHandler completionHandler: @escaping () -> Void) {

    // tell the app that we have finished processing the user’s action (eg: tap on notification banner) / response
    completionHandler()
  }
}
Bước 4 - Thêm code đăng kí của CloudKit
Cách hoạt động của CloudKit là ứng dụng đã đăng kí record trên CloudKit Dashboard. Bất kì record mới nào được tạo ra từ server sẽ được gửi thông báo đến app của bạn
// AppDelegate.swift
// Khi người dùng cho phép tpush notification và ứng dụng đã nhận được mã thông báo thiết bị
// (mã thông báo thiết bị là ID duy nhất mà máy chủ Apple sử dụng để xác định thiết bị nào sẽ gửi push notification tới)
func application(_ application: UIApplication, didRegisterForRemoteNotificationsWithDeviceToken deviceToken: Data) {
// Tạo đăng ký cho loại bản ghi 'Thông báo' trong CloudKit
// Người dùng sẽ nhận được thông báo đẩy khi tạo bản ghi mới trong CloudKit
// Đọc thêm trên https://developer.apple.com/library/archive/documentation/DataManagement/Conceptual/CloudKitQuickStart/SubscribingtoRecordChanges/SubscribingtoRecordChanges.html
// xác định điều kiện của đăng ký, ví dụ: chỉ được thông báo về thay đổi nếu thông báo mới được tạo bắt đầu bằng "A"
// TRUEPREDICATE nghĩa là mọi bản ghi Thông báo mới được tạo sẽ được thông báo
let subscription = CKQuerySubscription(recordType: "Notifications", predicate: NSPredicate(format: "TRUEPREDICATE"), options: .firesOnRecordCreation)
// Ở đây chúng tôi customize notification message
let info = CKNotificationInfo()
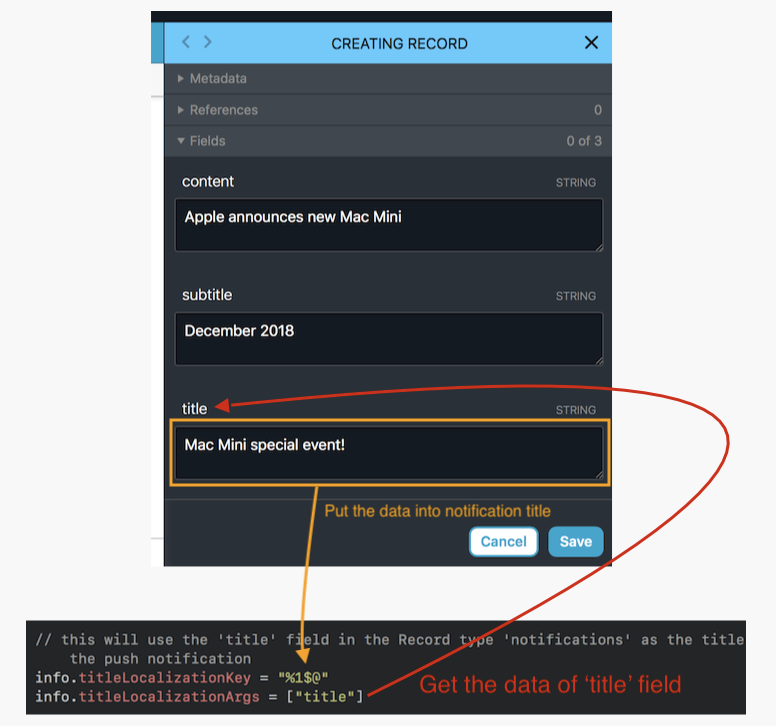
// Sử dụng 'title' trong Record type 'notifications' để làm title cho notification
info.titleLocalizationKey = "%1$@"
info.titleLocalizationArgs = ["title"]
// nếu bạn muốn sử dụng nhiều trường cho tiêu đề của push notification
// info.titleLocalizationKey = "%1$@ %2$@" // có thể thêm "%3$@", "%4$@"...
// info.titleLocalizationArgs = ["title", "subtitle"]
// sử dụng 'content' trong Record type 'notifications' làm content cho push notification
info.alertLocalizationKey = "%1$@"
info.alertLocalizationArgs = ["content"]
// tăng số lượng hiện thị số thông báo ngoài icon app
info.shouldBadge = true
// sử dụng âm thanh tông báo system default
info.soundName = "default"
subscription.notificationInfo = info
// Lưu đăng ký vào Cơ sở dữ liệu Public Database in Cloudkit
CKContainer.default().publicCloudDatabase.save(subscription, completionHandler: { subscription, error in
if error == nil {
// Subscription saved successfully
} else {
// Error occurred
}
})
}
Tạo một đối tượng CKQuerySubscription để đăng ký loại bản ghi "Notifications" (đã tạo ở bước trên), .firesOnRecordCreation có nghĩa là new push notification sẽ được gửi khi tạo bản ghi mới "record", bạn cũng có thể sử dụng .firesOnRecordUpdate một push notification mới sẽ được gửi bất cứ khi nào dữ liệu được updated. Tham số điều kiện predicate đăng ký, giả sử nếu chúng ta chỉ muốn được thông báo nếu trường nội dung của bản ghi chứa từ "khuyến mãi", chúng ta có thể sử dụng biến predicate như sau: NSPredicate (format: "content CONTAINS% @ "," Khuyến mãi ").
Sau đó, chúng ta có thể tùy chỉnh message của notification sẽ được gửi bằng cách sử dụng đối tượng CKNotificationInfo().
Các titleLocalizationKey và titleLocalizationArgs nó được sử dụng để tùy chỉnh văn bản sẽ xuất hiện trên tiêu đề notification.
Giống như trong Swift String, chúng ta có thể đặt một biến trong câu lệnh như sau:
    let name = "Steve Jobs"
print("Hello \(name)")
// outputs 'Hello Steve Jobs'
"%1$@" trong titleLocalizationKey tương tự như ở trên, nó sẽ được thay thế bằng văn bản trong trường title của Notifications record type.
alertLocalizationKey và alertLocalizationArgs cũng hoạt động tương tự, ngoại trừ alertLocalizationKey / Args sẽ được sử dụng cho nội dung của push notification thay vì tiêu đề.
Sau đó, tùy chỉnh dữ liệu thông báo này vào CKQuerySubscription:
subscription.notificationInfo = info. Dữ liệu thông báo này sẽ được sử dụng bất cứ khi nào phát hiện dữ liệu mới.
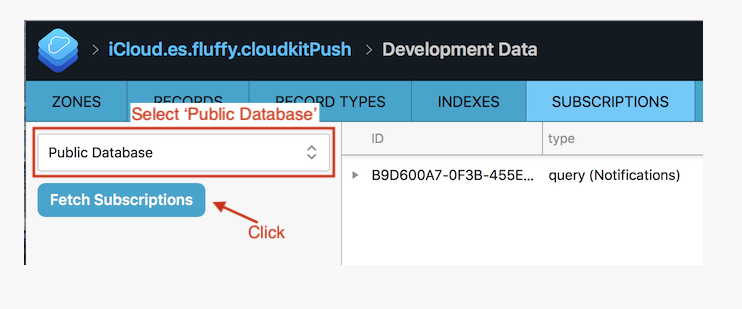
Xây dựng và chạy ứng dụng trên devices của bạn (not simulator). Sau đó đi đến bảng điều khiển CloudKit, nhấp vào 'Subscriptions', chọn 'CSubscriptions' và nhấp vào 'Fetch Subscriptions', bạn sẽ thấy đăng ký mới được tạo. Đây là đăng ký được tạo bởi ứng dụng.
Bước 5 - Send the push notification!
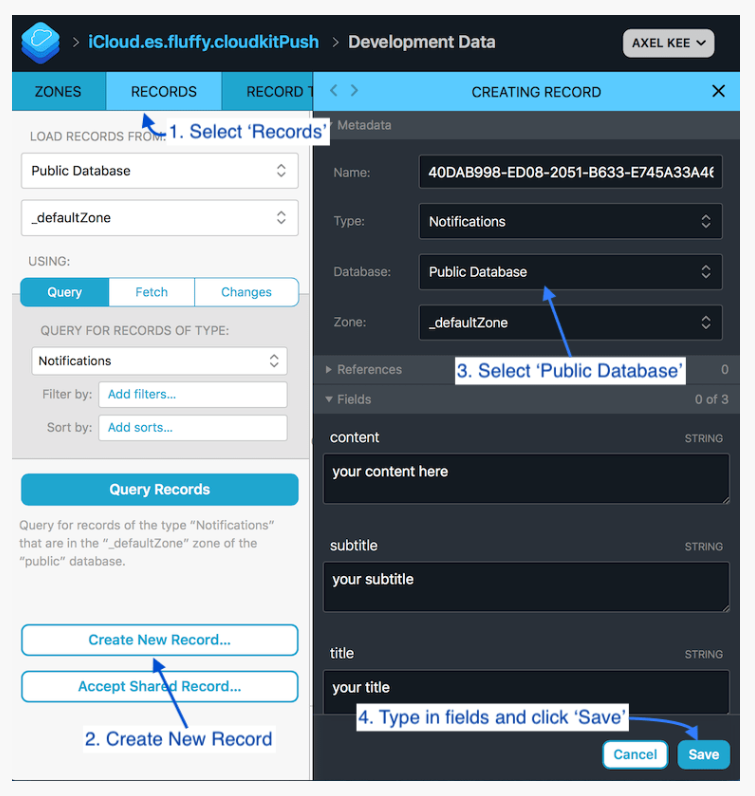
Trong Bảng điều khiển CloudKit, tạo bản ghi mới cho loại 'Notifications', hãy nhớ chọn 'Public Database' trong trường Database . Nhập văn bản bạn muốn vào trường 'content', 'title' and 'subtitle', sau đó nhấp vào 'save'.
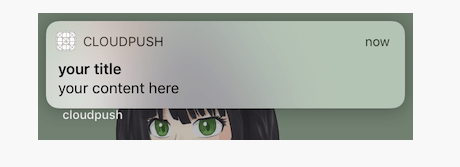
Bạn sẽ thấy một thông báo đẩy xuất hiện trên iPhone / iPad của bạn ngay bây giờ
Dễ dàng phải không? Không cần phải xử lý ccertificates, provisioning profiles, device tokens và thậm chí là Firebase. Bạn có thể gửi thông báo chỉ bằng cách tạo bản ghi mới trong Bảng điều khiển CloudKit!
Điều gì sẽ xảy ra nếu tôi muốn cho phép người dùng chỉ nhận được thông báo với các điều kiện cụ thể?
Giả sử người dùng chỉ muốn nhận thông báo nếu trường '' content '' của 'Thông báo' chứa từ '' khuyến mãi '", bạn có thể sử dụng tham số predicate để thực hiện việc lọc:
let subscription = CKQuerySubscription(recordType: "Notifications", predicate: NSPredicate(format: "content CONTAINS[c] %@", "khuyến mãi"), options: .firesOnRecordCreation)
Điều gì xảy ra nếu tôi muốn cho phép người dùng hủy đăng ký / chọn không nhận thông báo trong ứng dụng?
@IBAction func turnOffNotificationTapped(){
// fetch all subscriptions by the user and delete them
CKContainer.default().publicCloudDatabase.fetchAllSubscriptions(completionHandler: { subscriptions, error in
if error != nil {
  // failed to fetch all subscriptions, handle error here
  // end the function early
  return
}

if let subscriptions = subscriptions {
  for subscription in subscriptions {
    CKContainer.default().publicCloudDatabase.delete(withSubscriptionID: subscription.subscriptionID, completionHandler: { string, error in
      if(error != nil){
          // deletion of subscription failed, handle error here
      }
    })
  }
}

})
}
All rights reserved
