Thêm notifications vào web app với Node.JS và Service Workers
Bài đăng này đã không được cập nhật trong 6 năm
Trong bài viết này, bạn sẽ tìm hiểu cách để sử dụng service worker và web-push để tạo ra push notifications trên trình duyệt. Ngoài ra, bạn học được cách đăng kí người dùng và đẩy thông báo trên trình duyệt.
1. Chuẩn bị
Chúng ta cần sử dụng terminal để tạo ra các file cần thiết. Chạy lệnh npm init y để khởi tạo project Node mới.
Bước tiếp theo chúng ta cần cài đặt các dependencies cần thiết sử dụng trong project:
npm install dotenv body-parser express web-push -S
Giải thích:
- dotenv: Tải biến môi trường từ file
.envsang fileprocess.env - express: Framework của Node
- body-parser: Middleware for parsing incoming request bodies.
- web-push: Thư viện Web Push cho Node.js
2. Sinh ra VAPID Keys
Thư viện web-push dựa trên một loạt các VAPID key để làm việc. Các VAPID key là các cặp khoá public và private sử dụng để kiểm tra tính hợp lệ của các đăng kí tới server của ứng dụng, đồng thời xác định máy chủ đang gửi push notifications.
Chúng ta có thể sinh ra cặp VAPID key bằng việc chạy đoạn command sau:
./node_modules/.bin/web-push generate-vapid-keys

Sao chép cặp khoá vừa sinh ra và lưu chúng trong file variables.env trong project:
// variables.env
PORT=5000
PUBLIC_VAPID_KEY=<your public key>
PRIVATE_VAPID_KEY=<your private key>
3. Cài đặt Server
Tạo file index.js ở root của project như sau:
// index.js
require('dotenv').config({ path: 'variables.env' });

const express = require('express');
const webPush = require('web-push');
const bodyParser = require('body-parser');
const path = require('path');

const app = express();

app.use(bodyParser.json());

app.use(express.static(path.join(__dirname, 'client')));

const publicVapidKey = process.env.PUBLIC_VAPID_KEY;
const privateVapidKey = process.env.PRIVATE_VAPID_KEY;

webPush.setVapidDetails('mailto:test@example.com', publicVapidKey, privateVapidKey);

app.post('/subscribe', (req, res) => {
  const subscription = req.body

  res.status(201).json({});

  const payload = JSON.stringify({
    title: 'Push notifications with Service Workers',
  });

  webPush.sendNotification(subscription, payload)
    .catch(error => console.error(error));
});

app.set('port', process.env.PORT || 5000);
const server = app.listen(app.get('port'), () => {
  console.log(`Express running → PORT ${server.address().port}`);
});
Chúng ta có thể truy cập tới cặp khoá VAPID trong gile variables.env nhờ dotenv package. Đối số đầu tiên của hàm setVapidDetails() được gọi là một email. Nó cung cấp một điểm liên lạc trong trường hợp push service cần liên hệ với người gửi. /subscribe API dùng để kích hoạt sự kiện đẩy thông báo tới service worker.
Trên là những thứ cần thiết bên phía server side. Để start server, ta chạy lệnh:
node index.js
4. Cài đặt Client
Tạo ra thư mục client chứa toàn bộ code phía client và lần lượt tạo ra các file như sau:
touch index.html style.css main.js sw.js
Trong file index.html chứa toàn bộ code giao diện của app:
// client/index.html
<!DOCTYPE html>
<html lang="en">
<head>
<meta charset="UTF-8">
<meta name="viewport" content="width=device-width, initial-scale=1.0">
<meta http-equiv="X-UA-Compatible" content="ie=edge">
<title>Push Notifications using Node.js and Web Push</title>
<link rel="icon" type="image/png" href="https://d2cy1obokpvee9.cloudfront.net/manifest/favicon-196x196.png" sizes="196x196" class="next-head">
<link rel="stylesheet" href="style.css">
</head>
<body>
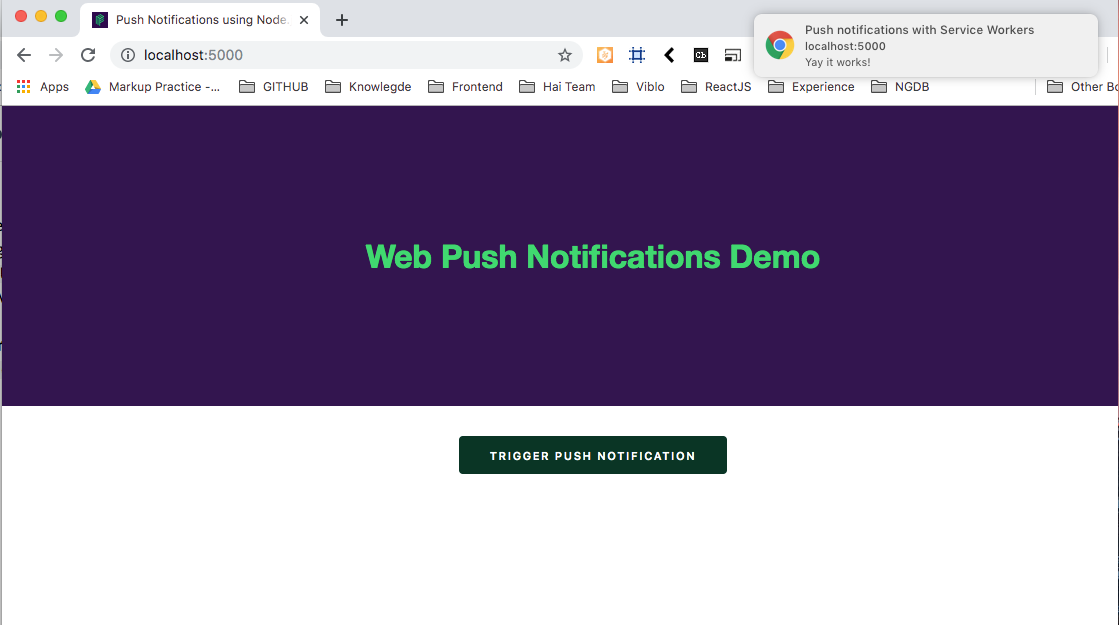
<header>
<h1>Web Push Notifications Demo</h1>
</header>
<div class="buttons">
<button class="trigger-push">Trigger Push Notification</button>
</div>
<script src="main.js"></script>
</body>
</html>
Tiếp theo trong file main.js sẽ xử lí việc đăng kí service worker:
// client/main.js

function urlBase64ToUint8Array(base64String) {
  const padding = '='.repeat((4 - base64String.length % 4) % 4);
  const base64 = (base64String + padding)
    .replace(/-/g, '+')
    .replace(/_/g, '/');

  const rawData = window.atob(base64);
  const outputArray = new Uint8Array(rawData.length);

  for (let i = 0; i < rawData.length; ++i) {
    outputArray[i] = rawData.charCodeAt(i);
  }
  return outputArray;
}

const publicVapidKey = '<your public vapid key>';

const triggerPush = document.querySelector('.trigger-push');

async function triggerPushNotification() {
  if ('serviceWorker' in navigator) {
    const register = await navigator.serviceWorker.register('/sw.js', {
      scope: '/'
    });

    const subscription = await register.pushManager.subscribe({
      userVisibleOnly: true,
      applicationServerKey: urlBase64ToUint8Array(publicVapidKey),
    });

    await fetch('/subscribe', {
      method: 'POST',
      body: JSON.stringify(subscription),
      headers: {
        'Content-Type': 'application/json',
      },
    });
  } else {
    console.error('Service workers are not supported in this browser');
  }
}

triggerPush.addEventListener('click', () => {
  triggerPushNotification().catch(error => console.error(error));
});
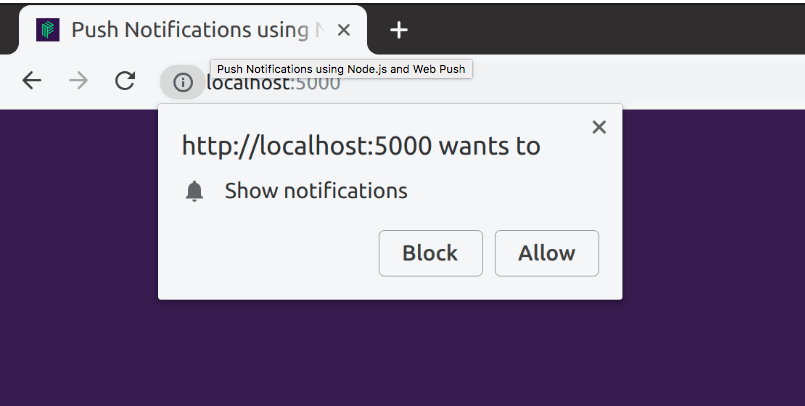
Khi người dùng click vào button Trigger Push Notification sẽ thực hiện việc đăng kí các service worker trong file sw.js và tạo ra đăng kí mà hiển thị một prompt xác nhận người dùng cho phép hiển thị thông báo tại trang hiện tại. Khi sử dụng VAPID key, chúng ta phải chuyển chuỗi URL safe base 64 thành Uint8Array sử dụng hàm urlBase64ToUint8Array. Đừng quên thay chuỗi <your public vapid key> bằng public key của bạn vừa nhận được khi Generate VAPID Keys ban nãy.
Tiếp theo gọi đến API /subscribe để triggers một sự kiện push mới. Bây giờ, chúng ta chỉ cần lắng nghe sự kiện của service worker và hiển thị thông báo mỗi khi người dùng kích hoạt sự kiện push bằng việc click button Trigger Push Notification
Trong file sw.js xử lý sự kiện khi nhận được một push event như sau:
// client/sw.js

self.addEventListener('push', event => {
  const data = event.data.json();

  self.registration.showNotification(data.title, {
    body: 'Yay it works!',
  });
});
Chúng ta tạo ra một thông báo nhờ hàm showNotification().
Cuối cùng để kiểm tra kết quả. Chúng ta chạy lệnh:
node index.js
sau đó mở đường dẫn http://localhost:5000/ và được kết quả như sau:
Kết luận:
Bài viết hướng dẫn cách bạn cài đặt và chạy một push notifications trên web sử dụng service worker và Web Push. Bạn có thể tham khảo source code tại source.
Tài liệu tham khảo:
All rights reserved
