Tạo ứng dụng message box app sử dụng React và Rails
Bài đăng này đã không được cập nhật trong 4 năm
JavaScript là một ngôn ngữ lập trình được sử dụng rất phổ biến. Dạo này một số framework mới đang nổi lên hàng ngày làm cho các developer nghi vấn rằng nên dùng tool nào và xây dựng user interface đang có thay đổi rất lớn. Đối với Rails developer biết rằng với view .erb không phải là phổ biến nữa và sẽ được thay thế bằng framework khác dựa vào framework của Javascript-based.
Trong đám đó, React của Facebook cùng cập hàng loạt phương pháp để xây dựng user interface. Thậm chí Rails có thể tiếp tục tích hợp với nó và rất dễ dàng để cài đặt một Rails API application và tạo lớp view với React. Bây giờ hãy xem app demo sau thực hiện chức năng đọc và tạo cho một model với React.
React.js là gì?
React.js là MVC framework chỉ sử dụng riêng cho view. Tương đương đó cũng có Backbone.js, AngularJS,.....
- React.js quản lý một chỗ route state nếu state thay đổi sẽ tự động render lại toàn bộ các component.
- Do state chỉ quan lý một chỗ thì không cần phải control kỹ về render do có tính dễ đọc và tính bảo trì cao. Ngoài ra React.js chỉ render phần thay đổi nên performance cũng không ảnh hưởng lắm.
- Cơ bản chỉ cần quản lý một chỗ ở route state là tốt rồi nhưng component của route sẽ trở thành phức tạm nên khó để làm thành quy mô lớn. Có thể giải quyết bằng Flux.
1. Cài đặt react-rails
Thông số mô trường
- Ruby 2.3.1p112
- Rails 5.0.0.1
- React-Rails 1.4.2
- React 15.4.1
Tạo một project mới
rails new react_test
cd ./react_test
Thêm react-rails vào Gemfile
gem "react-rails"
Chạy bundle install
Tiếp theo chạy script install rails g react:install với script này sẽ tạo một manifest component.js và một thư mục app/assets/javascripts/components/ nơi tạo các components.
vào application.js để tích hợp React.js vào Rails
//= require react
//= require react_ujs
//= require components
Thêm environment value của React.js
# config/environments/development.rb
Rails.application.configure do
...
+ # React development environment value
+ config.react.variant = :development
end

# config/environments/production.rb
Rails.application.configure do
...
  # React production environment value
  config.react.variant = :production
end
Trong trường hợp sử dụng addon thì phải thêm như sau
# config/environments/(development|test|production).rb
Rails.application.configure do
...
  # React.js Addon (default: false)
  config.react.addons = true
end
Tạo TopController#index
rails g controller top index
thêm route index cho controller Top
# config/routes.rb
  root 'top#index'
Chạy http://localhost:3000 rồi xem trong console có xảy ra lỗi Javascript hay không.
2. Các thành phần view của react
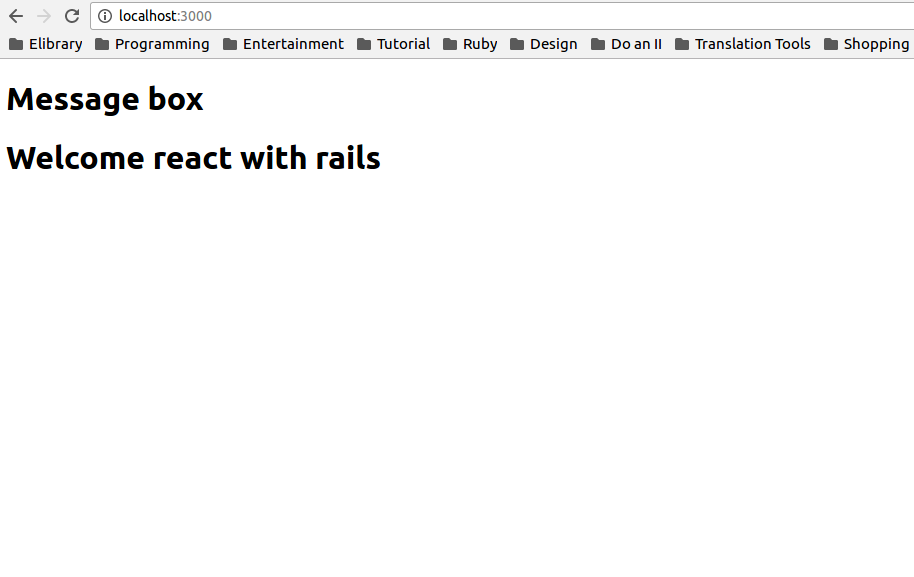
Hiển thị text Welcome react with rails
// app/assets/javascripts/main.js.jsx
$(function() {
    ReactDOM.render(
      <h1>Welcome react with rails</h1>,
      document.getElementById('content')
    );
 });
ReactDOM.render(,) để hiển thị Welcome react with rails trên trang web.
React component được hiển thị và nhận biết như basic html tag div, span,...
<!-- app/views/top/index.html.erb -->
  <h1>Message Box</h1>
  <div id="content"></div>
3. Tổng quan về Message box
React sử dụng Virtual DOM Tree, chỉ làm thay đổi HTML của phần thay đổi. Root node có state (có thể đổi), chuyển đến state (không thể đổi) tới các node con cần thiết. Node con nhận giá trị từ node cha, tiếp nhận props (ko thể đổi), dùng cái đó để render HTML. Mỗi node con nếu phát sinh event thì sẽ truyền đến node cha, đổi mới state của node cha bằng setState method. Như thế, từ node cha sẽ tái đổi mới toàn bộ node. Khi đó, vì có Virtual DOM tree nên chỉ đổi mới HTML phần thay đổi.
Message box sẽ có cấu trúc như sau
MessageBox
L MessageList
|  L MessageItem
L MessageForm
4. Tạo một danh sach message box
Đầu tiên sẽ tạo message box từ đây bằng tạo thư mục để chứa các component của React
mkdir app/assets/javascripts/components
- Tạo component MessageBox
// app/assets/javascripts/components/message_box.js.jsx
  var MessageBox = React.createClass({
    render: function() {
      return (
        <div className="messageBox">
          This is message box.
        </div>
      );
    }
  });
React.createClass() để tạo component và trả cho phần view với return render của chức năng. Do class dùng riêng cho nên thuộc thính class HTML sẽ sử dụng className.
Từ main.js.jsx các thành phần message box được gọi để sửa đổi
// app/assets/javascripts/main.js.jsx
 $(function() {
   ReactDOM.render(
     <MessageBox />,
     document.getElementById('content')
   );
 });
Sau đó bạn sẽ thấy trên màn hình như sau

ReactDOM.render sẽ render HTML component MessageBox như sau
<div id="content">
  <div class="messageBox" data-reactid=".0">
    This is message box.
  </div>
</div>
data-reactidđược cập tự động mục đích để React quản lý mỗi DOM.
render của React dễ dàng chỉ phù hợp tại thời điểm thực hiện
render sẽ return HTML element trên cùng duy nhất. Nếu muốn return 2 div element sẽ gấy ra lỗi.
var MessageBox = React.createClass({
  render: function() {
    // Do return 2 div sẽ gấy lỗi
    return (
      <div className="messageBox">
        This is message box.
      </div>
      <div className="messageBox">
        This is message box.
      </div>
    );
  }
});
- Các tag input/image phải có tag đóng.
var MessageBox = React.createClass({
  render: function() {
    return (
      <div className="messageBox">
        <image src="/path/to/file"/> {/* đúng */}
        <image src="/path/to/file">  {/* lỗi */}
      </div>
    );
  }
});
- Tạo component MessageItem
MessageItem là component để hiển thị các message.
// app/assets/javascripts/components/message_item.js.jsx
var MessageItem = React.createClass({
  render: function() {
    return (
      <div className="message">
        <h2 className="messageUser">{this.props.message.user}</h2>
        <span>{this.props.message.text}</span>
      </div>
    );
  }
});
this.props là giá trị được gán từ component cha. Ngoài ra với cú pháp này {variable_name} để biết giá trị của biết.
Ở đây message = { user: 'username', text: 'text' } được gán từ component cha sẽ được hiển thị nội dung từng mỗi username và message.
Quay lại MessageBox để thêm các MessageItem vào.
// message_box.js.jsx
 var MessageBox = React.createClass({
   render: function() {
   var messageItems = this.state.messages.map(function(message) {
      return (
        <MessageItem key={message.id} message={message}/>
      );
    });

     return (
       <div className="messageBox">
         {messageItems}
       </div>
     );
   }
 });
this.state giữ trạng thái của ứng dụng và giá trị có thể theo tên. Cơ bản nếu muốn quản lý state chỉ với root node(MessageBox) thì dễ để bảo trì JS code dễ hiểu vì state không trỏ đến các component ngẫu nhiên. Chúng ta dúng method this.setState để cập nhật các componenet của state và tất cả component sẽ được cập nhật bằng gọi render. Đối với React chỉ cập nhật khi có sự thay đổi nên render có thể thực hiện mà không cần quan tâm đến performance.
Cuối cùng chúng ta sẽ nhận data từ server, nhưng ở đấy tạm thời thì sẽ dùng tạm data chuẩn bị sẵn trước.
getInitialState tất cả các component được gọi sau khi state được tạo và thực hiện gán giá trị ban đầu.
// message_box.js.jsx
 var MessageBox = React.createClass({
   getInitialState: function() {
     return {
       messages: [
         { id: 1, user: 'Tom',   text: 'Good morning' },
         { id: 2, user: 'John',  text: 'Good afternoon' },
         { id: 3, user: 'Emily', text: 'Good evening' }
       ]
    };
 },

   render: function() {
     ...
5. Tạo message form
MessageForm là thành phần tạo form message để nhập và post message.
Tạo MessageForm component
// app/assets/javascripts/components/message_form.js.jsx
  var MessageForm = React.createClass({
    render: function() {
      return (
        <form className="commentForm">
          <input type="text" placeholder="Yousr name" />
          <input type="text" placeholder="Message" />
          <input type="submit" value="Post" />
        </form>
      );
    }
  });
Cho MessageForm vào trong MessageBox
// message_box.js.jsx
var MessageBox = React.createClass({
  getInitialState: function() {
    ...
  },

  render: function() {
    var messageItems = this.state.messages.map(function(message) {
      return (
        <MessageItem key={message.id} message={message}/>
      );
    });

    return (
      <div className="messageBox">
        {messageItems}
        <MessageForm />
      </div>
    );
  }
});
- Xử lý event submit
Chỉnh sửa MessageItem để có thể post message khi ấn nút Post.
Thêm
handleSubmitđể xử lý sự kiện submit trong MessageForm.
 var MessageForm = React.createClass({
   handleSubmit: function(event) {
     event.preventDefault();
     var user = this.refs.user.value.trim();
     var text = this.refs.text.value.trim();
     // どちらか入力されてなければ何もしない
     if (!user || !text) {
       return;
     }
     // 親コンポーネントのMessageBoxのイベントを呼ぶ
     this.props.onMessageSubmit({ user: user, text: text });
     // フォームの内容を削除
     this.refs.user.value = '';
     this.refs.text.value = '';
   },

    render: function() {
      return (
       <form className="commentForm" onSubmit={this.handleSubmit}>
         <input type="text" placeholder="Yousr name" ref="user" />
         <input type="text" placeholder="Message" ref="text"/>
          <input type="submit" value="Post" />
        </form>
      );
    }
  });
Khi sự kiện Submit xảy ra onSubmit={this.handleSubmit}, handleSubmit được gọi.
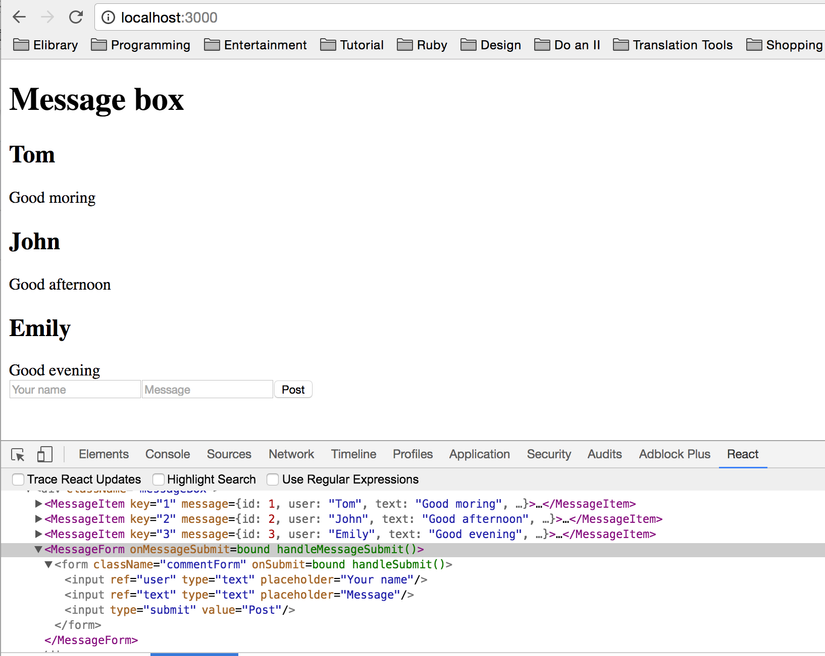
Khi chúng ta ấn nút Post, nội dung trong input sẽ được thêm vào trong list.
Thuộc tính key
Post button sẽ thêm một tin nhắn Javascript xuất hiện trong console message như sau:
React.self-bf 407 d 87 .... js? Body = 1: 2166
Warning: Each child in an array or iterator should have a unique "key" prop. Check the render method of `MessageBox`. See https://fb.me/react-warning-keys for more information.
MesssageItem là một danh sách element thì chúng ta sẽ set một giá trị key attribute vì khi thêm một message mới từ form chưa có id vậy sẽ thêm vào handleMessageSubmit để tạo unique id
- Phần sau sẽ nhận dữ liệu từ server nhưng bây giờ chỉ là một cách để tạo id dựa vào ngày tháng.
// message_box.js.jsx
  var MessageBox = React.createClass({
    getInitialState: function() {
      ...
    },

    handleMessageSubmit: function(message) {
+     message.id = new Date();
      var newMessages = this.state.messages.concat(message);
      this.setState({ messages: newMessages });
    },

    render: function() {
      var messageItems = this.state.messages.map(function(message) {
        return (
          <MessageItem key={message.id} message={message}/>
        );
      });

      return (
        <div className="messageBox">
          {messageItems}
          <MessageForm onMessageSubmit={this.handleMessageSubmit}/>
        </div>
      );
    }
  });
6.Kết hợp với phía server (Rails)
Tạo API trong Rails Chúng ta sẽ chuẩn bị 2 api
GET /messages.json - Lấy danh sách tất cả message.
POST /messages.json - Tạo một message
Đầu tiên tạo một controller và model
rails g resource Message user:string text:string
rails g resource là tạo file model, migration, controller khi không muốn tạo view.
Thêm route cho API
 # config/routes.rb

  Rails.application.routes.draw do
*   resources :messages, only: [:index, :create], format: 'json'
    root 'top#index'
  end
Trong MessageController tạo phương thức index và create
# app/controllers/messages_controller.rb
 class MessagesController < ApplicationController
   def index
     messages = Message.all
     render json: messages
   end

   def create
     message = Message.new(create_params)
     if message.save
       render json: message, status: :created # 201
     else
       render json: message, status: :unprocessable_entity
     end
   end

   private
     def create_params
       params.permit(:user, :text)
     end
 end
Tạo dữ liệu ban đầu
# db/seeds.rb
Message.delete_all
Message.create!([
  { user: 'Tom',   text: 'Good morning' },
  { user: 'John',  text: 'Good afternoon' },
  { user: 'Emily', text: 'Good evening' }
])


# terminal
bundle exec rake db:migrate db:seed
Nhận danh sách message từ server với React
Chúng ta sẽ sử dụng Ajax để lấy message từ server với GET. Cho url API vào trong thuộc tính url của MessageBox
// app/assets/javascripts/main.js.jsx
 $(function() {
   ReactDOM.render(
*     <MessageBox url="/messages"/>,
     document.getElementById('content')
   );
 });
Tiếp đến getInitialState phục vụ khở tạo dữ liệu ban đầu với mảng rỗng, componentDidMount định nghĩa một dánh sách message nhận từ server, setState({ messages: messages }) để set message cho state.
componentDidMount là một thuộc tính được gọi tự động bởi React.
/ app/assets/javascripts/components/message_box.js.jsx
 var MessageBox = React.createClass({
   getInitialState: function() {
*     return { messages: [] };
   },

  componentDidMount: function() {
    $.ajax({
      url:      this.props.url,
      dataType: 'json',
      cache:    false,
      success: function(messages) {
        this.setState({ messages: messages });
      }.bind(this),
      eror: function(_xhr, status, err) {
        console.error(this.props.url, status, err.toString());
      }.bind(this)
    });
  },
   ...
 });
Lý do screen ban đầu trắng xóa chưa có dữ liệu một lúc vì
1- getInitialState set messages là một mảng rỗng.
2- React hiển thị MessageBox, do chưa có message trong list nên chưa hiển thị ra.
3- Khi componentDidMount gọi để lấy dữ liệu message từ server và set cho messages.
4- Trong setState messages được cập nhận và React sẽ render thành phần thay đổi vậy danh sách sẽ hiển thị ra.
Tải và hiển thị dữ liệu
Trên màn hình sẽ hiển thị "Loading" khi đang tải cho đến khi dữ liệu được lấy và thành công.
Vào trong MessageBox, thêm một biến isLoading, với trạng thái đang tải có giá trị là true khi tải thành công có giá trị là false.
var MessageBox = React.createClass({
  getInitialState: function() {
    // isLoading = true display the loading
    return { messages: [], isLoading: true };
  },

  componentDidMount: function() {
    $.ajax({
      url: this.props.url,
      dataType: "json",
      cache: false,
      success: function(messages) {
        // isLoading = false hide loading
        this.setState({messages: messages, isLoading: false });
      }.bind(this),
      error: function(_xhr, status, err) {
        console.error(this.props.url, status, err.toString());
      }.bind(this)
    });
  },

  handleMessageSubmit: function(message) {
    $.ajax({
      url: this.props.url,
      dataType: "json",
      type: "POST",
      data: message,
      success: function(message) {
        var newMessages = this.state.messages.concat(message);
        this.setState({messages: newMessages});
      }.bind(this),
      error: function(_xhr, status, err) {
        console.error(this.props.url, status, err.toString());
      }.bind(this)
    });
  },

  render: function() {
    var messageItems = this.state.messages.map(function(message) {
      return (
        <MessageItem key={message.id} message={message}/>
      );
    });
    // Change the content to render display by value of isLoading
    if(this.state.isLoading) {
      return (
        <div>Loading</div>
      );
    } else {
      return (
        <div>
          <div className="messageBox">
            {messageItems}
            <MessageForm onMessageSubmit={this.handleMessageSubmit}/>
          </div>
        </div>
      );
    }
  }
});
Post message tới server với React
Khi ấn nút Post chúng ta cũng sử dụng ajax để gửi thông tin trong form lên server để ghi vào DB.
// app/assets/javascripts/components/message_box.js.jsx
  var MessageBox = React.createClass({
    ...

   handleMessageSubmit: function(message) {
     $.ajax({
       url:      this.props.url,
       dataType: 'json',
       type:     'POST',
       data:     message,
       success: function(message) {
*         var newMessages = this.state.messages.concat(message);
          this.setState({ messages: newMessages });
       }.bind(this),
       error: function(_xhr, status, err) {
         console.error(this.props.url, status, err.toString());
       }.bind(this)
     });
   },

    ...
  }
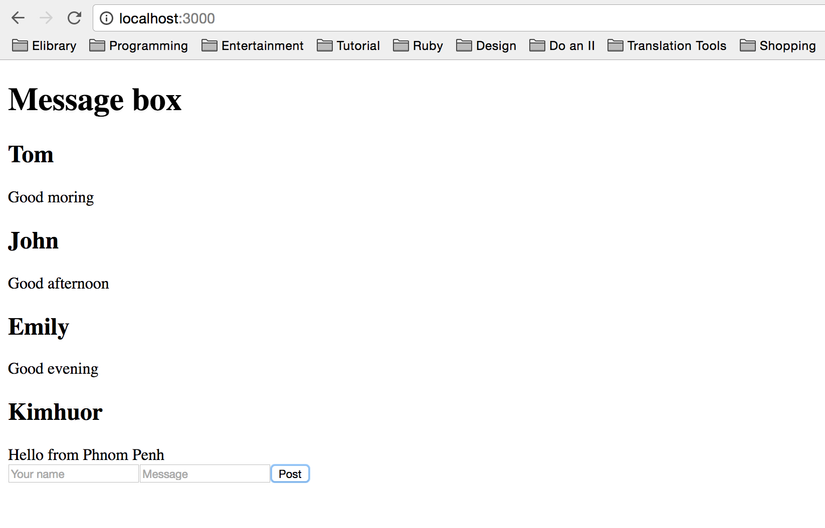
Dưới đây là một message được tạo.
Kết luận
Đây là một bài viết ngắn để giúp hiểu nhanh hơn khi bắt đầu tìm hiểu về ReactJS.
Tham khảo
All rights reserved
