Tạo Table View app trong lập trình iOS
Bài đăng này đã không được cập nhật trong 11 năm
**Table View trong iPhone app là gì ? **
Table View là 1 trong số những UI elements trong iOS apps. Hầu hết các app, đều sử dụng Table View để hiện thị list data. Ví dụ điển hình nhất là built-in Phone app. Ví dụ Contacts list được hiển thị trong Table View. Hoặc là Mail App. Nó sử dụng Table View để hiện thị mail box và email. Table ko chỉ sử dụng cho mỗi thiết kế textual data, nó còn cho phép bạn biểu diễn data dưới dạng form ảnh. Ví dụ điển hình là app Youtube or built-in Video app.
** Create SIMPLE TABLE PROJECT **
Với ý tưởng về table view, thử tạo 1 app đơn giản.
Đầu tiên chạy Xcode, tạo “Single View application”

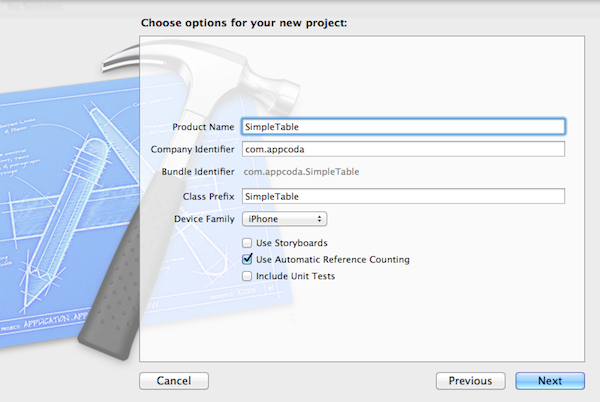
Click “Next” để tiếp tục. Điền thong tin dưới :
Product name : SimpleTable
Company Identifier:
Class Prefix : SimpleTable
Device Family : iPhone
Use Storyboards: [unchecked]
Use Automatic Reference Counting : [checked]
Include Unit Tests : [unchecked]
Click “Next” để tiếp tục. Chọn folder để save SimpleTable project.

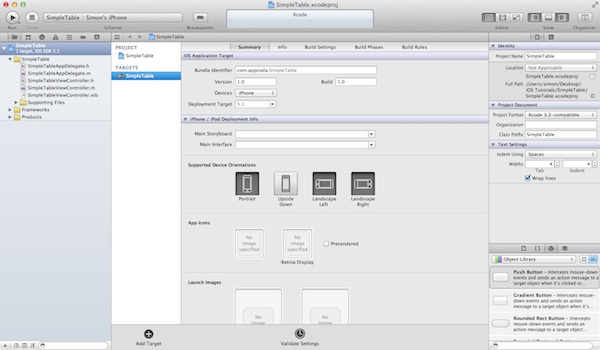
Sau khi ấn “Create” màn hình sẽ như dưới
** DESIGNING THE VIEW **
Đầu tiên, chúng ta tạo UI và add table view. Chọn “SimpleTableViewController.xib” để switch đến UI Builder.
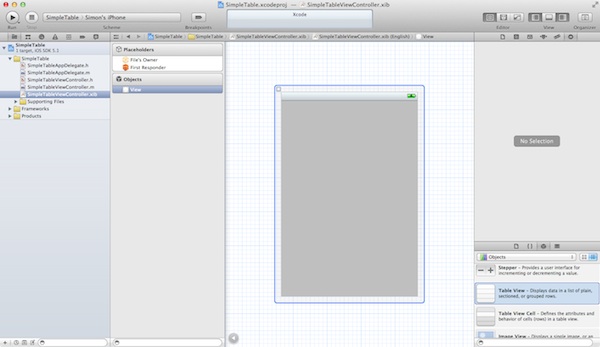
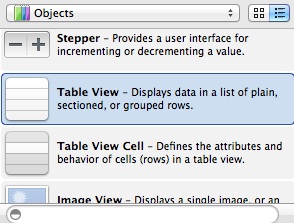
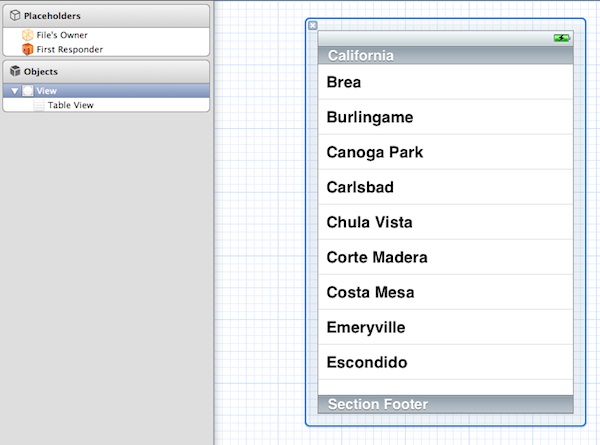
Trong Object Library, chọn Table View object và drag đến view.
Màn hình sẽ nhìn như thế này
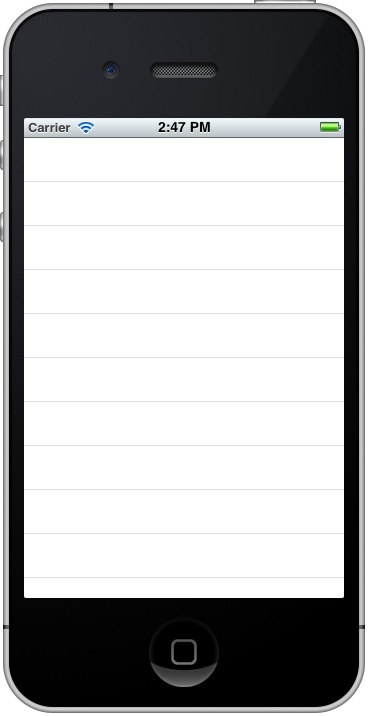
Chạy app lần đầu

Click Run, màn hình Simulator sẽ như thế này.
** Adding Table Data **
Append “<UITableViewDelegate, UITableViewDataSource>” vào phía sau “UIViewController”.
#import <UIKit/UIKit.h>

@interface SimpleTableViewController : UIViewController <UITableViewDelegate, UITableViewDataSource>

@end
The “UITableViewDelegate” and “UITableViewDataSource” được xem như là giao thức trong Object-C. Về cơ bản, dể hiển thị Data trong Table View, chúng ta phải tuân theo các yêu cầu được định nghĩa trong giao thức và thực thi các phương thức bắt buộc.
Chọn “SimpleTableViewController.m” và định nghĩa một biến để hiên thị table data.
@implementation SimpleTableViewController
{
    NSArray *tableData;
}
Trong method “viewDidLoad” method, add đoạn code dưới đây để khởi tạo mảng “tableData” . Chúng ta khởi tạo mảng array với danh sách thực đơn.
- (void)viewDidLoad
{
    [super viewDidLoad];
    // Initialize table data
    tableData = [NSArray arrayWithObjects:@"Egg Benedict", @"Mushroom Risotto", @"Full Breakfast", @"Hamburger", @"Ham and Egg Sandwich", @"Creme Brelee", @"White Chocolate Donut", @"Starbucks Coffee", @"Vegetable Curry", @"Instant Noodle with Egg", @"Noodle with BBQ Pork", @"Japanese Noodle with Pork", @"Green Tea", @"Thai Shrimp Cake", @"Angry Birds Cake", @"Ham and Cheese Panini", nil];
}
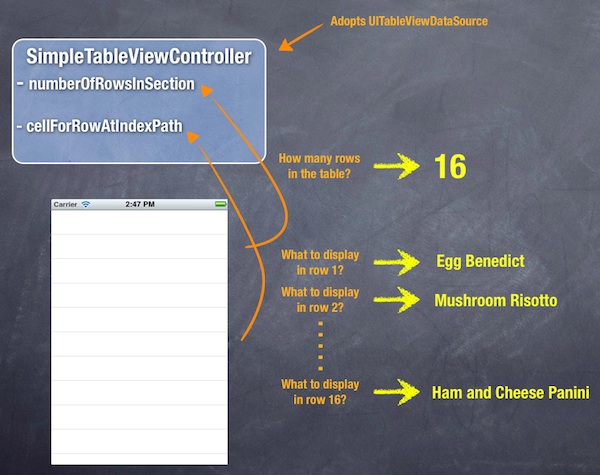
Cuối cúng, chèn thêm 2 phương thức datasource : “tableView:numberOfRowsInSection” và “tableView:cellForRowAtIndexPath”. 2 phương thức này thuộc của giao thức UITableViewDataSource. Và lat bắt buộc để thực thi các phương thức khi cấu hình một UITableView. Phương thức đầu tiên được sử dụng để thông báo table view bao nhiêu hàng trong section. Chèn đoạn code phía dưới. Phương thúc "count" sẽ trả về số lượng items trong mảng "tableData".
- (NSInteger)tableView:(UITableView *)tableView numberOfRowsInSection:(NSInteger)section
{
    return [tableData count];
}
Tiếp theo, thực thi 1 phương thức bắt buộc khác.
- (UITableViewCell *)tableView:(UITableView *)tableView cellForRowAtIndexPath:(NSIndexPath *)indexPath
{
    static NSString *simpleTableIdentifier = @"SimpleTableItem";

    UITableViewCell *cell = [tableView dequeueReusableCellWithIdentifier:simpleTableIdentifier];

    if (cell == nil) {
        cell = [[UITableViewCell alloc] initWithStyle:UITableViewCellStyleDefault reuseIdentifier:simpleTableIdentifier];
    }

    cell.textLabel.text = [tableData objectAtIndex:indexPath.row];
    return cell;
}
“cellForRowAtIndexPath” được gọi mỗi lần các hàng của table được hiển thị. Minh họa dưới đây sẽ cho chúng ta 1 cái nhìn tốt hơn về cách thức làm việc của UITableView và UITableDataSource
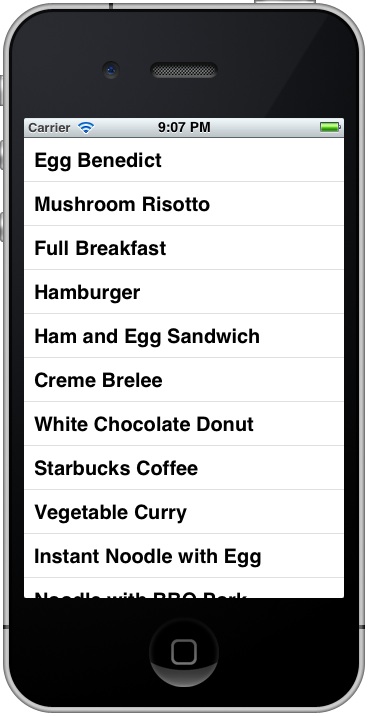
Click và “Run” button Nếu code chạy đúng the Simulator sẽ hiển thị như dưới đây.
KẾT NỐI ĐẾN DataSource VÀ Delegate
Tiếp theo chúng ta phải thiết lập kết nối giữa the Table View và 2 phương thức vừa tạo.
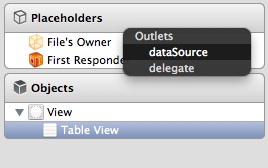
Trở lại “SimpleTableViewController.xib”. Ấn và giữ Control key, chọn Table View và drag đến “File’s Owner”. Màn hình sẽ như thế này:
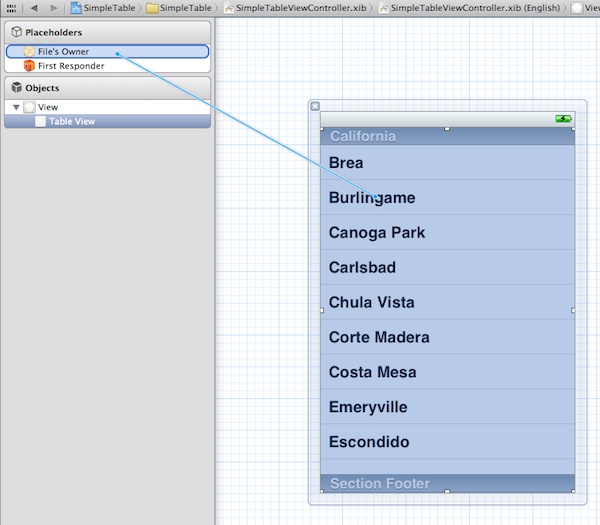
Release cả buttons và a pop-up sẽ hiển thị cả 2 “dataSource” & “delegate”. Chọn “dataSource” để tạo kết nối giữa Table View và data source của nó. Lặp lại bước trên để tạo kết nối cho delegate.
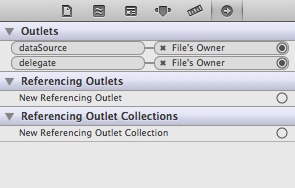
Để đảm bảo kết nối này là thích hợp, vào Table View. Ở phần trên của Utility , bạn có thê nhìn thấy các kêt nối ở mục “Connection Inspector”
Chương trình sau khi click vào nút RUN.
Source : http://www.appcoda.com/ios-programming-tutorial-create-a-simple-table-view-app/
All rights reserved
