Tạo một Token Based Authorization API đơn giản trong Rails
Bài đăng này đã không được cập nhật trong 7 năm
Chúng ta sẽ sử dụng Knock làm nền tảng cho Authorization API.
Bước 1__Thiết lập ứng dụng:
Khi bạn đã sẵn sàng, hãy mở terminal và nhập các lệnh sau đây:
# Lệnh này sẽ tạo ra 1 ứng dụng Rails với API mode.
# Trong ví dụ này chúng ta sẽ sử dụng MySQL làm cơ sở dữ liệu.
rails new auth-api --api -d mysql
# Di chuyển đến thử mục của ứng dụng
cd auth-api
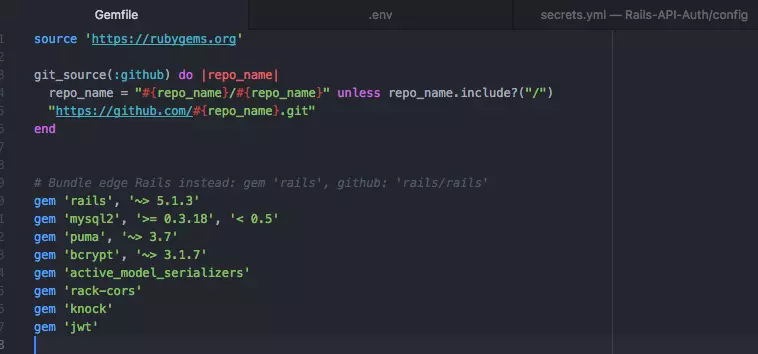
Bây giờ bạn đã tạo được ứng dụng và đã chuyển hướng đến thư mục của ứng dụng, hãy mở Gemfile của bạn lên và thêm các gem sau đây:
# auth-api/Gemfile
gem 'bcrypt', '~> 3.1.7'
gem 'active_model_serializers'
gem 'rack-cors'
gem 'knock'
gem 'jwt'
Nó sẽ trông giống Gemfile dưới đây:
Tiếp theo , chúng ta sẽ chạy các lệnh dưới đây trong terminal. Chúng ta sẽ hoàn thành việc thiết lập cấu trúc cơ bản cho ứng dụng.
bundle install
# Chạy lệnh này để thiết lập cấu trúc Knock cơ bản.
rails generate knock:install
rails generate knock:token_controller user
# Tiếp theo chạy các lệnh sau đây để chuẩn bị cho ứng dụng Rails của bạn
rails generate model users
rails generate controller users
rails generate controller home
rails g serializer user
rails db:create
Bước 2__Thiết lập cơ sở dữ liệu
Bây giờ chúng ta sẽ thiết lập bảng Users cho ứng dụng. Do chúng ta chỉ tạo một hệ thống cơ bản nên chúng ta sẽ giữ cơ sở dữ liệu đơn giản nhất có thể.
Knock sử dụng trường địa chỉ email cho mục đích xác minh. Chúng ta sẽ sử dụng trường role để cung cấp cho ứng dụng một hệ thống phân quyền đơn giản.
Mở tệp dưới đây và thêm vào đoạn code sau
# File location:
# - project_name/db/migrate/:random_number_create_users.rb
class CreateUsers < ActiveRecord::Migration[5.1]
  def change
    create_table :users do |t|
      t.string :username, null: false, unique: true
      t.string :email, null: false, index: true, unique: true
      t.string :password_digest
      t.string :role, null: false, default: 'user'
      t.datetime :last_login

      t.timestamps
    end
  end
end
Nhập dòng lệnh sau trong terminal để tạo bảng User:
rails db:migrate
Bước 3__Thiết lập Authorization/Knock
Đầu tiên chúng ta sẽ cấu hình Knock cho ứng dụng của chúng ta. Knock làm cho quá trình này trở lên đơn giản, bạn chỉ cần bỏ comment cách thiết lập mà bạn muốn sử dụng.
Đảm bảo các dòng dưới đây không bị comment trong tệp của bạn:
# File Location:
# - project_name/config/initializers/knock.rb

Knock.setup do |config|

  # Set how long a login token is valid.
  config.token_lifetime = 1.week
  config.token_signature_algorithm = 'HS256'
  config.token_secret_signature_key = -> { Rails.application.secrets.secret_key_base }
  config.not_found_exception_class_name = 'ActiveRecord::RecordNotFound'

end
Tiếp theo chúng ta cần thiết lập cho User model. Chúng ta sẽ thiết lập một số validations và phương thức để sử dụng sau.
# File Location:
# - project_name/app/model/user.rb

class User < ApplicationRecord

  # Necessary to authenticate.
  has_secure_password

  # Basic password validation, configure to your liking.
  validates_length_of       :password, maximum: 72, minimum: 8, allow_nil: true, allow_blank: false
  validates_confirmation_of :password, allow_nil: true, allow_blank: false

  before_validation {
    (self.email = self.email.to_s.downcase) && (self.username = self.username.to_s.downcase)
  }

  # Make sure email and username are present and unique.
  validates_presence_of     :email
  validates_presence_of     :username
  validates_uniqueness_of   :email
  validates_uniqueness_of   :username

  # This method gives us a simple call to check if a user has permission to modify.
  def can_modify_user?(user_id)
    role == 'admin' || id.to_s == user_id.to_s
  end

  # This method tells us if the user is an admin or not.
  def is_admin?
    role == 'admin'
  end

end
Bây giờ, chúng ta sẽ thiết lập tất cả các controllers cần thiết cho Authentication API.
# File Location:
# - project_name/app/controller/application_controller.rb

class ApplicationController < ActionController::API
  # Include Knock within your application.
  include Knock::Authenticable

  protected

  # Method for checking if current_user is admin or not.
  def authorize_as_admin
    return_unauthorized unless !current_user.nil? && current_user.is_admin?
  end
end
# File Location:
# - project_name/app/controller/home_controller.rb

class HomeController < ApplicationController
  # authenticate_user is now a resource you can use on any method to make sure the client is authorized
  before_action :authenticate_user,  only: [:auth]

  # Public method
  def index
    render json: { service: 'auth-api', status: 200 }
  end

  # Authorized only method
  def auth
    render json: { status: 200, msg: "You are currently Logged-in as #{current_user.username}" }
  end

end
Bước 4__Thiết lập User
Tiếp theo, chúng ta sẽ tạo các phương thức để tạo tài khoản và xử lý xác thực. Đây là các phương thức cơ bản cần thiết để bắt đầu thử nghiệm API của chúng ta.
# File Location:
# - project_name/app/controller/users_controller.rb

class UsersController < ApplicationController
  # Use Knock to make sure the current_user is authenticated before completing request.
  before_action :authenticate_user,  only: [:index, :current, :update]
  before_action :authorize_as_admin, only: [:destroy]
  before_action :authorize,          only: [:update]

  # Should work if the current_user is authenticated.
  def index
    render json: {status: 200, msg: 'Logged-in'}
  end

  # Call this method to check if the user is logged-in.
  # If the user is logged-in we will return the user's information.
  def current
    current_user.update!(last_login: Time.now)
    render json: current_user
  end

  private

  # Setting up strict parameters for when we add account creation.
  def user_params
    params.require(:user).permit(:username, :email, :password, :password_confirmation)
  end

  # Adding a method to check if current_user can update itself.
  # This uses our UserModel method.
  def authorize
    return_unauthorized unless current_user && current_user.can_modify_user?(params[:id])
  end
end
Bây giờ chúng ta sẽ thêm một số phương thức cơ bản để tạo và quản lý người dùng. Điều này sẽ cung cấp cho người dùng quyền truy cập để tạo và cập nhật tài khoản và cấp cho quản trị viên khả năng xóa người dùng.
# Phương thức tạo người dùng sử dụng params an toàn
def create
  user = User.new(user_params)
  if user.save
    render json: {status: 200, msg: 'User was created.'}
  end
end

# Phương thức cập nhật người dùng. Người dùng cần phải được ủy quyền.
def update
  user = User.find(params[:id])
  if user.update(user_params)
    render json: { status: 200, msg: 'User details have been updated.' }
  end
end

# Phương thức xóa người dùng, chỉ dành cho admin
def destroy
  user = User.find(params[:id])
  if user.destroy
    render json: { status: 200, msg: 'User has been deleted.' }
  end
end
Cuối cùng, chúng ta cần chỉnh sửa User Serializer mà chúng ta tạo lúc đầu. Chúng ta sẽ sử dụng serializer để tránh việc gửi dữ liệu từ API của chúng ta.
# File Location:
# - project_name/app/serializers/user_serializer.rb

class UserSerializer < ActiveModel::Serializer
  attributes :id, :email, :username, :role, :created_at, :updated_at, :last_login
end
Bước 5__Hoàn thành và Chạy thử
Chúng ta cần phải thêm các routes cho API của chúng ta trước khi chạy thử.
# File Location:
# - project_name/config/routes.rb

Rails.application.routes.draw do

  # Home controller routes.
  root   'home#index'
  get    'auth'            => 'home#auth'

  # Get login token from Knock
  post   'user_token'      => 'user_token#create'

  # User actions
  get    '/users'          => 'users#index'
  get    '/users/current'  => 'users#current'
  post   '/users/create'   => 'users#create'
  patch  '/user/:id'       => 'users#update'
  delete '/user/:id'       => 'users#destroy'

end
Bây giờ tất các các routes đã được thêm, đã đến lúc bắt đầu ứng dụng trên môi trường local
# Open Terminal and enter:
Rails s -p 5000
Khi test API, chúng ta sẽ sử dụng ứng dụng Postman. Postman là một công cụ miễn phí và đơn giản để test API.
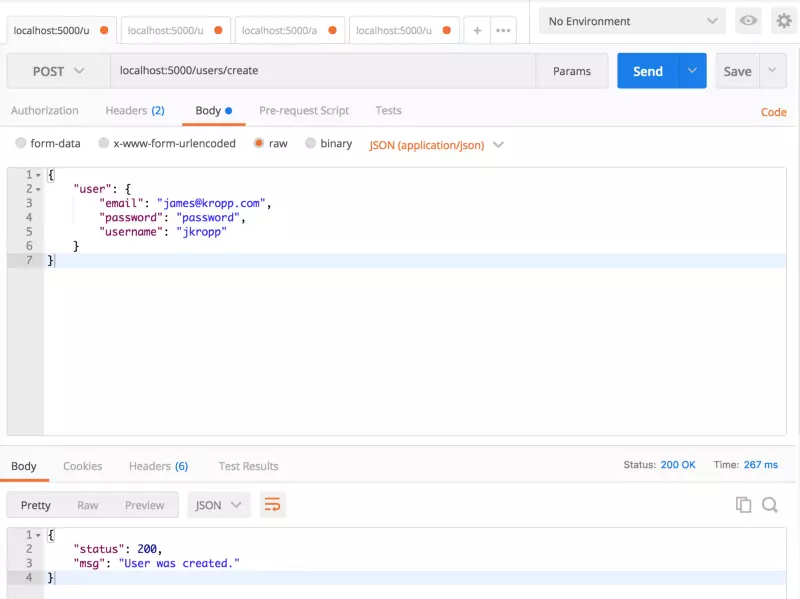
Đầu tiên, hãy bắt đầu bằng các thử tạo người dùng. Chúng ta chỉ cần đặt body bằng thông chi tiết của một tài khoản mới.
Tiếp theo, hãy thử test phần đăng nhập mà chúng ta đã tạo.
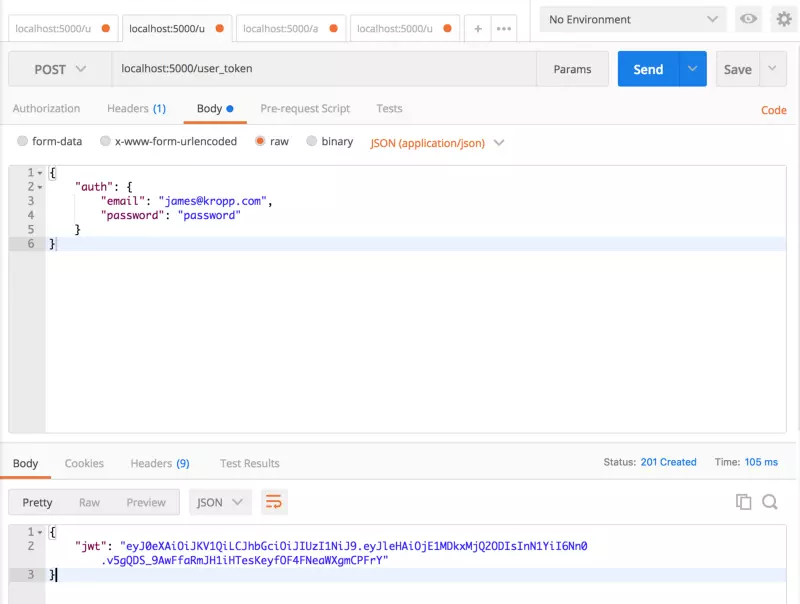
Nếu mọi thứ đã hoạt động bình thường, chúng ta sẽ nhận được JWT Token từ Knock, trông giống như kết quả dưới đây.

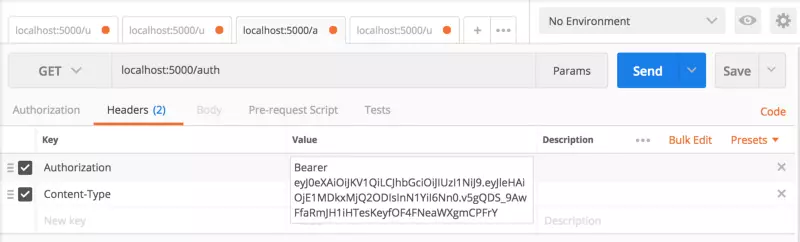
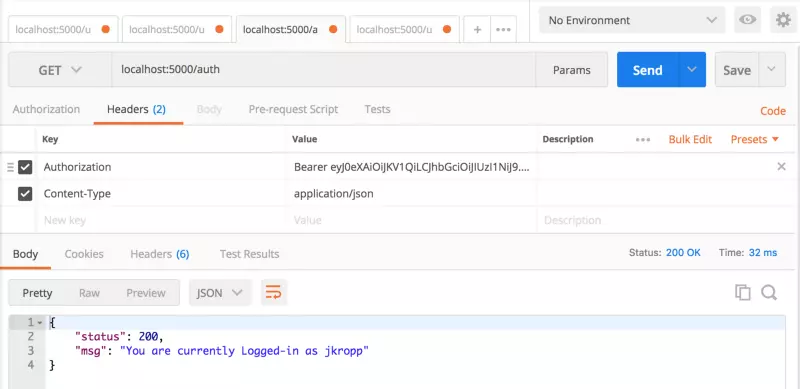
Bây giờ chúng ta đã có JWT token, hãy thử ủy quyền với token đã tạo của chúng ta. Để gửi token tới API, chúng ta cần thêm Authorization key với định dạng sau:
Bearer generated_key
Postman của bạn sẽ trông giống cài đặt dưới đây.
Khi bạn đã thêm Authorization key, nhấn button send. Bạn sẽ nhận được status: 200 và message mà chúng ta thiết lập trong HomeController
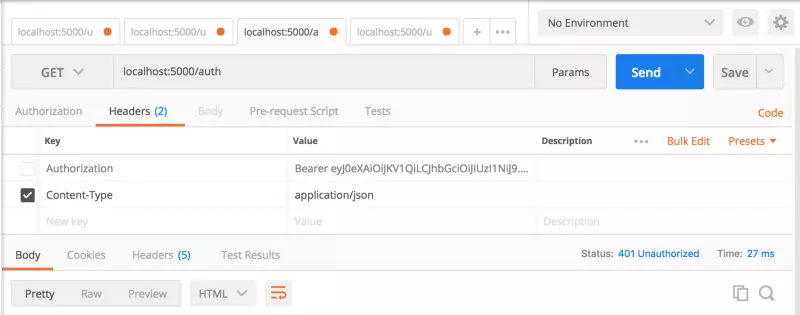
Tiếp theo, hãy đảm bảo hệ thống ủy quyền của chúng ta hoạt động bình thường. Bắt đầu bằng cách bỏ Authorization key đã thiết lập trước đó. Sau khi bị vô hiệu hóa, hãy thử gửi lại yêu cầu và xem bạn có nhận lại được status: 401 Unauthorized
Thank for reading~!
Link nguồn của tác giả James Kropp: https://engineering.musefind.com/building-a-simple-token-based-authorization-api-with-rails-a5c181b83e02
All rights reserved
