Tạo hiệu ứng chuyển pages trong ứng dụng React
Bài đăng này đã không được cập nhật trong 6 năm
Giới thiệu về React transition group
React-transition-group là một thư viện được phát triển bởi cộng đồng các lập trình viên React. Thư viện này hỗ trợ, cung cấp cho developers các component cần thiết để tạo ra các hiệu ứng, tương tác dễ dàng hơn với CSS Transition trong một ứng dụng React.
Thư viện cung cấp các component chính như:
- Transition
- CssTransition
- TransitionGroup
1.Component Transition
Component transition cho phép định nghĩa mô tả một transition để chuyển đổi từ một trạng thái giao diện này sang một trạng thái giao diện khác trong một khoảng thời gian. Có 4 states chính trong một Component Transiotion:
- 'entering'
- 'entered'
- 'exiting'
- 'exited'
Và các callback function:
- 'onEnter'
- 'onEntering'
- 'onEntered'
- 'onExit'
- 'onExiting'
- 'onExited'
Việc sử dụng các states này giúp chúng ta trigger cũng như định nghĩa css cho component trong những trạng thái biến đổi của component.
Một props quan trọng trong Component Transition là in:
- Khi giá trị của
inchuyển từfalsesangtruenó sẽ gọi lần lượt 3 sự kiện làonEnteronEnteringvàonEntered. Component Transition sẽ chuyển sang trạng tháienteringvà giữ trạng thái trong khoảng thời giantimeoutvà chuyển về trạng tháientered. - Ngược lại khi
inchuyển từtruesangfalselần lượt 3 sự kiệnonExitonExitingvàonExitedđược gọi và component chuyển dần từ trạng tháiexitingvề trạng tháiexited.
Chi tiết các bạn có thể tham khảo tại Component Transition
2.CSSTransition
CSSTransition được xây dựng dựa trên Component Transition vì vậy nó được kế từa các props của Transition Component ngoài ra nó có thêm 1 props là classNames
CSSTransition là một cách khác để sử dụng transition vào trong ứng dụng, nó hỗ trợ làm việc dễ dàng hơn Transition khi thao tác với Css transitions và các animations.
Các bạn có thể tham khảo thêm tại CSSTransition
3. TransitionGroup
Component TransitionGroup giúp quản lý một tập hợp các component Transition hoặc CSSTransition trong một danh sách.
TransitionGroup
Demo
Chúng ta cung thử sử dụng thư viện react-transition-group cho việc thêm hiệu ứng khi chuyển pages trong ứng dụng React.
Ở đây mình sử dụng <CSSTransition> kết hợp với styled-components và react-router.
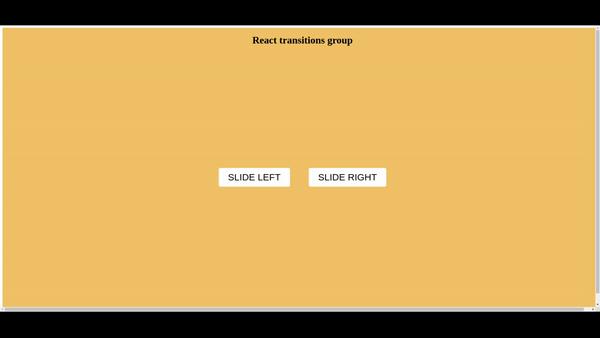
Chúng ta tạo một ứng dụng đơn giản gồm 2 buttons. Khi bấm vào 1 trong 2 button ứng dụng sẽ chuyển sang một route khác và mỗi một button chúng ta sẽ thêm một hiệu ứng cho việc chuyển trang.
LINK Source code
Đầu tiên định nghĩa một page đơn giản với 2 buttons, khi nhấn vào button ta sẽ push sang một route khác đồng thời gửi thêm state trong history.location nhằm xác định hiệu ứng transition chúng ta muốn áp dụng:
// Page.js
import React from "react";
import styled from "styled-components";

const Wrapper = styled.div`
  width: 100vw;
  height: 100vh;
  position: absolute;
  display: flex;
  flex-direction: column;
  align-items: center;
  justify-content: space-between;
  background-color: ${props => props.color};
`;

const Button = styled.button`
  background: white;
  border: 1px #333;
  height: 60px;
  font-size: 30px;
  border-radius: 5px;
  cursor: pointer;
  padding: 0 30px;
  margin: 10px 30px;
  &:focus {
    outline: none;
  }
`;

const Footer = styled.div`
  display: flex;
  justify-content: space-between;
  width: 300px;
  padding: 20px;
`;

const Page = ({ history, to, ...props }) => (
  <Wrapper {...props}>
    <h1>React transitions group</h1>
    <div>
      <Button onClick={() => history.push({ pathname: to, state: "slideLeft" })}>
        SLIDE LEFT
      </Button>
      <Button onClick={() => history.push({ pathname: to, state: "slideRight" })}>
        SLIDE RIGHT
      </Button>
    </div>
    <Footer>
    </Footer>
  </Wrapper>
);

export const Green = props => <Page color="#60d7a9" to="/yellow" {...props} />;
export const Yellow = props => <Page color="#fdc162" to="/green" {...props} />;
Tiếp theo ta định nghĩa một TransitionGroup, TransitionGroup sẽ quyết định hiệu ứng transition nào được áp dụng thông qua state của location mà chúng ta gửi kèm:
//transition/index.js
import React from "react";
import { TransitionGroup, CSSTransition } from "react-transition-group";

const childFactoryCreator = props => child => React.cloneElement(child, props);

export default ({ duration = 600, pageKey, children, history }) => {
  let transitionType = '';

  if (history.location && history.location.state === "slideLeft") {
    transitionType = 'slideLeft';
  } else if (history.location && history.location.state === "slideRight") {
    transitionType = 'slideRight';
  }

  if (duration == null) {
    duration = 600;
  }

  return (
    <TransitionGroup
      childFactory={childFactoryCreator({
        classNames: transitionType,
        timeout: duration
      })}
    >
      <CSSTransition key={pageKey} timeout={duration}>
        <div>{children}</div>
      </CSSTransition>
    </TransitionGroup>
  );
};
Ta sử dụng TransitionGroup được tạo trong khi chuyển trang kết hợp với react-router:
// App.js
import React from "react";
import { Router, Switch, Route, Redirect } from "react-router-dom";
import createHistory from "history/createBrowserHistory";
import Transitions from "./transition";
import { Green, Yellow } from "./Page";
import Wrapper from './styles';

const history = createHistory();
export default () => (
  <Router history={history}>
    <Route
      render={({ location }) => (
        <Wrapper>
          <Transitions
            pageKey={location.key}
            history={history}
            {...location.state}
          >
            <Switch location={location}>
              <Route path="/green" component={Green} />
              <Route path="/yellow" component={Yellow} />
              <Redirect from="/" to="/green" />
            </Switch>
          </Transitions>
        </Wrapper>
      )}
    />
  </Router>
);
Ta định nghĩa css cho các transition tương ứng:
// styles.js
import styled, { keyframes } from 'styled-components';

const moveFromRight = keyframes`
from { transform: translateX(100%); }
`;

const moveToLeft = keyframes`
from { transform: translateX(0%); }
to { transform: translateX(-100%);}
`;

const moveFromLeft = keyframes`
from { transform: translateX(0%); translateZ(0%); }
to { transform: translateX(100%); translateZ(0%); }
`;

const moveToRight = keyframes`
from { transform: translateX(-100%); translateZ(100%); }
to { transform: translateX(0%); translateZ(100%); }
`;

const Wrapper = styled.div`
  width: 100vw;
  height: 100vh;
  perspective: 1200px;
  .slideLeft-enter, .slideLeft-exit {
    position: relative;
  }
  .slideLeft-enter-active {
    animation: ${moveFromRight} 600ms ease both;
    z-index: 2;
  }
  .slideLeft-exit-active {
    animation: ${moveToLeft} 600ms ease both;
    z-index: 1;
  }
  .slideRight-enter, .slideRight-exit {
    position: relative;
  }
  .slideRight-enter-active {
    animation: ${moveToRight} 600ms ease both;
    z-index: 2;
  }
  .slideRight-exit-active {
    animation: ${moveFromLeft} 600ms ease both;
    z-index: 1;
  }
`;

export default Wrapper;
Kết
Cảm ơn mọi người đã theo dõi bài viết, hy vọng bài viết sẽ giúp ích cho các bạn khi thêm hiệu ứng cho ứng dụng React của mình.
All rights reserved
