Tạo chức năng thông báo đẩy cho trang web với Laravel
Bài đăng này đã không được cập nhật trong 7 năm
Mở đầu
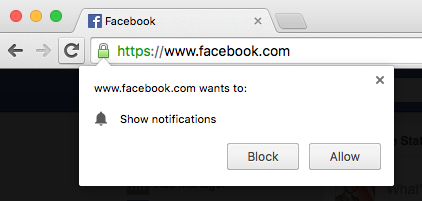
hiện nay, hầu hết các trang web đều yêu cầu cấp quyền hiển thị thông báo như thế này.
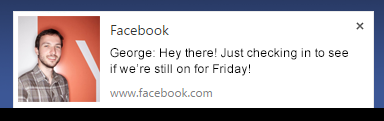
và khi có thông báo sẽ hiện lên như thế này.
Tính năng này sẽ giúp bạn show thông báo cho người dùng ngay cả khi người dùng không truy cập vào trang web. Tính năng này được gọi là Webpush Notification.
Ở bài hôm nay, mình sẽ hướng dẫn mọi người xây dựng chức năng này bằng Laravel.
Cài Đặt
Push Notification là 1 tính năng của Service Worker. Và Service Worker chỉ chạy khi dùng HTTPS hoặc dùng localhost.
Tiếp theo mình cần cài đặt package webpush
composer require laravel-notification-channels/webpush
Sau khi cài xong, ta cần thêm Trait vào trong model User.
<?php
use NotificationChannels\WebPush\HasPushSubscriptions; //import trait
class User extends Model
{
    use HasPushSubscriptions; // thêm trait vào class
    //code...
Tiếp theo, ta cần tạo 1 bảng để lưu thông tin đăng ký của người dùng.
php artisan vendor:publish --provider="NotificationChannels\WebPush\WebPushServiceProvider" --tag="migrations"
câu lệnh này sẽ tự tạo 1 file migration trong thư mục migrations
<?php
public function up()
{
    Schema::create('push_subscriptions', function (Blueprint $table) {
        $table->charset ='utf8';
        $table->collation = 'utf8_unicode_ci';
        $table->increments('id');
        $table->integer('guest_id')->unsigned()->index();
        $table->string('endpoint', 255)->unique();
        $table->string('public_key')->nullable();
        $table->string('auth_token')->nullable();
        $table->timestamps();
    });
}
tiếp theo, ta cần tạo Vapid key để server xác thực người dùng.
php artisan webpush:vapid
câu lệnh này sẽ tạo 2 trường VAPID_PUBLIC_KEY và VAPID_PRIVATE_KEY trong file .env.
Tạo file service.js
ta sẽ tạo file service.js để hiển thị ra thông báo mỗi khi có thông báo tới.
self.addEventListener('push', function(e) {
    if (!(self.Notification && self.Notification.permission === 'granted')) {
        return;
    }
    if (e.data) {
        var msg = e.data.json();
        e.waitUntil(
            self.registration.showNotification(msg.title, {
                body: msg.body,
                icon: msg.icon,
                image: msg.icon
            })
        );
    }
});
Register Service Worker
Vừa rồi, ta đã tạo file service.js. Bây giờ, ta sẽ tạo file register_service.js để đăng ký file đó vào trình duyệt.
    //đăng ký service worker
    let swRegistration = navigator.serviceWorker.register('/service.js');
    //sau khi đăng ký xong ta sẽ yêu cầu quyền để được đẩy thông báo
    if (swRegistration) {
        let permission = window.Notification.requestPermission();
        if (permission !== 'granted') {
            throw new Error('Permission not granted for Notification');
        }
    }
Subscribe User
Ta thêm các hàm sau vào trong file register_service.js
function urlBase64ToUint8Array(base64String) {
    var padding = '='.repeat((4 - base64String.length % 4) % 4);
    var base64 = (base64String + padding)
        .replace(/\-/g, '+')
        .replace(/_/g, '/');

    var rawData = window.atob(base64);
    var outputArray = new Uint8Array(rawData.length);

    for (var i = 0; i < rawData.length; ++i) {
        outputArray[i] = rawData.charCodeAt(i);
    }
    return outputArray;
}
hàm này dùng để chuyển VAPID_PUBLIC_KEY sang dạng Uint8Array;
function subscribeUser() {
    navigator.serviceWorker.ready
        .then(registration => {
            const subscribeOptions = {
                userVisibleOnly: true,
                applicationServerKey: urlBase64ToUint8Array(window.appServerKey)
            };

            return registration.pushManager.subscribe(subscribeOptions);
        })
        .then(pushSubscription => {
            storePushSubscription(pushSubscription);
        });
}

function storePushSubscription(pushSubscription) {
    fetch('/subscriptions', {
        method: 'POST',
        body: JSON.stringify(pushSubscription),
        headers: {
            Accept: 'application/json',
            'Content-Type': 'application/json'
        }
    }).then(res => {
        return res.json();
    });
}

subscribeUser();
khi service worker ở trạng thái ready, tức là người dùng đã nhấn cho phép đẩy thông báo, ta sẽ subscribe user này, sau đó gọi hàm storePushSubscription() để lưu user lên server.
Xử lí trên server
Thêm route
Route::post('/subscriptions', 'PushController@store');
Route::get('/push', 'PushController@push')->name('push');
subscribe user
public function store(Request $request)
{
    $this->validate($request, [
        'endpoint' => 'required',
        'keys.auth' => 'required',
        'keys.p256dh' => 'required',
    ]);
    $endpoint = $request->endpoint;
    $token = $request->keys['auth'];
    $key = $request->keys['p256dh'];
    $user = Auth::user();
    if (isset($user)) {
        $user->updatePushSubscription($endpoint, $key, $token);
    }

    return response()->json('subscribe success', 200);
}
Trait HasPushSubscriptions có hàm updatePushSubscription() giúp ta lưu hoặc cập nhật subscription của User trong database.
Push Message
Giả sử ta sẽ đẩy thông báo cho người dùng mỗi khi có tin nhắn đến.
đầu tiên ta sẽ tạo PushNotification
php artisan make:notification PushNotification
class PushNotification extends Notification
{
    use Queueable;

    private $user;
    private $message;
    /**
     * Create a new notification instance.
     *
     * @return void
     */
    public function __construct(User $user, $message)
    {
        $this->user = $user;
        $this->message = $message;
    }

    /**
     * Get the notification's delivery channels.
     *
     * @param  mixed  $notifiable
     * @return array
     */
    public function via($notifiable)
    {
        return [WebPushChannel::class];
    }

    public function toWebPush($notifiable, $notification)
    {
        return (new WebPushMessage)
            ->title($this->user->fullname . ' đã nhắn tin cho bạn')
            ->icon($this->user->avatar)
            ->body($this->message)
            ->action('View Message', 'view_message');
    }
}
để đẩy được thông báo, trong hàm via sẽ cần trả về instance của class WebPushChanel và thêm hàm toWebPush . Trong hàm này ta có thể set title, icon, body, action cho thông báo. Phần body sẽ hiển thị ra đoạn text còn action sẽ hiển thị ra các button.
Bạn có thể tìm hiểu rõ hơn về action trong tại đây.
Giờ quay lại PushController
    public function push(Request $request)
    {
        $users = User::all();
        $user = Auth::user();
         $notices = Notification::send($users, new PushNotification($user, $request->message));
    }
OK. Vậy là mình đã hướng dẫn các bạn tạo chức năng đẩy thông báo cho trang web rồi. Chúc các bạn thành công!
Tham Khảo
https://medium.com/@sagarmaheshwary31/push-notifications-with-laravel-and-webpush-446884265aaa
https://developers.google.com/web/fundamentals/push-notifications/
All rights reserved
