Tạo các shadows nâng cao trong Swift
Bài đăng này đã không được cập nhật trong 6 năm
Trong Swift, chúng ta có thể dễ dàng tạo ra các custom shadows cho UIVew thông qua các thuộc tính của layer.
Bài viết này sẽ hướng dẫn bạn các tạo 5 loại shadows như sau:
- Drop Shadows
- Basic Contact Shadows
- Contact Shadows with Depth
- Flat contact shadows
- Curved Shadows
Nhưng trước hết, hãy cùng tìm hiểu về 5 thuộc tính của layer sẽ dùng để tạo ra custom shadows.
shadowColor
Custom màu sắc của shadows, mặc định là màu đen (UIColor.black.cgColor), bạn có thể set màu tuỳ ý.
shadowOpacity
Custom độ mờ của shadow từ 0 -> 1. Với giá trị 0 tức là shadow không được hiển thị
shadowRadius
Custom mức độ mờ của shadow, Giá trị 0 nghĩa là shadow sẽ không bị mờ đi chút nào, nó sẽ hoàn toàn đều nhau.
shadowPath
Custom hình dạng của shadow, mặc định thuộc tính này sẽ nil có nghĩa là UIKit sẽ tự xác định hình dáng của View cha.
Không thiết lập shadowPath làm cho việc tạo shadow chậm hơn rất nhiều, do đó đây là một cách thực hiện tốt để đặt đường dẫn đến thuộc tính này, ngay cả với 1 bóng cơ bản có hình vuông.
1. Drop Shadows.
Drop shadows là một loại shadow cổ điển mà bạn có thể thấy ở nhiều app và web. No chỉ sử dụng opacity, radius và offset để tạo ra chiều sâu cho giao diện bằng cách mô phỏng độ cao của các thành phần và vị trí của nó từ nguồn sáng.
imageView.layer.shadowRadius = 10
imageView.layer.shadowOffset = .zero
imageView.layer.shadowOpacity = 0.5
imageView.layer.shadowColor = UIColor.black.cgColor
imageView.layer.shadowPath = UIBezierPath(rect: imageView.bounds).cgPath
Bạn có thể set thuộc tình của layer masksToBound thành true nếu shadows không hiện. Điều này có nghĩa bạn cho phép draw nội dung ra ngoài giới hạn của layer

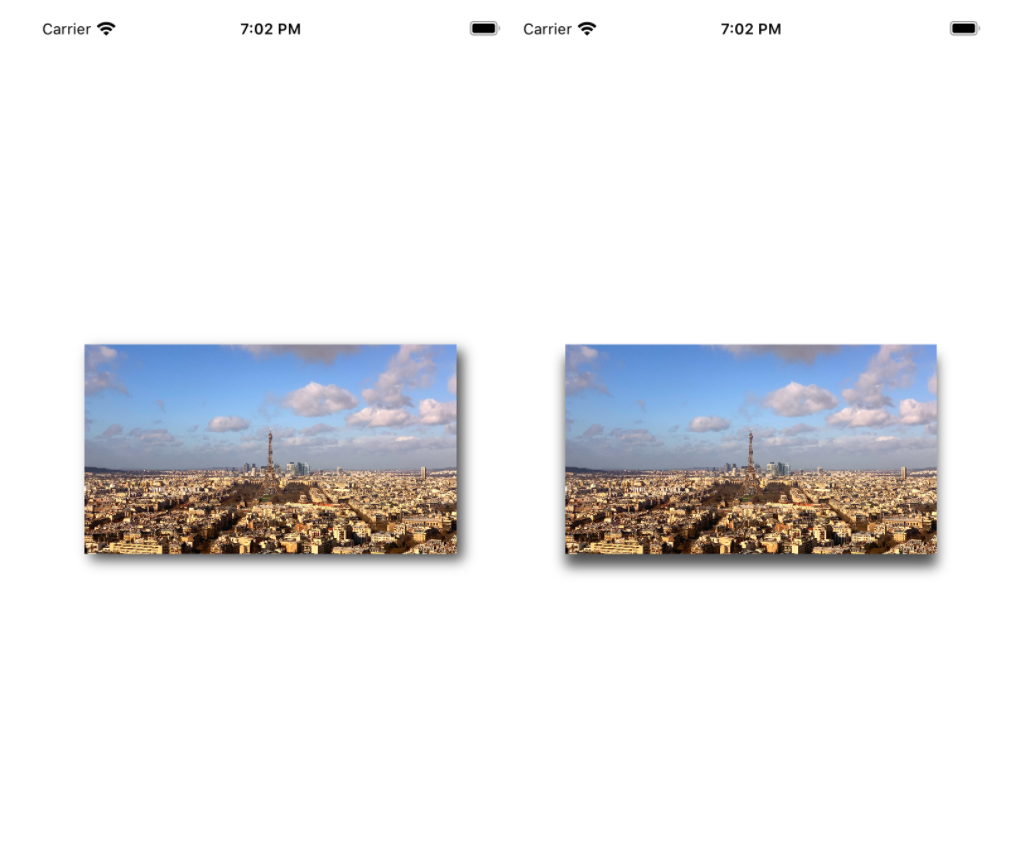
Bạn cũng có thể set non-zero offset để tuỳ chỉnh vị trí shadow.
imageView.layer.shadowOffset = CGSize(width: 0, height: 10)
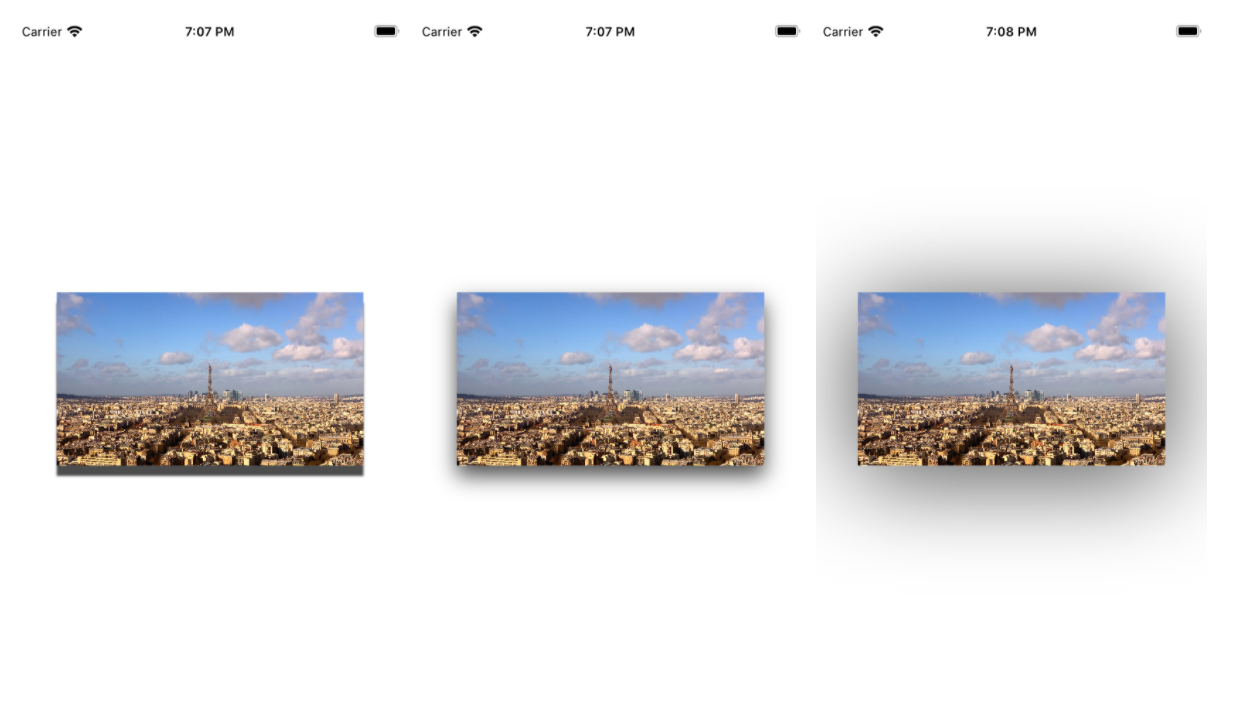
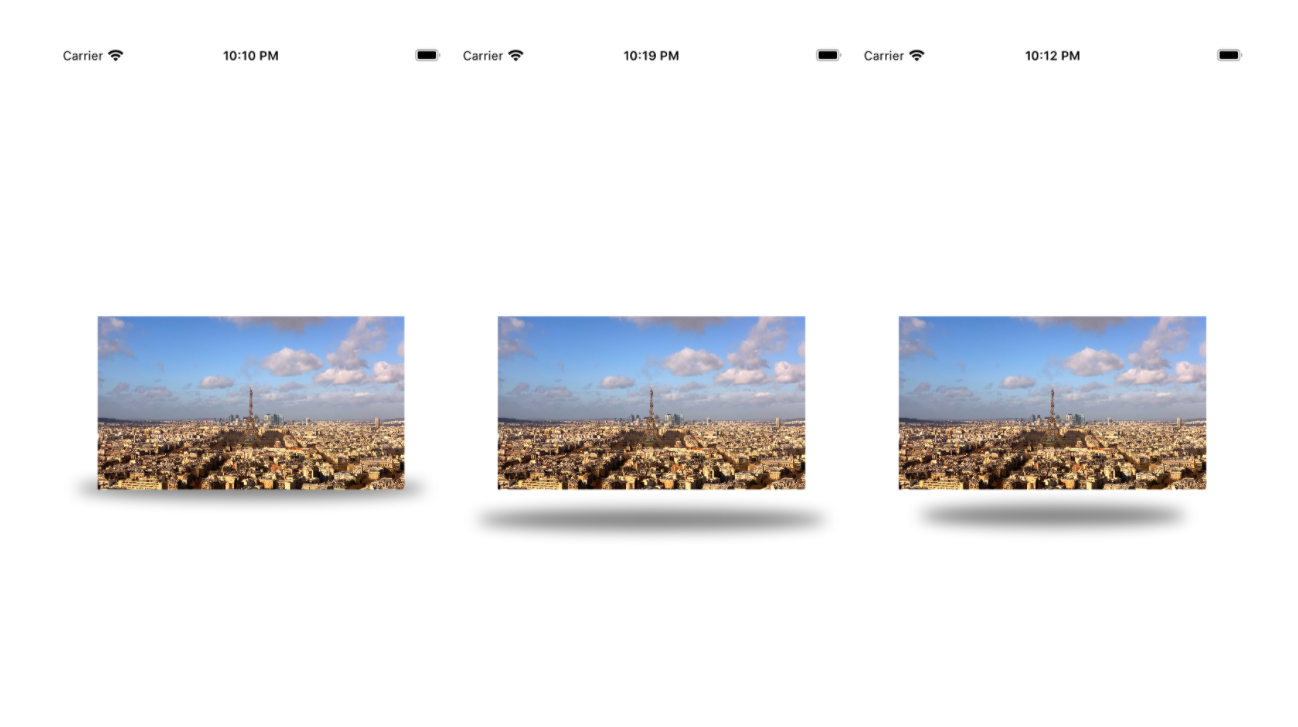
Thuộc tính shadowsRadius sẽ cho phép bạn custom độ mờ áp dụng cho shadow. Dưới đây là ví dụ với radius là 1, 10 và 50
Nếu bạn muốn học nhiều hơn về cách xác định logic độ cao tốt để áp dụng cho shadow trong ứng dụng của mình, bạn có thể xem tại material.io
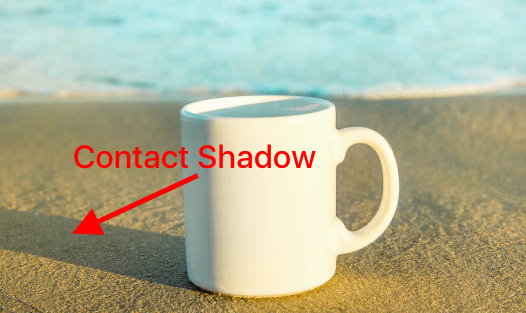
2. Contact shadows.
Contact shadows là một loại shadow bạn có thể nhìn thấy khi một vật tiếp xúc với bề mặt gần nó.
Để có thể thêm shadows này bạn cần tạo một path là hình dạng của shadow mà bạn mong muốn.
let size: CGFloat = 20
let distance: CGFloat = 0
let rect = CGRect(
    x: -size,
    y: imageView.frame.height - (size * 0.4) + distance,
    width: imageView.frame.width + size * 2,
    height: size
)

imageView.layer.shadowColor = UIColor.black.cgColor
imageView.layer.shadowRadius = 7
imageView.layer.shadowOpacity = 0.5
imageView.layer.shadowPath = UIBezierPath(ovalIn: rect).cgPath
Một kích thước âm sẽ làm cho shadow nhỏ hơn so với hình ảnh, và khoảng cách lớn hơn 0 sẽ khiến cho view nhìn xa hơn so với các view khác
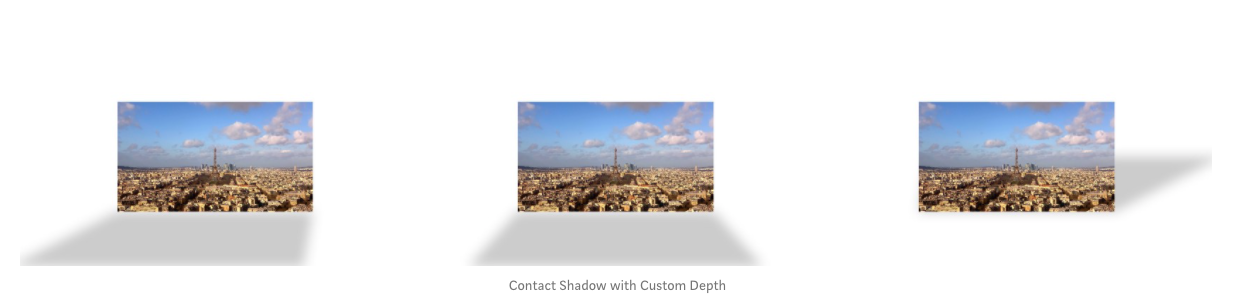
3. Contact shadows with Depth.
Trong phần trước Contact shadow được tạo trông giống như có 1 đèn chiếu trên view, chúng ta có thể thêm độ sâu cho hiệu ứng này giống như 3D với đèn phía trên View.
Để khởi tạo hiệu ứng này, bạn sẽ cần tạo thủ công một shadowPath như sau:
let scale = CGSize(width: 1.25, height: 0.5)
let offsetX: CGFloat = 0

let shadowPath = UIBezierPath()
shadowPath.move(to:
    CGPoint(
        x: 0,
        y: imageView.frame.height
    )
)
shadowPath.addLine(to:
    CGPoint(
        x: imageView.frame.width,
        y: imageView.frame.height
    )
)
shadowPath.addLine(to:
    CGPoint(
        x: imageView.frame.width * scale.width + offsetX,
        y: imageView.frame.height * (1 + scale.height)
    )
)
shadowPath.addLine(to:
    CGPoint(
        x: imageView.frame.width * (1 - scale.width) + offsetX,
        y: imageView.frame.height * (1 + scale.height)
    )
)
Bạn có thể tuỳ chỉnh các thuộc scale cũng như offset để đc các dạng khác nhau.
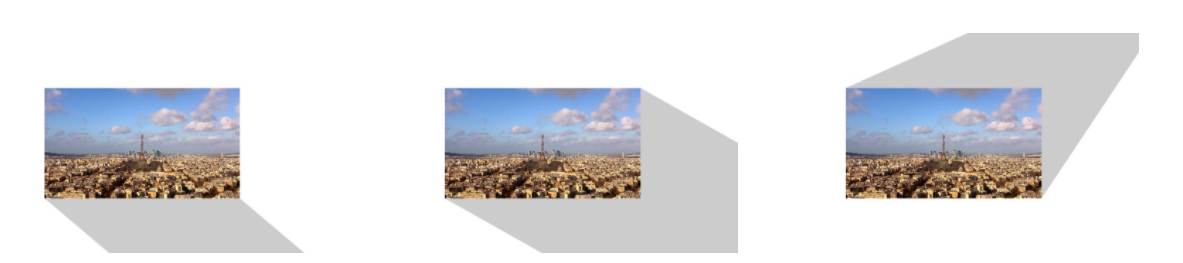
4. Flat contact shadows.
Hiệu ứng shadow này có vị trí đặc biệt trong thiết kế hiện đại. Nó đang ngày càng trở nên phổ biến hơn với thiết kế phẳn hiện đang là chuẩn mực.
Đối với hiệu ứng này, chúng ta sẽ sử dụng dựa trên phần code của Contact shadow with depth. Chúng ta thực sự chỉ cần một giá trị mới của offsetY để tạo độ phẳng và giảm bán kính của bóng
let scale = CGSize(width: 1.5, height: 1.5)
let offset = CGPoint(x: imageView.frame.width, y: -imageView.frame.height)

let shadowPath = UIBezierPath()
shadowPath.move(to:
    CGPoint(
        x: 0,
        y: imageView.frame.height + (copysign(1, scale.height) * copysign(1, offset.x) == 1 ? 0 : offset.y)
    )
)
shadowPath.addLine(to:
    CGPoint(
        x: imageView.frame.width,
        y: imageView.frame.height + (copysign(1, scale.height) * copysign(1, offset.x) == -1 ? 0 : offset.y)
    )
)
shadowPath.addLine(to:
    CGPoint(
        x: imageView.frame.width * scale.width + offset.x,
        y: imageView.frame.height * (1 + scale.height) + offset.y
    )
)
shadowPath.addLine(to:
    CGPoint(
        x: imageView.frame.width * (1 - scale.width) + offset.x,
        y: imageView.frame.height * (1 + scale.height) + offset.y
    )
)
imageView.layer.shadowPath = shadowPath.cgPath
imageView.layer.shadowRadius = 0
imageView.layer.shadowOffset = .zero
imageView.layer.shadowOpacity = 0.2
imageView.layer.shadowColor = UIColor.black.cgColor
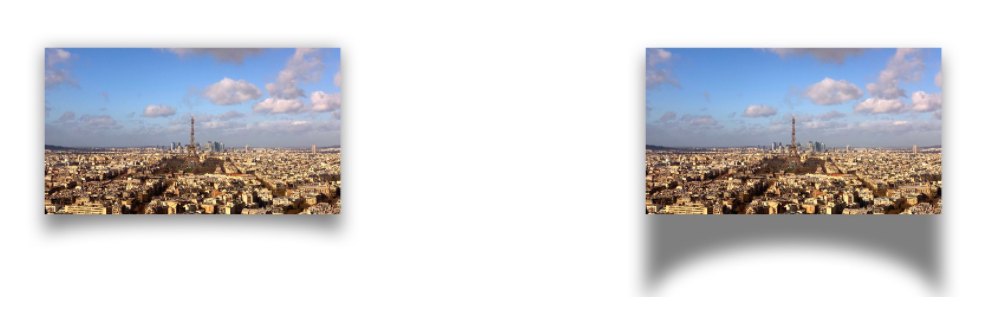
5. Curved Shadows.
Với loại shadow cuối cùng này, chúng ta sẽ một lần nữa sử dụng shadowPath.
Để tạo một shadow có độ cong, bạn cần sử dụng addCurve của UIBezierPath. Bạn có thể sử dụng trực tiếp thuộc tính shadowOffset của layer để điều chỉnh nó xung quanh View.
let curve: CGFloat = 100

let shadowPath = UIBezierPath()
shadowPath.move(to: CGPoint.zero)
shadowPath.addLine(to: CGPoint(
    x: imageView.frame.width,
    y: 0
))
shadowPath.addLine(to: CGPoint(
    x: imageView.frame.width,
    y: imageView.frame.height + curve
))
shadowPath.addCurve(
    to: CGPoint(
        x: 0,
        y: imageView.frame.height + curve
    ),
    controlPoint1: CGPoint(
        x: imageView.frame.width,
        y: imageView.frame.height
    ),
    controlPoint2: CGPoint(
        x: 0,
        y: imageView.frame.height
    )
)
imageView.layer.shadowPath = shadowPath.cgPath
imageView.layer.shadowRadius = 10
imageView.layer.shadowOffset = CGSize(width: 0, height: 10)
imageView.layer.shadowOpacity = 0.5
imageView.layer.shadowColor = UIColor.black.cgColor
Tổng kết.
Bây giờ bạn đã biết cách tạo một shadow có chiều sâu với CALayer và bạn đã học đc các cách tạo shadow cơ bản cũng như nâng cao hơn dựa trên shadowPath. Chúc bạn thành công 
Nguồn:
https://medium.com/swlh/how-to-create-advanced-shadows-in-swift-ios-swift-guide-9d2844b653f8
All rights reserved
