Tag một người dùng bằng symbol (@) trên app ruby on rails
Bài đăng này đã không được cập nhật trong 2 năm
Giới thiệu
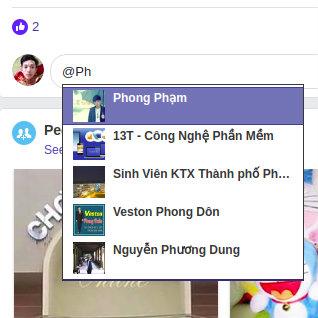
Một chức năng góp phần Facebook trở thành website mạng xã hội yêu thích nhất đó chính là có thể tag một người bạn của mình, tag mọi lúc mọi nơi =)))
 Hôm này mình xin giới thiệu đến các bạn các thực hiện một chức năng tương tự như vậy trên app ruby on rails
Bước 1: cài đặt gem "jquery-atwho-rails"
Trong file Gemfile add gem
gem "jquery-atwho-rails"
Vào rails console chạy lệnh
$bundle install
Thêm dòng sau vào file app/assets/javascripts/application.js
//= require jquery.atwho
Chú ý thêm sau các require jquery và trước requiretree . Và thêm dòng sau vào file app/assets/stylesheets/applications.css:
*= require jquery.atwho
Bước 2: Tag user
Tương tự chức năng Tag của facebook trước hết mình cần có 1 danh sách người dùng(tên + id), ở đầy mình thực hiên một ajax request
$(document).ready(function(){
  var userList = [];
  $.ajax({
    url: '/tag_users',
    async: false,
    success: function (data) {
      for (var i = data.data.length - 1; i >= 0; i--) {
        userList.push({'id' :data.data[i][0], 'name' :data.data[i][1] });
      }
    },
    timeout: 3000
  });
</div>
Thông thường ta dùng text_field để nhập dữ liệu và submit, nhưng text_field không thể hiển thị format html, vì vậy ta sử dụng thẻ div với class contenteditable
<div class="editable" contenteditable="true" placeholder="<%= t("comments.create.content") %>"></div>
Và dùng hidden_filed thay cho text_filed
<%= form_for comment, remote: true, html: { class: "comment-form" } do |f| %>
  <div class="form-group">
    <%= f.hidden_field :content, placeholder: t(".content"),
      minlength: Settings.post.min_title, required: true, class: "form-control txta-tag-users" %>
  </div>
  <div class="form-group">
    <%= f.submit button_name, class: "btn btn-primary btn-xs" %>
  </div>
<% end %>
Quay trở lại với file js ở trên bạn cần thêm đạng code sau để tag người dùng
$('.editable').atwho({
at: '@',
data: userList,
startWithSpace: true,
searchKey: 'name',
insertTpl: ('<a class="tag-user-item" href="/users/${id}"><span class="fa fa-address-book-o"></span> ${name}</a>'),
displayTpl: ('<li><a class="tag-user-item" href="/users/${id}"><span class="fa fa-address-book-o"></span> ${name}</a></li>')
});
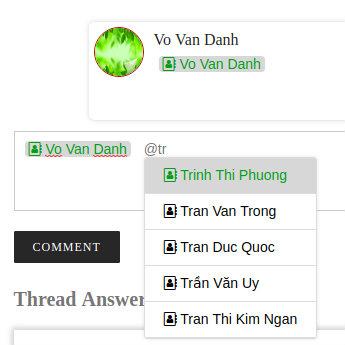
Lưu ý vì sau khi một người dùng được tag thì ta có thể click vào đó để đến trang cá nhân nên ta tạo 1 danh sách các link từ danh sách người dùng ở trên để hiện ra cho người dùng tag với option displayTpl, và option insertTpl là link là người dùng được tag Bước cuối cùng là submit nó, và đương nhiên trước khi submit t cần chuyển nội dung của div contenteditable sang hidden_field
  $(document).on('click', '.comment-form', (function() {
    $(this).find('.txta-tag-users').val($('.editable').html());
  }));
Bước 3: Hình ảnh minh họa
All rights reserved
