Sử dụng Vue Router tạo single page trong laravel
Bài đăng này đã không được cập nhật trong 6 năm
Chào các bạn, vừa rồi mình đang làm dự án và tự nhiên được sử dụng vuejs vào dự án laravel của mình, thế là tiện thể có cơ hội tìm hiển luôn về vuejs. Hôm nay mình sẽ viết về vue router mà mình mới tìm hiểu, do mới tìm hiểu nên có gì sai sót mong các cao nhân chỉ giáo giúp mình =)).
 Hôm nay chúng ta sẽ đi xây dựng một single page app với vue router và laravel. Bắt đầu luôn thôi nào!
Cài đặt laravel và vue router
Để bắt đầu một cái gì luôn phải có khâu chuẩn bị.
1. Cài đặt laravel
- vào thư mục cần cài đặt project:
composer create-project --prefer-dist laravel/laravel laravel-vue
Sau khi cài đặt xong chúng ta tiếp tục như sau:
cd laravel-vue
Chúng ta có thể thấy trong file package.json đã đầy đủ thứ chúng ta cần, việc cần làm là chạy
npm install
Xong đâu đấy các bạn nhớ chạy
php artisan serve
và ngoài trình duyệt gõ: localhost:8000
Bắt đầu với Vue.js
Đầu tiên chúng ta sẽ thay file Thay đổi resources/views/welcome.balde.php như sau:
<!doctype html>
<html lang="{{ app()->getLocale() }}">
    <head>
        <meta charset="utf-8">
        <meta http-equiv="X-UA-Compatible" content="IE=edge">
        <meta name="viewport" content="width=device-width, initial-scale=1">

        <!-- Main styles for this application -->
        <link href="{{ mix('css/app.css') }}" rel="stylesheet">
    </head>
    <body>
        <p>Laravel</p>
        <div id="app">
            <example-component></example-component>
        </div>

        <script src="{{ mix('js/app.js') }}"></script>
    </body>
</html>
Tiếp tục build các tài nguyên js và css bằng lệnh
npm run dev
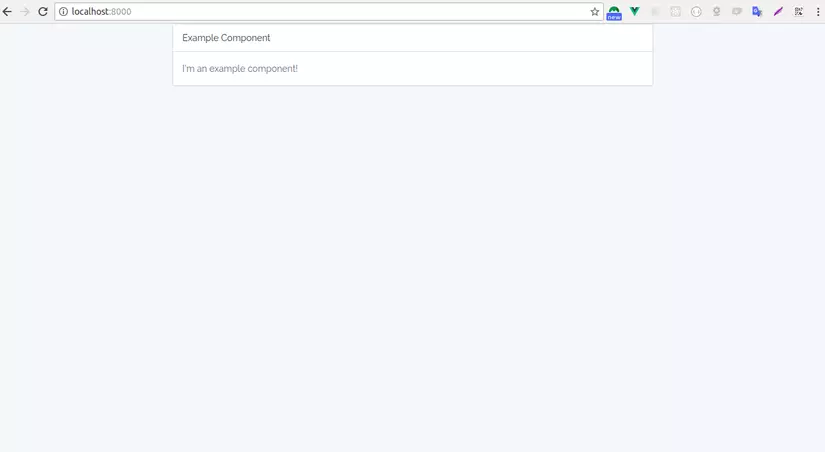
Và chạy lại localhost:8000 sẽ thấy view của example-component:
 1. Sửa view welcome.blade.php
Viết lại file resources/views/welcome.blade.php với nội dung sau:
<!doctype html>
<html lang="{{ app()->getLocale() }}">
    <head>
        <meta charset="utf-8">

        <!-- Main styles for this application -->
        <link href="{{ mix('css/app.css') }}" rel="stylesheet">
        <meta id="csrf-token" name="csrf-token" value="{{ csrf_token() }}">
    </head>
    <body>
        <p>Laravel</p>
        <div id="app">
            <router-view></router-view>
        </div>

        <script src="{{ mix('js/app.js') }}"></script>
    </body>
</html>
Trong welcome.blade.php, thẻ <router-view> là rất quan trọng nó nói với Vue.js rằng chỗ này sẽ được Vue-router xử lý và đưa vào các nội dung là các component tùy thuộc vào đường dẫn. Nó cũng giống như khi bạn làm việc với @yield trong Laravel template.
2. Tạo điểm bắt đầu của vueJs
Tiếp tục chỉnh sửa resources/assets/js/app.js như sau:
require('./bootstrap');

window.Vue = require('vue');

import VueRouter from 'vue-router'
import { routes }  from './index';

Vue.use(VueRouter)

const router = new VueRouter({
    mode: 'hash',
    routes
})

const app = new Vue({
    el: '#app',
    router
});
3. Xây dựng file mapping route Tạo file resources/assets/js/index.js như sau:
// Views
import CategoryView from './components/CategoryView'
import CategoryCreateView from './components/CategoryCreateView'

export const routes = [
	{ path: '/', name: 'Category', component: CategoryView },
	{ path: '/categories/create', name: 'Create', component: CategoryCreateView }
];
Tiếp đến tạo các components trong resources/assets/js/components:
- CategoryCreateView.vue
<template>
	<span>
		Home!
		<router-link to="/category"><a>url to category</a></router-link>
	</span>
</template>
- CategoryView.vue
<template>
	<span>
		Category!
		<router-link to="/contact"><a>url to contact</a></router-link>
	</span>
</template>
Sau đó vào thử các đường dẫn:
4. Chế độ routing HTML5 history
Mặc định, vue-router sử dụng chế độ routing là hash, các đường dẫn sẽ có dạng http://localhost:8000/#/, http://localhost:8000/#/categoríes/create Vue-router cũng có một chế độ routing khác là HTML5 history, nó sử dụng history.pushState API để điều hướng các URL mà không cần tải lại trang. Do đó các đường dẫn trở lại về dạng như bình thường là http://localhost:8000/, http://localhost:8000/categoríes/create. Chỉ cần thêm mode:’history’ vào trong phần khai báo router là xong.
Trong resources/assets/js/app.js ta thêm vào mode: 'history':
require('./bootstrap');

window.Vue = require('vue');

import VueRouter from 'vue-router'
import { routes }  from './index';

Vue.use(VueRouter)

const router = new VueRouter({
    mode: 'history',
    routes
})

const app = new Vue({
    el: '#app',
    router
});
Tạo database và API
Chúng ta sẽ bắt đầu làm single page bằng cách tạo database và api.
php artisan make:model Category -m
file app/Category.php được tạo ra và chúng ta chỉnh sửa như sau:
<?php

namespace App;

use Illuminate\Database\Eloquent\Model;

class Category extends Model
{
    protected $fillable = ['name', 'description'];
}
sau đó là trong thư mục database sửa file migrate:
<?php

use Illuminate\Support\Facades\Schema;
use Illuminate\Database\Schema\Blueprint;
use Illuminate\Database\Migrations\Migration;

class CreateCategoriesTable extends Migration
{
    /**
     * Run the migrations.
     *
     * @return void
     */
    public function up()
    {
        Schema::create('categories', function (Blueprint $table) {
            $table->increments('id');
            $table->string('name')->nullable();
            $table->string('description')->nullable();
            $table->timestamps();
        });
    }

    /**
     * Reverse the migrations.
     *
     * @return void
     */
    public function down()
    {
        Schema::dropIfExists('categories');
    }
}
Tạo controller xử lý bằng câu lệnh:
php artisan make:controller Api/V0/CategoriesController
Sau đó sửa lại một chút file CategoriesController:
<?php

namespace App\Http\Controllers\Api\V0;

use App\Category;
use Illuminate\Http\Request;
use App\Http\Controllers\Controller;

class CategoriesController extends Controller
{
    public function index()
    {
        return Category::all();
    }

    public function update(Request $request, $id)
    {
        $category = Category::find($id);
        $category->update($request->all());

        return $category;
    }

    public function store(Request $request)
    {
        $category = Category::create($request->all());
        return $category;
    }

    public function destroy($id)
    {
        $category = Category::find($id);
        $category->delete();
        return;
    }
}
Trong file routes/api.php chỉnh như sau:
Route::group(['prefix' => '/v0', 'namespace' => 'Api\V0', 'as' => 'api.'], function () {
    Route::resource('Categories', 'CategoriesController', ['except' => ['create', 'edit']]);
});
Ok nhớ chạy php artisan migrate để tạo database
Create single page vueJS
Chúng ta sửa lại một chút file resources/assets/js/index.js
// Views
import CategoryView from './components/CategoryView'
import CategoryCreateView from './components/CategoryCreateView'
import CategoryEditView from './components/CategoryEditView'

export const routes = [
	{ path: '/', name: 'category', component: CategoryView },
	{ path: '/categories/create', name: 'create', component: CategoryCreateView },
	{ path: '/categories/edit/:id', name: 'edit', component: CategoryEditView }
];
Tiếp tục sửa file resources/assets/js/components/CategoryView.vue:
<template>
    <div>
        <div class="form-group">
            <router-link :to="{name: 'create'}" class="btn btn-success">Create new category</router-link>
        </div>

        <div class="panel panel-default">
            <div class="panel-heading">categories list</div>
            <div class="panel-body">
                <table class="table table-bordered table-striped">
                    <thead>
                    <tr>
                        <th>Name</th>
                        <th>Description</th>
                        <th</th>
                    </tr>
                    </thead>
                    <tbody>
                    <tr v-for="category, index in categories">
                        <td>{{ category.name }}</td>
                        <td>{{ category.description }}</td>
                        <td>
                            <router-link :to="{name: 'edit', params: {id: category.id}}" class="btn btn-xs btn-default">
                                Edit
                            </router-link>
                            <a href="#"
                               class="btn btn-xs btn-danger"
                               v-on:click="deleteItem(category.id, index)">
                                Delete
                            </a>
                        </td>
                    </tr>
                    </tbody>
                </table>
            </div>
        </div>
    </div>
</template>

<script>
    export default {
        data: function () {
            return {
                categories: []
            }
        },
        mounted() {
            var self = this;
            axios.get('/api/v0/categories')
                .then(function (resp) {
                    self.categories = resp.data;
                })
                .catch(function (resp) {
                    alert("not category");
                });
        },
        methods: {
            deleteItem(id, index) {
                if (confirm("Do you really want to delete category?")) {
                    var self = this;
                    axios.delete('/api/v0/categories/' + id)
                        .then(function (resp) {
                            self.categories.splice(index, 1);
                        })
                        .catch(function (resp) {
                            alert("delete category");
                        });
                }
            }
        }
    }
</script>
Data trong bảng được get từ API bởi JS axios.get(‘/api/v0/categories’) -> self.categories = resp.data;
Tương tự với CategoryCreateView.vue:
<template>
    <div>
        <div class="form-group">
            <router-link to="/" class="btn btn-default">Back Home</router-link>
        </div>

        <div class="panel panel-default">
            <div class="panel-heading">Create new category</div>
            <div class="panel-body">
                <form v-on:submit="saveForm()">
                    <div class="row">
                        <div class="col-xs-12 form-group">
                            <label class="control-label">name</label>
                            <input type="text" v-model="category.name" class="form-control">
                        </div>
                    </div>
                    <div class="row">
                        <div class="col-xs-12 form-group">
                            <label class="control-label">description</label>
                            <input type="text" v-model="category.description" class="form-control">
                        </div>
                    </div>
                    <div class="row">
                        <div class="col-xs-12 form-group">
                            <button class="btn btn-success">Create</button>
                        </div>
                    </div>
                </form>
            </div>
        </div>
    </div>
</template>

<script>
    export default {
        mounted() {
            let self = this;
            let id = self.$route.params.id;
            self.categoryId = id;
            axios.get('/api/v0/categories/' + id)
                .then(function (resp) {
                    self.category = resp.data;
                })
                .catch(function () {
                    alert("not category")
                });
        },
        data: function () {
            return {
                categoryId: null,
                category: {
                    name: '',
                    description: '',
                }
            }
        },
        methods: {
            saveForm() {
                event.preventDefault();
                var self = this;
                var newcategory = self.category;
                axios.patch('/api/v0/categories/' + self.categoryId, newcategory)
                    .then(function (resp) {
                        self.$router.replace('/');
                    })
                    .catch(function (resp) {
                        console.log(resp);
                        alert("not category");
                    });
            }
        }
    }
</script>
Luôn phải chạy npm run watch nhé. Vào đường dẫn http://localhost:8000/ để xem kết quả!
 Thế là chúng ta có 1 project nhè nhẹ về vue-router rồi. Chúc các bạn thành công.
Bài này tương đối dài rồi. mình xin phép kết thúc tại đây. Xin chào và hẹn gặp lại.
Tài liệu tham khảo
- 10 simple Vue.js CRUD example and tutorials Quick Start with Laravel 5.5 + Vue.js: Simple CRUD Project Vue.js document
All rights reserved