Sử dụng FCM để gửi notification trong Spring boot
Bài đăng này đã không được cập nhật trong 6 năm
Sử dụng FCM để gửi notification trong Spring boot
1. Giới thiệu về FCM
Firebase Cloud Messaging (FCM) là một dịch vụ miễn phí của Google. Thông qua FCM, nhà phát triển ứng dụng có thể gửi thông điệp một cách nhanh chóng, an toàn tới các thiết bị cài đặt ứng dụng của họ.
2. Cách thức hoạt động của FCM
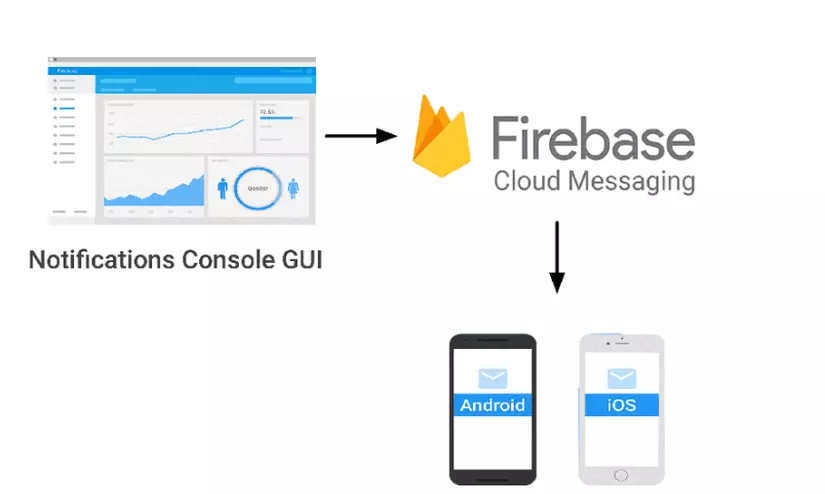
Mô hình hoạt động của FCM. Đơn giản FCM hoạt động nhờ 3 thành phần:
- Publisher: Nguồn gửi notification, đây chính là server API mà chúng ta sẽ cài đặt
- FCM Server: Đây là API trung gian giữa Publisher và Client App có nhiệm vụ tiếp nhận Notification từ Publisher và push Notification tới client. Ngoài ra nó cũng tiếp nhận message đăng kí device token từ client.
- Client app: Thiết bị nhận notification, cự thể ở đây là các thiết bị Android
Ở bài này, chúng ta sẽ đứng ở vai trò publisher để cài đặt thiết lập FCM. Cụ thể chúng ta sẽ thiết lập nó trong Project Spring boot.
3. Cài đặt FCM
Bước 1: Trong Firebase console
https://console.firebase.google.com/u/0/
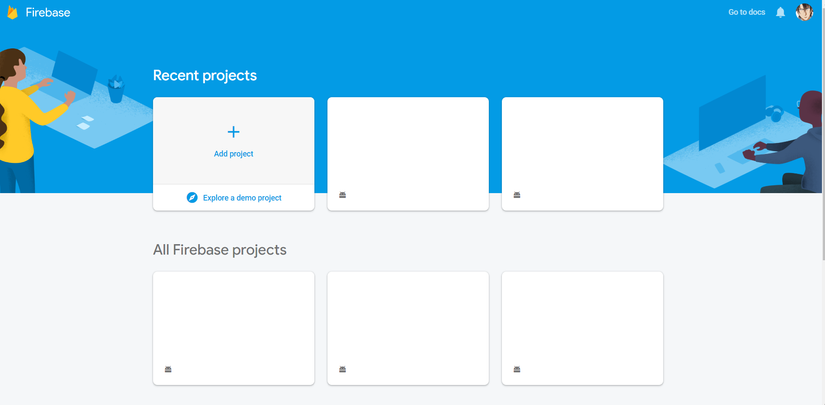
Chúng ta tạo mới một project trên firebase
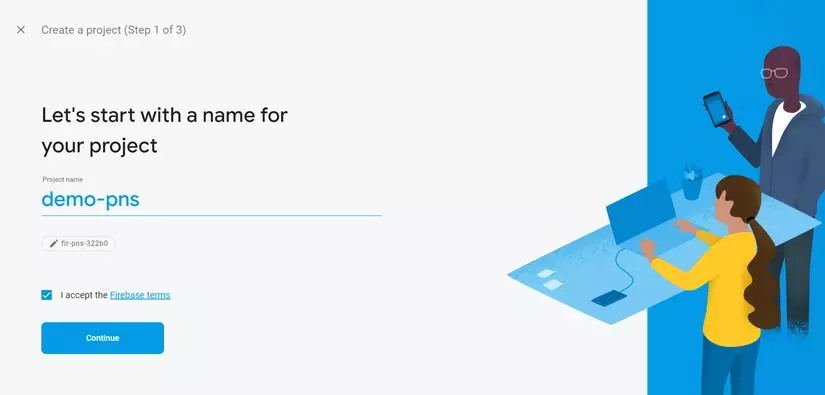
Continue ->

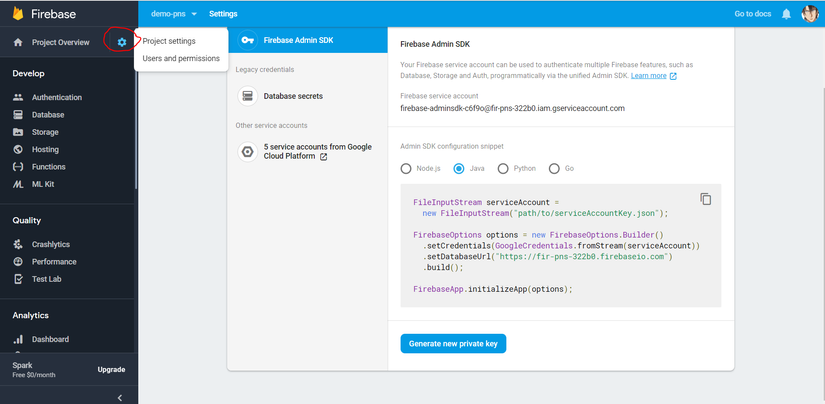
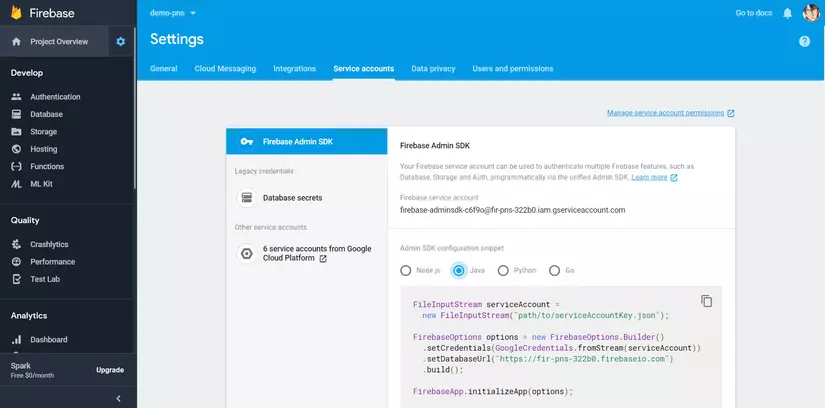
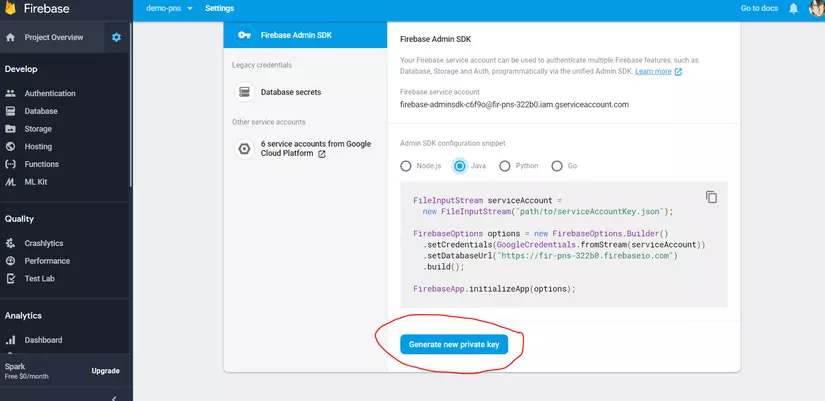
Bước 2: Tạo private key để sử dụng Firebase Admin SDK. Đây là SDK sẽ được thêm vào trong project Spring boot
Project settings -> Service accounts -> Generate new private key
Tiếp theo
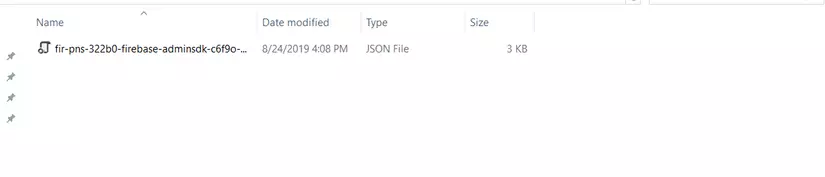
Tiếp theo
Ta sẽ nhận được một file json
4. Thêm và sử dụng Firebase Admin SDK
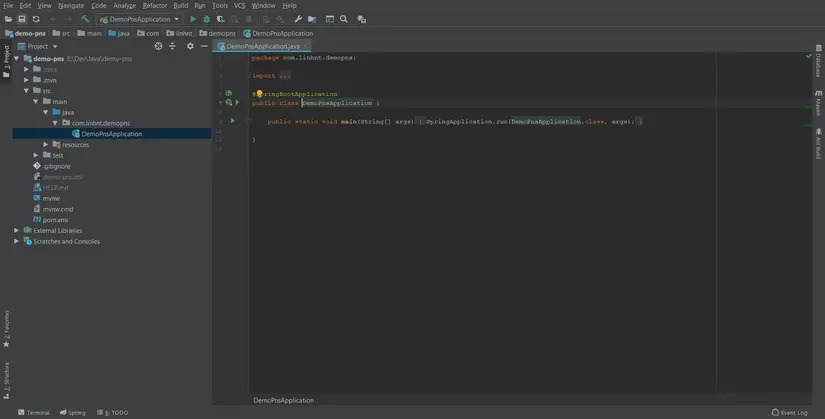
Bước 1: Tạo project Spring boot
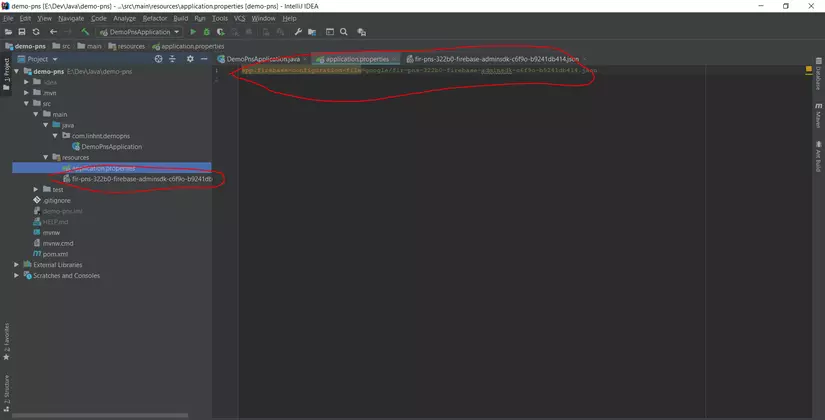
Bước 2: Copy file Json mà mình tạo được từ bước Generate new private key vào resource và config file application.properties như sau
Bước 3: Thêm dependency sau
<dependency>
  <groupId>com.google.firebase</groupId>
  <artifactId>firebase-admin</artifactId>
  <version>6.9.0</version>
</dependency>
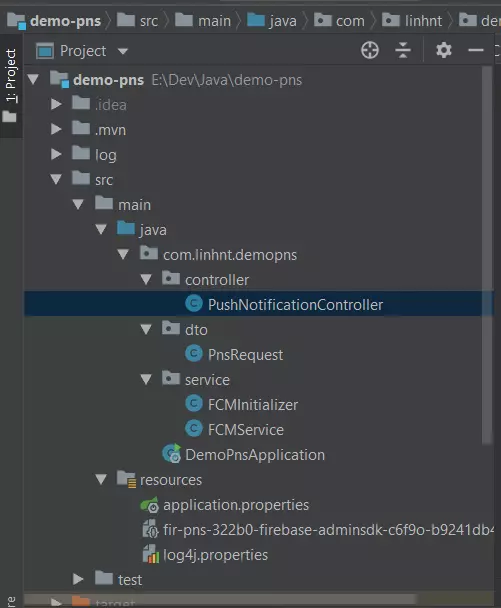
* Cấu trúc project
File: PushNotificationController
@RestController
public class PushNotificationController {

    @Autowired
    private FCMService fcmService;

    @PostMapping("/notification")
    public String sendSampleNotification(@RequestBody PnsRequest pnsRequest) {
        return fcmService.pushNotification(pnsRequest);
    }
}
File: PnsRequest
public class PnsRequest {
    private String fcmToken;
    private String content;

    public String getFcmToken() {
        return fcmToken;
    }

    public void setFcmToken(String fcmToken) {
        this.fcmToken = fcmToken;
    }

    public String getContent() {
        return content;
    }

    public void setContent(String content) {
        this.content = content;
    }
}
File: FCMInitializer
@Service
@Log4j
public class FCMInitializer {
    @Value("${app.firebase-configuration-file}")
    private String firebaseConfigPath;

    @PostConstruct
    public void initialize() {
        log.info("Start init");
        try {
            FirebaseOptions options = new FirebaseOptions.Builder()
                    .setCredentials(GoogleCredentials.fromStream(new ClassPathResource(firebaseConfigPath).getInputStream())).build();
            if (FirebaseApp.getApps().isEmpty()) {
                FirebaseApp.initializeApp(options);
                log.info("Firebase application has been initialized");
            }
        } catch (IOException e) {
            log.error(e.getMessage());
        }
    }
}
File: FCMService
@Service
public class FCMService {

    public String pushNotification(PnsRequest pnsRequest) {
        Message message = Message.builder()
                .putData("content", pnsRequest.getContent())
                .setToken(pnsRequest.getFcmToken())
                .build();

        String response = null;
        try {
            response = FirebaseMessaging.getInstance().send(message);
        } catch (FirebaseMessagingException e) {
            e.printStackTrace();
        }
        return response;
    }
}
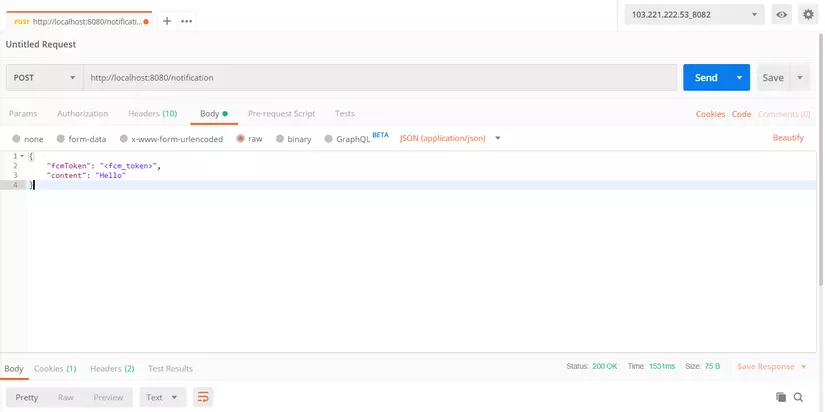
Kết quả test:
Vậy là mình đã hướng dẫn mọi người cách thêm FCM vào trong project Spring boot. Hi vọng bài viết này sẽ hữu ích với mọi người.
All rights reserved
