Sử dụng Cookie Authentication trong ASP.NET Core
Bài đăng này đã không được cập nhật trong 8 năm
1. Giới thiệu
Nếu các bạn đã từng làm việc với ASP.NET Core Identity thì có thể thấy nó là một bộ đầy đủ các tính năng về authentication cung cấp và bảo trì công việc login. Tuy nhiên, chúng ta có thể muốn tùy chỉnh logic authentication của riêng chúng ta với authentication dựa trên cookie. Bài viết này sẽ giới thiệu với các bạn cách để triển khai một function login đơn giản sử sụng Cookie Authentication.
2. Tạo project ASP.NET Core MVC
Trước tiên bạn cần có .NET Core SDK, nếu chưa có bạn có thể cài nó theo link Getting started with .NET in 10 minutes, ở đó có đầy đủ hướng dẫn cài đặt và chạy ứng dụng ASP.NET Core trên nhiều môi trường khác nhau như: Window, Linux, MacOS.
Ở bài viết này tôi sử dụng môi trường window. Trước tiên, chúng ta sẽ tạo project ASP.NET Core MVC bằng command line
dotnet new mvc --name=aspNetCoreCookie
Chạy restore packages và build project:
cd aspNetCoreCookie
dotnet restore
dotnet build
Sau khi quá trình build thành công, chúng ta run project
dotnet run
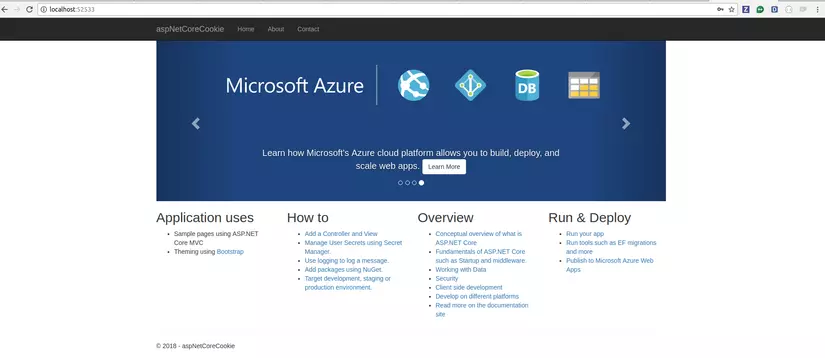
Dưới đây là trang home khởi tạo mặc định của ASP.NET Core như hình bên dưới
3. Triển khai
3.1 Startup
Trước tiên, bạn cần tạo service Authentication Middleware trong method ConfigureServices trong class Startup.cs
services.AddAuthentication(CookieAuthenticationDefaults.AuthenticationScheme)
    .AddCookie();
AuthenticationCheme được truyền tới method AddAuthentication thiết lập giá trị default authentication scheme cho ứng dụng. AuthenticationScheme là hữu ích khi có nhiều thể hiện của cookie authentication và bạn muốn xác thực với một scheme nhất định. Thiết lập AuthenticationScheme với enum CookieAuthenticationDefaults.AuthenticationScheme cung cấp một giá trị của Cookies cho scheme. Bạn có thể cung cấp bất kì giá trị string nào cho scheme. Có rất nhiều option khác mà có thể sử dụng trong các trường hợp cụ thể, bạn có thể tham khảo đầy đủ tại đây CookieAuthenticationOptions
Trong method Configure, sử dụng method UserAuthentication để triệu gọi Authentication Middleware. Lưu ý cần gọi phương thức này trước khi gọi UseMvcWithDefaultRoute hoặc UseMvc
app.UseAuthentication();
Dưới đây là code config cho việc sử dụng Cookie Authentication với một số options:
services.AddAuthentication("DemoSecurityScheme")
    .AddCookie("DemoSecurityScheme", options =>
    {
        options.AccessDeniedPath = new PathString("/Account/Access");
        options.Cookie = new CookieBuilder
        {
            //Domain = "",
            HttpOnly = true,
            Name = ".aspNetCoreDemo.Security.Cookie",
            Path = "/",
            SameSite = SameSiteMode.Lax,
            SecurePolicy = CookieSecurePolicy.SameAsRequest
        };
        options.Events = new CookieAuthenticationEvents
        {
            OnSignedIn = context =>
            {
                Console.WriteLine("{0} - {1}: {2}", DateTime.Now,
                    "OnSignedIn", context.Principal.Identity.Name);
                return Task.CompletedTask;
            },
            OnSigningOut = context =>
            {
                Console.WriteLine("{0} - {1}: {2}", DateTime.Now,
                    "OnSigningOut", context.HttpContext.User.Identity.Name);
                return Task.CompletedTask;
            },
            OnValidatePrincipal = context =>
            {
                Console.WriteLine("{0} - {1}: {2}", DateTime.Now,
                    "OnValidatePrincipal", context.Principal.Identity.Name);
                return Task.CompletedTask;
            }
        };
        //options.ExpireTimeSpan = TimeSpan.FromMinutes(10);
        options.LoginPath = new PathString("/Account/Login");
        options.ReturnUrlParameter = "RequestPath";
        options.SlidingExpiration = true;
    });
Các bạn có thể thấy, chúng ta có thể thiết lập scheme name, security policy, khai báo các events xảy ra khi login, logout, chỉ định đường dẫn trang login, ...
3.2 LoginViewModel:
Tạo thông tin login đơn giản với: user name, password, request path.
public class LoginViewModel
{
    public string Username { get; set; }

    public string Password { get; set; }

    public string RequestPath { get; set; }
}
3.3 AccountController
Bước tiếp theo, chúng ta tạo một AccountController để xây dựng các chức năng Login, Logout. Để đơn giản, trong demo này tôi sẽ hardcode một user hợp lệ cho việc login như sau:
private bool IsAuthenticated(string username, string password)
{
    return (username == "hiephv" && password == "admin123");
}
Login
[HttpPost]
public async Task<IActionResult> Login(LoginViewModel model)
{
    if (!IsAuthenticated(model.Username, model.Password))
        return View();

    // create claims
    List<Claim> claims = new List<Claim>
    {
        new Claim(ClaimTypes.Name, "Cookie authentication demo"),
        new Claim(ClaimTypes.Email, model.Username)
    };

    // create identity
    ClaimsIdentity identity = new ClaimsIdentity(claims, "cookie");

    // create principal
    ClaimsPrincipal principal = new ClaimsPrincipal(identity);

    // sign-in
    await HttpContext.SignInAsync(
            scheme: "DemoSecurityScheme",
            principal: principal,
            properties: new AuthenticationProperties
            {
                //IsPersistent = true, // for 'remember me' feature
                //ExpiresUtc = DateTime.UtcNow.AddMinutes(1)
            });

    return Redirect(model.RequestPath ?? "/");
}
Để tạo một cookie nắm giữ thông tin người dùng, bạn phải xây dựng một ClaimsPrincipal. Thông tin người dùng được serialized và lưu trữ trong cookie. Các bạn có thể tham khảo ClaimsPrincipal để hiểu sau về nó.
Tiếp theo, các bạn sẽ gọi SignInAsync để thực hiện login với thiết lập scheme đã được cấu hình tại Startup, principal và option cho việc lưu trữ cookie.
Logout
public async Task<IActionResult> Logout(string requestPath)
{
    await HttpContext.SignOutAsync(
            scheme: "DemoSecurityScheme");

    return RedirectToAction("Login");
}
Với logout, chúng ta đơn giản gọi hàm SignOutAsync của HttpContext với đúng scheme name đã cấu hình trước đó và đồng thời xóa cookie của người dùng.
View
Chúng ta tạo một form login đơn giản với code bên dưới.
<div class="container-fluid">
    <div class="row">
        <form asp-controller="Account" asp-action="Login" method="post" class="form">
            <input type="hidden" name="requestpath" id="requestpath" value="@ViewBag.RequestPath" />
            <div class="form-group">
                <input class="form-control" type="text" name="username" id="username" />
            </div>
            <div class="form-group">
                <input class="form-control" type="password" name="password" id="password" />
            </div>
            <div class="form-group">
                <input class="btn btn-primary" type="submit" value="Login" />
            </div>
        </form>
    </div
Như vậy, những thứ cần thiết chúng ta đã làm. Bây giờ các bạn có thể thử hoạt động của nó
4. Tham khảo
Bài viết giới thiệu với các bạn các bước triển khai đơn giản với Cookie Authentication. Ở đây chúng ta có thể tùy chỉnh và control mọi thứ theo ý mình. Từ đó các bạn có thể áp dụng cho trường hợp cụ thể trong thực thế . Hy vọng bài viết đem lại một số thông tin có giá trị với các bạn.
- Link code demo: https://github.com/quanghiepth86/aspnet_core_cookie
Tham khảo:
All rights reserved
