Series JSF – Phần 4: Tạo ví dụ, trang web hello world với JSF
Bài đăng này đã không được cập nhật trong 4 năm
Series JSF – Phần 4: Tạo ví dụ, trang web hello world với JSF
Ở bài này mình sẽ hướng dẫn các bạn tạo một ứng dụng web (Web Application) đầu tiên với JSF và giải thích các thông tin cấu hình, annotation... Nguồn: https://stackjava.com/jsf/series-jsf-phan-4-tao-ung-dung-web-voi-jsf.html
1. Môi trường (Project Enviroment)
Mình sẽ tạo một project dựa trên
JSF 2 Maven 3 (Xem lại cách cài đặt và cấu hình maven: ) JDK 1.8 (Xem lại cách cài và cấu hình JDK: ) Tomcat 8 (Xem lại cách cài đặt và cấu hình tomcat: ) Eclipse Neon (4.6)
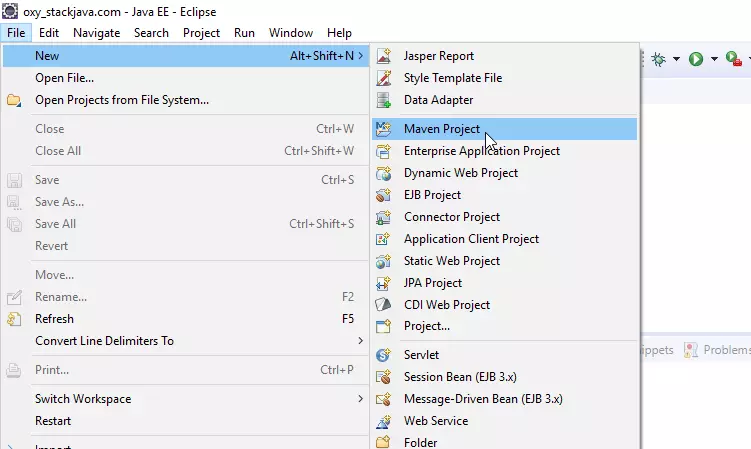
2. Tạo Project với JSF
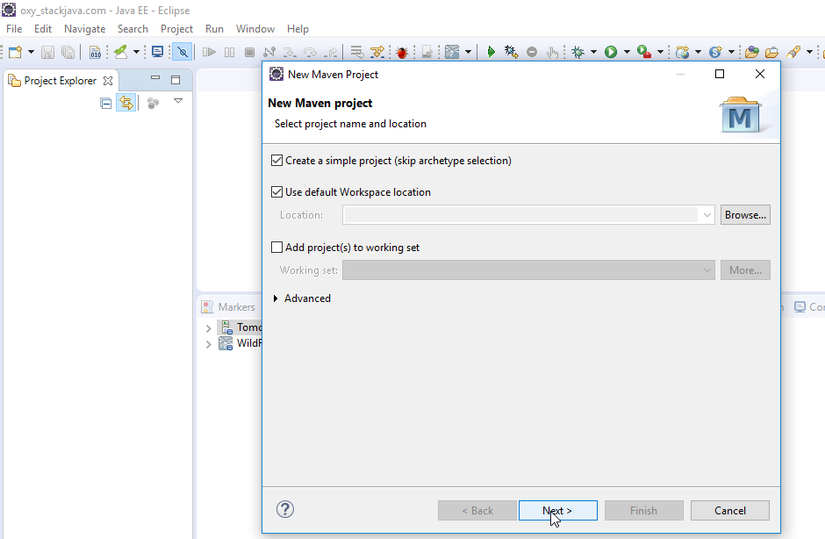
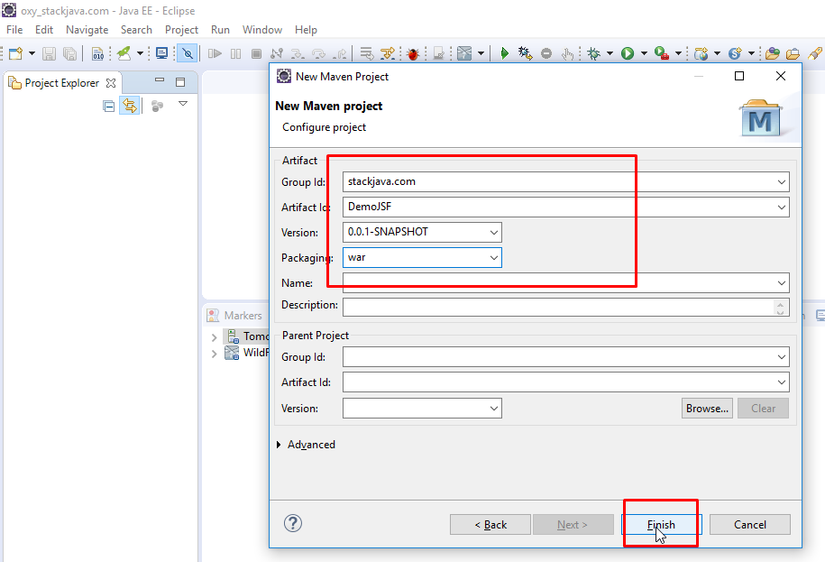
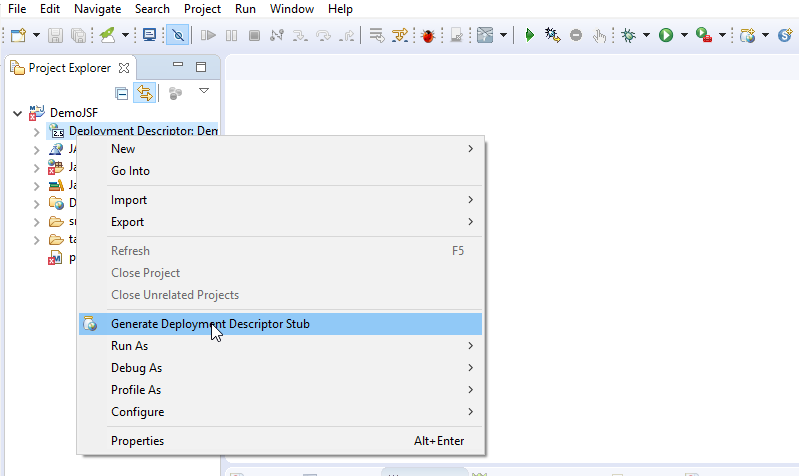
Tạo maven project với name là DemoJSF Tạo file web.xml bằng cách click chuột phải vào Deployment Description và chọn Generate Deployment Descriptior Stub
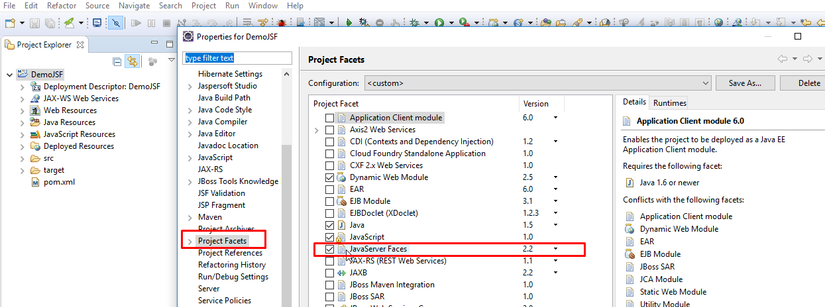
Chọn project facets là 2.2 bằng cách click chuột phải vào project > Properties > Project Facets > chọn JavaServer Faces 2.2
Thêm thư viện jsf vào file pom.xml
<dependencies>
  <dependency>
    <groupId>com.sun.faces</groupId>
    <artifactId>jsf-api</artifactId>
    <version>2.2.8</version>
  </dependency>
  <dependency>
    <groupId>com.sun.faces</groupId>
    <artifactId>jsf-impl</artifactId>
    <version>2.2.8</version>
  </dependency>
</dependencies>
Cấu hình framework trong file web.xml
<?xml version="1.0" encoding="UTF-8"?>
<web-app xmlns:xsi="http://www.w3.org/2001/XMLSchema-instance"
  xmlns="http://java.sun.com/xml/ns/javaee"
  xsi:schemaLocation="http://java.sun.com/xml/ns/javaee http://java.sun.com/xml/ns/javaee/web-app_2_5.xsd"
  version="2.5">
  <display-name>DemoJSF</display-name>
  <display-name>JavaServerFaces</display-name>

  <!-- Change to "Production" when you are ready to deploy -->
  <context-param>
    <param-name>javax.faces.PROJECT_STAGE</param-name>
    <param-value>Development</param-value>
  </context-param>

  <!-- Welcome page -->
  <welcome-file-list>
    <welcome-file>index.xhtml</welcome-file>
  </welcome-file-list>

  <!-- JSF mapping -->
  <servlet>
    <servlet-name>Faces Servlet</servlet-name>
    <servlet-class>javax.faces.webapp.FacesServlet</servlet-class>
    <load-on-startup>1</load-on-startup>
  </servlet>

  <!-- Map these files with JSF -->
  <servlet-mapping>
    <servlet-name>Faces Servlet</servlet-name>
    <url-pattern>/faces/*</url-pattern>
  </servlet-mapping>
  <servlet-mapping>
    <servlet-name>Faces Servlet</servlet-name>
    <url-pattern>*.jsf</url-pattern>
  </servlet-mapping>
  <servlet-mapping>
    <servlet-name>Faces Servlet</servlet-name>
    <url-pattern>*.faces</url-pattern>
  </servlet-mapping>
  <servlet-mapping>
    <servlet-name>Faces Servlet</servlet-name>
    <url-pattern>*.xhtml</url-pattern>
  </servlet-mapping>
</web-app>
Tạo class HelloService thực hiện xử lý logic, business Annotation @ManagedBean đánh dấu đây là managed bean. name = "helloService": tên của bean, được dùng khi inject
Annotation @SessionScope xác định scope cho bean này
@ManagedBean(name = "helloService")
@SessionScoped
public class HelloService {

  public String convert(String input) {
    return "HELLO: " + input.toUpperCase();
  }
}
Tạo class HelloBean thực hiện điều hướng trang và nhận request @ManagedProperty(value = "#{helloService}"): Thực hiện inject đối tượng HelloService qua method setter. Thực hiện inject đối tượng HelloService qua method setter. Bạn có thể dùng đối tượng này mà không cần khởi tạo. Lưu ý là bắt buộc phải có hàm setter cho thuộc tính này.
@ManagedBean
@SessionScoped
public class HelloBean {

  @ManagedProperty(value = "#{helloService}")
  HelloService helloService;

  private String name;

  public String sayHello() {
    this.name = helloService.convert(this.name);
    return "hello";
  }

  public String getName() {
    return name;
  }

  public void setName(String name) {
    this.name = name;
  }

  public HelloService getHelloService() {
    return helloService;
  }

  public void setHelloService(HelloService helloService) {
    this.helloService = helloService;
  }

}
Tạo file index.xhtml (trang hiện lên khi start project, dùng để nhập name) Khai báo namespace để sử dụng các component UI của JSF
<html xmlns="http://www.w3.org/1999/xhtml"
  xmlns:f="http://java.sun.com/jsf/core"
  xmlns:h="http://java.sun.com/jsf/html">
<?xml version="1.0" encoding="UTF-8"?>
<!DOCTYPE html PUBLIC "-//W3C//DTD XHTML 1.0 Transitional//EN"
"http://www.w3.org/TR/xhtml1/DTD/xhtml1-transitional.dtd">
<html xmlns="http://www.w3.org/1999/xhtml"
  xmlns:f="http://java.sun.com/jsf/core"
  xmlns:h="http://java.sun.com/jsf/html">

<h:head>
  <title>Demo JSF</title>
</h:head>
<h:body>
  <h2>stackjava.com - demo JSF</h2>
  <h:form>
    <h:inputText value="#{helloBean.name}"></h:inputText>
    <h:commandButton value="Welcome Me" action="#{helloBean.sayHello()}"></h:commandButton>
  </h:form>
</h:body>
</html>
Cú pháp #{...} đánh dấu đây là Expression Language (EL), trong trường hợp này #{helloBean.name}, khi submit form nó sẽ tìm trường name của helloBean để set vào.
action="#{helloBean.sayHello()}: khi click button nó sẽ gọi tới method sayHello của helloBean. Hàm sayHello của helloBean sẽ gọi helloService để xử lý name và chuyển tới trang hello.xhtml
Tạo file hello.xhmlt (trang hiển thị kết quả đã nhập ở bên index.xhtml)
<?xml version="1.0" encoding="UTF-8"?>
<!DOCTYPE html PUBLIC "-//W3C//DTD XHTML 1.0 Transitional//EN"
"http://www.w3.org/TR/xhtml1/DTD/xhtml1-transitional.dtd">
<html xmlns="http://www.w3.org/1999/xhtml"
  xmlns:f="http://java.sun.com/jsf/core"
  xmlns:h="http://java.sun.com/jsf/html">

<h:head>
  <title>JSF Hello World</title>
</h:head>
<h:body>
  <h:outputText value="#{helloBean.name}" />
</h:body>
</html>
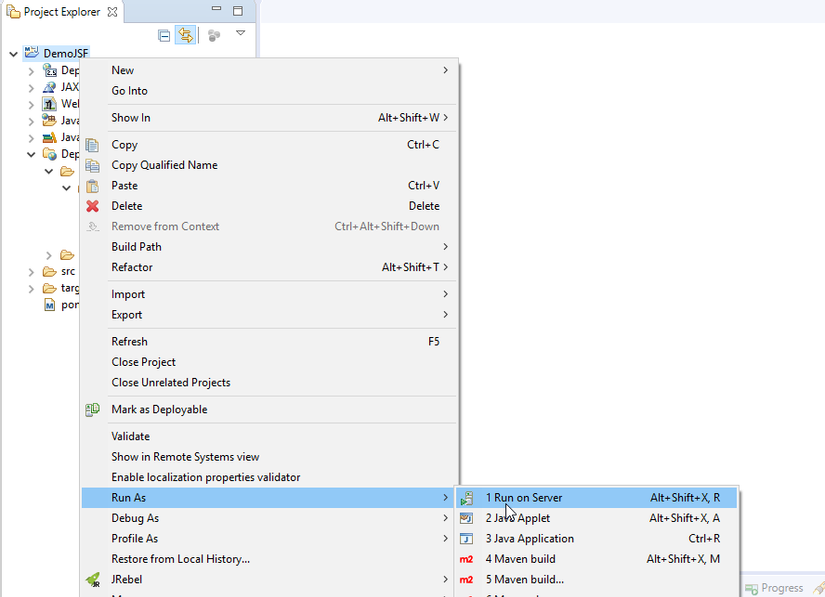
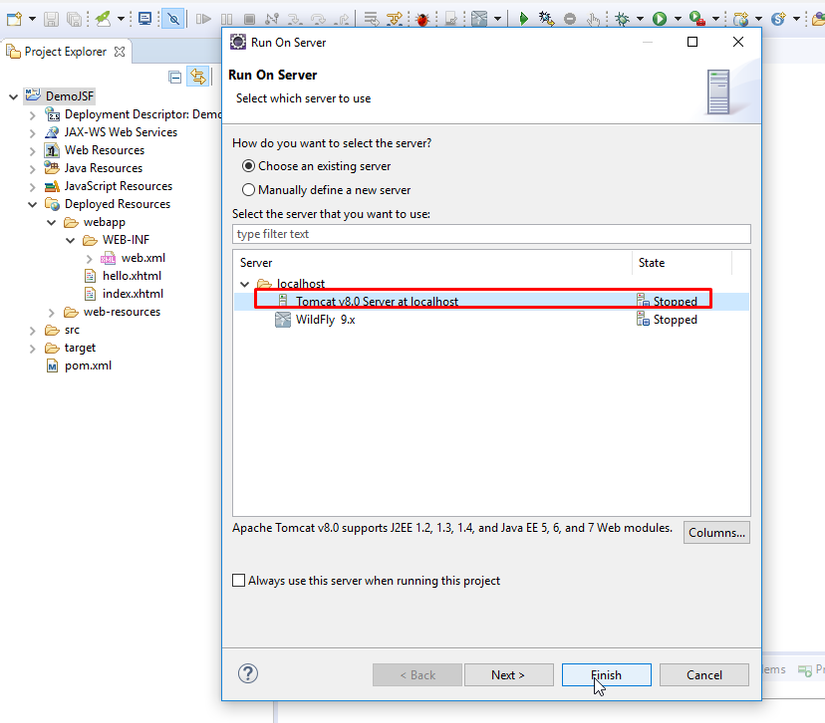
Chạy project trên server tomcat:
Kết quả:
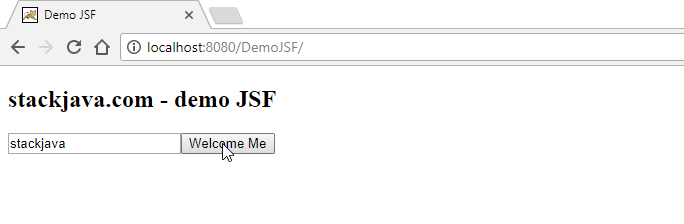
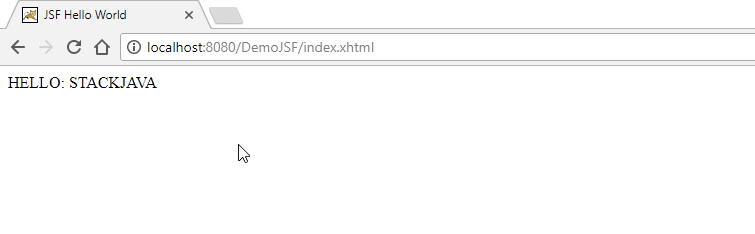
Okay, DONE!
Download code ví dụ trên tại đây: https://stackjava.com/wp-content/uploads/2017/11/DemoJSF.zip
Phần tiếp theo mình sẽ hướng dẫn cách chuyển trang / điều hướng trong JSF: https://stackjava.com/jsf/series-jsf-phan-5-chuyen-trang-dieu-huong-trong-jsf.html
Thanks các bạn đã theo dõi 
All rights reserved
