Selenium với Cucumber (BDD Framwork) - Hướng dẫn sử dụng tool ChroPath để kiểm tra phần tử (Phần 2)
Bài đăng này đã không được cập nhật trong 5 năm
Nếu như ở phần 1 bạn đang nhàm chán với đống lý thuyết, đọc không cũng không hiểu gì. Thì lần này mình sẽ đi sâu vào phần thực hành, có làm nhiều thì mới có nhiều kinh nghiệm, nếu 1 ngày bạn đang làm mà cảm thấy "ồ, hay thế" thì lúc đó nó đã thực sự hữu ích rồi đó. Cổ nhân đã đúc kết thì cấm có sai "trăm hay không bằng tay quen"  bạn đọc lý thuyết mà không hiểu gì thì cứ thử thực hành nhiều, làm nhiều vào lúc đó ắt sẽ hiểu thôi, chỉ mong bạn kiên trì đừng "đứt gánh giữa đường" để công sức bỏ ra đừng bỏ sông đổ bể
Bài viết này sẽ có bài tập từ đơn giản đến phức tạp, bạn cùng thực hành cùng tôi nhé:
Bài tập 1: Viết script để automation test cho chức năng Login
Dữ liệu test lần này sẽ gồm nhiều case kiểm thử, ở đây tôi sẽ mô tả đặc trưng cho 2 case login thành công và login thất bại
Đầu tiên là viết script trong class login.feature đặt trong forder Feature
- Nếu bài trước tôi chỉ sử dụng
Scenariođể chạy 1 bộ dữ liệu => thì bài này để sử dụng được nhiều bộ dữ liệu ta sẽ dùngScenario Outline - Thêm từ khóa
Examples:là nơi chứa bộ dữ liệu test - Mỗi action tôi sẽ để ở 1 line. Vì dụ như ở dưới trong
Whencó nhiều action thì chúng ta sẽ sử dụng từ khóaAndđể clear action hơn. Tương tự nếu Given và Then có nhiều action thì ta sẽ chia từng action ở mỗi 1 line bằng từ khóaAnd
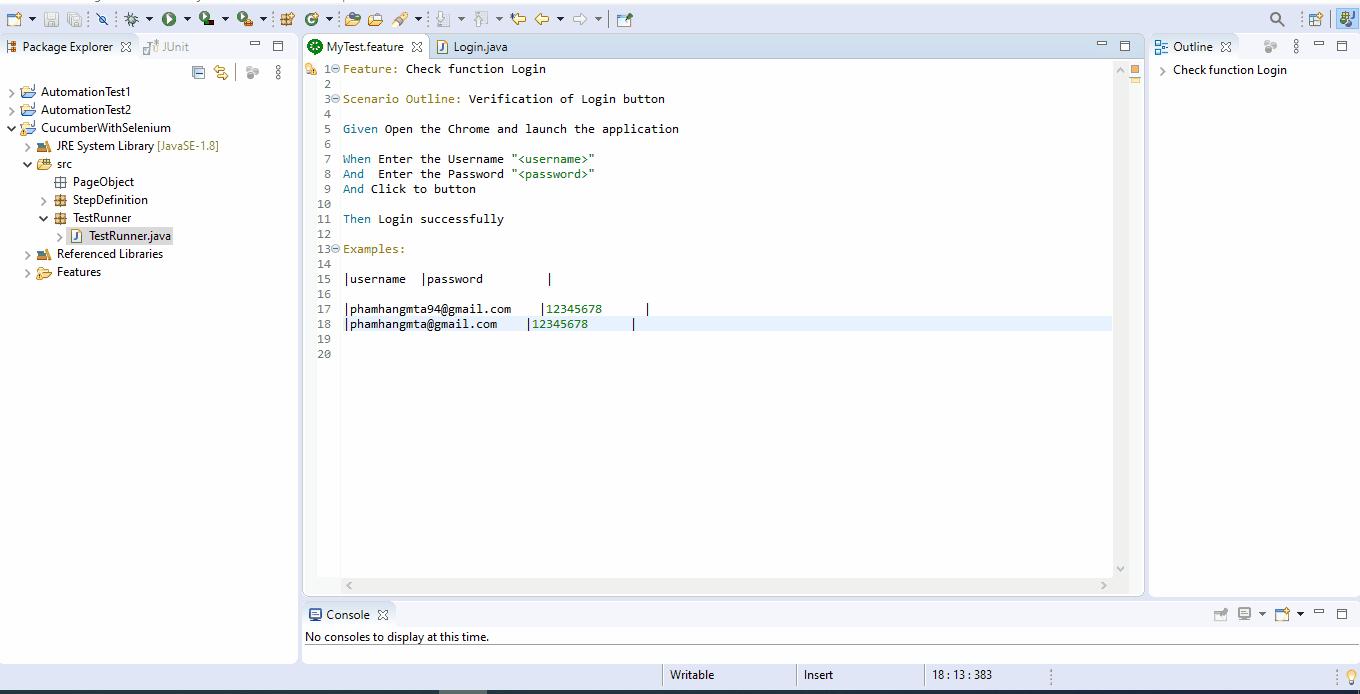
=> Ở đây tôi kiểm thử với account phamhangmta94@gmail.com/12345678 là login thành công. Và account phamhangmta@gmail.com/12345678 là login thất bại . Tôi sẽ vẫn sử dụng trang https://selenium-training.herokuapp.com/ để thực hiện bài viết
Feature: Check function Login

Scenario Outline: Verification of Login button

Given Open the Chrome and launch the application

When Enter the Username "<username>"
And  Enter the Password "<password>"
And Click to button

Then Login successfully

Examples:

|username  |password         |

|phamhangmta94@gmail.com    |12345678      |
|phamhangmta@gmail.com    |12345678      |
Sau đó thực hiện viết code trong class Login.java trong package Step Definition để chạy thôi
package StepDefinition;

import cucumber.api.java.en.Given;
import cucumber.api.java.en.Then;
import cucumber.api.java.en.When;

import org.openqa.selenium.By;
import org.openqa.selenium.WebDriver;
import org.openqa.selenium.chrome.ChromeDriver;


public class Login {

	WebDriver driver;

	@Given("^Open the Chrome and launch the application$")
    public void open_the_Chrome_and_launch_the_application() throws Throwable
    {
		System.setProperty("webdriver.chrome.driver",
				"C:\\Users\\pham.thi.thu.hang\\Documents\\Chrome driver 83\\chromedriver_win32\\chromedriver.exe");
		driver = new ChromeDriver();

		String url = "https://selenium-training.herokuapp.com/login";
		driver.get(url);
    }

    @When("^Enter the Username \"(.*)\"$")
    public void enter_the_Username(String username) throws Throwable
    {
    	driver.findElement(By.name("session[email]")).sendKeys(username);
    }

    @When("^Enter the Password \"(.*)\"$")
    public void enter_the_Password(String password) throws Throwable
    {
    	driver.findElement(By.name("session[password]")).sendKeys(password);

    }

    @When("^Click to button")
    public void click_to_button() throws Throwable{
    	driver.findElement(By.name("commit")).submit();
    }


    @Then("^Login successfully$")
    public void Login_successfully() throws Throwable
    {
    		String expectTitle ="Hằng | Ruby on Rails Tutorial Sample App";
    		String actualTitle = driver.getTitle();

    		if (expectTitle.contentEquals(actualTitle)) {
    			System.out.print("Test Passed!");
    		} else {
    			System.out.print("Test Failed!");
    		}
    }
}
Kết quả thu được sẽ như sau:

Bài 2: Viết script thực hiện automation test cho chức năng đăng ký
Nếu như ở bài 1 chúng ta đã thử nhập data và kiểm tra pass/fail thì bài 2 tôi sẽ demo 1 bài về submit dữ liệu và kiểm tra xem dữ liệu vừa submit có lưu thành công hay không
- Bài được chọn là kiểm thử chức năng đăng ký
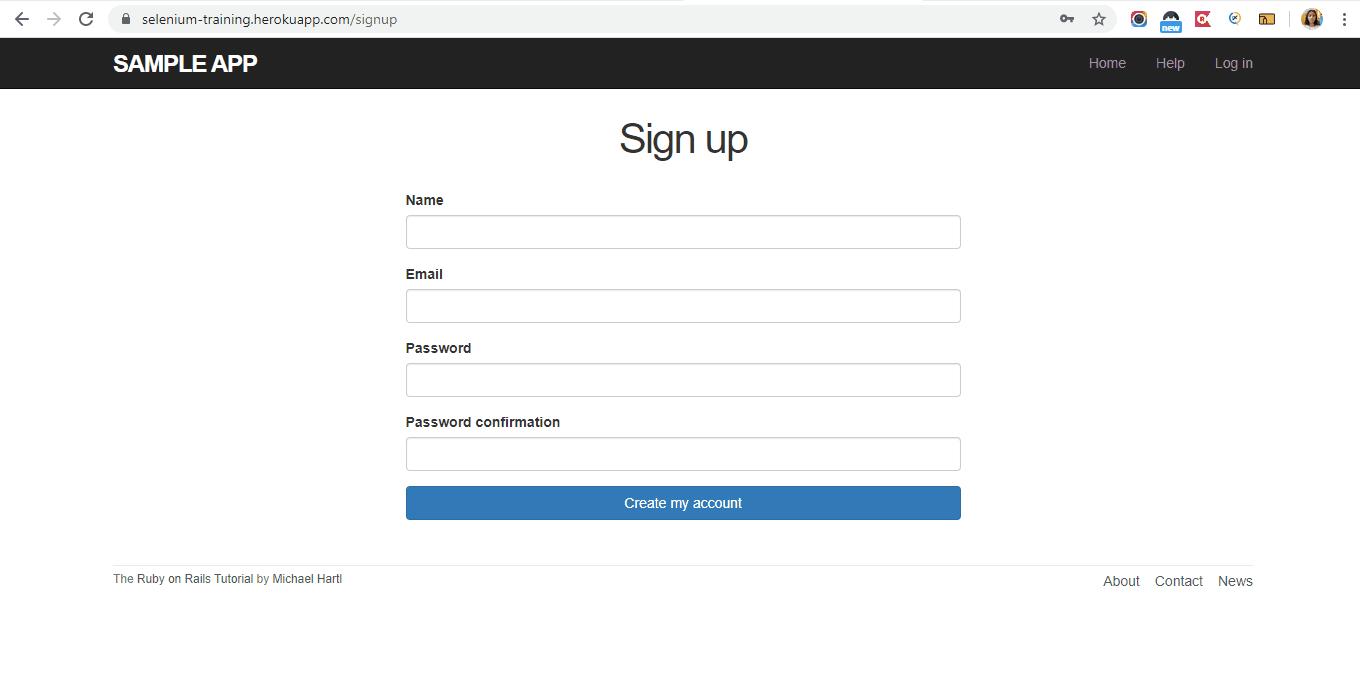
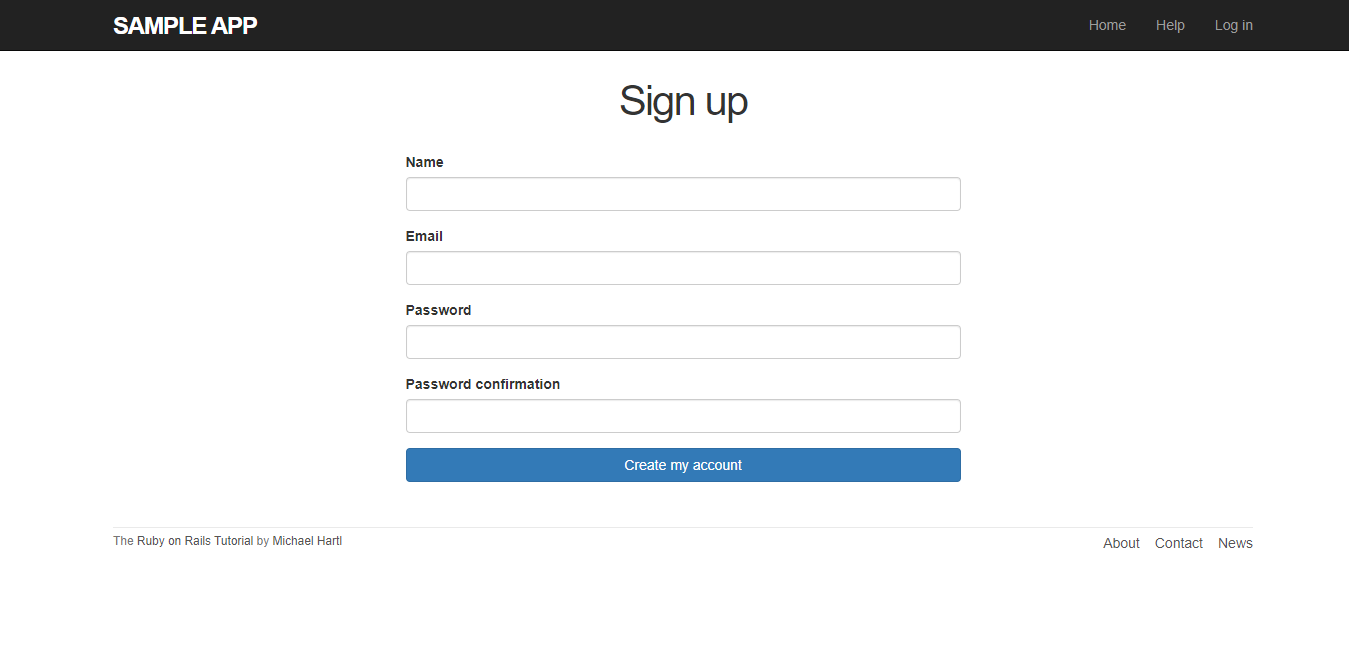
- Đầu tiên tôi sẽ xem qua màn hình Đăng ký xem có bao nhiêu phần tử và lấy đường dẫn của các phần tử đó:
![]()
- Item
Namethực hiện inspect element tôi lấy đượcXPathcủa phần tử này là://input[@id='user_name'] - Item
Emailthực hiện inspect element tôi lấy đượcXPathcủa phần tử này là://input[@id='user_email'] - Item
Passwordthực hiện inspect element tôi lấy đượcXPathcủa phần tử này là://input[@id='user_password'] - Item
Password confirmationthực hiện inspect element tôi lấy đượcXPathcủa phần tử này là://input[@id='user_password_confirmation'] - Button
Create my accountthực hiện inspect element tôi lấy đượcXPathcủa phần tử này là://input[@name='commit']
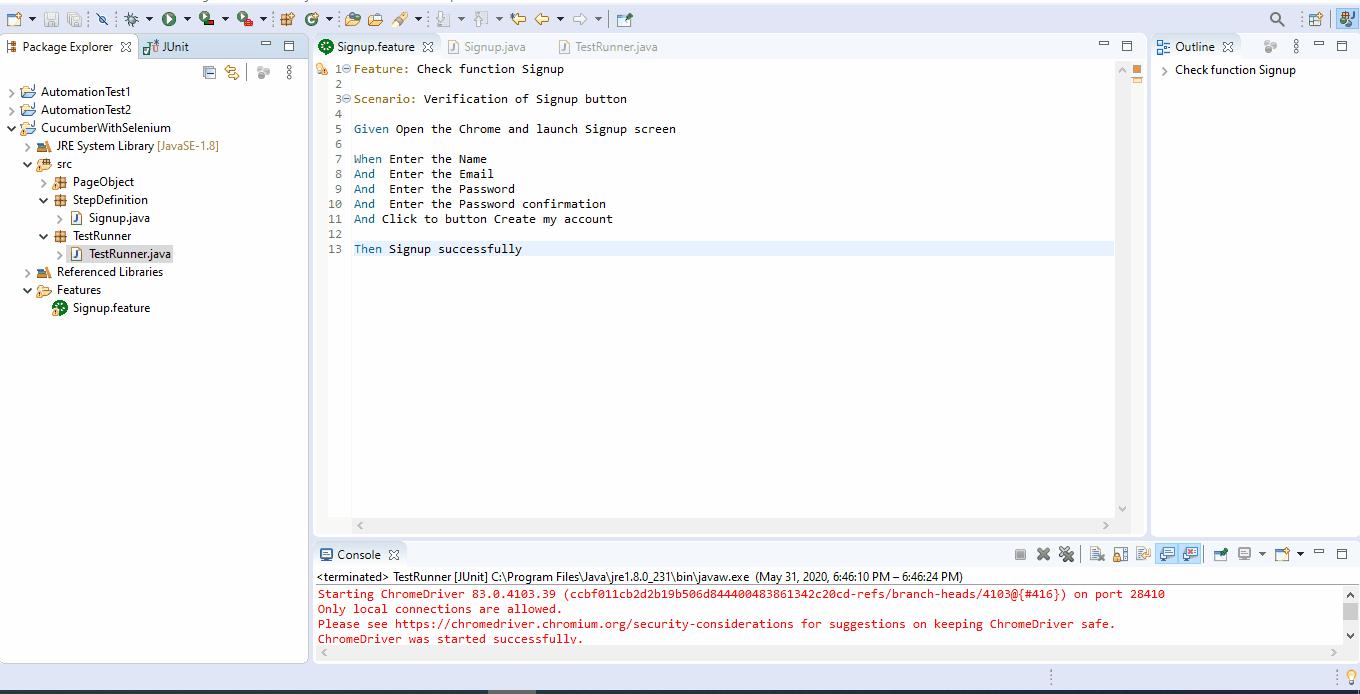
Rồi, đã lấy được các phần tử cần dùng. Bây giờ thì viết feature cho chức năng Đăng ký nào!
Feature: Check function Signup

Scenario: Verification of Signup button

Given Open the Chrome and launch Signup screen

When Enter the Name
And  Enter the Email
And  Enter the Password
And  Enter the Password confirmation
And Click to button Create my account

Then Signup successfully
Sau đó tạo class Signup.java trong package StepDefinition
package StepDefinition;

import cucumber.api.java.en.Given;
import cucumber.api.java.en.Then;
import cucumber.api.java.en.When;

import org.openqa.selenium.By;
import org.openqa.selenium.WebDriver;
import org.openqa.selenium.chrome.ChromeDriver;


public class Signup {

	WebDriver driver;

	@Given("^Open the Chrome and launch Signup screen$")
    public void open_the_Chrome_and_launch_Signup_screen() throws Throwable
    {
		System.setProperty("webdriver.chrome.driver",
				"C:\\Users\\pham.thi.thu.hang\\Documents\\Chrome driver 83\\chromedriver_win32\\chromedriver.exe");
		driver = new ChromeDriver();

		String url = "https://selenium-training.herokuapp.com/signup";
		driver.get(url);
    }

    @When("^Enter the Name$")
    public void enter_the_Name() throws Throwable
    {
    	driver.findElement(By.xpath("//input[@id='user_name']")).sendKeys("UserTest");
    }

    @When("^Enter the Email$")
    public void enter_the_Email() throws Throwable
    {
    	driver.findElement(By.xpath("//input[@id='user_email']")).sendKeys("phamhang+1@gmail.com");

    }

    @When("^Enter the Password$")
    public void enter_the_Password() throws Throwable
    {
    	driver.findElement(By.xpath("//input[@id='user_password']")).sendKeys("12345678");
    }

    @When("^Enter the Password confirmation$")
    public void enter_the_Password_confirmation() throws Throwable
    {
    	driver.findElement(By.xpath("//input[@id='user_password_confirmation']")).sendKeys("12345678");

    }

    @When("^Click to button Create my account")
    public void click_to_button_Create_my_account() throws Throwable{
    	driver.findElement(By.xpath("//input[@name='commit']")).submit();
    }


    @Then("^Signup successfully$")
    public void Signup_successfully() throws Throwable
    {
    		String expectTitle ="UserTest | Ruby on Rails Tutorial Sample App";
    		String actualTitle = driver.getTitle();

    		if (expectTitle.contentEquals(actualTitle)) {
    			System.out.print("Test Passed!");
    		} else {
    			System.out.print("Test Failed!");
    		}
    }
}
Chạy chương trình và kết quả thu được như sau:

Hướng dẫn sử dụng tool ChroPath để kiểm tra phần tử 1 cách nhanh chóng và chính xác
Trước đây tôi đã hướng dẫn các bạn cách kiểm tra phần tử bằng cách bấm F12 hoặc chuột phải -> chọn inspect element để lấy phần tử. Tuy nhiên trong quá trình thao tác bạn chưa biết cách chọn phần tử đó là duy nhất, hoặc do đường dẫn lấy phần tử quá dài mặc dù có thể tối ưu được ngắn gọn hơn.
Việc cài tool ChroPath sẽ dành cho bạn nào đã hiểu được cách lấy phần tử manual và ý nghĩa của chúng, dùng tool sẽ giúp các bạn thao tác nhanh và gọn hơn thôi.
Đầu tiên bạn search từ khóa "ChroPath for Chrome" và add nó vào Chrome của bạn. Add thành công thì bạn sẽ thấy có thêm logo của ChroPath trên thanh công cụ bên phải ô tìm kiếm của Chrome.
Sau đó hãy thử 1 chút nhé 
Mình demo 1 ảnh Gif dưới đây, bạn xem qua sẽ hiểu ngay cách dùng thôi nhé!

Cảm ơn bạn đã đọc bài viết  Thân!
Thân!
All rights reserved
