RxSwift by Examples #3 – Networking
Bài đăng này đã không được cập nhật trong 4 năm
Tiếp theo 2 phần trước: Phần I, Phần II
Theo tài liệu: Droids
Đối với Rx, có rất nhiều thư viện để làm việc với networking, bao gồm cả RxAlamofire và Moya. Trong tutorial này, chúng ta sẽ tập trung vào Moya.
Moya
Ý tưởng của Moya là chúng ta muốn 1 network abstraction layer mà có thể đóng gói và gọi Alamofire trực tiếp. Nó cần phải đơn giản đủ để những thứ thông thường có thể làm một cách dễ dàng, nhưng cũng đủ phức tạp để thực hiện các tác vụ phức tạp 1 cách cũng dễ dàng luôn. Về cơ bản, bằng cách sử dụng thư viện này chúng ta có thể tạo ra kết nối với API in no-time, và với phần mở rộng của nó mà bao gồm cả RxSwift và ModelMapper chúng ta đã có đầy đủ tool để bắt đầu.
Setup
Để setup Moya, chúng ta cần một Provider, mà bao gồm việc setup cho stubbing, endpoint closure,...(đừng lo lắng vì có khá nhiều từ mà tôi không dịch ra được, chúng ta sẽ rõ ràng mọi thứ hơn khi vào việc thực tế ). Trong trường hợp đơn giản của chúng ta, chúng ta chỉ cần khởi tạo 1 Provider với RxSwift. Và thứ 2 là là cần phải config cho Endpoint - một enum của tất cả các đối tượng cuối mà có thể có. Điều này khá đơn giản, chúng ta chỉ cần tạo ra 1 enum mà conform từ TargetType và thế là xong. Nhưng TargetType là gì? Đó là 1 protocol, trong đó có: url, method, task (là 1 request/upload/download), parameters, parameterEncoding (đều là những thứ cơ bản với URL request), nhưng nó vẫn còn 1 thứ quan trọng nữa: sampleData. Moya rất quan trọng việc test. Nói coi các test alf những công dân hạng nhất (first-class citizens). Nhưng vấn đề về test ta sẽ nói đến ở chapter tiếp theo. Bây giờ ta chỉ cần biết: với mỗi request, ta cần 1 sample response từ server.
Example
Không giống 2 phần trước, chúng ta sẽ bỏ qua phần definitions, vì không có nhiều lý thuyết, chúng ta sẽ học từng bước thông qua việc code. Trong ví dụ này, chúng ta sẽ cố gắng để lấy được các issues cho một repository cụ thể sử dụng GitHub API. Nhưng để phức tạp mọi thứ 1 chút, đầu tiên chúng ta sẽ nhận được repository object, kiểm tr xem nó có tồn tại không, rồi bằng cách kết nối các requests, chúng ta sẽ lấy được các issues của repository này. Chúng ta sẽ map tất cả mọi thứ từ JSON sang objects, và chúng ta cũng sẽ phải chú ý đến các vấn đề về errors, duplicating requests, spamming API và những thứ kiểu kiểu như vậy.
Hầu hết mọi thứ về RxSwift chúng ta đã nói ở trong Phần I, Phần II. Ở đấy chúng ta chỉ cần hiểu về chaining và error handling, cộng với việc làm sao để connect chained operation tới table view. Không quan trọng, cuối cùng app Issue Tracker của chúng ta sẽ hoạt động kiểu như sau:
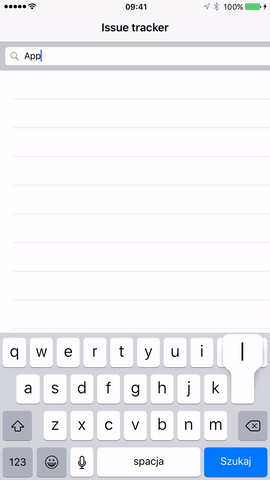 Chúng ta sẽ nhập tên đầy đủ của repository (gồm cả tên
 repository owner và dấu gạch chéo) như: apple/swift, apple/cups, moya/moya. Khi tìm được repository (tức là URL request thứ nhất), chúng ta sẽ tièm các issues của repository đó (URL request thứ 2). Đó là mục tiêu của chúng ta!
Đầu tiên, hãy tạo 1 preject mới và install CocoaPods. Podfile của chúng ta sẽ trông như sau:
platform :ios, '8.0'
use_frameworks!

target 'RxMoyaExample' do

pod 'RxCocoa', '~> 3.0.0'
pod 'Moya-ModelMapper/RxSwift', '~> 4.1.0'
pod 'RxOptional'

end

post_install do |installer|
   installer.pods_project.targets.each do |target|
       target.build_configurations.each do |config|
             config.build_settings['ENABLE_TESTABILITY'] = 'YES'
             config.build_settings['SWIFT_VERSION'] = '3.0'
       end
   end
end
Step 1 - Controller and Moya setup
Chúng ta sẽ bắt đầu với UI: chỉ cần 1 UITableView và 1 UISearchBar giống như ở Phần I. Rất đơn giản, bạn có thể theo design như file gif phía trên hoặc bạn có thể tạo theo phong cách của mình. Tiếp theo chúng ta sẽ cần 1 controller để quản lý mọi thứ. Chúng ta sẽ cố gắng mô tả các chức năng của controller trước khi tạo kiến trúc cho nó. Vậy controller của chúng ta cần những gì? NÓ cần lấy data từ search bar, truyền data cho model, nhận issues từ model và truyền nó ra table view -> khá đơn giản. Hãy cùng bắt đầu với IssueListViewController. Tạo mới file IssueListViewController.swift và chuẩn bị controller của chúng ta với những modules đc import và basic configuration như sau:
import Moya
import Moya_ModelMapper
import UIKit
import RxCocoa
import RxSwift

class IssueListViewController: UIViewController {

  @IBOutlet weak var tableView: UITableView!
  @IBOutlet weak var searchBar: UISearchBar!

  override func viewDidLoad() {
      super.viewDidLoad()
      setupRx()
  }

  func setupRx() {
  }
}
Như code ở trên chúng ta có thể thấy ta đã chuẩn bị sẵn method setupRx() bởi vì dĩ nhiên, chúng ta sẽ phải setup việc binding. Nhưng trước đó, chúng ta cần phải setup Endpoint cho Moya. TRước đó chúng ta đã nói rằng cần 2 bước: thứ nhất là Provider và thứ 2 là Endpoint. Hãy bắt đầu với Endpoint: Chúng ta sẽ tạo 1 file mới tên là GithubEndpoint.swift và tạo 1 enum với 1 số targets có thể:
import Foundation
import Moya

enum GitHub {
  case userProfile(username: String)
  case repos(username: String)
  case repo(fullName: String)
  case issues(repositoryFullName: String)
}
Dĩ nhiên GitHub ở trên chỉ là 1 enum, để sử dụng với Moya, GitHub cần phải conform TargetType. Chúng ta sẽ viết dưới dạng extension như sau:
import Foundation
import Moya

private extension String {
  var URLEscapedString: String {
      return self.addingPercentEncoding(withAllowedCharacters: CharacterSet.urlHostAllowed)!
  }
}

enum GitHub {
  case userProfile(username: String)
  case repos(username: String)
  case repo(fullName: String)
  case issues(repositoryFullName: String)
}

extension GitHub: TargetType {
  var baseURL: URL { return URL(string: "https://api.github.com")! }
  var path: String {
      switch self {
      case .repos(let name):
          return "/users/\(name.URLEscapedString)/repos"
      case .userProfile(let name):
          return "/users/\(name.URLEscapedString)"
      case .repo(let name):
          return "/repos/\(name)"
      case .issues(let repositoryName):
          return "/repos/\(repositoryName)/issues"
      }
  }
  var method: Moya.Method {
      return .get
  }
  var parameters: [String: Any]? {
      return nil
  }
  var sampleData: Data {
      switch self {
      case .repos(_):
          return "{{\"id\": \"1\", \"language\": \"Swift\", \"url\": \"https://api.github.com/repos/mjacko/Router\", \"name\": \"Router\"}}}".data(using: .utf8)!
      case .userProfile(let name):
          return "{\"login\": \"\(name)\", \"id\": 100}".data(using: .utf8)!
      case .repo(_):
          return "{\"id\": \"1\", \"language\": \"Swift\", \"url\": \"https://api.github.com/repos/mjacko/Router\", \"name\": \"Router\"}".data(using: .utf8)!
      case .issues(_):
          return "{\"id\": 132942471, \"number\": 405, \"title\": \"Updates example with fix to String extension by changing to Optional\", \"body\": \"Fix it pls.\"}".data(using: .utf8)!
      }
  }
  var task: Task {
      return .request
  }
  var parameterEncoding: ParameterEncoding {
      return JSONEncoding.default
  }
}
Ở đây chúng ta không cần gửi parameters nào lên cả, vì vậy chúng ta return nil. Method luôn luôn là .get bởi vì chúng ta chỉ lấy dữ liệu về. baseURL cũng không đổi, chỉ có sampleData vào path là cần phải đặt vào trong switch. Nếu bạn tạo 1 target khác, bạn cần phải check nếu như request của bạn cần .get hay .post method, có cần parameters hay không,... khi đấy chúng cũng sẽ phải cần switch. Ngoài ra, bạn sẽ để ý thấy hàm URLEscapedString được sử dụng đẻ giúp sức trong việc encoding characters trong URL.
Như vậy chúng ta đã implement Provider của Moya, chúng ta cũng sẽ implement việc ẩn keyboard khi click vào cell, với RxSwift và dĩ nhiên chúng ta cần DisposeBag. Ngoài ra chúng ta sẽ tạo ra Observable mới mà tương ứng với text từ search bar, nhưng có filtered (loại bỏ các kết quả duplicates, chờ khi đang type, ... hầu hết mọi việc từ Phần I). Tóm lại chúng ta sẽ có 3 properties được add và method setupRx() cần được implement.
class IssueListViewController: UIViewController {
    ...
    let disposeBag = DisposeBag()
    var provider: RxMoyaProvider<GitHub>!
    var latestRepositoryName: Observable<String> {
        return searchBar
            .rx.text
            .orEmpty
            .debounce(0.5, scheduler: MainScheduler.instance)
            .distinctUntilChanged()
    }
    ...
    func setupRx() {
        // First part of the puzzle, create our Provider
        provider = RxMoyaProvider<GitHub>()

        // Here we tell table view that if user clicks on a cell,
        // and the keyboard is still visible, hide it
        tableView
            .rx.itemSelected
            .subscribe(onNext: { indexPath in
                if self.searchBar.isFirstResponder() == true {
                    self.view.endEditing(true)
                }
            })
            .addDisposableTo(disposeBag)
    }
    ...
}
Bạn có thể thấy code của biến latestRepositoryName nhìn rất quen thuộc bởi chúng ta đã viết như thế này ở Phần I. Về phần Provider, chúng ta có thể thấy chưa hề có gì đặc biệt, chỉ là initializer, và bởi vì chúng ta sử dụng Moya và RxSwift nên chúng ta phải dùng RxMoyaProvider. Nếu bạn muốn viết API sử dụng Moya và ReactiveCocoa hoặc chỉ sử dụng Moya, có những kiểu providers khác (MoyaProvider cho Moya thuần và ReactiveCocoaMoyaProvider cho ReactiveCocoa+Moya).
Tiếp theo chúng ta có việc setup ẩn keyboard. Với RxCocoa, chúng ta access vào tableView.rx.itemSelected - mà sẽ phát ra signal mỗi khi tap vào 1 table view cell. Chúng ta thể subscribe nó và làm công việc mình muốn (ẩn keyboard). Chúng ta cũng sẽ check xem search bar có phải là first responder (khi keyboard được show) hay không và ẩn nó đi.
Step 2 - Network model and mapping objects
Chúng ta cần 2 loại model để parse, với ModelMapper, mọi thứ vô cùng đơn giản, chỉ cần conform Mappable như sau:
import Mapper

struct Repository: Mappable {

   let identifier: Int
   let language: String
   let name: String
   let fullName: String

   init(map: Mapper) throws {
       try identifier = map.from("id")
       try language = map.from("language")
       try name = map.from("name")
       try fullName = map.from("full_name")
   }
}
import Mapper

struct Issue: Mappable {

   let identifier: Int
   let number: Int
   let title: String
   let body: String

   init(map: Mapper) throws {
       try identifier = map.from("id")
       try number = map.from("number")
       try title = map.from("title")
       try body = map.from("body")
   }
}
Tiếp theo, chúng ta sẽ chuyển sang thứ thú vị nhất trong tutorial này: IssueTrackerModel - phần core của Networking. Đầu tiên, model của chúng ta cần phải có 1 property Provider mà sẽ đc truyền vào khi init. Tiếp theo là 1 preperty cho text kiểu Observable - chinhs là repositoryNames mà viewcontroller sẽ truyền vào, dĩ nhiên là 1 method có kiểu trả về là observable sequence of issues aray: Observable<[Issue]>, mà viewcontroller dùng để bind dữ liệu vào table view. Và chúng ta ko cần phải implement init vì swift back up cho chúng ta với memberwise initializer
import Foundation
import Moya
import Mapper
import Moya_ModelMapper
import RxOptional
import RxSwift

struct IssueTrackerModel {

   let provider: RxMoyaProvider<GitHub>
   let repositoryName: Observable<String>

   func trackIssues() -> Observable<[Issue]> {

   }

   internal func findIssues(repository: Repository) -> Observable<[Issue]?> {

   }

   internal func findRepository(name: String) -> Observable<Repository?> {

   }
}
2 function ở phía trên: findRepository(_:) sẽ trả về kiểu repository optional (nil nếu như ko thể map object từ response, Repository object nếu có thể map), và findIssues(_:) sẽ tìm kiếm repositories dựa trên 1 repostory object cho trước. Implement 2 method:
internal func findIssues(repository: Repository) -> Observable<[Issue]?> {
   return self.provider
       .request(GitHub.issues(repositoryFullName: repository.fullName))
       .debug()
       .mapArrayOptional(Issue.self)
}

internal func findRepository(name: String) -> Observable<Repository?> {
   return self.provider
       .request(GitHub.repo(fullName: name))
       .debug()
       .mapObjectOptional(Repository.self)
}
- Chúng ta có
provider, ở đó ta có thể tạo request với 1 case cho trước - Tiếp theo, ta truyền
Github.repohoặcGitHub.issuesvào và thế là request xong debug()được sử dụng để prints ra 1 số thông tin trừ request mà ta cần, nó rất cần thiết trong việc develop/testing- Tiếp theo chúng ta có thể parse và map response nhận đc nhưng, với những extension mà chúng ta đã sử dụng, chúng ta có thể dùng các method như
mapObject(),mapArray(),mapObjectOptional()hoặcmapArrayOptional(). Điểm khác biệt là: với các method optional, khi object không thể parsed được, function sẽ trả về nil, trong khi methods thông thường thì throws errors và chúng ta phảicatch()hoặcretry(). trong trường hợp của ta thì optionals là tuyệt vời, chúng ta có thể clear tableview nếu request bị failure. Như vậy chúng ta đã có 2 methods mà trả cho chúng ta 1 số thứ dựa vào 1 số thứ chúng ta đưa cho method =)), vậy kết nối 2 methods với nhau ntn? Chúng ta sẽ sử dụng 1 operator mới:flatMap()và đặc biệt làflatMapLatest(): tác dụng của 2 operator này là từ 1 sequence, chúng tạo ra 1 sequence mới. Ở đây, chúng ta có 1 sequence của strings và chúng ta muốn convert nó thành 1 sequence của repositories, hoặc 1 sequence của repositories thành 1 sequence của issues. CHúng ta sẽ biến đổi nó trong một hoạt động dây chuyền (chaining operation). Và khi nhận đc nil thì return ra empty array để clear tableview. VậyflatMap()vàflatMapLatest()khác nhau ntn?flatMap()nhận đc 1 giá trị, sẽ thực hiện task và khi nó nhận được giá trị mới, task trước đó sẽ vẫn phải đc finish khi mà giá trị mới nhận được trong lúc đang thực hiện task hiện tại. Đó không phải những gì chúng ta cần ở đây, vì khi chúng ta nhận đc text mới ở search bar, chúng ta muốn cancel request cũ và bắt đầu 1 request mới. Đó là những gìflatMapLatest()làm. methodtrackIssuessẽ như sau:
func trackIssues() -> Observable<[Issue]> {
    return repositoryName
        .observeOn(MainScheduler.instance)
        .flatMapLatest { name -> Observable<Repository?> in
            print("Name: \(name)")
            return self
                .findRepository(name)
        }
        .flatMapLatest { repository -> Observable<[Issue]?> in
            guard let repository = repository else { return Observable.just(nil) }

            print("Repository: \(repository.fullName)")
            return self.findIssues(repository)
        }
        .replaceNilWith([])
}
- Chúng ta muốn nó được observed trên MainScheduler bởi vì mục đích là bind model vào UI (cụ thể là tableview)
- Chúng ta biến đổi text (tên của repository) vào observable repository sequence, trong trường hợp đó nó có thể nil khi không thể map được object
- chúng ta kiểm tra xem repository chúng ta map có nil hay không
Nếu nil, return observable nil sequence (nếu repository là nil, method
flatMapLatest()sẽ đảm bảo trả về empty array).Observable.just(nil)có nghĩa là chúng ta sẽ gửi 1 item nhưn là 1 observable trong trường hợp item là nil Nếu không nil, chúng ta muốn biến đổi nó thành 1 arrayc của những issues (nếu repository có issues) Nó có thể trả về nil hoặc array của các issues, vì thế chúng ta có observable với optional array. .replaceNilWith([])làRxOptionalextension mà trong trường hợp này transform nil thành empty array để clear tableview.
Step 3 - Bind issues to tableview
Phần cuối cùng của chúng ta là connect data từ moded tới tableview. tức là binds observable tới tableview. Thông thường bạn sẽ phải conform lại UITableViewDataSource, implement 1 số method cần thiết, gán dataSource cho view controller. Với RxSwift, chúng ta có thể setup UITableViewDataSource với chỉ 1 closure. VỚi rx.itemsWithCellFactory công việc của ta là vô cùng dễ dàng:
class IssueListViewController: UIViewController {
   ...
   var issueTrackerModel: IssueTrackerModel!
   ...
   func setupRx() {
       // First part of the puzzle, create our Provider
       provider = RxMoyaProvider<GitHub>()

       // Now we will setup our model
       issueTrackerModel = IssueTrackerModel(provider: provider, repositoryName: latestRepositoryName)

       // And bind issues to table view
       // Here is where the magic happens, with only one binding
       // we have filled up about 3 table view data source methods
       issueTrackerModel
           .trackIssues()
           .bindTo(tableView.rx.items) { tableView, row, item in
               let cell = tableView.dequeueReusableCell(withIdentifier: "issueCell", for: IndexPath(row: row, section: 0))
               cell.textLabel?.text = item.title

               return cell
           }
           .addDisposableTo(disposeBag)

       // Here we tell table view that if user clicks on a cell,
       // and the keyboard is still visible, hide it
       tableView
           .rx.itemSelected
           .subscribe(onNext: { indexPath in
               if self.searchBar.isFirstResponder == true {
                   self.view.endEditing(true)
               }
           })
           .addDisposableTo(disposeBag)
   }
   ...
}
property mới được khai báo ở đây là IssueTrackerModel (mà đã được init trong setupRx()) và việc binding: từ model của trackIssues() method, tới property rx.itemsWithCellFactory. Ngoài ra, đừng quên sự thay đổi của cellIndentifier trong dequeReusableCell() method.
Cuối cùng run project sẽ như dưới đây:

All rights reserved
