Repository Pattern trong Laravel
Bài đăng này đã không được cập nhật trong 5 năm
Mở đầu
Laravel là một PHP framework, có mã nguồn mở và miễn phí, được xây dựng nhằm hỗ trợ và phát triển các phần mềm, ứng dụng, theo kiến trúc MVC. Hiện nay, Laravel đang là PHP framework phổ biến nhất và tốt nhất. Một trong những cách phổ biến nhất để xây dựng một ứng dụng sử dụng Laravel là Repository Pattern. Đầu tiên, để có thể triển khai được Repository Pattern trong Laravel chúng ta cần phải hiểu được Repository Pattern là gì và lợi ích khi sử dụng nó.
Repository Pattern là gì?
Repository Pattern là một cách tổ chức source code trong Laravel. Ý tưởng cơ bản và mục tiêu chính để sử dụng Repository Pattern là xây dựng một lớp kết nối giữa tầng Business Login và Data Access, giúp cho việc truy cập dữ liệu được chặt chẽ và bảo mật hơn.
Trong Laravel, Repository là cầu nối giữa Model và Controller, lưu trữ logic truy vấn dữ liệu. Các lệnh truy vấn dữ liệu vốn được viết trực tiếp ở Controller sẽ được đưa vào Repository. Khi đó, Controller sẽ dùng Repository để tương tác với dữ liệu thay vì sử dụng trực tiếp. Việc truy vấn dữ liệu được giấu kín trong Repository. Thông thường trong Laravel, các phương thức như find, create, update, delete.. được viết khá giống nhau, chỉ khác nhau trên Model (đối tượng) cần tương tác. Vì vậy các đoạn code này nên được đưa vào Repository để tiết kiệm việc việc code.
Lợi ích của việc sử dụng Repository Pattern
- Tập trung hóa logic truy vấn dữ liệu giúp code dễ bảo trì hơn
- Logic truy vấn dữ liệu và logic code có thể được tách biệt
- Giảm sự trùng lặp code
- Hạn chế lỗi trong truy vấn
- Dễ dàng thực hiện test
Thông thường khi không sử dụng Repository, code sẽ như thế này
class UsersController extends Controller
{
   private $userRepository;

   public function __construct(UserRepositoryInterface $userRepository)
   {
       $this->userRepository = $userRepository;
   }

   public function index()
   {
       $users = $this->userRepository->all();

       return view('users.index', [
           'users' => $users
       ]);
   }
}
Đoạn code này vẫn đúng. Tuy nhiên, có một vấn đề cần chú ý ở đây đó là Controller được gắn chặt vào Model dùng để thực hiện các thao tác với Cơ sở dữ liệu. Điều này gây ra 2 vấn đề nghiêm trọng như sau:
- Chúng ta không thể viết Test cho Controller
- Controller gắn chặt với ORM Layer, nếu có những thay đổi về cầu trúc bảng, hay thực hiện giải pháp nào đó tái cấu trúc, chúng ta sẽ gặp khó khăn trong việc phải tìm lại toàn bộ các controller và sửa
Đó chính là lí do chúng ta nên sử dụng Repository trong trường hợp này. Chúng ta sẽ xây dựng một lớp trung gian giữa Controller và Model, thay vì việc Controller tương tác trực tiếp với Model, Controller sẽ làm việc với Repository đã được đóng gói và các thao tác trong Model. Với bất kì sự thay đổi nào liên quan đến Model, chúng ta chỉ cần tìm và sửa lại Repository. Chúng ta sẽ viết lại code như sau:
class UsersController extends Controller
{
   private $userRepository;

   public function __construct(UserRepositoryInterface $userRepository)
   {
       $this->userRepository = $userRepository;
   }

   public function index()
   {
       $users = $this->userRepository->all();

       return view('users.index', [
           'users' => $users
       ]);
   }
}
Sử dụng Repository trong Laravel
Sau khi tìm hiểu về các lợi ích của Repository, bây giờ chúng ta hãy cùng triển khai Repository trong Laravel.
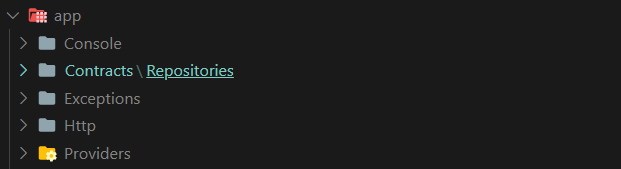
Bước 1: Tạo một Repository Interface
Tạo một folder bên trong folder app đặt tên là Contracts, sau đó tạo folder Repositories theo cấu trúc sau
Sau đó tạo file BaseRepository.php Đây là Interface mà chúng ta sẽ sử dụng. Bên trong interface này, bạn add vào đoạn code sau:
<?php

namespace App\Contracts\Repositories;

interface BaseRepository
{
    public function store($data = []);

    public function update($id, $data = []);

    public function delete($id);

    public function show($id);
}
Tiếp theo tại file UserRepository.php kế thừa BaseRepository.php
<?php

namespace App\Contracts\Repositories;

interface UserRepository extends BaseRepository
{
    public function all();
    public function paginate($items = null);
    public function find($id);
}
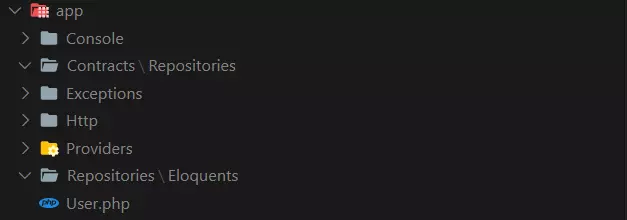
Bước 2: Tạo Repository
Tạo một folder bên trong folderapp đặt tên là Repositories và tạo folder Eloquents theo cấu trúc như sau:
Bên trong folder Eloquents tạo file EloquentBaseRepository.php Class này sẽ implement lại interfaceBaseRepositoryInterface mà chúng ta vừa tạo ở Bước 1. Code trong file EloquentBaseRepository.php như sau:
<?php

namespace App\Repositories\Eloquents;

use App\Contracts\Repositories\BaseRepository;

class EloquentBaseRepository implements BaseRepository
{
    protected $model;

    public function __construct(Model $model)
    {
        $this->model = $model;
    }

    public function index()
    {
        return $this->model->paginate();
    }

    public function store($data = [])
    {
        return $this->model->create($data);
    }

    public function update($id, $data = [])
    {
        $record = $this->model->findOrFail($id);

        return $record->update($data);
    }

    public function delete($id)
    {
        return $this->model->destroy($id);
    }

    public function show($id)
    {
        return $this->model->findOrFail($id);
    }
}
Trong file EloquentBaseRepository.php, chúng ta bắt buộc phải tạo các method được khai báo trong interface và triển khai chúng, nếu không sẽ gặp lỗi trong quá trình chạy và sẽ không sử dụng được class mà ta vừa tạo ra. Tiếp theo tạo file EloquentUserRepository kế thừa EloquentBaseRepository và class này sẽ implement lại interface UserRepositoryInterface mà chúng ta vừa tạo ở Bước 1. Code trong file EloquentUserRepository.php như sau:
<?php

namespace App\Repositories\Eloquents;

use App\Models\User;
use App\Contracts\Repositories\UserRepository;

class EloquentUserRepository extends EloquentBaseRepository implements UserRepository
{
    protected $model;

    public function __construct(User $model)
    {
        $this->model = $model;
    }

    public function all()
    {
        return $this->model->with('roles')->get();
    }

    public function find($id)
    {
        return $this->model->find($id);
    }
}
Bước 3: Đăng kí trong app/Providers/AppServiceProvider.php
 public function register()
    {
        $this->app->bind(
            'App\Contracts\Repositories\UserRepository',
            'App\Repositories\Eloquents\EloquentUserRepository'
        );
    }
Bước 4: Sử dụng Repository trong Controller
<?php

namespace App\Http\Controllers;

use App\Contracts\Repositories\UserRepository;
use Illuminate\Http\Request;
use App\Http\Controllers\Controller;

class UserController extends Controller
{
    protected $userRepository;

    public function __construct(UserRepository $userRepository)
    {
        $this->userRepository = $userRepository;
    }

    public function index()
    {

        $users = $this->userRepository->all();
        return view('users.index', [
            'users' => $users
        ]);
    }
}
Lời kết
Bây giờ bạn đã có thể triển khai thành công Repository trong Laravel. Trong một ứng dụng bạn cũng có thể triển khai nhiều Repository khác nhau, tất cả việc bạn cần làm là tạo một interface và sau đó tạo repository, sau đó đăng ký chúng trong Service Provider Trên đây là tìm hiểu của mình về Repository trong Laravel. Hy vọng nó có thể giúp ích được các bạn
All rights reserved
