[React Native] Dựng base App React Native - Navigation Sample P2
Bài đăng này đã không được cập nhật trong 5 năm
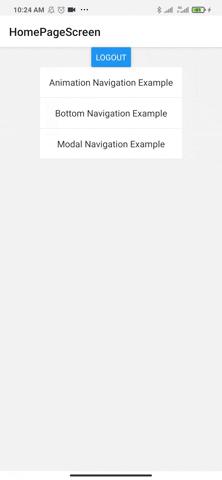
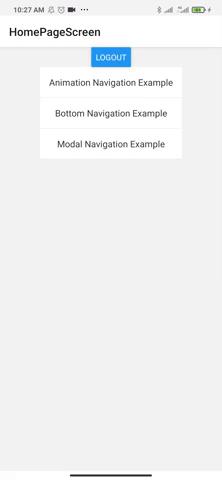
Ở bài trước mình đã giới thiệu sơ qua về react-navigation rồi, hôm nay mình sẽ làm một số demo nhỏ nha mn .
Animation Navigation Example
Example Code mình hướng tới bài toán như sau:
- Sử dụng một vài animation cho navigation
- Check một vài điều kiện và cho phép navigation rời khỏi màn hình đang đứng hay không
Animation Config
Như đã giới thiệu một vài animation ở bài trước thì mình sẽ tạo sẵn luôn một object để config navigation như sau:
const AnimationConfig: TransitionSpec = {
  ...TransitionSpecs.TransitionIOSSpec,
  animation: 'spring',
  config: {
    stiffness: 600,
    damping: 200,
    mass: 3,
    overshootClamping: true,
    restDisplacementThreshold: 0.01,
    restSpeedThreshold: 0.01,
  },
};
ở đây mình đang sử dụng animation spring cho navigation.
Thư viên react-navigation có cung cấp sẵn một vài config rồi và nếu chúng ta cảm thấy ko cần config gì thêm thì có thể sử dụng các config có sẵn, nhưng nếu các bạn cần phải điều chỉnh một vài config thì có thể làm như mình phía trên
{
 .
 ...TransitionSpecs.TransitionIOSSpec,
 .
}
với cách làm này thì các bạn có thể sử dụng các config có sẵn của react-navigation và các custom property.
Sau khi đã config navigation thì chúng ta chỉ cần đưa nó vào Navigation stack như sau:
const AnimationConfig: TransitionSpec = {
  ...TransitionSpecs.TransitionIOSSpec,
  animation: 'spring',
  config: {
    stiffness: 600,
    damping: 200,
    mass: 3,
    overshootClamping: true,
    restDisplacementThreshold: 0.01,
    restSpeedThreshold: 0.01,
  },
};

const AnimationStack = createStackNavigator();

const AnimationSampleStack = () => {
  return (
    <AnimationStack.Navigator
      initialRouteName={StackRoute.AnimationNavigation1Screen}
      screenOptions={{
        cardStyleInterpolator: CardStyleInterpolators.forHorizontalIOS,
        gestureDirection: 'horizontal-inverted',
        transitionSpec: {
          open: AnimationConfig,
          close: AnimationConfig,
        },
      }}>
      <AnimationStack.Screen
        name={StackRoute.AnimationNavigation1Screen}
        component={AnimationNavigation1Screen}
        options={{
          title: 'Animation Navigation Example',
        }}
      />
    </AnimationStack.Navigator>
  );
};

export default AnimationSampleStack;
Handle BeforeRemove
Như vậy là chúng ta đã có một navigation có animation rồi á, chúng ta qua chức năng thứ 2 đó là làm sao để chúng ta có thể chặn không cho navigation navigate đi sang screen khác.
Trên thực tế sẽ có một vài bài toán như sau:
- Khi call API thì Loading Indicator sẽ được hiển thị ra để báo cho user biết rằng lúc này đang đợi API trả kết quả về, nhưng sẽ làm sao nếu user sử dụng button back trên các thiết bị, và điều hiển nhiên là chúng ta sẽ goBack lại màn hình phía trước, mặc dù Loading Indicator vẫn đang quay.
Để khắc phục điều đó thì react-navigation từ phiên bản 5.7 đã bổ sung thêm một event mang tên beforeRemove, nó cho phép chúng ta có thể handle được việc có cho phép navigation đi khỏi màn hình hiện tại hay là không.
Vậy chúng ta config nó như thế nào:
Đầu tiên chúng ta sẽ viết một function để chặn navigate như sau:
const beforeRemove = (e: any) => {
    return e.preventDefault();
};
và đưa nó vào navigation như sau:
const AnimationConfig: TransitionSpec = {
  ...TransitionSpecs.TransitionIOSSpec,
  animation: 'spring',
  config: {
    stiffness: 600,
    damping: 200,
    mass: 3,
    overshootClamping: true,
    restDisplacementThreshold: 0.01,
    restSpeedThreshold: 0.01,
  },
};

const AnimationStack = createStackNavigator();

const beforeRemove = (e: any) => {
  return e.preventDefault();
};

const AnimationSampleStack = () => {
  return (
    <AnimationStack.Navigator
      initialRouteName={StackRoute.AnimationNavigation1Screen}
      screenOptions={{
        cardStyleInterpolator: CardStyleInterpolators.forHorizontalIOS,
        gestureDirection: 'horizontal-inverted',
        transitionSpec: {
          open: AnimationConfig,
          close: AnimationConfig,
        },
      }}>
      <AnimationStack.Screen
        name={StackRoute.AnimationNavigation1Screen}
        component={AnimationNavigation1Screen}
        options={{
          title: 'Animation Navigation Example',
        }}
      />
      <AnimationStack.Screen
        name={StackRoute.AnimationNavigation2Screen}
        component={AnimationNavigation2Screen}
        listeners={{
          beforeRemove: beforeRemove,
        }}
        options={{
          title: 'Animation Navigation Example',
        }}
      />
    </AnimationStack.Navigator>
  );
};

export default AnimationSampleStack;
Nhìn có vẻ ngon rồi nhỉ, nhưng chưa đúng lắm thì phải, bởi vì như đoạn code trên thì cứ măcự định vào AnimationNavigation2Screen là sẽ không thể nào rời đi được, bởi vì chúng ta đã chặn ở beforeRemove rồi.
Trong Project của mình thì mình đang sử dụng Mobx để quản lý state và sẽ update code như sau.
import { action, computed, observable } from 'mobx';

class NavigationStore {
  @observable _lockNavigation: boolean = false;

  @action setLockNavigation = (hasLock: boolean) => {
    this._lockNavigation = hasLock;
  };

  @computed get IsLockNavigation(): boolean {
    return this._lockNavigation;
  }
}

const navigationStore = new NavigationStore();
export default navigationStore;
Mình sẽ update lại code chỗ function beforeRemove như sau:
const beforeRemove = (e: any) => {
  if (NavigationStore.IsLockNavigation) {
    return e.preventDefault();
  }
};
Ok Như vậy có vẻ ngon hơn rồi nhưng câu hỏi đặt ra tiếp theo là chúng ta sẽ handle việc ON/OFF này ở đâu.
Trong ví dụ của mình thì mình đang handle trong screen AnimationNavigation2Screen bằng cách call function update State của NavigationStore
    <View style={styles.lockNavigationContent}>
        <Text
          style={
            styles.lockStatus
          }>{`Navigation is Lock status: ${NavigationStore.IsLockNavigation}`}</Text>
        <Button
          title="Toggle Lock Navigation"
          onPress={() => {
            NavigationStore.setLockNavigation(!NavigationStore.IsLockNavigation);
          }}
        />
   </View>
Rồi giờ thì ngon thật rồi á, chúng ta có thể handle việc có cho phép navigate hay không bằng state rồi, mọi người cùng xem kết quả bên dưới nhé

Bottom Navigation
Tiếp tục chúng ta sẽ đến với Bottom Navigation, một loại navigation được sử dụng khá là nhiều với các navigation được đặt phía bên dưới app. Ví dụ như trong app của mình đang demo.
Chúng ta thường sẽ chuẩn bị sẵn vài tab cho user dễ dàng Navigate, vậy làm sao để chúng ta sẽ xử lý như thế nào.
import React from 'react';

import { createBottomTabNavigator } from '@react-navigation/bottom-tabs';

import { BottomNavigationScreen } from 'screens/NavigationExample/BottomNavigation';
import { StackRoute } from 'constants/Routes';
import { Alert } from 'react-native';

const BottomStack = createBottomTabNavigator();

const BottomNavigationStack = () => {
  return (
    <BottomStack.Navigator initialRouteName={StackRoute.BottomNavigation1ScreenScreen}>
      <BottomStack.Screen
        name={StackRoute.BottomNavigation1ScreenScreen}
        options={{
          title: 'Home',
        }}>
        {(props) => <BottomNavigationScreen {...props} title="This is Home Screen" />}
      </BottomStack.Screen>
      <BottomStack.Screen
        name={StackRoute.BottomNavigation2ScreenScreen}
        options={{
          title: 'Account',
        }}>
        {(props) => <BottomNavigationScreen {...props} title="This is Account Screen" />}
      </BottomStack.Screen>
    </BottomStack.Navigator>
  );
};

export default BottomNavigationStack;
Nói xử lý nghe thật là ghê gớm nhưng chúng ta chỉ cần apply đầy đủ như document từ phía nhà sản xuất là được, Tài liệu thì ở đây nha.
tabPress
Nhưng trong thực tế thì có những tab sẽ cần phải bắt buộc user phải Login trước khi navigate qua, và bài toán đặt ra là chúng ta sẽ check và ngăn việc navigate như thế nào.
Cũng tương tự như beforeRemove thì chúng ta sẽ sử dụng một event khác của bottom navigation, đó chính là tabPress, với tabPress thì nó cho phép chúng ta làm cái gì đó trước lúc mà navigation thực hiện navigate.
Và công việc của chúng ta đơn giản chỉ là check xem User đã login hay chưa và nếu chưa thì chặn nó lại, mình sẽ update Code như sau:
import React from 'react';

import { createBottomTabNavigator } from '@react-navigation/bottom-tabs';

import { BottomNavigationScreen } from 'screens/NavigationExample/BottomNavigation';
import { StackRoute } from 'constants/Routes';
import { Alert } from 'react-native';

const BottomStack = createBottomTabNavigator();

const BottomNavigationStack = () => {
  return (
    <BottomStack.Navigator initialRouteName={StackRoute.BottomNavigation1ScreenScreen}>
      <BottomStack.Screen
        name={StackRoute.BottomNavigation1ScreenScreen}
        options={{
          title: 'Home',
        }}>
        {(props) => <BottomNavigationScreen {...props} title="This is Home Screen" />}
      </BottomStack.Screen>
      <BottomStack.Screen
        name={StackRoute.BottomNavigation2ScreenScreen}
        listeners={{
          tabPress: (e) => {
            e.preventDefault();
            Alert.alert('You Need Login before access Account screen!');
          },
        }}
        options={{
          title: 'Account',
        }}>
        {(props) => <BottomNavigationScreen {...props} title="This is Account Screen" />}
      </BottomStack.Screen>
    </BottomStack.Navigator>
  );
};

export default BottomNavigationStack;
Ok chúng ta cùng xem kết quả nó như thế nào nhé.
Ok hôm nay mình dừng ở đây nha, hẹn gặp lại mn
All rights reserved
