Push Notification trong Simualator IOS
Bài đăng này đã không được cập nhật trong 5 năm
Có một tính năng mà các nhà phát triển IOS đã đợi lâu đó là test push notificaiton bằng simulator. Tính năng có thể nói là đã có từ rất lâu bên Android. Hôm nay mình xin giới thiệu cách cài đặt để test được push notification trên simulator.
I. Các bước.
- Bạn hãy download ngay Xcode 11.4 beta và cài đặt.
- Tạo 1 project cho phép nhận push notificaiton.
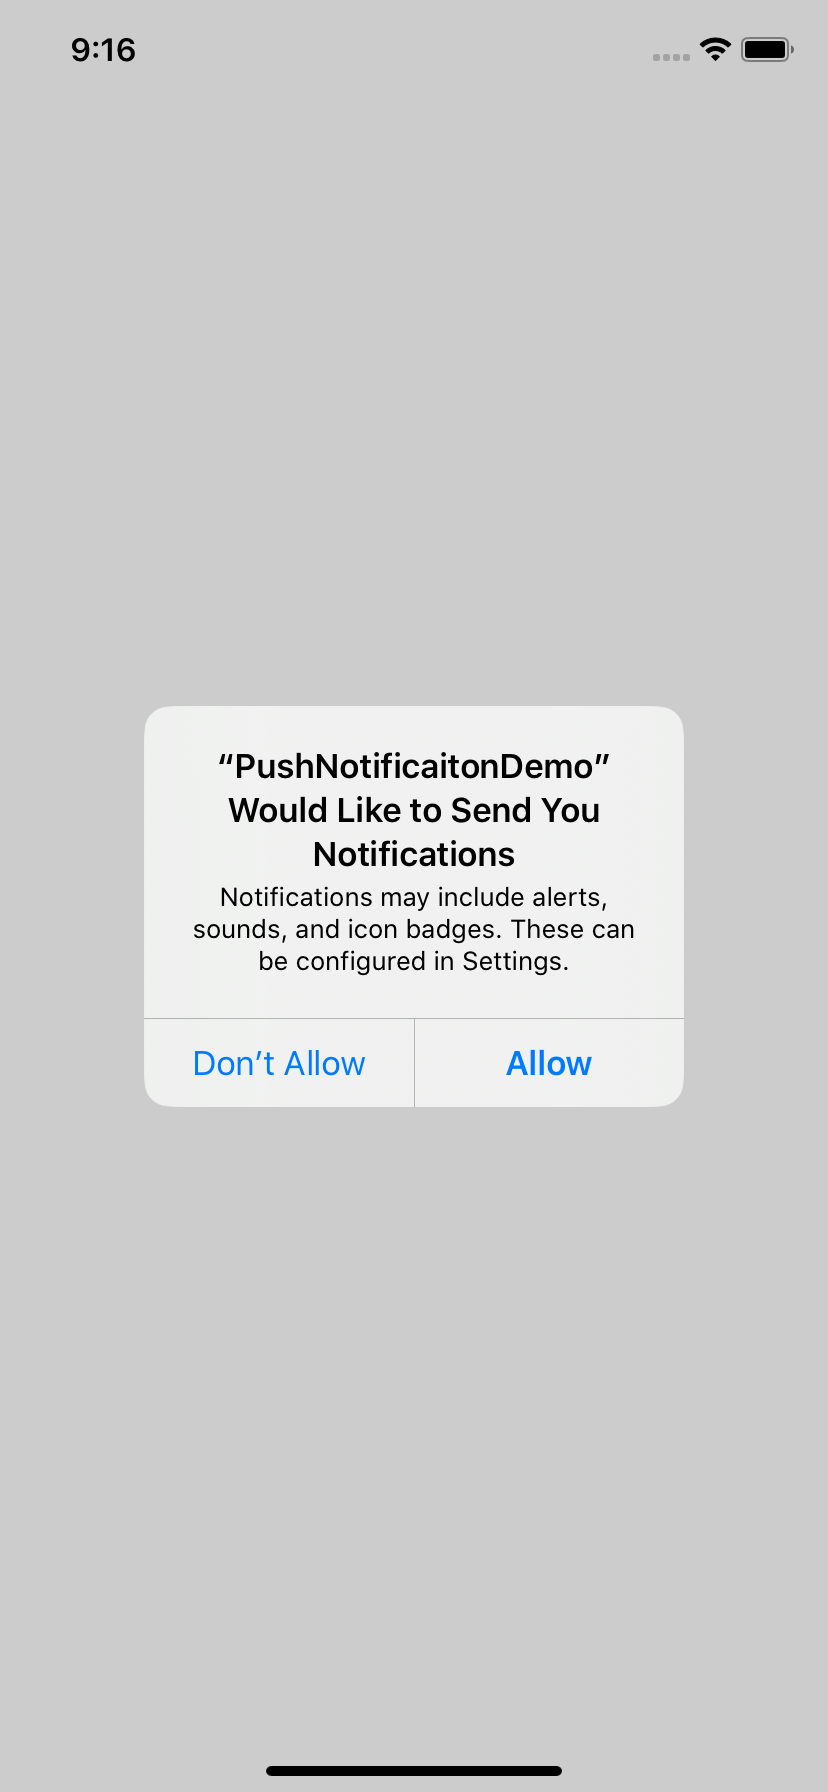
- Chạy app và cho phép quyền push notification
- Tạo file Apple Push Notification Service (APNS)
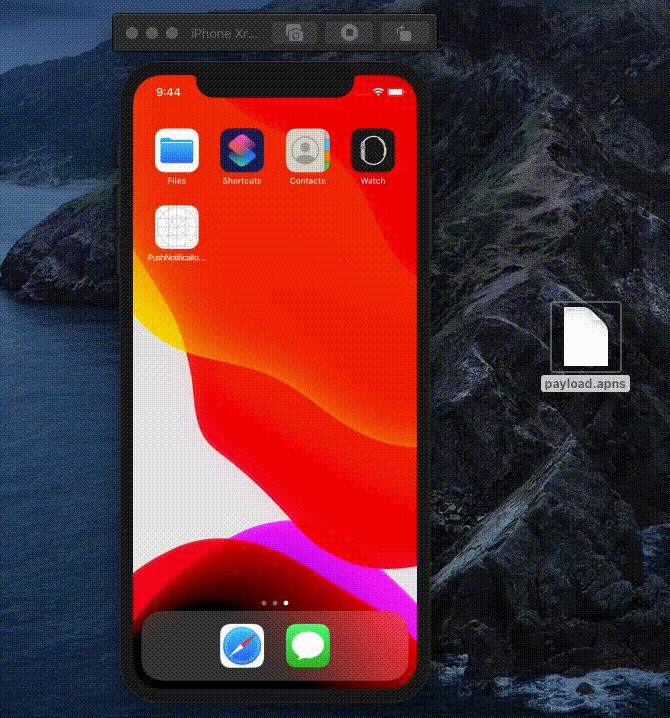
- Kéo và thả file trên vào trong simulator.
OK giờ sẽ đi lần lượt các bước trên nhé.
1. Bạn hãy download ngay Xcode 11.4 beta và cài đặt.
Bạn hãy vào link: https://developer.apple.com/download/more/ sau để tải xcode và cài đặt.
2. Tạo 1 project cho phép nhận push notificaiton.
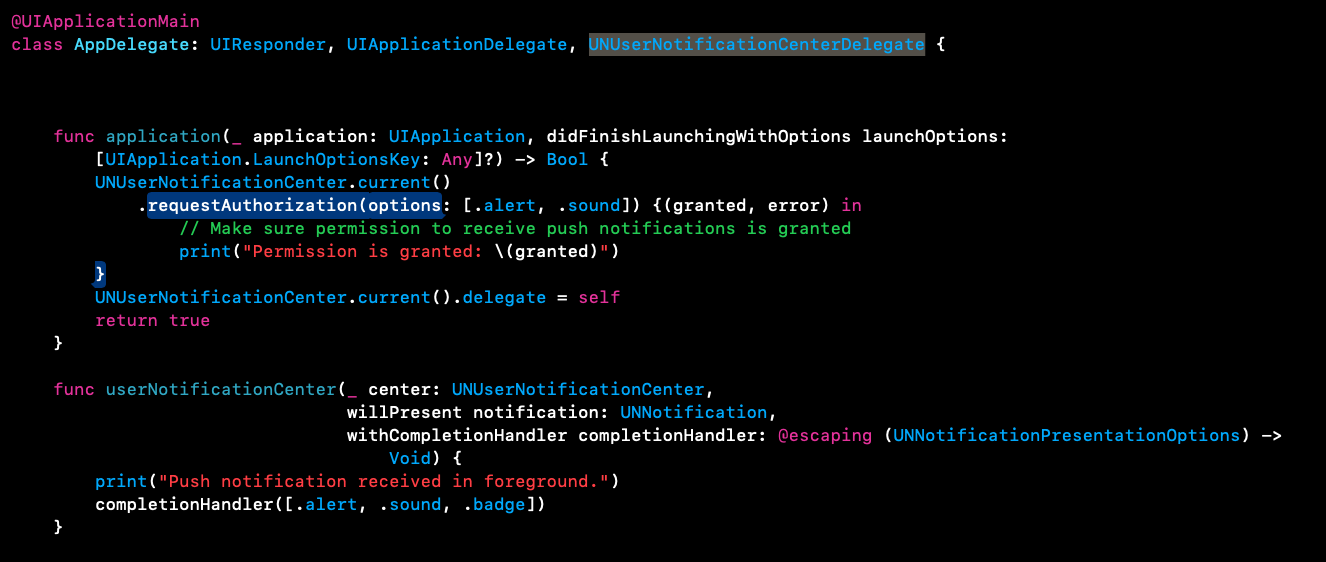
Trong file AppDelegate.swift, bạn import UserNotifications framework. Tiếp theo trong application(_:didFinishLaunchingWithOptions:) bạn thêm đoạn code sau để request permission để nhận được push notificaiton.
UNUserNotificationCenter.current()
    .requestAuthorization(options: [.alert, .sound]) {(granted, error) in
        // Make sure permission to receive push notifications is granted
        print("Permission is granted: \(granted)")
}
3. Chạy app và cho phép quyền push notification

4. Tạo file Apple Push Notification Service (APNS)
File APNS payload là 1 file json chứa các thông tin về push notification. Bạn có thể tìm hiểu về nó tại Apple's documentation.
Trước tiên để tạo file payload, chúng ta cần lấy bundle ID từ Xcode để tạo file APNS.

Bây giờ mình sẽ tạo file payload, việc tạo rất đơn giản, bạn thêm đoạn code sau vào textEdit hoặc Sublime Text. Khi lưu bạn nhớ đổi tên file thành file có đuôi .apns Ví dụ : "abcz.apns"
{
  "aps": {
    "alert": {
      "title": "Swift Senpai",
      "body": "🥳 Woohoo! Push notification in simulator! 🎉",
      "sound": "default"
    },
    "badge": 10
  },
  "Simulator Target Bundle": "le.huu.dung.PushNotificaitonDemo"
}
Note: Chú ý nhớ thay giá trị Simulator Target Bundle thành bundleID của project mà bạn tạo nhé.

OK , như vậy là bạn đã test được push 1 cách dễ dàng mà ko cần phải cần máy thật cũng như cần cetificate push thì mới test được .Chú ý đoạn code mình chỉ đang thực hiện test push khi app ở background. Còn để test được push ở foreground thì bạn cần phải setting thêm code nhé ^_^.
Bây giờ , mình sẽ hướng dẫn các bạn test push bằng cách dùng terminal.
II. Push notification bằng termial.
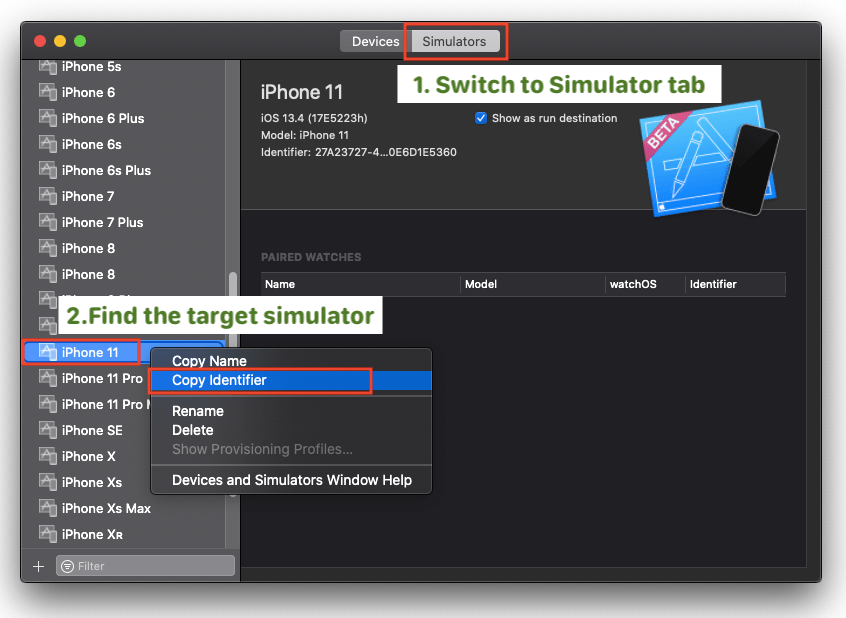
Trước tiên bạn cần identifier của simulator. Trong Xcode bạn nhấn phím tổ hợp phím: Shift + ⌘ + 2 để mở "Devices and Simulators”.

Note: Chú ý để nếu bạn cài nhiều Xcode bạn cần setting đúng Xcode 11.4 beta mà bạn cần test.
 Trong termial bạn thực hiện gõ câu lệnh theo cấu trúc sau:
xcrun simctl push <simulator-identifier> <path-to-payload-file>
Trong máy mình thì mình sẽ dùng lệnh sau:
xcrun simctl push 9DD0ADE5-C11B-414F-A76C-684A4CA61221 payload.apns
III. Push notification khi app ở foreground.****
Trong file Appdelegate.swift bạn thêm đoạn code sau:
func userNotificationCenter(_ center: UNUserNotificationCenter,
                            willPresent notification: UNNotification,
                            withCompletionHandler completionHandler: @escaping (UNNotificationPresentationOptions) -> Void) {
    print("Push notification received in foreground.")
    completionHandler([.alert, .sound, .badge])
}
class AppDelegate bạn adopt class UNUserNotificationCenterDelegate
Trong phương thức application(_:didFinishLaunchingWithOptions:) bạn thêm đoạn code sau.:
UNUserNotificationCenter.current().delegate = self

OK Bây giờ bạn test lại push khi app ở foreground nhé.
IV. Tài liệu tham khảo :
https://medium.com/swlh/simulating-push-notifications-in-ios-simulator-9e5198bed4a4
All rights reserved